关于JWT原理在这不多说,主要由三部分组成:Header、Payload、Signature,有兴趣自己上网了解。
1.首先创建.Net Core 一个Api项目

2.添加 JWT 配置
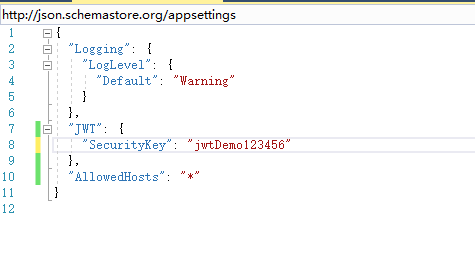
2.1 修改 appsettings.json,添加如下节点,这里配置好了密钥用于JWT Token 的第三部分签名

  "JWT": {
    "SecurityKey": "jwtDemo123456dfdgrserert3434"
  },
3.修改 Startup.cs 注册 JWT
    // This method gets called by the runtime. Use this method to configure the HTTP request pipeline.
        public void Configure(IApplicationBuilder app, IHostingEnvironment env)
        {
            if (env.IsDevelopment())
            {
                app.UseDeveloperExceptionPage();
            }
            else
            {
                // The default HSTS value is 30 days. You may want to change this for production scenarios, see https://aka.ms/aspnetcore-hsts.
                app.UseHsts();
            }
            //启用jwt认证
            app.UseAuthentication();

            app.UseHttpsRedirection();
            app.UseMvc();
        }
  public void ConfigureServices(IServiceCollection services)
        {
            #region Jwt认证
            services.AddAuthentication(JwtBearerDefaults.AuthenticationScheme)
               .AddJwtBearer(options =>
               {
                   options.TokenValidationParameters = new TokenValidationParameters
                   {
                       ValidateIssuer = true,
                       ValidateAudience = true,
                       ValidateLifetime = true,
                       ValidateIssuerSigningKey = true,
                       ValidIssuer = "qq.com",
                       ValidAudience = "qq.com",
                       IssuerSigningKey = new SymmetricSecurityKey(Encoding.UTF8.GetBytes(Configuration["JWT:SecurityKey"]))
                   };
               });
            #endregion
            services.AddMvc().SetCompatibilityVersion(CompatibilityVersion.Version_2_2);
        }
这个就是对验证的一些设置,比如是否验证发布者,订阅者,密钥,以及生命时间等等
4.给 Controller 增加认证
注册了认证之后,认证并没有作用于 Controller 之上,所以我们需要通过给Controller 添加 AuthorizeAttribute 特性类标签来让认证在这个 Controller 上生效。

现在访问这个Controller 会提示 401 ,,,所以我们现在还需要一个接口来检查认证信息以及返回认证的结果给用户使用
5.Token 给予
我们新建一个 OauthController,这个API Controller 类需要完成用户信息的比对以及如果比对结果显示这个是合法的用户,我们需要给用户返回 Token 信息。
using System;
using System.Collections.Generic;
using System.IdentityModel.Tokens.Jwt;
using System.Linq;
using System.Security.Claims;
using System.Text;
using System.Threading.Tasks;
using LiliBuyMasterService.Models.Authentication;
using Microsoft.AspNetCore.Authorization;
using Microsoft.AspNetCore.Http;
using Microsoft.AspNetCore.Mvc;
using Microsoft.Extensions.Configuration;
using Microsoft.IdentityModel.Tokens;

namespace JWT.demo.Controllers
{
    [AllowAnonymous]     // AllowAnonymous 属性是说明这个不需要用户登录
    [Route("api/[controller]")]
    [ApiController]
    public class OauthController : ControllerBase
    {
        public IConfiguration Configuration { get; }

        public OauthController(IConfiguration configuration)
        {
            Configuration = configuration;
        }

        [HttpPost("authenticate")]
        public IActionResult RequestToken([FromBody]TokenRequest request)
        {
            if (request != null)
            {
                //验证账号密码,这里只是测试
                if ("jwtdemo".Equals(request.UserName) && "123456".Equals(request.Password))
                {
                    var claims = new[] {
                        //加入用户的名称
                        new Claim(ClaimTypes.Name,request.UserName)
                    };

                    var key = new SymmetricSecurityKey(Encoding.UTF8.GetBytes(Configuration["JWT:SecurityKey"]));
                    var creds = new SigningCredentials(key, SecurityAlgorithms.HmacSha256);

                    var authTime = DateTime.UtcNow;
                    var expiresAt = authTime.AddDays(7);

                    var token = new JwtSecurityToken(
                        issuer: "qq.com",
                        audience: "qq.com",
                        claims: claims,
                        expires: expiresAt,
                        signingCredentials: creds);

                    return Ok(new
                    {
                        access_token = new JwtSecurityTokenHandler().WriteToken(token),
                        token_type = "Bearer",
                        profile = new
                        {
                            name = request.UserName,
                            auth_time = new DateTimeOffset(authTime).ToUnixTimeSeconds(),
                            expires_at = new DateTimeOffset(expiresAt).ToUnixTimeSeconds()
                        }
                    });
                }
            }

            return BadRequest("用户名密码错误");
        }
    }
}
这是TokenRequest模型类


using System;
using System.Collections.Generic;
using System.Linq;
using System.Threading.Tasks;

namespace LiliBuyMasterService.Models.Authentication
{
    public class TokenRequest
    {
        public string UserName { get; set; }

        public string Password { get; set; }
    }
}
现在请求values会提示401 验证不通过

所以首先要调oauthenticate接口获得Token,然后带着token再请求其他接口

这里可以看到我们已经拿到认证通过的信息了,access_token就是返回给用户的token,然后将这个token加在Header中

这样就可以请求了,注意 Authorization:Bearer eyJhbGciOiJIUzI1NiIsInR5cCI6IkpXVCJ9.eyJodHRwOi8vc2NoZW1hcy54bWxzb2FwLm9yZy93cy8yMDA1LzA1L2lkZW50aXR5L2NsYWltcy9uYW1lIjoiand0ZGVtbyIsImV4cCI6MTU3MTQ2NDE2MCwiaXNzIjoicXEuY29tIiwiYXVkIjoicXEuY29tIn0.03P4WfLp14ESGlOLzKFhFmVyA5hZvoFdLi7hHtWtONo ,Bearer后面必须要有一个空格