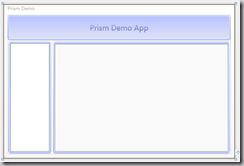
在这个例子我想实现一个简单的demo 用来练习用配置文件的方式来加载Prism Module.
- 假设我们要开发一个实现产品和公司资料管理的小demo,首还是建立解决方案的下的几个项目
PrimsDemo.DesktopMain(启动项目)
PrismDemo.DesktopCompany(公司资料管理)
PrismDemo.DesktopProduct(产品资料管理)
- Main启动项目中 Shell 是有一个的简单布局 右侧导航 左侧显示主内容区。

- PrismDemo.DesktopCompany模块 实现公司管理的导航和内容视图。在这些项目里将来用MVVM模式。

- PrismDemo.DesktopProduct模块 同理
上面的内容同一般建立一个简单Prism程序没有什么区别
- Bootstrapper继承自 UnityBootstrapper
class Bootstrapper : UnityBootstrapper
{

   //…

}
- 重载 CreateModuleCatalog() 返回一个 ConfigurationModuleCatalog
protected override IModuleCatalog CreateModuleCatalog()
{
return new ConfigurationModuleCatalog();
}
- 然后配置 App.config
|
1
2
3
4
5
6
7
8
9
10
11
12
13
14
15
16
17
18
19
20
|
<configSections> <section name="modules" type="Microsoft.Practices.Prism.Modularity.ModulesConfigurationSection, Microsoft.Practices.Prism"/> </configSections> <startup> <supportedRuntime version="v4.0" sku=".NETFramework,Version=v4.0"/> </startup> <modules> <module assemblyFile="PrismDemo.DesktopCompany.dll" moduleType="PrismDemo.DesktopCompany.CompanyModule, PrismDemo.DesktopCompany" moduleName="CompanyModule" startupLoaded="true" /> <module assemblyFile="PrismDemo.DesktopProduct.dll" moduleType="PrismDemo.DesktopProduct.ProductModule, PrismDemo.DesktopProduct" moduleName="ProductModule" startupLoaded="true"> <!--<dependencies> <dependency moduleName="ModuleE"/> </dependencies>--> </module> </modules> |
- Unity Container 的配置没有什么特别导入配置即可
protected override void ConfigureContainer()
{
UnityConfigurationSection config = ConfigurationManager.GetSection("unity") as UnityConfigurationSection;
config.Configure(this.Container);
base.ConfigureContainer();
}
配置方式
<configSections>
  <section name="modules" type="Microsoft.Practices.Prism.Modularity.ModulesConfigurationSection, Microsoft.Practices.Prism"/>
  <section name="unity" type="Microsoft.Practices.Unity.Configuration.UnityConfigurationSection,Microsoft.Practices.Unity.Configuration"/>
</configSections>

<unity>
  <typeAliases>
    <!--三个不同类型的生命周期-->
    <typeAlias alias="singleton"
               type="Microsoft.Practices.Unity.ContainerControlledLifetimeManager, Microsoft.Practices.Unity" />
    <typeAlias alias="external"
               type="Microsoft.Practices.Unity.ExternallyControlledLifetimeManager, Microsoft.Practices.Unity" />
    <typeAlias alias="perThread"
               type="Microsoft.Practices.Unity.PerThreadLifetimeManager, Microsoft.Practices.Unity" />


    <!--给类注册别名,以后直接使用别名就可以代替具体类,type=类的详细命名空间和类名词,然后逗号后面是程序集名词-->
    <typeAlias alias="ProductListView" type="PrismDemo.DesktopProduct.Views.ProductListView, PrismDemo.DesktopProduct" />
    <typeAlias alias="ProductMenuView" type="PrismDemo.DesktopProduct.Views.ProductMenuView, PrismDemo.DesktopProduct" />
    <typeAlias alias="CompanyListView" type="PrismDemo.DesktopCompany.Views.CompanyListView, PrismDemo.DesktopCompany" />
    <typeAlias alias="CompanyMenuView" type="PrismDemo.DesktopCompany.Views.CompanyMenuView, PrismDemo.DesktopCompany" />
    <typeAlias alias="UIMessagesService" type="PrismDemo.UIMessage.Service.UIMessagesService, PrismDemo.UIMessage" />

  </typeAliases>
  <containers>
    <container>
      <types>
        <!--type是接口,mapto是目标实例化对象-->
        <type type="ProductListView" mapTo="ProductListView" >
          <lifetime type="singleton" />
        </type>
        <type type="ProductMenuView" mapTo="ProductMenuView" >
          <lifetime type="singleton" />
        </type>
        <type type="CompanyListView" mapTo="CompanyListView" >
          <lifetime type="singleton" />
        </type>
        <type type="CompanyMenuView" mapTo="CompanyMenuView" >
          <lifetime type="singleton" />
        </type>
        <type type="UIMessagesService" mapTo="UIMessagesService" >
          <lifetime type="singleton" />
        </type>
      </types>
    </container>
  </containers>
</unity>
一个简单的 就完成了
例子本身不完善,后面会继续改进。


