.jpg)
如上所示一条简单的请求数据,用到了vue中axios,promise,qs等等
这里我将vue中用到的axios进行了封装方便日后使用
先对工具类进行封装utils/axios.js:
// 引入模块
import axios from "axios"
import qs from 'qs'

// 是否允许跨域
axios.defaults.withCredentials=true;

// axios初始化:延迟时间,主路由地址
let instance = axios.create({
  baseURL: 'https://easy-mock.com/mock/5b7bb6b9d02c1e7f50b4102f/example/',
  timeout: 10000,
});

// 设置拦截器
instance.interceptors.request.use(function(config){
  //在发送请求之前做某事
  return config;
},function(error){
  //请求错误时做些事
  return Promise.reject(error);
});
//响应拦截器
instance.interceptors.response.use(function(response){
  //对响应数据做些事
  return response;
},function(error){
  //请求错误时做些事
  return Promise.reject(error);
});

// 是否销毁拦截器
// 1.给拦截器起个名称 var myInterceptors = instance.interceptors.requesst.use();
// 2.instance.interceptors.request.eject(myInterceptor);

// 请求成功的回调
function checkStatus(res) {
  //请求结束成功
  if (res.status === 200 || res.status === 304) {
    return res.data
  }
  return {
    code: 0,
    msg: res.data.msg || res.statusText,
    data: res.statusText
  }
  return res
}
// 请求失败的回调
function checkCode(res) {
  if (res.code === 0) {
    throw new Error(res.msg)
  }
  return res
}
//模块化导出
export default {
  get(url, params) {
    if (!url) return;
    return instance({
      method: 'get',
      url: url,
      params,
      timeout: 30000
    }).then(checkStatus).then(checkCode)
  },
  post(url, data) {
    if (!url) return;
    return instance({
      method: 'post',
      url: url,
      data: qs.stringify(data),
      timeout: 30000
    }).then(checkStatus).then(checkCode)
  },
  postFile(url, data) {
    if (!url) return;
    return instance({
      method: 'post',
      url: url,
      data
    }).then(checkStatus).then(checkCode)
  }
}
上述源码中我已将注释标清,大家看源码就会明白都是些什么东西
下来为了方便使用 ,我们需要将这些方法放在全局中供我们更加便利的使用:
main.js
// The Vue build version to load with the `import` command
// (runtime-only or standalone) has been set in webpack.base.conf with an alias.
import Vue from 'vue'
import App from './App'
import router from './router'
import axios from "./utils/axios"
Vue.prototype.$http = axios;
/* eslint-disable no-new */
new Vue({
  el: '#app',
  router,
  components: { App },
  template: '<App/>'
})
通过Vue.prototype原型链的方式供全局都可调用
接下来是引入页面
index.vue
<template>
<div class="home">
<h3>这里是首页</h3>
</div>
</template>
<script>
export default {
methods: {
loadData: function () {
let s = new Promise((resolve,reject) => {
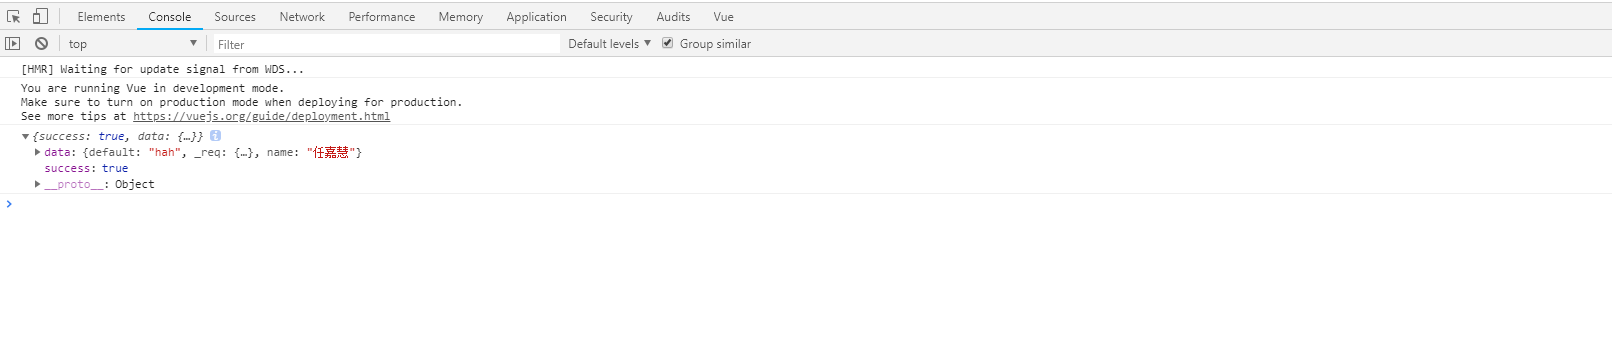
this.$http.get("query",{name:"任嘉慧"})
.then(res => {
console.log(res);//获取数据
// 可通过resolve发送给后端一些参数:resolve(res.data.xxx);
})
.catch(error => {
console.log(error);
})
});
}
},
mounted () {
this.loadData();
}
}
</script>
<style scoped>
.home {
100%;
flex: 1;
overflow-y: auto;
}
</style>
其实重点都是axios的深入使用,查看api就可,博主推荐查看这篇文章:https://www.cnblogs.com/libin-1/p/6607945.html
关于模块化的导出博主再以前的文章中又有整理过:https://www.cnblogs.com/bgwhite/p/9298794.html
其次,再源码中我已经将注释标明,如果还有不懂的小伙伴可以留言哦。