struts2里面的各个功能,现在确实都不清楚,完全属于新学!
通过前面的例子,有时就会疑问,这些jsp中的数据信息是怎么传送给action的?例如:
1 <form action = "LoginAction.action" method="post">
2     <p>用户名 <input type = "text" name="user.name"/></p>
3     <p>密码 <input type = "text" name="user.password"/></p>
4     <input type = "submit" value = "登录"/>
5 </form>
user.name是怎么传给action的? action是怎么获取的??这个就是下面讲解的struts2参数自动封装!
一:struts2参数自动封装
前篇文章对struts2的一个入门,重点是对struts2的架构图有一个大概的了解即可,之后的几篇文章,就是细化struts2,将struts2中的各种功能进行梳理,其实学完之后,对struts2的使用不外乎这几点,参数自动封装,拦截器的使用,数据校验,ognl表达(值栈和actionContext的讲解),struts2的标签,struts2的国际化,struts2的文件上传下载。 把这几个功能都学会了使用之后,struts2基本上就学完了。所以接下来的文章就是对这几个功能进行讲解。如何使用。而进行就对数据自动封装和数据类型自动转型进行讲解。
什么叫封装呢?其实就是把用户输入的数据获取到,然后输出或者封装到类里面去。

1.1 静态参数封装
action获取struts.xml中的参数--------是从struts.xml中获取。
——静态参数,也就是我们写死的数据,不能算是用户动态提交的数据。下面给一个例子:
 1 <?xml version="1.0" encoding="UTF-8" ?>
 2 <!DOCTYPE struts PUBLIC
 3     "-//Apache Software Foundation//DTD Struts Configuration 2.3//EN"
 4     "http://struts.apache.org/dtds/struts-2.3.dtd">
 5
 6 <struts>
 7
 8     <constant name="struts.enable.DynamicMethodInvocation" value="false" />
 9     <constant name="struts.devMode" value="true" />
10
11     <package name="zxl" namespace="/" extends="struts-default">
12
13         <action name="MyParaAction" class="action.MyParaAction" method="test01">
14             <result name="success">/index.jsp</result>
15             <param name="username">zhangsan</param>
16             <param name="password">12345</param>
17         </action>
18
19         <action name="MyParaAction2" class="action.MyParaAction2" method="test01">
20             <result name="success">/index.jsp</result>
21             <param name="user.username">zhaosi</param>
22             <param name="user.password">12345</param>
23         </action>
24
25     </package>
26 </struts>
我们来看第一个action:MyParaAction.java
 1 package action;
 2
 3 import com.opensymphony.xwork2.ActionSupport;
 4
 5 public class MyParaAction extends ActionSupport {
 6
 7     private String username;
 8     private String password;
 9     /**
10      * @return the username
11      */
12     public String getUsername() {
13         return username;
14     }
15     /**
16      * @param username the username to set
17      */
18     public void setUsername(String username) {
19         this.username = username;
20     }
21     /**
22      * @return the password
23      */
24     public String getPassword() {
25         return password;
26     }
27     /**
28      * @param password the password to set
29      */
30     public void setPassword(String password) {
31         this.password = password;
32     }
33
34     public String test01(){
35
36         System.out.println("username : " + username + ", password : " + password);
37
38         return "success";
39     }
40
41 }
加入本测试不关注的index.jsp
 1 <%@ page language="java" contentType="text/html; charset=ISO-8859-1"
 2     pageEncoding="ISO-8859-1"%>
 3 <!DOCTYPE html PUBLIC "-//W3C//DTD HTML 4.01 Transitional//EN" "http://www.w3.org/TR/html4/loose.dtd">
 4 <html>
 5 <head>
 6 <meta http-equiv="Content-Type" content="text/html; charset=ISO-8859-1">
 7 <title>Insert title here</title>
 8 </head>
 9 <body>
10 Hi, Struts2!!!
11
12 </body>
13 </html>
我们在浏览器输入:http://localhost:8080/Struts2Demo/MyParaAction
可以看到浏览器输出:Hi, Struts2!!!
而我们看控制台:username : zhangsan, password : 12345
可以看到在struts.xml中配置的参数传递到了action。
上面这种静态参数是直接定义在action里面,没有对应的实体内。下面我们看有实体内的静态参数怎么传给action:
MyParaAction2的action已经在前面struts.xml已经配置了。看具体action和JavaBean实体类:
 1 package login;
 2
 3 public class User {
 4
 5     private String username;
 6     private String password;
 7
 8     /**
 9      * @return the username
10      */
11     public String getUsername() {
12         return username;
13     }
14
15     /**
16      * @param username the username to set
17      */
18     public void setUsername(String username) {
19         this.username = username;
20     }
21     /**
22      * @return the password
23      */
24     public String getPassword() {
25         return password;
26     }
27     /**
28      * @param password the password to set
29      */
30     public void setPassword(String password) {
31         this.password = password;
32     }
33
34 }
 1 package action;
 2
 3 import com.opensymphony.xwork2.ActionSupport;
 4
 5 import login.User;
 6
 7 public class MyParaAction2 extends ActionSupport {
 8
 9     private User user;
10
11     /**
12      * @return the user
13      */
14     public User getUser() {
15         return user;
16     }
17
18     /**
19      * @param user the user to set
20      */
21     public void setUser(User user) {
22         this.user = user;
23     }
24
25
26     public String test01(){
27
28         System.out.println("user info:"+ user.getUsername() +" " + user.getPassword());
29         return "success";
30     }
31
32
33 }
在浏览器输入:http://localhost:8080/Struts2Demo/MyParaAction2
同样浏览器输出:Hi, Struts2!!!
控制台输出:user info:zhaosi 12345
从上面可以看出,主要是根据action中定义的情况来配置struts.xml。至于传进去的参数怎么返回给jsp等,不是这个讨论的,后面继续。
——因为在我们执行test01()方法的前后,有很多拦截器interceptor做一些工作,其中有一个叫做staticParams的拦截器,它就是专门负责看看你struts.xml里的action里是否有定义param参数,如果有的话,拿到这个参数的name名字,然后去这个action的对应的类class里面的方法method去找setXXX方法,和setXXX中set后面的XXX比较(这里它会自动转换大小写),如果发现有匹配的,就把值复制给类class里面的变量。然后我们在执行这个方法method的时候,这个变量其实就已经有值了,我们输出到控制台的时候就能看到值了。
记住:静态参数封装就是从struts.xml中获取数据传给action.
1.2 动态参数封装
动态参数封装。核心的例子就是表单数据的提交。所以这个地方开始肯定有表单jsp

1.2.1 属性驱动
1.2.1.1 基本属性驱动: 基本属性驱动就是数据模型和动作类写在一起(即动作类中有数据模型)
我们看下面这个例子,同样以上面action为例:
 1 package action;
 2
 3 import com.opensymphony.xwork2.ActionSupport;
 4
 5 public class MyParaAction extends ActionSupport {
 6
 7     private String username;
 8     private String password;
 9     /**
10      * @return the username
11      */
12     public String getUsername() {
13         return username;
14     }
15     /**
16      * @param username the username to set
17      */
18     public void setUsername(String username) {
19         this.username = username;
20     }
21     /**
22      * @return the password
23      */
24     public String getPassword() {
25         return password;
26     }
27     /**
28      * @param password the password to set
29      */
30     public void setPassword(String password) {
31         this.password = password;
32     }
33
34     public String test01(){
35
36         System.out.println("username : " + username + ", password : " + password);
37
38         return "success";
39     }
40
41 }
添加表单页面:login1.jsp
 1 <%@ page language="java" contentType="text/html; charset=UTF-8"
 2     pageEncoding="UTF-8"%>
 3 <!DOCTYPE html PUBLIC "-//W3C//DTD HTML 4.01 Transitional//EN" "http://www.w3.org/TR/html4/loose.dtd">
 4 <html>
 5 <head>
 6 <meta http-equiv="Content-Type" content="text/html; charset=UTF-8">
 7 <title>登录实例</title>
 8 </head>
 9 <body>
10 <form action = "MyParaAction" method="post">
11     <p>用户名 <input type = "text" name="username"/></p>
12     <p>密码 <input type = "text" name="password"/></p>
13     <input type = "submit" value = "登录"/>
14 </form>
15 </body>
16 </html>
在浏览器输入:http://localhost:8080/Struts2Demo/login1.jsp, 浏览器输出:
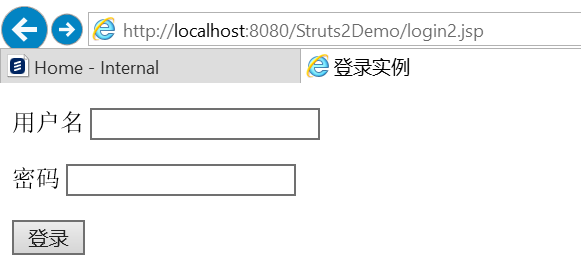
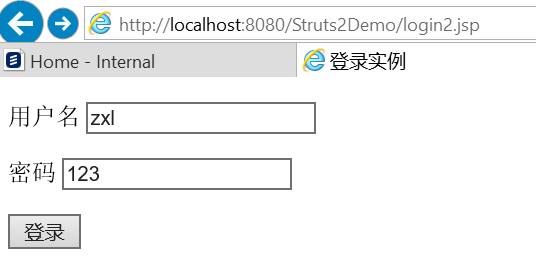
在输入框输入用户名和密码,然后看到控制台输出:username : zxl, password : 123
这个地方注意了,我没有修改struts.xml,也就是说里面action还是配置了静态参数的。但结果是动态参数会直接覆盖静态参数的传递。
此方式简单易懂,但是在实际开发中,用的不是很多,局限性大,并且数据模型和动作类写在一个类中,不利于解耦管理。由此出现了动态参数封装的第二种方式。
1.2.1.2 ognl表达式来封装数据: 数据模型和动作类分别写在不同类中(即数据模型建立javabean)
就按照前面第二个action,即:MyParaAction2.java, 里面User 和Action不在同一个class中。
 1 package action;
 2
 3 import com.opensymphony.xwork2.ActionSupport;
 4
 5 import login.User;
 6
 7 public class MyParaAction2 extends ActionSupport {
 8     //动作类中只有一个javabean对象。通过set.get方法进行管理
 9     private User user;
10
11     /**
12      * @return the user
13      */
14     public User getUser() {
15         return user;
16     }
17
18     /**
19      * @param user the user to set
20      */
21     public void setUser(User user) {
22         this.user = user;
23     }
24
25
26     public String test01(){
27
28         System.out.println("user info:"+ user.getUsername() +" " + user.getPassword());
29         return "success";
30     }
31 }
32
33 //所需要的数据模型:
34 package login;
35
36 public class User {
37
38     private String username;
39     private String password;
40
41     /**
42      * @return the username
43      */
44     public String getUsername() {
45         return username;
46     }
47
48     /**
49      * @param username the username to set
50      */
51     public void setUsername(String username) {
52         this.username = username;
53     }
54     /**
55      * @return the password
56      */
57     public String getPassword() {
58         return password;
59     }
60     /**
61      * @param password the password to set
62      */
63     public void setPassword(String password) {
64         this.password = password;
65     }
66
67 }
然后看我们的表单页面:login2.jsp
 1 <%@ page language="java" contentType="text/html; charset=UTF-8"
 2     pageEncoding="UTF-8"%>
 3 <!DOCTYPE html PUBLIC "-//W3C//DTD HTML 4.01 Transitional//EN" "http://www.w3.org/TR/html4/loose.dtd">
 4 <html>
 5 <head>
 6 <meta http-equiv="Content-Type" content="text/html; charset=UTF-8">
 7 <title>登录实例</title>
 8 </head>
 9 <body>
10 <form action = "MyParaAction2" method="post">
11     <p>用户名 <input type = "text" name="user.username"/></p>
12     <p>密码 <input type = "text" name="user.password"/></p>
13     <input type = "submit" value = "登录"/>
14 </form>
15 </body>
16 </html>
同样在浏览器输入:http://localhost:8080/Struts2Demo/login2.jsp 在输入框输入信息:
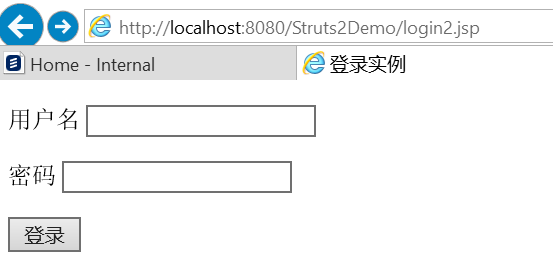
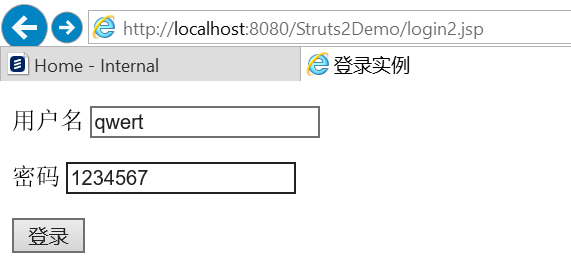
控制台输出:user info:qwert 1234567。
同样可以看出,也没有修改struts.xml 里面同样还是配置了静态参数, 但是动态参数依然会覆盖掉静态参数。
表单中的name属性值必须是javabean的对象的属性,不是简单的username了,变成了user.username。
还有动作类中set.get方法的执行顺序:
get方法:struts2先调用get方法,判断对象是否存在,如果不存在,使用反射创建一个对象。
set方法:不存在的时候,创建一个对象,把它set进去
get方法:再调用get方法得到对象,调用set方法得到对象的各种属性,为属性赋值。
在jsp页面中的user.name和user.age其实就是ognl表达式,代表着往根(root,值栈valueStack)中存放值,而值栈中的栈顶元素也就是为当前action,我们在action中设置user的get、set属性,即可以让存进来的值匹配到,进而将对应属性赋值成功。
上面这种参数封装属于OGNL中的封装对象。
下面看一下封装列表和map
下面先看OGNL封装List 例子:
 1 package action;
 2
 3 import java.util.List;
 4
 5 import com.opensymphony.xwork2.ActionSupport;
 6
 7 import login.User;
 8
 9 public class MyParaAction2 extends ActionSupport {
10
11     //创建用户对象,在JSP中用OGNL封装对象来获取参数
12     private User user;
13     //创建List对象,在JSP中用OGNL封装列表list来获取参数
14     private List<User> users;
15
16     /**
17      * @return the user
18      */
19     public User getUser() {
20         return user;
21     }
22
23     /**
24      * @param user the user to set
25      */
26     public void setUser(User user) {
27         this.user = user;
28     }
29
30     /**
31      * @return the users
32      */
33     public List<User> getUsers() {
34         return users;
35     }
36
37     /**
38      * @param users the users to set
39      */
40     public void setUsers(List<User> users) {
41         this.users = users;
42     }
43
44     public String test01(){
45
46         System.out.println("user info:"+ user.getUsername() +" " + user.getPassword());
47         return "success";
48     }
49
50     public String test03(){
51         System.out.println("test03");
52         System.out.println("user1 info:"+ users.get(0).getUsername() +" " + users.get(0).getPassword());
53         System.out.println("user2 info:"+ users.get(1).getUsername() +" " + users.get(1).getPassword());
54         return "success";
55     }
56
57     public String test04(){
58         System.out.println("test04");
59         System.out.println("user1 info:"+ users.get(0).getUsername() +" " + users.get(0).getPassword());
60         System.out.println("user2 info:"+ users.get(1).getUsername() +" " + users.get(1).getPassword());
61         return "success";
62     }
63 }
然后我们来看一下表单页面:login3.jsp
 1 <%@ page language="java" contentType="text/html; charset=UTF-8"
 2     pageEncoding="UTF-8"%>
 3 <!DOCTYPE html PUBLIC "-//W3C//DTD HTML 4.01 Transitional//EN" "http://www.w3.org/TR/html4/loose.dtd">
 4 <html>
 5 <head>
 6 <meta http-equiv="Content-Type" content="text/html; charset=UTF-8">
 7 <title>登录实例</title>
 8 </head>
 9 <body>
10 <form action = "Login3!test03" method="post">
11     <p>用户名1 <input type = "text" name="users[0].username"/></p>
12     <p>密码 <input type = "text" name="users[0].password"/></p>
13     <p>用户名2 <input type = "text" name="users[1].username"/></p>
14     <p>密码 <input type = "text" name="users[1].password"/></p>
15     <input type = "submit" value = "登录"/>
16 </form>
17 </body>
18 </html>
这个表单页面是不是和前面有点不一样了:
首先,后面传递的参数users[0].username,users[0].password,users[1].username,users[1].password就是用OGNL对List进行的封装。
这个地方的list必须与动作类中定义的list完全对应。
其次action处是:Login3!test03,看到这个要想到这个是动态函数调用。和struts.xml配合使用。
我们看一下struts.xml
<?xml version="1.0" encoding="UTF-8" ?>
<!DOCTYPE struts PUBLIC
    "-//Apache Software Foundation//DTD Struts Configuration 2.3//EN"
    "http://struts.apache.org/dtds/struts-2.3.dtd">

<struts>

    <constant name="struts.enable.DynamicMethodInvocation" value="true" />
    <constant name="struts.devMode" value="false" />

    <package name="zxl" namespace="/" extends="struts-default">

        <action name="MyParaAction" class="action.MyParaAction" method="test01">
            <result name="success">/index.jsp</result>
            <param name="username">zhangsan</param>
            <param name="password">12345</param>
        </action>

        <action name="Login3" class="action.MyParaAction2" >
            <result name="success">/index.jsp</result>
        </action>

        <action name="Login4_*" class="action.MyParaAction2" method="{1}">
            <result name="success">/index.jsp</result>
        </action>

    </package>

    <include file="example.xml"/>
    <include file="struts-constant.xml"/>
    <include file="struts-dynamic.xml"/>
    <include file="struts-actionsupport.xml"/>
    <!-- Add packages here -->
</struts>
此处看到了OGNL封装List. 在此添加一个知识点:动态函数调用
动态函数调用主要有三种方式:
方式一:我们很常见,在struts.xml中显示的指示出来method。
1         <action name="MyParaAction2" class="action.MyParaAction" method="test01">
2             <result name="success">/index.jsp</result>
3             <param name="username">zhangsan</param>
4             <param name="password">12345</param>
5         </action>
也就是说通过在struts.xml文件中通过配置action标签的method属性来设置即可。
但是这个方法有一个缺陷,当一个action中有很多方法的时候就需要为每个方法配置一遍action,同时通过分配不同的name属性来指定到对应的method,因此这种方法很麻烦
方式二:感叹号方式(需要在struts.xml中配置常量,启动动态方法调用)
前面的例子就是通过这种方式来动态调用test03的。
表单页面:需要在调用的时候在action名字加上感叹号加上你要调用的方法名即可。
<form action = "Login3!test03" method="post">
在struts2.xml配置文件中需要添加常量指明可以动态调用方法才可以。
<constant name="struts.enable.DynamicMethodInvocation" value="true" />

在配置action的地方就不用写method参数了。这样test03()就会运行了。

上面那个常量属性在哪儿呢?
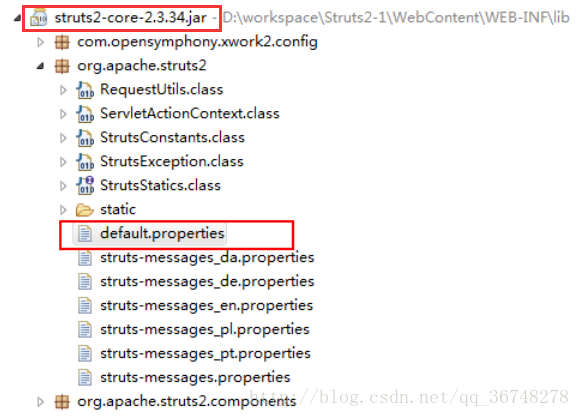
方式三:通配符方法调用
也就是说name属性中的占位符*可以用来指定你想指定的值。第一个通配符匹配的就是属性值为{1}的,第二个通配符就是指定属性值为{2}的值。
看下面表单定义:在action后面加上“_”+函数名
表单login4.jsp
 1 <%@ page language="java" contentType="text/html; charset=UTF-8"
 2     pageEncoding="UTF-8"%>
 3 <!DOCTYPE html PUBLIC "-//W3C//DTD HTML 4.01 Transitional//EN" "http://www.w3.org/TR/html4/loose.dtd">
 4 <html>
 5 <head>
 6 <meta http-equiv="Content-Type" content="text/html; charset=UTF-8">
 7 <title>登录实例</title>
 8 </head>
 9 <body>
10 <form action = "Login4_test04" method="post">
11     <p>用户名1 <input type = "text" name="users[0].username"/></p>
12     <p>密码 <input type = "text" name="users[0].password"/></p>
13     <p>用户名2 <input type = "text" name="users[1].username"/></p>
14     <p>密码 <input type = "text" name="users[1].password"/></p>
15     <input type = "submit" value = "登录"/>
16 </form>
17 </body>
18 </html>
然后在struts.xml中进行匹配:
1         <action name="Login4_*" class="action.MyParaAction2" method="{1}">
2             <result name="success">/index.jsp</result>
3         </action>
运行效果同上。
OGNL封装MAP
给出例子如下:
 1 package action;
 2
 3 import java.util.List;
 4 import java.util.Map;
 5
 6 import com.opensymphony.xwork2.ActionSupport;
 7
 8 import login.User;
 9
10 public class MyParaAction2 extends ActionSupport {
11
12     //创建用户对象,在JSP中用OGNL封装对象来获取参数
13     private User user;
14     //创建List对象,在JSP中用OGNL封装列表list来获取参数
15     private List<User> users;
16     //创建Map对象,在JSP中用OGNL封装Map来获取参数
17     private Map<String, User> userMap;
18
19     /**
20      * @return the user
21      */
22     public User getUser() {
23         return user;
24     }
25
26     /**
27      * @param user the user to set
28      */
29     public void setUser(User user) {
30         this.user = user;
31     }
32
33     /**
34      * @return the users
35      */
36     public List<User> getUsers() {
37         return users;
38     }
39
40     /**
41      * @param users the users to set
42      */
43     public void setUsers(List<User> users) {
44         this.users = users;
45     }
46
47
48
49     /**
50      * @return the userMap
51      */
52     public Map<String, User> getUserMap() {
53         return userMap;
54     }
55
56     /**
57      * @param userMap the userMap to set
58      */
59     public void setUserMap(Map<String, User> userMap) {
60         this.userMap = userMap;
61     }
62
63     public String test01(){
64
65         System.out.println("user info:"+ user.getUsername() +" " + user.getPassword());
66         return "success";
67     }
68
69     public String test03(){
70         System.out.println("test03");
71         System.out.println("user1 info:"+ users.get(0).getUsername() +" " + users.get(0).getPassword());
72         System.out.println("user2 info:"+ users.get(1).getUsername() +" " + users.get(1).getPassword());
73         return "success";
74     }
75
76     public String test04(){
77         System.out.println("test04");
78         System.out.println("user1 info:"+ users.get(0).getUsername() +" " + users.get(0).getPassword());
79         System.out.println("user2 info:"+ users.get(1).getUsername() +" " + users.get(1).getPassword());
80         return "success";
81     }
82
83     public String test05(){
84         System.out.println("test05");
85         System.out.println("user1 info:"+ userMap.get("china").getUsername() +" " + userMap.get("china").getPassword());
86         System.out.println("user2 info:"+ userMap.get("Japan").getUsername() +" " + userMap.get("Japan").getPassword());
87         return "success";
88     }
89 }
看表单login5.jsp
 1 <%@ page language="java" contentType="text/html; charset=UTF-8"
 2     pageEncoding="UTF-8"%>
 3 <!DOCTYPE html PUBLIC "-//W3C//DTD HTML 4.01 Transitional//EN" "http://www.w3.org/TR/html4/loose.dtd">
 4 <html>
 5 <head>
 6 <meta http-equiv="Content-Type" content="text/html; charset=UTF-8">
 7 <title>登录实例</title>
 8 </head>
 9 <body>
10 <form action = "Login5_test05" method="post">
11     <p>用户名1 <input type = "text" name="userMap['china'].username"/></p>
12     <p>密码 <input type = "text" name="userMap['china'].password"/></p>
13     <p>用户名2 <input type = "text" name="userMap['Japan'].username"/></p>
14     <p>密码 <input type = "text" name="userMap['Japan'].password"/></p>
15     <input type = "submit" value = "登录"/>
16 </form>
17 </body>
18 </html>
userMap['china'].username来匹配动作类中的map
map集合和上面的list集合类似,只不过在编写ognl表达式有些不同,userMap['china'].username、userMap['china'].password,userMap['china']代表的是map中key为China的value,也就找到了key为China的User对象,然后在进行封装数据即可。看struts.xml配置:同样采用模式匹配来进行动态函数调用。
1         <action name="Login5_*" class="action.MyParaAction2" method="{1}">
2             <result name="success">/index.jsp</result>
3         </action>
在浏览器输入:http://localhost:8080/Struts2Demo/login5.jsp
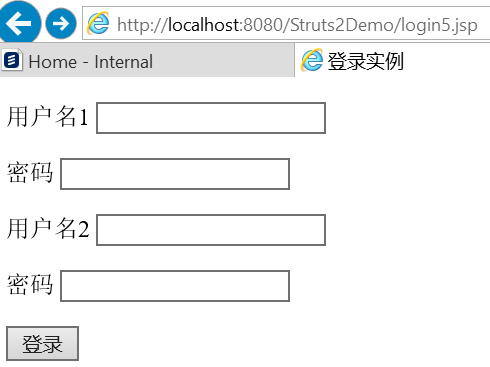
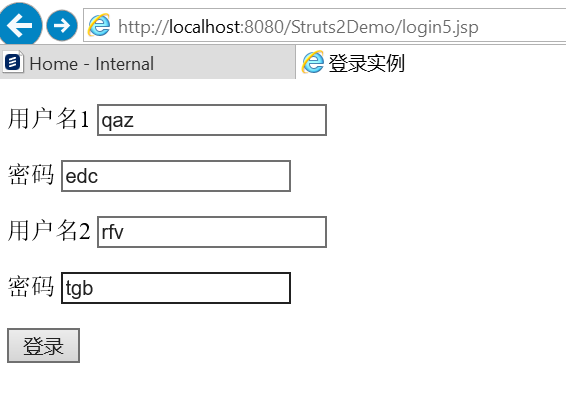
在控制台输出:test05
user1 info:qaz edc
user2 info:rfv tgb。
到此属性驱动的参数封装结束。下面看模型驱动的参数封装:
1.2.1 模型驱动
使用模型驱动进行参数封装时,数据模型必须和动作类方法不在同一个类中。
使用步骤如下:
1. 动作类实现ModelDriven的接口
2. 实现接口中的抽象方法getModel
3. 使用模型驱动时,数据模型必须由我们自己实例化。即
private User user = new User();
此时在form表单中可以直接使用username进行参数传递了~
先看下动作类:MyParaAction3.java
 1 package action;
 2
 3 import com.opensymphony.xwork2.ActionSupport;
 4 import com.opensymphony.xwork2.ModelDriven;
 5
 6 import login.User;
 7
 8 public class MyParaAction3 extends ActionSupport implements ModelDriven<User> {//动作类实现ModelDriven的接口
 9     //使用模型驱动时,数据模型必须由我们自己实例化
10     private User user = new User();
11     //实现接口中的抽象方法getModel
12     @Override
13     public User getModel() {
14
15         return user;
16     }
17
18     public String test01(){
19         System.out.println("user info:" + user.getUsername() +" , " + user.getPassword());
20
21         return "success";
22     }
23
24 }
看表单数据login6.jsp:
 1 <%@ page language="java" contentType="text/html; charset=UTF-8"
 2     pageEncoding="UTF-8"%>
 3 <!DOCTYPE html PUBLIC "-//W3C//DTD HTML 4.01 Transitional//EN" "http://www.w3.org/TR/html4/loose.dtd">
 4 <html>
 5 <head>
 6 <meta http-equiv="Content-Type" content="text/html; charset=UTF-8">
 7 <title>登录实例</title>
 8 </head>
 9 <body>
10 <form action = "Login6_test01" method="post">
11     <p>用户名1 <input type = "text" name="username"/></p>
12     <p>密码 <input type = "text" name="password"/></p>
13     <input type = "submit" value = "登录"/>
14 </form>
15 </body>
16 </html>
上面是动态参数传递。下面看struts.xml配置:
1         <action name="Login6_*" class="action.MyParaAction3" method="{1}">
2             <result name="success">/index.jsp</result>
3         </action>
在浏览器输入:http://localhost:8080/Struts2Demo/login6.jsp
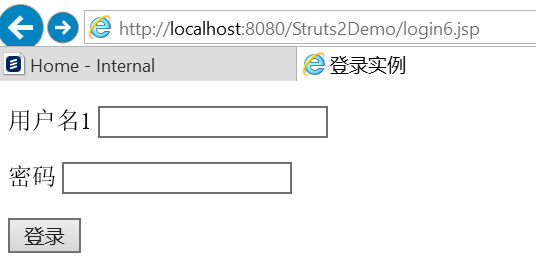
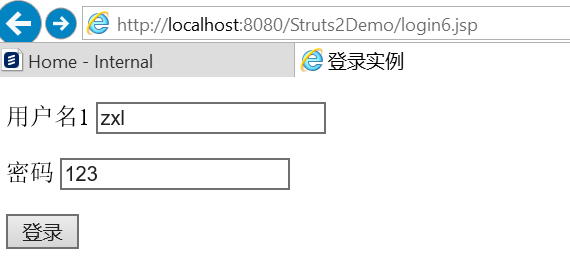
控制台输出:user info:zxl , 123。
这个地方有个主意:如果在jsp中不直接写username, 而是写user.username, 发现action 得不到参数。参数传递失败。
模型驱动方式通过JavaBean模型进行数据传递。只要是普通的JavaBean,就可以充当模型部分。采用这种方式,JavaBean所封装的属性与表单的属性一一对应,JavaBean将成为数据传递的载体。
记住:通过模型驱动时,在表单页面中必须直接按照JavaBean中数据模型来填写参数!
二:struts2参数自动类型转换
上面我们知道了struts2的方便之处,不用我们自己手动来获取请求参数了,struts2中的某些拦截器已经帮我们全部解决好了,我们只需要写get、set方法即可,真是非常方便。不知道大家发现了没有,从表单元素提交过来的都是String类型的,而我们在servlet中获取到表单元素后,得到的是Object类型,也就是需要我们自己手动转型。但是在struts2中,我们却不需要,是因为有这么一个机制,参数类型自动转型,获取过来的参数都是String类型的,但是如果我们需要int型,double型等,都会帮我们自己转换。
下面我们看一个例子:首先给出动作类:定义了不同的数据类型
  1 package action;
  2
  3 import java.util.Date;
  4
  5
  6 import com.opensymphony.xwork2.ActionSupport;
  7
  8 public class MyParaAction4 extends ActionSupport {
  9     private int age;
 10     private String name;
 11     private float money;
 12     private boolean married;
 13     private char sex;
 14     private Date date;
 15
 16
 17     /**
 18      * @return the date
 19      */
 20     public Date getDate() {
 21         return date;
 22     }
 23
 24     /**
 25      * @param date the date to set
 26      */
 27     public void setDate(Date date) {
 28         this.date = date;
 29     }
 30
 31     /**
 32      * @return the age
 33      */
 34     public int getAge() {
 35         return age;
 36     }
 37
 38     /**
 39      * @param age the age to set
 40      */
 41     public void setAge(int age) {
 42         this.age = age;
 43     }
 44
 45     /**
 46      * @return the name
 47      */
 48     public String getName() {
 49         return name;
 50     }
 51
 52     /**
 53      * @param name the name to set
 54      */
 55     public void setName(String name) {
 56         this.name = name;
 57     }
 58
 59     /**
 60      * @return the money
 61      */
 62     public float getMoney() {
 63         return money;
 64     }
 65
 66     /**
 67      * @param money the money to set
 68      */
 69     public void setMoney(float money) {
 70         this.money = money;
 71     }
 72
 73     /**
 74      * @return the married
 75      */
 76     public boolean isMarried() {
 77         return married;
 78     }
 79
 80     /**
 81      * @param married the married to set
 82      */
 83     public void setMarried(boolean married) {
 84         this.married = married;
 85     }
 86
 87     /**
 88      * @return the sex
 89      */
 90     public char getSex() {
 91         return sex;
 92     }
 93
 94     /**
 95      * @param sex the sex to set
 96      */
 97     public void setSex(char sex) {
 98         this.sex = sex;
 99     }
100
101
102     public String test01(){
103
104         System.out.println("user info:" + name +","+ age +","+ money +","+ sex +","+ married +","+ date);
105
106         return "success";
107     }
108
109 }
下面给出表单页面login7.jsp
 1 <%@ page language="java" contentType="text/html; charset=UTF-8"
 2     pageEncoding="UTF-8"%>
 3 <!DOCTYPE html PUBLIC "-//W3C//DTD HTML 4.01 Transitional//EN" "http://www.w3.org/TR/html4/loose.dtd">
 4 <html>
 5 <head>
 6 <meta http-equiv="Content-Type" content="text/html; charset=UTF-8">
 7 <title>登录实例</title>
 8 </head>
 9 <body>
10 <form action = "Login7_test01" method="post">
11     <p>int <input type = "text" name="age"/></p>
12     <p>String <input type = "text" name="name"/></p>
13     <p>float <input type = "text" name="money"/></p>
14     <p>boolean <input type = "radio" name="married" value=true checked="checked"/>是
15                <input type = "radio" name="married" value=false />否</p>
16     <p>char <input type = "radio" name="sex" value="男" checked="checked"/>男
17                <input type = "radio" name="sex" value="女" />女</p>
18     <p>日期 <input type = "text" name="date"/></p>
19
20     <input type = "submit" value = "登录"/>
21 </form>
22 </body>
23 </html>
struts配置就不贴出来。在浏览器输入:http://localhost:8080/Struts2Demo/login7.jsp
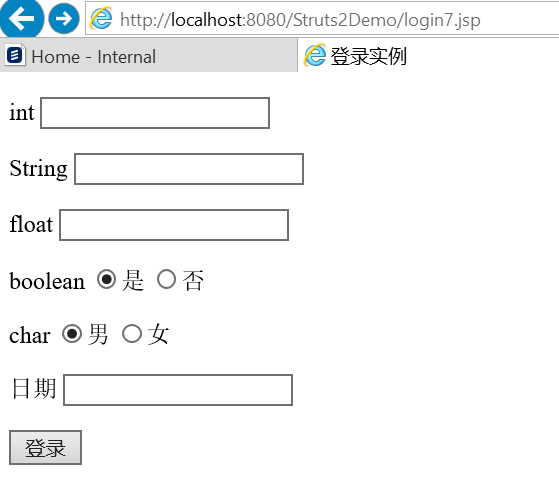
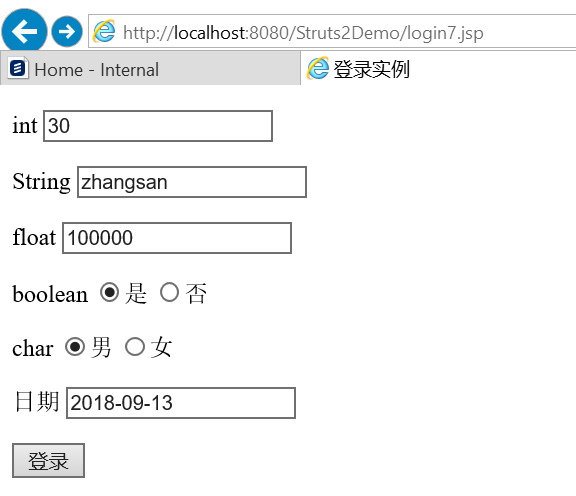
点击登陆,
在浏览器页面输出:Hi, Struts2!!!
在控制台输出:user info:zhangsan,30,100000.0,男,true,Thu Sep 13 00:00:00 CST 2018.
这个地方注意了:上面输入日期的格式必须是:2018-09-13。也就是说,必须是:年-月-日。如果我们按照下面格式输入:
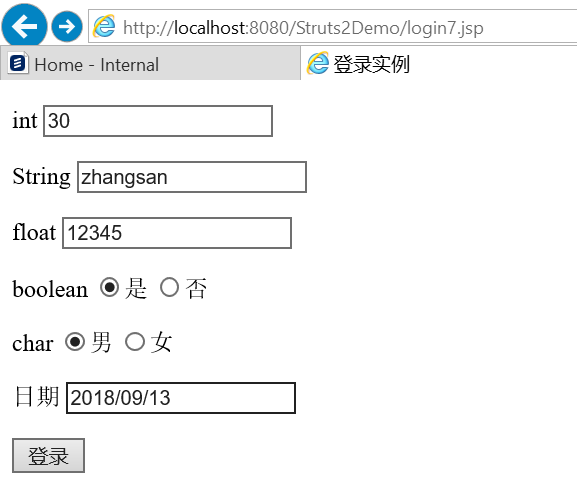
点击登录:会报错。
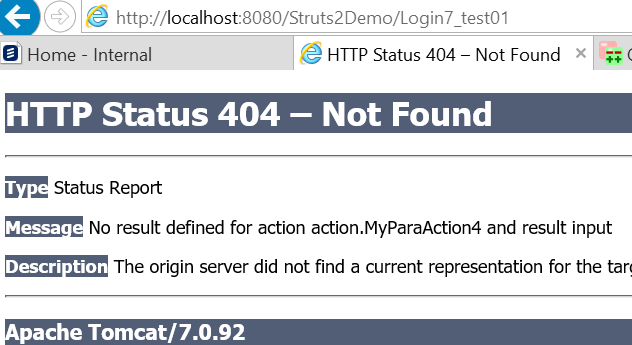
看上面例子,全部都自动转型了,这里需要注意一点,在使用struts2中的日期自动转型时,表单中的日期字符串的格式是固定的,也就是说按照上面那样编程,日期格式必须是那样,没法进行自动转换。但是如果给客户使用,客户就是没按照那种格式来书写,怎么办?
struts2能够让我们自定义类型转换器,格式让我们自己来决定。自定义日期转换器:
只需要两步即可完成:1、继承DefaultTypeConverter类,重写convertValue方法
2、注册转换器。也就是该转换器的作用范围。局部配置和全局配置。
下面给出例子:动作类还是上面那个,只是输入日期可以有好多个格式:
自定义转换器:MyConvert.java
 1 package util;
 2
 3 import java.text.DateFormat;
 4 import java.text.ParseException;
 5 import java.text.SimpleDateFormat;
 6 import java.util.Date;
 7
 8 import com.opensymphony.xwork2.conversion.TypeConversionException;
 9 import com.opensymphony.xwork2.conversion.impl.DefaultTypeConverter;
10
11 public class MyConvert extends DefaultTypeConverter {
12     //支持转换的多种日期格式,可增加时间格式
13     private final DateFormat[] dfs={
14             new SimpleDateFormat("yyyy年MM月dd日"),
15             new SimpleDateFormat("yyyy-MM-dd"),
16             new SimpleDateFormat("MM/dd/yy"),
17             new SimpleDateFormat("yyyy.MM.dd"),
18             new SimpleDateFormat("yy.MM.dd"),
19             new SimpleDateFormat("yyyy/MM/dd")
20         };
21
22     /* (non-Javadoc)
23      * @see com.opensymphony.xwork2.conversion.impl.DefaultTypeConverter#convertValue(java.lang.Object, java.lang.Class)
24      */
25     @Override
26     public Object convertValue(Object value, Class toType) {
27         //用特定格式转换,也就是说输入格式必须是2018/09/13,也即是说字符串的格式只能是这个才可以转换
28         SimpleDateFormat sf = new SimpleDateFormat("yyyy-mm-dd");
29
30         if(toType == java.util.Date.class){
31             //获得数据
32             String[] param = (String[])value;//获取日期的字符串
33
34             for(int i=0; i < dfs.length ; i++){//遍历日期支持格式,进行转换
35
36                 try {
37                     return dfs[i].parse(param[0]);//转化为特定格式的date类型
38                 } catch (ParseException e) {
39                         continue;
40                 }
41             }
42             //如果遍历完毕后仍没有转换成功,表示出现转换异常
43             throw new TypeConversionException();
44         }
45         //将日期转换为指定的字符串格式
46         if(toType == String.class){
47             java.util.Date date = (Date) value;
48             return sf.format(date);        //输出格式是yyyy-MM-dd
49         }
50
51         return null;
52     }
53 }
然后注册转换器:分两种情况:一种是局部注册,一种是全局注册
局部注册:
位置:action类同包
名称:actionClass-conversion.properties
actionClass:action类的类名
conversion.properties:固定名
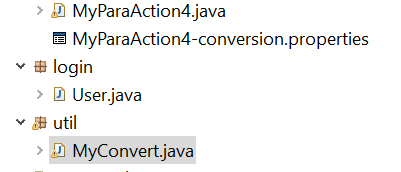
内容:属性=转换器类的全限定类名
date=util.MyConvert
这样一来,我们自定义的转换器就只能在Demo01Action中属性名为date身上使用了,超过了该范围,就会使用struts2默认的转换器。
全局注册:
注册,全局配置
位置:src
名称:xwork-conversion.properties

内容:需要转换得类=转换器
全局配置后,所有在struts2中使用Date型的都会用我们写的转换器进行转换。
本测试中用的是局部注册,然后我们在访问浏览器:http://localhost:8080/Struts2Demo/login7.jsp
在日期那一行就可以输入各种自定义的日期格式了。
到此关于struts的参数封装和自动转换学习完了。有个疑问就是struts在动作类中的参数又是怎么回显到表单的呢?这个是在哪个模块呢?struts标签????
主要参考的帖子有:在此感谢!!!
https://www.cnblogs.com/jingpeipei/p/5945724.html-----日期转换
https://www.cnblogs.com/whgk/category/964133.html------各个功能介绍
https://blog.csdn.net/wjw0130/article/category/2503465-----各个功能介绍
https://blog.csdn.net/q547550831/article/category/6532892-----各个功能介绍
https://blog.csdn.net/xtayfjpk/article/details/14133589-----专门介绍拦截器