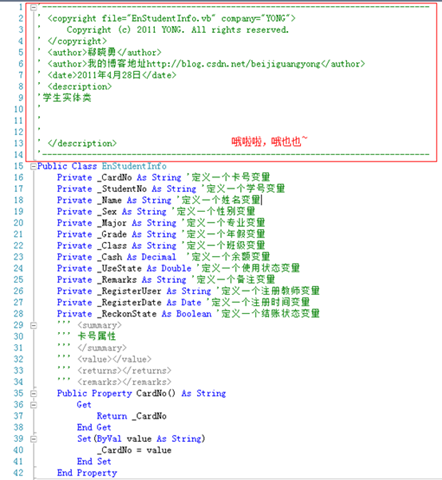
在Visual Studio 2010(下面简称VS)编写类的过程中通常会在类的前面写上如下注释:
1: '------------------------------------------------------------------------------2: ' <copyright file="***.vb" company="YONG">3: ' Copyright (c) 2011 YONG. All rights reserved.4: ' <copyright>5: ' <author>郗晓勇<author>6: ' <author>博客地址http://blog.csdn.net/beijiguangyong<author>7: ' <date>2011年4月29日<date>8: ' <description>9: '10: '11: '12: '13: ' <description>14: '------------------------------------------------------------------------------每次复制粘贴未免太麻烦,我们可以利用VS的宏来为我们自动添加如上注释。具体操作如下:
1. 找到VS的IDE宏编辑器

2. 打开后选择添加Model
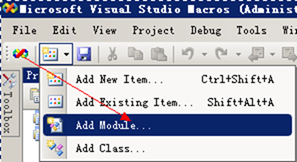
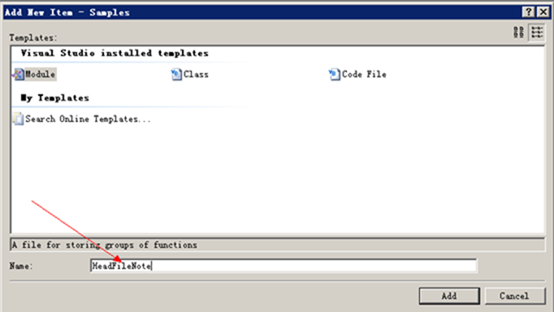
3. 起一个自己喜欢的名字(这里以HeadFileNote为例)
4. 点击添加后出现如下编辑界面
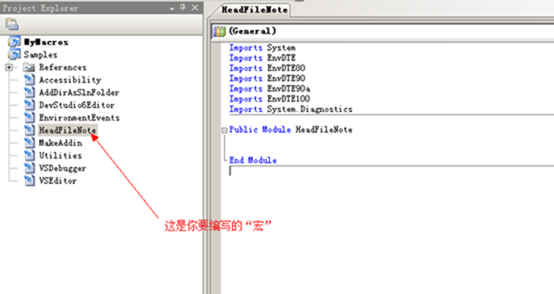
5. 在右侧即可编辑自己所需要的“宏”了,我们将添加的“宏”代码如下
1: Imports System2: Imports EnvDTE3: Imports EnvDTE804: Imports EnvDTE905: Imports EnvDTE90a6: Imports EnvDTE1007: Imports System.Diagnostics8:9: Public Module HeadFileNote10: Sub DocumentFileHeader()11: Dim doc As Document12: Dim docName As String13: Dim companyName As String = "YONG"14: Dim authorName As String = "郗晓勇"15: Dim authorContact As String = "我的博客地址http://blog.csdn.net/beijiguangyong"16: Dim copyrightText As String = String.Format("Copyright (c) {0} {1}. All rights reserved.", Date.Now.Year, companyName)17:18: ' 从程序中获得文件的名字19: doc = DTE.ActiveDocument20:21: '获得当前编辑类的名字22: docName = doc.Name23:24: ' 将添加焦点定位在文件首部25: DTE.ActiveDocument.Selection.StartOfDocument()26:27: ' 添加一个版权说明28: DTE.ActiveDocument.Selection.Text = "'------------------------------------------------------------------------------" '以String类型添加自己想要的符号、文字29: DTE.ActiveDocument.Selection.NewLine() '添加一个空行30: DTE.ActiveDocument.Selection.Text = "' <copyright file=""" + docName + """ company=""" + companyName + """>"31: DTE.ActiveDocument.Selection.NewLine()32: DTE.ActiveDocument.Selection.Text = "' " + copyrightText33: DTE.ActiveDocument.Selection.NewLine()34: DTE.ActiveDocument.Selection.Text = "' <copyright>"35:36: ' 添加用户相关信息37: DTE.ActiveDocument.Selection.NewLine()38: DTE.ActiveDocument.Selection.Text = "' <author>" + authorName + "<author>"39: DTE.ActiveDocument.Selection.NewLine()40: DTE.ActiveDocument.Selection.Text = "' <author>" + authorContact + "</author>"41: DTE.ActiveDocument.Selection.NewLine()42: DTE.ActiveDocument.Selection.Text = "' <date>" + String.Format("{0:D}", Date.Now) + "<date>"43: DTE.ActiveDocument.Selection.NewLine()44: DTE.ActiveDocument.Selection.Text = "' <description>"45: DTE.ActiveDocument.Selection.NewLine()46: DTE.ActiveDocument.Selection.Text = "'"47: DTE.ActiveDocument.Selection.NewLine()48: DTE.ActiveDocument.Selection.Text = "'"49: DTE.ActiveDocument.Selection.NewLine()50: DTE.ActiveDocument.Selection.Text = "'"51: DTE.ActiveDocument.Selection.NewLine()52: DTE.ActiveDocument.Selection.Text = "'"53: DTE.ActiveDocument.Selection.NewLine()54: DTE.ActiveDocument.Selection.Text = "' <description>"55: DTE.ActiveDocument.Selection.NewLine()56: DTE.ActiveDocument.Selection.Text = "'------------------------------------------------------------------------------"57: DTE.ActiveDocument.Selection.NewLine()58: End Sub59: End Module6. 添加完毕后点击保存

这样我们的“宏”就编好了,下面接着介绍怎样定义快捷键为我们的类添加头注释。
7. 进入我们的VS开发环境打开选项,进行相关设置
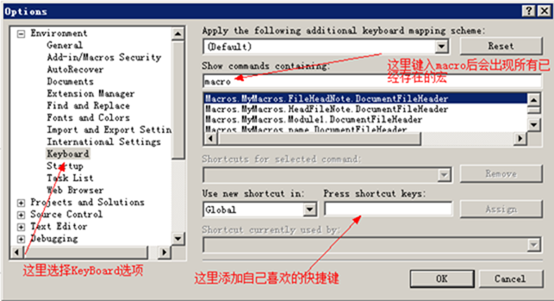
8. 设置完成后单击“Assign”(注册快捷键)如图
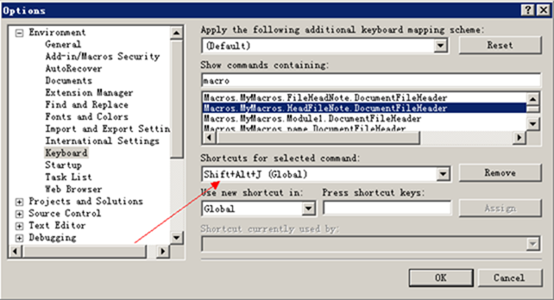
9. 单击“OK”完成所有设置,现在就去按下快捷键试试自己编辑的“注释添加宏”吧。
