在使用spring cloud 项目创建微服务项目时,遇到过很多坑,现在我将整理如下:
条件:Idea 开发工具 maven 项目
1. 创建一个空的mvn项目。

2. 创建完了就添加Module,首先添加一个Module作为项目的父类。
pom文件如下:
<modelVersion>4.0.0</modelVersion>

<groupId>cn.fintecher.pangolin</groupId>
<artifactId>microservice</artifactId>
<version>1.0-SNAPSHOT</version>

<packaging>pom</packaging>

<modules>
    <module>microservice-common</module>
    <module>microservice-provider</module>
</modules>

<properties>
    <project.build.sourceEncoding>UTF-8</project.build.sourceEncoding>
    <maven.compiler.source>1.8</maven.compiler.source>
    <maven.compiler.target>1.8</maven.compiler.target>
    <spring-cloud.version>Finchley.SR1</spring-cloud.version>
    <spring-boot.version>2.0.5.RELEASE</spring-boot.version>
    <lombok.version>1.16.18</lombok.version>
</properties>


<dependencyManagement>
    <dependencies>
        <!-- 定义 spring cloud 版本 -->
        <dependency>
            <groupId>org.springframework.cloud</groupId>
            <artifactId>spring-cloud-dependencies</artifactId>
            <version>${spring-cloud.version}</version>
            <type>pom</type>
            <scope>import</scope>
        </dependency>
        <!-- 定义 spring boot 版本 -->
        <dependency>
            <groupId>org.springframework.boot</groupId>
            <artifactId>spring-boot-dependencies</artifactId>
            <version>${spring-boot.version}</version>
            <type>pom</type>
            <scope>import</scope>
        </dependency>
        <!-- 定义 lombok 版本 -->
        <dependency>
            <groupId>org.projectlombok</groupId>
            <artifactId>lombok</artifactId>
            <version>${lombok.version}</version>
        </dependency>
    </dependencies>
</dependencyManagement>

<build>
    <plugins>
        <plugin>
            <groupId>org.springframework.boot</groupId>
            <artifactId>spring-boot-maven-plugin</artifactId>
        </plugin>
    </plugins>
</build>

3. 创建子模块
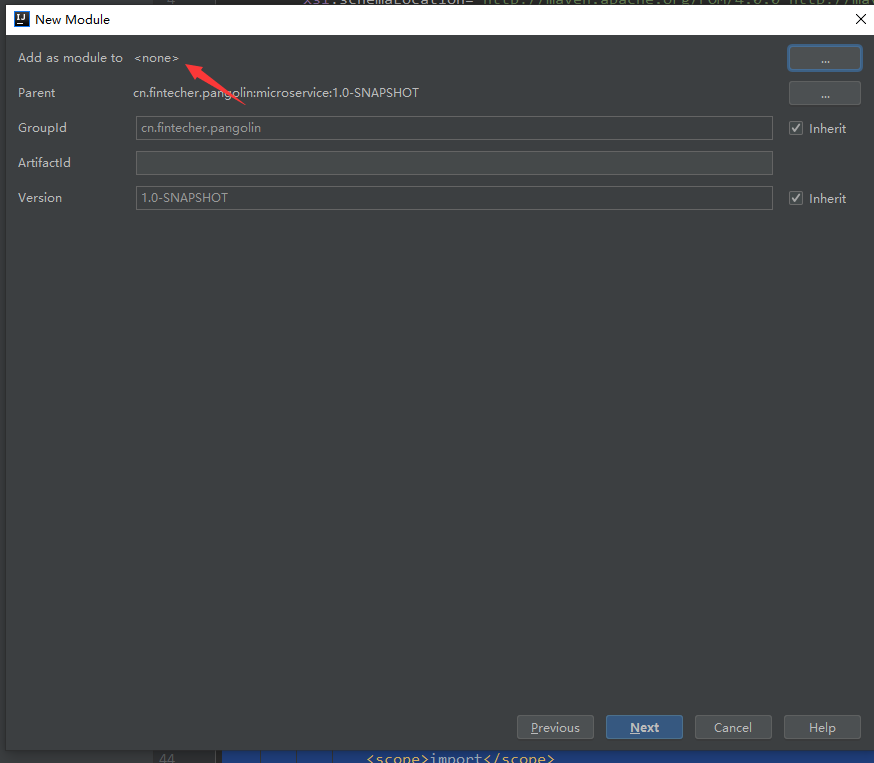
注意红色标注的地方为None.后面是可以选的。
4. 注意路径,要在父类的下面。

5. 创建完之后发现父类的<modeules>中没有包含进去
手工包含进去

6. 创建好的pom文件如下:

7. 添加启动类
添加完引入
<dependency>
    <groupId>org.springframework.boot</groupId>
    <artifactId>spring-boot-autoconfigure</artifactId>
</dependency>

启动类引用
这样在启动服务的时候会报

这个是由于没有添加start统一配置,
特别说明,springboot的特性里面就有一个点,Start 全局配置,意思就是你在用其他的包的时候不知道用哪个版本,springbootstart.jar 会帮助你找到最合适的。
<dependency>
    <groupId>org.springframework.boot</groupId>
    <artifactId>spring-boot-starter-web</artifactId>
</dependency>
加入这个pom配置,就可以启动起来了。

8. 使用
@SpringCloudApplication 注解,这个注解封装了@SpringBootApplication
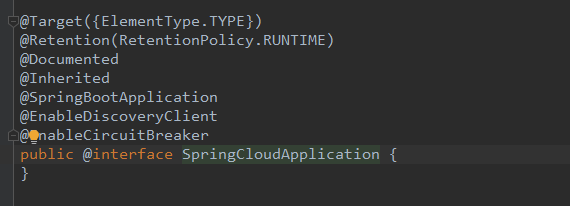
多了一个服务发现和熔断处理
但是引用之后启动会报如下错误。

这个的原因是 spring cloud版本和springboot版本不一致引起的。
修改版本

但是版本对应关系如下:

通过这个图并不能准确的确定版本的对应关系,所以还是要看网上的同学的踩坑分享。
还需要增加一个pom配置
<dependency>
    <groupId>org.springframework.boot</groupId>
    <artifactId>spring-boot-starter-web</artifactId>
</dependency>

<dependency>
    <groupId>org.springframework.cloud</groupId>
    <artifactId>spring-cloud-starter-netflix-hystrix</artifactId>
</dependency>

这样就可以顺利启动起来了。

源码地址:https://github.com/jamesbaoyi/springcloud-sample
源码地址2: https://github.com/jamesbaoyi/luyue-service