课程名称
基于Android平台移动互联网开发
实验日期
2016年3月24日
实验项目名称
颜色、字符串资源的使用
实验地点
S3010
实验类型
□验证型 √设计型 □综合型
学 时
4
一、实验目的及要求(本实验所涉及并要求掌握的知识点)
【目的】
- 掌握Android中颜色和字符串资源的使用方法。
- 理解Android中尺寸和布局资源的使用方法。
【要求】
- 在工程中为Activity、View使用颜色资源;
- 使用字符串资源并理解字符串资源的引用机制;
- 为Android中的视图组件设定尺寸;
- 运用布局资源将界面上的组件放在指定的位置。
二、实验环境(本实验所使用的硬件设备和相关软件)
(1)PC机
(2)操作系统:Windows XP
(3)软件: Eclipse, JDK1.6,Android SDK,ADT
三、实验内容及步骤
【过程】
1. 创建工程
2. 修改字符串资源
打开/res/values/strings.xml文件。
点击Add按钮,添加字符串,输入字符串的name 和value
新建的工程含有三个已有字符串
3. 新建颜色资源color.xml
4. 使用资源颜色和字符串资源
四、实验结果(本实验源程序清单及运行结果或实验结论、实验设计图)
|
1
2
3
4
5
6
7
8
9
10
11
12
13
14
15
16
17
18
19
20
|
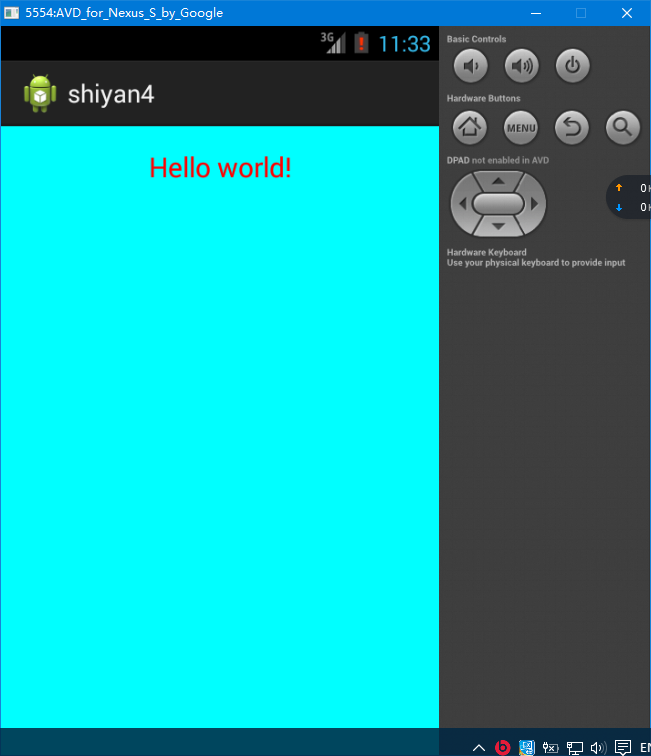
<RelativeLayout xmlns:android="http://schemas.android.com/apk/res/android" android:layout_width="match_parent" android:layout_height="match_parent" android:paddingBottom="@dimen/activity_vertical_margin" android:paddingLeft="@dimen/activity_horizontal_margin" android:paddingRight="@dimen/activity_horizontal_margin" android:paddingTop="@dimen/activity_vertical_margin" android:background="#00ffff" tools:context=".MainActivity" > <TextView android:layout_width="fill_parent" android:layout_height="wrap_content" android:text="@string/hello_world" android:gravity="center" android:textSize="20sp" android:textColor="@color/text_blue"/></RelativeLayout> |
2.资源
|
1
2
3
4
5
6
7
8
9
10
11
12
13
14
15
16
17
18
19
20
21
22
23
24
25
26
27
28
29
30
31
|
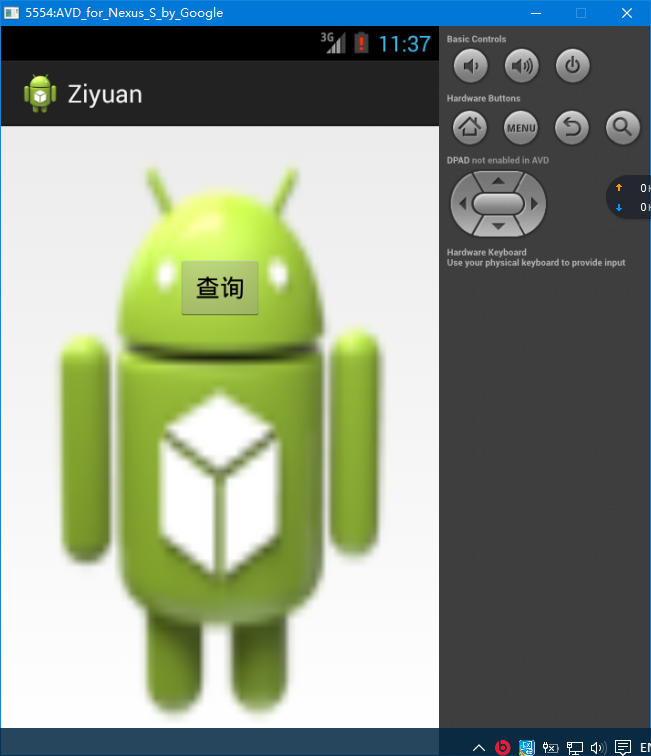
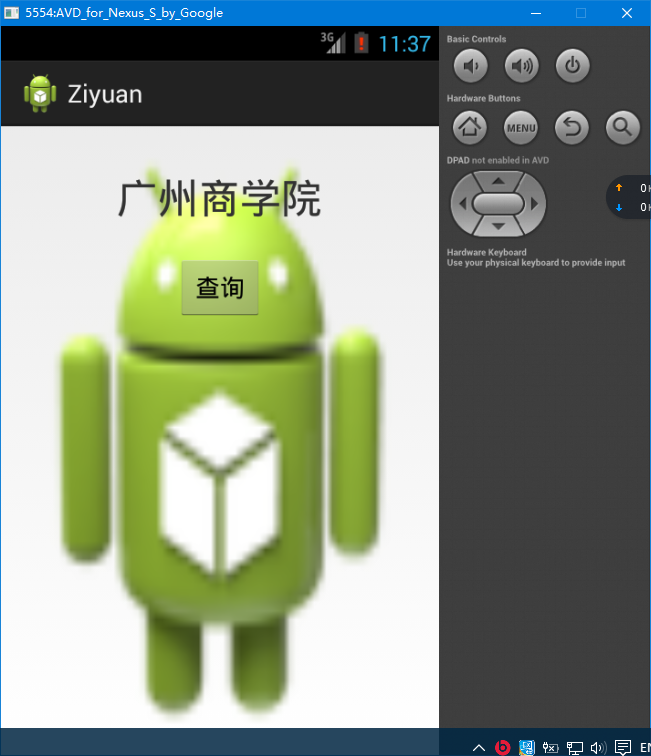
<RelativeLayout xmlns:android="http://schemas.android.com/apk/res/android" android:layout_width="match_parent" android:layout_height="match_parent" android:paddingBottom="@dimen/activity_vertical_margin" android:paddingLeft="@dimen/activity_horizontal_margin" android:paddingRight="@dimen/activity_horizontal_margin" android:paddingTop="@dimen/activity_vertical_margin" android:background="@drawable/ic_launcher" tools:context=".MainActivity" > <TextView android:id="@+id/textView1" android:layout_width="wrap_content" android:layout_height="wrap_content" android:layout_alignParentTop="true" android:layout_centerHorizontal="true" android:textSize="30sp" android:layout_marginTop="15dp" android:text="@string/gzcc" /> <Button android:id="@+id/but1" android:layout_width="wrap_content" android:layout_height="wrap_content" android:layout_below="@+id/textView1" android:layout_centerHorizontal="true" android:layout_marginTop="22dp" android:text="@string/find" /></RelativeLayout> |
|
1
2
3
4
5
6
7
8
9
10
11
12
13
14
15
16
17
18
19
20
21
22
23
24
25
26
27
28
29
|
package com.example.ziyuan;import android.os.Bundle;import android.app.Activity;import android.view.Menu;import android.view.View;import android.view.View.OnClickListener;import android.widget.Button;import android.widget.TextView;public class MainActivity extends Activity { TextView tv; @Override protected void onCreate(Bundle savedInstanceState) { super.onCreate(savedInstanceState); setContentView(R.layout.activity_main); Button btn = (Button)findViewById(R.id.but1); btn.setOnClickListener(new OnClickListener() { @Override public void onClick(View arg0) { // TODO Auto-generated method stub tv=(TextView)findViewById(R.id.textView1); tv.setTextColor(TRIM_MEMORY_MODERATE); } }); } |
五、实验总结(对本实验结果进行分析,实验心得体会及改进意见)
经过本次的实验,可以更加了解到android实验颜色、字符串资源的使用,但对于android的具体结构还是不懂,日后需要多看,多练。
实验评语
实验成绩
指导教师签名: 年 月 日