今天来说下原生JS如何实现拖拽的功能 —— 只能在可拖拽范围内进行拖拽。实现该功能的思路,就是: 通过改变拖拽元素的位置(left, top)来实现。
在这个功能中我们需要考虑三个事件和两个临界点。
拖拽的三事件:
-
- 鼠标落下 —— mousedown
- 鼠标移动 —— onmousemove
- 鼠标抬起 —— mouseup
两个临界点:
-
- 最小的临界点
- 最大的临界点
接下来,我们先写好html代码和css 样式。我们定义一个可拖拽的容器 wrapper 和 一个 拖拽框 box。
// CSS
*{
    margin: 0;
    padding: 0;
}
.wrapper{
   position:relative;
    width: 500px;
    height: 500px;
    margin: 150px auto;
    border: 1px solid #000;
}
 .box{
    position: absolute;
    width: 200px;
    height: 200px;
    background-color: red;
    cursor: move;
}
// HTML
<div class="wrapper">
    <div class="box"></div>
</div>
HTML 和 CSS 写好了,接下来我们来写JS。
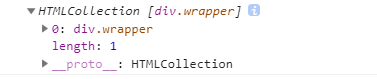
首先我们要获得到 wrapper 和 box 这个两个元素。采用 document.getElementsByClassName('className')[0] 。为什么要用 [0] ? 因为 getElementByClassName 获取到的是一个类数组的数据。将document.getElementsByClassName('wrapper')打印出来,如下图:
接着,我们实现 监听【鼠标落下】的功能,为了后续的【当鼠标移除可拖拽范围】,此处我们先获取 wrapper 元素。
var wrap= document.getElementByClassName('wrapper')[0],
    oBox = document.getElementByClassName('box')[0]

oBox.addEventListener('mousedown', function(e){

     var lastX = e.clientX,
         lastY = e.clientY;

});
【鼠标移动】,此时我们要获取鼠标移动所在的坐标,并计算出此时的坐标与上一个坐标的差值。
解析图如下:鼠标在 a 点位置落下,移动到 b 点,此时需要计算出 移动的垂直和水平距离。

document.onmousemove = function (e){
//  此处 ,为什么要用document ? 而不用 oBox ?  如果用 oBox ,当鼠标快速移动的时候,会出现 移动块(box) 脱落,不会跟着鼠标移动。
//  如果后续设置了鼠标只能在拖拽框中进行拖拽,此处就可以采用 oBox ,但是后面的对应的鼠标移动事件也需要使用 oBox 。
    var nowX = e.clientX,
        nowY = e.clientY

    var disX = nowX - lastX,
        disY = nowY - lastY

    var left = oBox.offsetLeft + disX,   // offsetLeft  是 当前元素距离父级元素的距离
        top = oBox.offsetTop + disY
}
在css 中,我们给 wrapper 设置了——相对定位,给 box 元素设置了——绝对定位,此时,我们就可以将 上面代码中的 left 和 top 赋值给 box 元素
oBox.style.left = left + 'px'
oBox.style.top = top + 'px'
*此时,需要注意的是,拖拽的过程中,鼠标是不停的在移动,所以,此时的初始点 (a) 和 移动终点 (b) 也是在不断的改变,所以我们需要重新给 初始点 a 的水平和垂直距离赋值。
lastX = nowX
lastY = nowY
【鼠标抬起】:鼠标落下和鼠标移动实现了, 那当我们将 box 元素拖拽到目标位置点的时候,此时,我们就需要实现 鼠标抬起 的功能。代码如下:
document.onmouseup = function(){
    document.onmousemove = null;
}
上面实现了拖拽的功能,但是发现 移动块可以满屏的拖,那如果只想要在可拖拽范围内拖拽呢?
此时就需要考虑临界值的问题。即左上角 和右下角。在鼠标移动事件中,我们增加 left 和 top 取值限制。即当 右下角坐标 > left / top > 左上角坐标, 代码如下:
// 最小临界值
left = left <= wrapLeft ? wrapLeft.left : left
top = top <= 150 ? 150 : top;

// 最大临界值
left = left >= wrapLeftLast ? wrapLeftLast : left
top = top >= (500 - 200 + 152) ? 452 : top;
此处,因为我给 box 设置了居中,所以采用了 getBoundingClientRect().left 获取 box 左侧距离窗口的距离。如果需求中没有给box 设置,可以直接将 wrapLeft = 0 , wrapLeftLast = (wrapper.width - box.width) 来代替。
最后,我们再实现上文说的后续功能。当鼠标移出拖拽范围 wrapper 的时候,我们停止拖拽行为。代码如下:
wrap.onmouseleave = function(e){
    document.onmousemove = null
}
好了,思路都解析完了,下面贴上完整的代码:
<!DOCTYPE html>
<html lang="en">
<head>
    <meta charset="UTF-8">
    <meta name="viewport" content="width=device-width, initial-scale=1.0">
    <meta http-equiv="X-UA-Compatible" content="ie=edge">
    <title>Document</title>
    <style>
        *{
            margin: 0;
            padding: 0;
        }
        .wrapper{
            width: 500px;
            height: 500px;
            margin: 150px auto;
            border: 1px solid #000;
        }
        .box{
            position: absolute;
            width: 200px;
            height: 200px;
            background-color: red;
            cursor: move;
        }
    </style>
</head>
<body>
    <div class="wrapper">
        <div class="box"></div>
    </div>
    <script>
        var oBox = document.getElementsByClassName('box')[0],
           wrap = document.getElementsByClassName('wrapper')[0],
           wrapLeft = wrap.getBoundingClientRect().left,
           wrapLeftLast = wrapLeft +  302;   // 302 :  考虑了边框 两个像素的问题

        oBox.addEventListener('mousedown', function(e){
            var lastX = e.clientX,
               lastY = e.clientY;

            document.onmousemove = function(e){
                var nowX = e.clientX,
                   nowY = e.clientY;

                var disX = nowX - lastX,
                   disY = nowY - lastY;

                var left = oBox.offsetLeft + disX,
                   top = oBox.offsetTop + disY;

                left = left <= wrapLeft ? wrapLeft.left : left;
                top = top <= 150 ? 150 : top;

                left = left >= wrapLeftLast ? wrapLeftLast : left;
                top = top >= (500 - 200 + 152) ? 452 : top;  // 452 考虑了边框两像素的问题

                oBox.style.left = left + 'px';
                oBox.style.top = top + 'px';

                lastX = nowX;
                lastY = nowY;
            }

            document.onmouseup = function(){
                document.onmousemove = null
            }
        })

        wrap.onmouseleave = function(e){
            document.onmousemove = null
        }
    </script>
</body>
</html>