之前做RN项目没调用过本地摄像头,今天下班早,做了一个简单的小demo:主要实现的功能:点击拍照按钮进入拍照界面,点击flip进行前后摄像头转换,点击开始拍照实现拍照功能(没写保存到本地的功能,大家可以自主开发),代码是参照expo官网的Camera写的一个小demo,大家可以结合的expo官网来看,该加注释的地方都在代码中加了,希望能对你有所帮助。
import React from 'react'

import {
    View,
    Text,
    TouchableOpacity,
    Button,
    Image
} from 'react-native'
import { Camera, Permissions } from 'expo';

interface Props{

}
//定义Camera的两个属性
interface State{
    hasCameraPermission?:any,
    type?:any,
    isShowCamera: Boolean,
    uri:string
}

export default class componentName extends React.Component<Props,State> {
    public camera:any              //定义一个camera来拿到Camera节点

    constructor(props:Props) {
        super(props)
        this.state = {
            hasCameraPermission: null,              //照相机权限
            type: Camera.Constants.Type.back,       //照相机类型
            isShowCamera: false,                    //是否开启照相机
            uri: ''
        }
    }
    async componentWillMount() {
        const { status } = await Permissions.askAsync(Permissions.CAMERA);
        this.setState({ hasCameraPermission: status === 'granted' });
    }
    //把官网里面的render粘过来
    render() {
        const { hasCameraPermission } = this.state;
        if (hasCameraPermission === null) {
          return <View />;
        } else if (hasCameraPermission === false) {
          return <Text>没有权限打开照相机</Text>;
        } else {
          return (
            <View style={{ flex: 1, paddingTop: 20 }}>
              {
                  !this.state.isShowCamera ?
                  <View>
                      <View>
                          <Image source={{uri:this.state.uri}} style={{ 200, height: 200}}></Image>
                      </View>
                      <Button
                        onPress={this.takePicture.bind(this)}
                        title='拍照'
                    ></Button>
                  </View>:
                  <Camera
                    style={{ flex: 1 }}
                    type={this.state.type}
                    ref={(el:any)=>this.camera=el}      //参照官网的Methods
                  >
                    <View
                        style={{
                            flex: 1,
                            backgroundColor: 'transparent',
                            flexDirection: 'row',
                        }}>
                        <TouchableOpacity
                            style={{
                            flex: 1,
                            alignSelf: 'flex-end',
                            alignItems: 'center',
                            }}
                            onPress={() => {
                            this.setState({
                                type: this.state.type === Camera.Constants.Type.back
                                ? Camera.Constants.Type.front
                                : Camera.Constants.Type.back,
                            });
                            }}>
                            <Text
                            style={{ fontSize: 18, marginBottom: 10, color: 'white' }}>
                            {' '}Flip{' '}
                            </Text>
                        </TouchableOpacity>
                        {/* 复制一个开始拍照的点击按钮 */}
                        <TouchableOpacity
                            style={{
                            flex: 1,                    //flex为0.1改成flex为1
                            alignSelf: 'flex-end',
                            alignItems: 'center',
                            }}
                            //参照官网的Methods
                            onPress={async () => {
                                if (this.camera) {
                                    let photo = await this.camera.takePictureAsync();
                                    console.log(photo)
                                    this.setState({
                                        isShowCamera: false,
                                        uri: photo.uri
                                    })
                                }
                            }}>
                            <Text
                            style={{ fontSize: 18, marginBottom: 10, color: 'white' }}>
                            {' '}开始拍照{' '}
                            </Text>
                        </TouchableOpacity>
                    </View>
                </Camera>
              }
            </View>
          );
        }
    }
    takePicture(){
        this.setState({
            isShowCamera: true
        })
    }
}
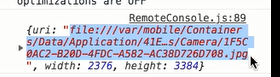
控制台打印的photo结果: