人生苦短,我用 Python
前文传送门:
小白学 Python 爬虫(2):前置准备(一)基本类库的安装
小白学 Python 爬虫(3):前置准备(二)Linux基础入门
小白学 Python 爬虫(4):前置准备(三)Docker基础入门
小白学 Python 爬虫(6):前置准备(五)爬虫框架的安装
小白学 Python 爬虫(10):Session 和 Cookies
小白学 Python 爬虫(11):urllib 基础使用(一)
小白学 Python 爬虫(12):urllib 基础使用(二)
小白学 Python 爬虫(13):urllib 基础使用(三)
小白学 Python 爬虫(14):urllib 基础使用(四)
小白学 Python 爬虫(15):urllib 基础使用(五)
小白学 Python 爬虫(16):urllib 实战之爬取妹子图
小白学 Python 爬虫(17):Requests 基础使用
小白学 Python 爬虫(18):Requests 进阶操作
小白学 Python 爬虫(21):解析库 Beautiful Soup(上)
小白学 Python 爬虫(22):解析库 Beautiful Soup(下)
小白学 Python 爬虫(23):解析库 pyquery 入门
小白学 Python 爬虫(26):为啥买不起上海二手房你都买不起
小白学 Python 爬虫(27):自动化测试框架 Selenium 从入门到放弃(上)
小白学 Python 爬虫(28):自动化测试框架 Selenium 从入门到放弃(下)
小白学 Python 爬虫(29):Selenium 获取某大型电商网站商品信息
小白学 Python 爬虫(31):自己构建一个简单的代理池
小白学 Python 爬虫(32):异步请求库 AIOHTTP 基础入门
小白学 Python 爬虫(33):爬虫框架 Scrapy 入门基础(一)
小白学 Python 爬虫(34):爬虫框架 Scrapy 入门基础(二)
小白学 Python 爬虫(35):爬虫框架 Scrapy 入门基础(三) Selector 选择器
小白学 Python 爬虫(36):爬虫框架 Scrapy 入门基础(四) Downloader Middleware
小白学 Python 爬虫(37):爬虫框架 Scrapy 入门基础(五) Spider Middleware
小白学 Python 爬虫(38):爬虫框架 Scrapy 入门基础(六) Item Pipeline
引言
Splash 是一种 JavaScript 渲染服务,是一个带有 HTTP API 的轻量级浏览器,同时它对接了 Python3 中的 Twisted 和 QT 库。
通过它,我们同样可以实现动态渲染页面的抓取。
Github:https://github.com/scrapy-plugins/scrapy-splash
Splash 官方文档:http://splash.readthedocs.io
功能说明:
- 并行处理多个网页;
- 获取 HTML 结果和/或获取屏幕截图;
- 关闭图片或使用 Adblock Plus 规则来加快渲染速度;
- 在页面上下文中执行自定义 JavaScript;
- 编写 Lua 浏览脚本 ;
- 在 Splash-Jupyter Notebook 中开发 Splash Lua 脚本。
- 以 HAR 格式获取详细的渲染信息。
安装
安装 Splash 主要有两个部分,一个是 Splash 服务的安装,具体是通过Docker,安装之后,会启动一个 Splash 服务。另外一个是 Scrapy-Splash 的 Python 库的安装,安装之后即可在 Scrapy 中使用 Splash 服务。
在 Docker 中安装 Splash 服务,命令如下:
docker run -p 8050:8050 scrapinghub/splash
理论上看到如下内容,就证明安装成功了。
2020-01-10 13:09:41+0000 [-] Log opened.
2020-01-10 13:09:41.824978 [-] Xvfb is started: ['Xvfb', ':1196586140', '-screen', '0', '1024x768x24', '-nolisten', 'tcp']
QStandardPaths: XDG_RUNTIME_DIR not set, defaulting to '/tmp/runtime-splash'
2020-01-10 13:09:42.153188 [-] Splash version: 3.4
2020-01-10 13:09:42.376664 [-] Qt 5.13.1, PyQt 5.13.1, WebKit 602.1, Chromium 73.0.3683.105, sip 4.19.19, Twisted 19.7.0, Lua 5.2
2020-01-10 13:09:42.376820 [-] Python 3.6.8 (default, Oct  7 2019, 12:59:55) [GCC 8.3.0]
2020-01-10 13:09:42.376898 [-] Open files limit: 1048576
2020-01-10 13:09:42.376965 [-] Can't bump open files limit
2020-01-10 13:09:42.394903 [-] proxy profiles support is enabled, proxy profiles path: /etc/splash/proxy-profiles
2020-01-10 13:09:42.395050 [-] memory cache: enabled, private mode: enabled, js cross-domain access: disabled
2020-01-10 13:09:42.594670 [-] verbosity=1, slots=20, argument_cache_max_entries=500, max-timeout=90.0
2020-01-10 13:09:42.594909 [-] Web UI: enabled, Lua: enabled (sandbox: enabled), Webkit: enabled, Chromium: enabled
2020-01-10 13:09:42.595245 [-] Site starting on 8050
2020-01-10 13:09:42.595341 [-] Starting factory <twisted.web.server.Site object at 0x7f26e5414fd0>
2020-01-10 13:09:42.595541 [-] Server listening on http://0.0.0.0:8050
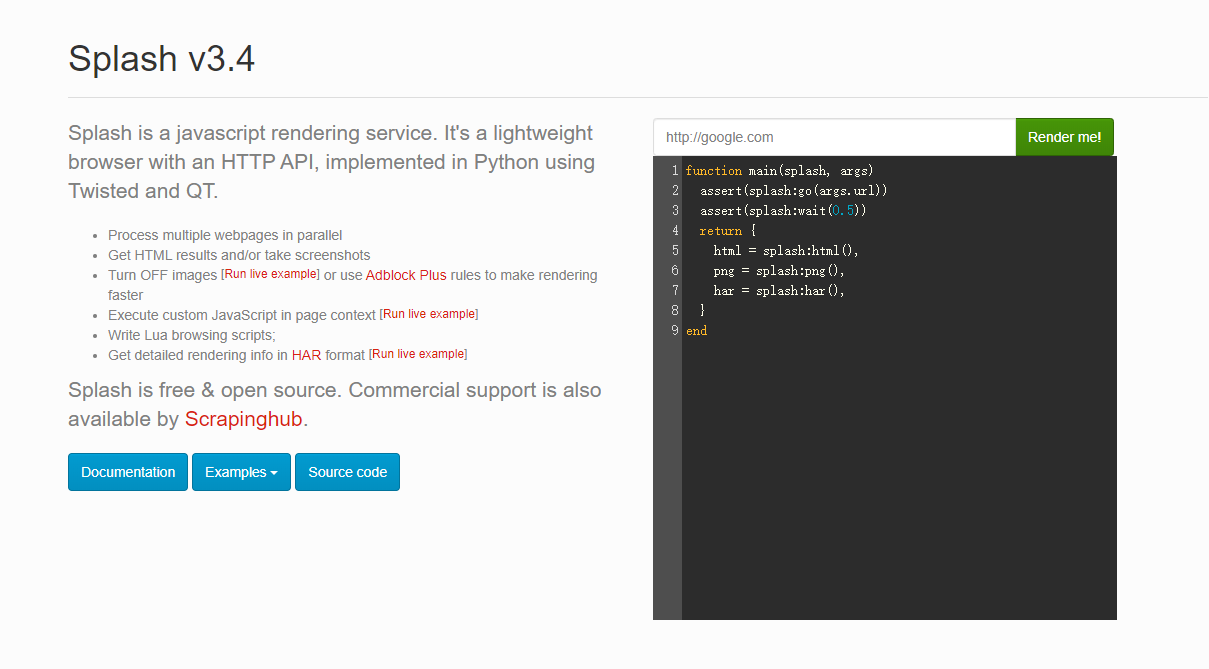
这时我们打开浏览器直接访问 http://localhost:8050 ,就能看到 Splash 的主页:

接下来安装 Scrapy-Splash 的 Python 库,这个就比较简单了,一个命令搞定:
pip install scrapy-splash
试用
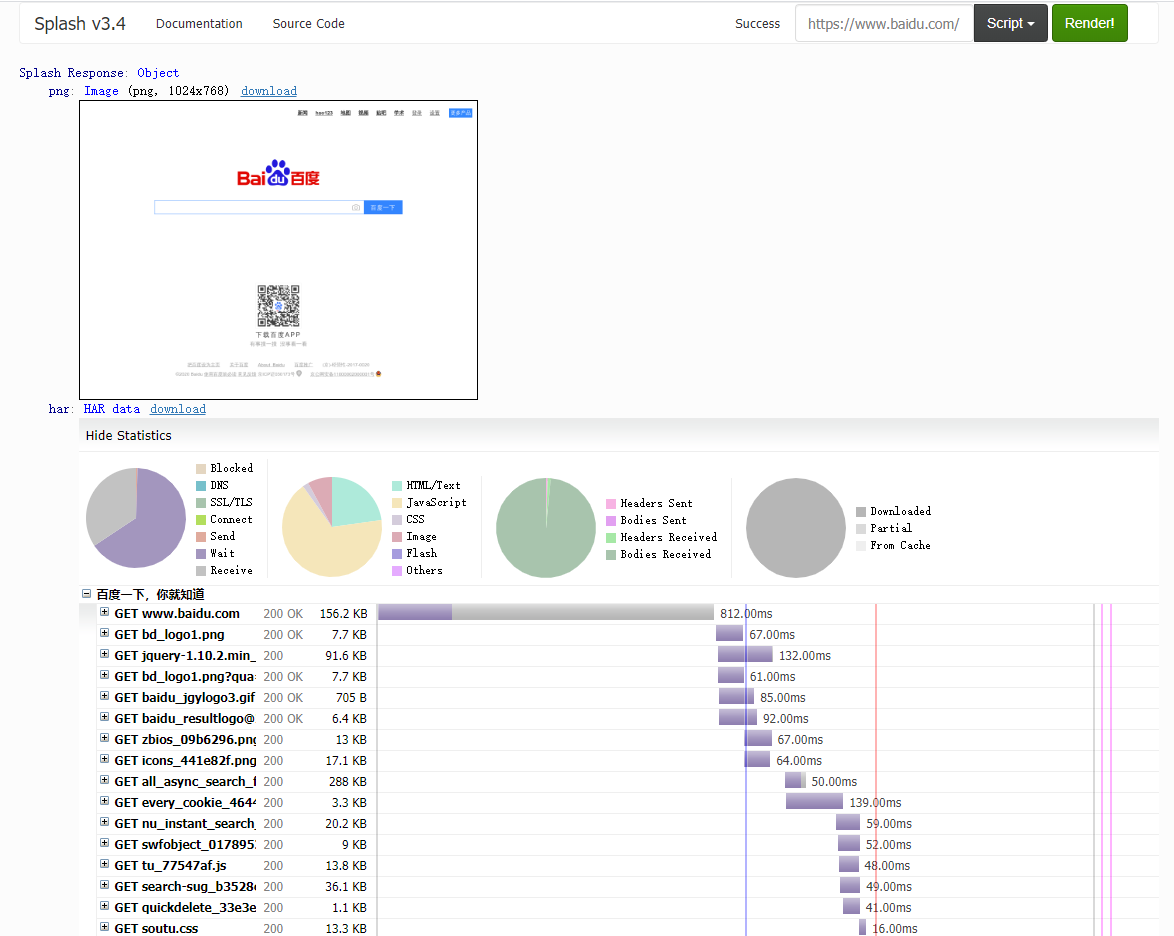
打开 Splash 的主页,可以看到输入框中默认访问的是 http://google.com ,我们这里换成度娘的首页看下:

可以看到,网页的返回结果呈现了渲染截图、 HAR 加载统计数据、网页的源代码。
通过 HAR 的结果可以看到, Splash 执行了整个网页的渲染过程,包括 CSS 、 JavaScript 的加载等过程,呈现的页面和我们在浏览器中得到的结果完全一致。
点击上方的 Script 按钮,可以看到一段脚本,如下:
function main(splash, args)
  assert(splash:go(args.url))
  assert(splash:wait(0.5))
  return {
    html = splash:html(),
    png = splash:png(),
    har = splash:har(),
  }
end
这里其实是一段 Lua 脚本, Splash 的整个渲染都是由这个 Lua 脚本进行控制的。
虽然我们并不清楚 Lua 脚本的语法,但是看了这个代码,也应该能大致猜测出来首先是使用 go() 访问了 url ,然后使用 wait() 等待了 0.5 秒。最后返回了页面的 html 源码,png 的截图和 har 的一些数据。
Splash Lua API
我们来简单的了解一下 Splash Lua 的一些内置的 API ,更多的内容可以访问文档获得,小编这里主要介绍一下有关页面操作的 API 。
Splash Lua API 文档地址:https://splash.readthedocs.io/en/stable/scripting-overview.html
导航
- splash:go - 向浏览器加载URL;
- splash:set_content - 将指定的内容(通常是HTML)加载到浏览器;
- splash:lock_navigation and splash:unlock_navigation - 锁定/解锁导航;
- splash:on_navigation_locked 允许检查锁定导航后丢弃的请求;
- splash:set_user_agent 允许更改用于请求的User-Agent标头;
- splash:set_custom_headers 允许设置默认的HTTP标头Splash使用。
- splash:on_request 允许过滤或替换对相关资源的请求;它还允许根据请求设置HTTP或SOCKS5代理服务器;
- splash:on_response_headers 允许根据请求的标头(例如,基于Content-Type)过滤掉请求;
- splash:init_cookies, splash:add_cookie, splash:get_cookies, splash:clear_cookies and splash:delete_cookies 管理cookie。
延迟
- splash:wait 允许等待指定的时间;
- splash:call_later 计划将来的任务;
- splash:wait_for_resume 允许等待直到某个JS事件发生;
- splash:with_timeout 允许限制在代码块中花费的时间。
从页面中提取信息
- splash:html 在由浏览器呈现后返回页面HTML内容;
- splash:url 返回浏览器中加载的当前URL;
- splash:evaljs and splash:jsfunc 允许使用JavaScript从页面提取数据;
- splash:select and splash:select_all 允许在页面中运行CSS选择器;它们返回Element对象,该对象具有许多对抓取和进一步处理有用的方法
- element:text 返回DOM元素的文本内容;
- element:bounds 返回元素的边界框;
- element:styles 返回元素的计算样式;
- element:form_values 返回
<form>元素的值。
截图
- splash:png, splash:jpeg - 拍摄PNG或JPEG屏幕截图;
- splash:set_viewport_full - 更改视口大小(在 splash:png 或 splash:jpeg 之前调用 )以获取整个页面的屏幕截图;
- splash:set_viewport_size - 更改视口的大小;
- element:png and element:jpeg - 截取单个DOM元素的屏幕截图。
与页面互动
- splash:runjs, splash:evaljs and splash:jsfunc 允许在页面上下文中运行任意JavaScript;
- splash:autoload 允许在每个页面渲染开始时预加载JavaScript库或执行一些JavaScript代码;
- splash:mouse_click, splash:mouse_hover, splash:mouse_press, splash:mouse_release 允许将鼠标事件发送到页面上的特定坐标;
- element:mouse_click and element:mouse_hover 允许将鼠标事件发送到特定的DOM元素;
- splash:send_keys and splash:send_text 允许将键盘事件发送到页面;
- element:send_keys and element:send_text 允许将键盘事件发送到特定的DOM元素;
- 可以
<form>使用element:form_values获取初始值,在Lua代码中对其进行更改,使用element:fill用更新后的值填充表单,并使用element:submit提交它 ; - splash.scroll_position 允许滚动页面;
HTTP请求
- splash:http_get - 发送HTTP GET请求并获得响应,而无需将页面加载到浏览器;
- splash:http_post - 发送HTTP POST请求并获得响应,而无需将页面加载到浏览器;
检查网络流量
- splash:har 以 HAR 格式返回所有请求和响应
- splash:history 返回有关重定向和加载到浏览器主窗口的页面的信息;
- splash:on_request 允许捕获网页和脚本发出的请求;
- splash:on_response_headers 允许在标头到达时检查(或丢弃)响应;
- splash:on_response 允许检查收到的原始响应(包括相关资源的内容);
- splash.response_body_enabled 在 splash:har 和 splash:on_response 中启用完整的响应主体 ;
示例
上面讲了这么这么多 API ,我们写一个简单的小例子吧:
function main(splash, args)
  splash:set_viewport_size(400, 700)
  assert(splash:go(args.url))
  assert(splash:wait(0.5))
  return {
    url = splash:url(),
    jpeg = splash:jpeg(),
    har = splash:har(),
    cookies = splash:get_cookies()
  }
end
这里小编设置了当前浏览器页面的大小,返回了当前访问的 url ,并且将返回的图片格式改成了 jpeg ,同时返回了当前的 cookies 。
结果太长了,小编这里就不截图了,各位同学可以自己动手尝试下,属实很简单,并不难。
Splash HTTP API
上面我们介绍了如何在 Splash 主页上通过 Lua 脚本进行一些操作,但这并不是我们想要的,我们想要通过我们自己 Python 程序来结合 Splash 对页面进行抓取。
Splash 给我们提供了一些 HTTP API 接口,我们只需要请求这些接口并传递相应的参数即可,下面我们简单的介绍一下这些接口的使用。
更多内容可以查阅文档:https://splash.readthedocs.io/en/stable/api.html
render.html
此接口用于获取JavaScript渲染的页面的HTML代码,接口地址就是Splash的运行地址加此接口名称,例如 http://localhost:8050/render.html 。
比如我们使用某东做测试:
import requests

url = 'http://localhost:8050/render.html?url=https://www.jd.com'
response = requests.get(url)
print(response.text)
render.html 其实还支持很多参数,具体内容可以查阅文档获得。
render.png
此接口可以获取网页截图,其参数比 render.html 多了几个,通过width和height来控制宽高,它返回的是PNG格式的图片二进制数据,示例如下:
import requests

url = 'http://localhost:8050/render.png?url=https://www.jd.com&width=1000&height=700'
response = requests.get(url)
with open('jd.png', 'wb') as f:
    f.write(response.content)
这里我们可以看到当前目录下多了一张名为 jd.png 的图片,如下:

render.har
此接口用于获取页面加载的HAR数据,示例如下:
import requests

url = 'http://localhost:8050/render.har?url=https://www.jd.com'
response = requests.get(url)
print(response.text)
结果太长了,小编就不贴了,结果是一个JSON格式的数据,其中包含页面加载过程中的 HAR 数据。
render.json
此接口包含了前面接口的所有功能,返回结果是JSON格式,示例如下:
url = 'http://localhost:8050/render.json?url=https://httpbin.org'
response = requests.get(url)
print(response.text)
结果如下:
{"url": "https://httpbin.org/get", "requestedUrl": "https://httpbin.org/get", "geometry": [0, 0, 1024, 768], "title": ""}
我们可以通过传入不同参数控制其返回结果。比如,传入 html=1 ,返回结果即会增加源代码数据;传入 png=1 ,返回结果即会增加页面PNG截图数据;传入 har=1 ,则会获得页面 HAR 数据。示例代码如下:
url = 'http://localhost:8050/render.json?url=https://httpbin.org/get&html=1&har=1'
response = requests.get(url)
print(response.text)
execute
此接口才最为强大的接口,我们前面用的那些 Lua 脚本,就是通过这个接口来与 Splash 进行对接的,我们将刚才上面的示例稍微改动下,代码如下:
import requests
from urllib.parse import quote

lua = '''
function main(splash, args)
  splash:go("https://www.geekdigging.com/")
    return {
      url = splash:url(),
      jpeg = splash:jpeg(),
      har = splash:har(),
      cookies = splash:get_cookies()
    }
end
'''

url = 'http://localhost:8050/execute?lua_source=' + quote(lua)
response = requests.get(url)
print(response.text)
结果同样有点长,小编就不贴了。
本篇内容就到这里了,感谢观看。
示例代码
本系列的所有代码小编都会放在代码管理仓库 Github 和 Gitee 上,方便大家取用。
参考
https://splash.readthedocs.io/en/stable/scripting-overview.html
https://splash.readthedocs.io/en/stable/api.html
https://github.com/scrapy-plugins/scrapy-splash