目录
关于此文
项目中要实现编辑器生成带格式的html文档,存入模板,最后生成html的URL,所以选择了UEditor。
UEditor是由百度WEB前端研发部开发的所见即所得的开源富文本编辑器,具有轻量、可定制、用户体验优秀等特点。
之前没有接触过编辑器,从头开始摸索。看API,看网上的例子。之前,用的是UMeditor,是UEditor的mini版本。用的人少,例子也少。让我很苦恼。之后又换回了完整版。
官网地址:http://ueditor.baidu.com/website/index.html
下载源码
源码下载地址:http://ueditor.baidu.com/website/download.html
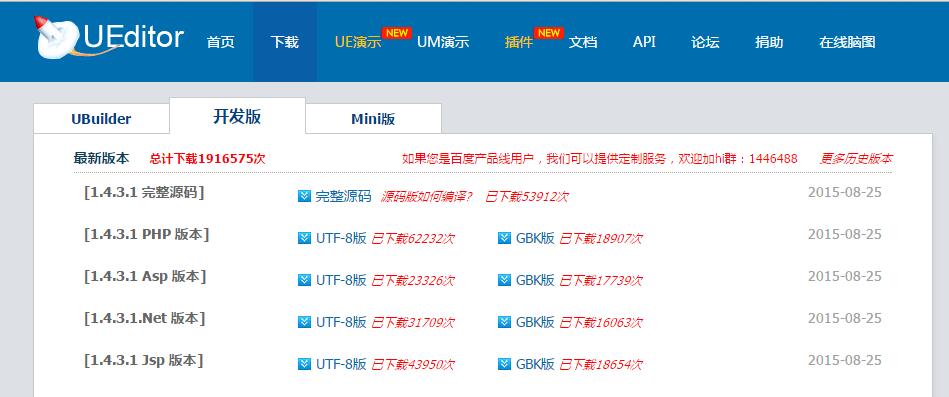
我是JSP版本。ueditor1_4_3-utf8-jsp,解压后,放入工程中。
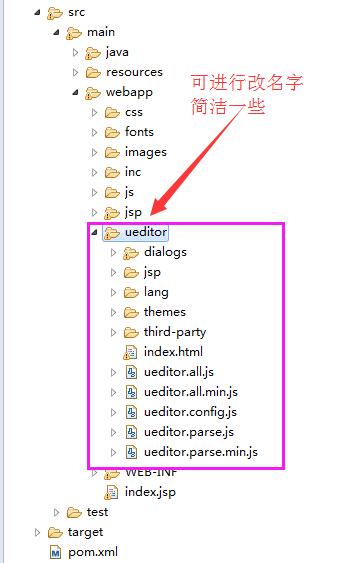
将ueditor/jsp/lib下的jar包导入WEB-INF下lib下,maven工程导入外部jar方法,如下:
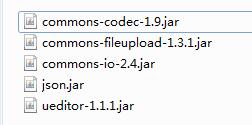
例子:
        <dependency>
            <groupId>cn.com.umeditor</groupId>
            <artifactId>json</artifactId>
            <version>1.0</version>
            <scope>system</scope>
            <systemPath>${project.basedir}/src/main/webapp/WEB-INF/lib/json.jar</systemPath>
        </dependency>
JSP代码
编辑自己的JSP页面:
<%@ page language="java" contentType="text/html; charset=utf-8" pageEncoding="utf-8"%>
<html>
<head>
    <meta http-equiv="Content-Type" content="text/html; charset=UTF-8">
    <title>惠民网消息推送平台</title>
    <meta charset="utf-8">
     <script  src="<%=request.getContextPath() %>/ueditor/ueditor.config.js"></script>
     <script  src="<%=request.getContextPath() %>/ueditor/ueditor.all.min.js"></script>
     <script  src="<%=request.getContextPath() %>/ueditor/lang/zh-cn/zh-cn.js"></script>
    <script  src="<%=request.getContextPath() %>/ueditor/third-party/jquery-1.10.2.min.js"></script>
    <link href="<%=request.getContextPath() %>/ueditor/themes/iframe.css" type="text/css" rel="stylesheet">
    <link href="<%=request.getContextPath() %>/ueditor/themes/default/css/ueditor.css" type="text/css" rel="stylesheet">
    <link href="<%=request.getContextPath() %>/ueditor/third-party/codemirror/codemirror.css" type="text/css" rel="stylesheet">
</head>
 <style type="text/css">
        div{
            width:100%;
        }
    </style>
<body>
<form method="post" action="<%=request.getContextPath() %>/test/test.do">
    <br>类别:<input type="text" name="stype" />
    标题:<input type="text" name="title" /> <br/>
    <!--style给定宽度可以影响编辑器的最终宽度-->
    <!-- 加载编辑器的容器 -->
    <!-- 实例化编辑器 -->
    <script id="editor" type="text/plain" style="1024px;height:500px;"></script>
    <script type="text/javascript">
        var ue = UE.getEditor('editor');
    </script>

    <input type="submit" value="提交"/>
</form>
</body>
</html>
遇到的错误:1)var ue = UE.getEditor('editor'); 报错原因:js引入错误,路径错误/引入顺序错误。
2)表情包,html页面都是404.路径都对,文件也存在,就是找不到。错误原因:spring拦截器问题。(表情包要再官网下载后导入到程序中,下载的包里面有很详细的导入方法。)
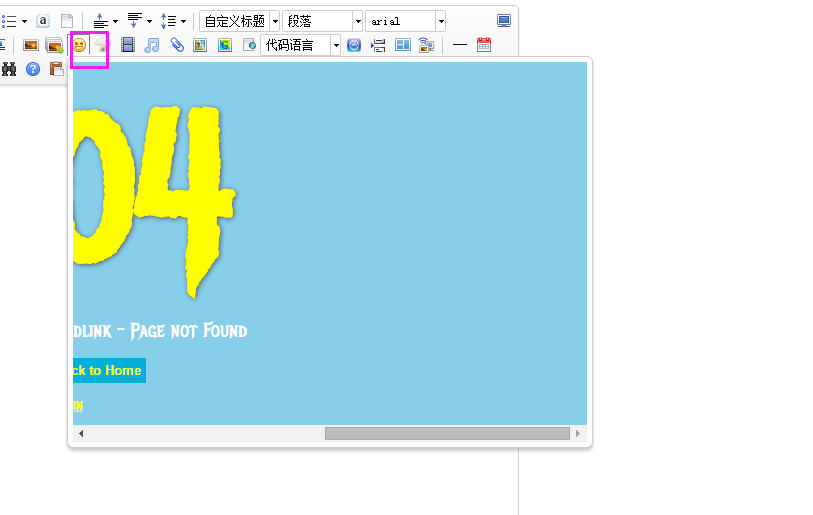
错误解决就可以启动tomcat进行展示页面了。
Java代码
由于上传图片/上传文件都保存到本地的tomcat下,下次启动,文件/图片就会消失。根据业务需求,都是把图片/文件存到服务器下。或者本地的其它路径。
然后UEditor的上传代码都是写到源码中了。让我一阵纠结。百度了一下,搜到了一个非常棒的例子,符合我项目,符合框架,什么都符合,下载源码进行实验。
源码下载地址:http://download.csdn.net/detail/qq457557442/8322227
博客地址:http://blog.csdn.net/wang_jingj
上代码
action:
package getui.controller;

import getui.util.FileUtils;

import java.io.IOException;
import java.io.InputStream;
import java.util.HashMap;
import java.util.Map;

import javax.annotation.Resource;
import javax.servlet.http.HttpServletRequest;

import org.springframework.http.MediaType;
import org.springframework.stereotype.Controller;
import org.springframework.util.StringUtils;
import org.springframework.web.bind.annotation.RequestMapping;
import org.springframework.web.bind.annotation.RequestMethod;
import org.springframework.web.bind.annotation.ResponseBody;
import org.springframework.web.multipart.MultipartFile;
import org.springframework.web.multipart.MultipartHttpServletRequest;


@Controller
@RequestMapping(value = "/test")
public class testController {

    // 文件上传路径
    @Resource(name="fileuploadPath")
    private String fileuploadPath;

    // 文件读取路径
    @Resource(name="httpPath")
    private String httpPath;

    /**
     * 文件上传Action
     * @param req APPLICATION_JSON_VALUE
     * @return UEDITOR 需要的json格式数据
     */
    @RequestMapping(value = "/test.do")
    @ResponseBody
    public Map<String,Object> upload(HttpServletRequest req){
        Map<String,Object> result = new HashMap<String, Object>();

        MultipartHttpServletRequest mReq  =  null;
        MultipartFile file = null;
        InputStream is = null ;
        String fileName = "";
        // 原始文件名   UEDITOR创建页面元素时的alt和title属性
        String originalFileName = "";
        String filePath = "";

        try {
            mReq = (MultipartHttpServletRequest)req;
            // 从config.json中取得上传文件的ID
            file = mReq.getFile("upfile");
            // 取得文件的原始文件名称
            fileName = file.getOriginalFilename();

            originalFileName = fileName;

            if(!fileName.isEmpty()){
                is = file.getInputStream();
                fileName = FileUtils.reName(fileName);
                filePath = FileUtils.saveFile(fileName, is, fileuploadPath);
            } else {
                throw new IOException("文件名为空!");
            }

            result.put("state", "SUCCESS");// UEDITOR的规则:不为SUCCESS则显示state的内容
            result.put("url",httpPath + filePath);
            result.put("title", originalFileName);
            result.put("original", originalFileName);
        }
        catch (Exception e) {
            System.out.println(e.getMessage());
            result.put("state", "文件上传失败!");
            result.put("url","");
            result.put("title", "");
            result.put("original", "");
            System.out.println("文件 "+fileName+" 上传失败!");
        }

        return result;
    }
}
工具包
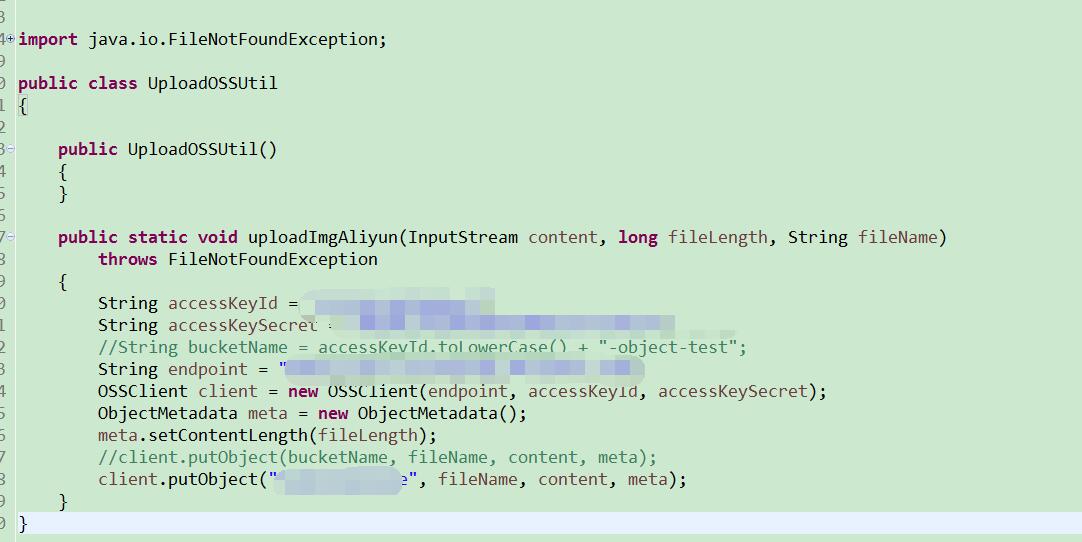
package getui.util;

import java.io.File;
import java.io.FileOutputStream;
import java.io.IOException;
import java.io.InputStream;
import java.io.OutputStream;
import java.util.Date;

/**
 * 文件上传/图片上传 工具类
 * FileUtils.java
 *
 * @author Anny
 *
 */
public class FileUtils {
    /**
     * 文件copy方法
     * @param src
     * @param dest
     */
    public static void copy(InputStream src, OutputStream dest) {
        try {
            byte[] tmp = new byte[1024];
            int len = -1;
            while ((len = src.read(tmp)) != -1)
                dest.write(tmp, 0, len);
        } catch (IOException e) {
            throw new RuntimeException(e);
        }
    }

    /**
     * 给文件重命名 防止覆盖
     * @param fileName
     * @return 时间戳+原始文件的后缀
     */
    public static String reName(String fileName){
        return new StringBuffer().append(new Date().getTime()).append(fileName.substring(fileName.indexOf("."))).toString();
    }

    /**
     * 文件保存
     * @param fileName reName之后的文件名称
     * @param content
     * @param filePath 文件保存路径
     * @return
     * @throws IOException
     */
    public static String saveFile(String fileName,InputStream content,String filePath) throws IOException {
        FileOutputStream fos = null;
        StringBuffer contentPath =  new StringBuffer("");; // 上下文地址
        try {
            contentPath.append("detail/");
//            contentPath.append("/");
            contentPath.append(fileName);       //

            File pictureFile = new File(filePath + contentPath.toString());
            File pf = pictureFile.getParentFile();
            if(!pf.exists()){
                pf.mkdirs();
            }
            pictureFile.createNewFile();    // 创建文件
            fos = new FileOutputStream(pictureFile);
            FileUtils.copy(content, fos);


            // 上传到OSS
            UploadOSSUtil.uploadImgAliyun(content,
                    pictureFile.length(), contentPath.toString());


        } catch (Exception e) {
            throw new IOException("文件保存失败!");
        } finally {
            if (fos != null) {
                try {
                    fos.close();
                } catch (Exception e) {
                    throw new IOException("文件保存失败!");
                }
            }
        }
        return contentPath.toString();
    }
}
JSP
 <script>
//编辑器资源文件根路径 最好在ueditor.config.js中配置
window.UEDITOR_HOME_URL = "/getui-huimin/ueditor/";
//建议使用工厂方法getEditor创建和引用编辑器实例,如果在某个闭包下引用该编辑器,直接调用UE.getEditor('editor')就能拿到相关的实例
var ue = UE.getEditor('editor',{initialFrameHeight: 500,initialFrameWidth:800,maximumWords:3000,elementPathEnabled:false});
//复写UEDITOR的getActionUrl 方法,定义自己的Action
UE.Editor.prototype._bkGetActionUrl = UE.Editor.prototype.getActionUrl;
UE.Editor.prototype.getActionUrl = function(action) {
    if (action == 'uploadimage' || action == 'uploadfile') {
        var id = $('#carInfoId').val();
           return '<%=request.getContextPath() %>/test/test.do';
    } else {
        return this._bkGetActionUrl.call(this, action);
    }
};
// 复写UEDITOR的getContentLength方法 解决富文本编辑器中一张图片或者一个文件只能算一个字符的问题,可跟数据库字符的长度配合使用
UE.Editor.prototype._bkGetContentLength = UE.Editor.prototype.getContentLength;
UE.Editor.prototype.getContentLength = function(){
    return this.getContent().length;
}
</script>
阿里云jar包引入配置
阿里云jar引入
<!-- aliyun -->
        <dependency>
            <groupId>com.aliyun.openservices</groupId>
            <artifactId>aliyun-openservices</artifactId>
            <version>1.0.10</version>
        </dependency>
        <dependency>
                <groupId>com.aliyun</groupId>
                <artifactId>aliyun-java-sdk-core</artifactId>
                <version>2.1.6</version>
        </dependency>
        <dependency>
                <groupId>com.aliyun</groupId>
                <artifactId>aliyun-java-sdk-sts</artifactId>
                <version>2.1.0</version>
        </dependency>
        <dependency>
                <groupId>com.aliyun</groupId>
                <artifactId>aliyun-java-sdk-yundun</artifactId>
                <version>2.1.3</version>
        </dependency>
        <dependency>
                <groupId>com.aliyun</groupId>
                <artifactId>aliyun-java-sdk-slb</artifactId>
                <version>2.0.0-rc1</version>
        </dependency>
        <dependency>
                <groupId>com.aliyun</groupId>
                <artifactId>aliyun-java-sdk-oms</artifactId>
                <version>2.0.1</version>
        </dependency>
        <dependency>
                <groupId>com.aliyun</groupId>
                <artifactId>aliyun-java-sdk-ecs</artifactId>
                <version>2.0.0-rc2</version>
        </dependency>
        <dependency>
                <groupId>com.aliyun</groupId>
                <artifactId>aliyun-java-sdk-rds</artifactId>
                <version>2.0.0-rc1</version>
        </dependency>
        <dependency>
                <groupId>com.aliyun</groupId>
                <artifactId>aliyun-java-sdk-bss</artifactId>
                <version>2.0.0-rc1</version>
        </dependency>
        <dependency>
                <groupId>com.aliyun</groupId>
                <artifactId>aliyun-java-sdk-ocs</artifactId>
                <version>2.0.0-rc1</version>
        </dependency>
        <dependency>
                <groupId>com.aliyun</groupId>
                <artifactId>aliyun-java-sdk-cms</artifactId>
                <version>2.0.0</version>
        </dependency>
        <!-- aliyun -->
spring配置文件:
<bean id="fileuploadPath" class="java.lang.String">
        <constructor-arg index="0" value="${fileuploadPath}"></constructor-arg>
    </bean>

    <bean id="httpPath" class="java.lang.String">
        <constructor-arg index="0" value="${httpPath}"></constructor-arg>
    </bean>

    <bean id="multipartResolver"
        class="org.springframework.web.multipart.commons.CommonsMultipartResolver">
        <property name="maxUploadSize">
            <value>10485760</value>
        </property>
    </bean>
config.properties
#file upload path
fileuploadPath=F:/worksoft/nginxfilepath  -- 本地目录
#file read path
httpPath=http://rexs.xxx.cn/
 --读取回显的地址:阿里云服务器地址
成功啦!
一切准备就绪,开始上传。
显示上传到本地 保存一份后,在进行服务器上传。

前两个 由于网络,上传阿里云失败。本地保存成功。
后一个 上传成功了。成功后回显回来。

访问阿里云服务器图片地址,能够下载到图片。^_^