1.安装vue-cli 3.0
|
1
2
3
|
npm install -g @vue/cli# oryarn global add @vue/cli |
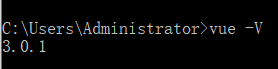
安装成功后查看版本:vue -V(大写的V)
2.命令变化
|
1
|
vue create --help |
用法:create [options] <app-name>
创建一个由 `vue-cli-service` 提供支持的新项目
选项:
-p, --preset <presetName> 忽略提示符并使用已保存的或远程的预设选项
-d, --default 忽略提示符并使用默认预设选项
-i, --inlinePreset <json> 忽略提示符并使用内联的 JSON 字符串预设选项
-m, --packageManager <command> 在安装依赖时使用指定的 npm 客户端
-r, --registry <url> 在安装依赖时使用指定的 npm registry (仅用于 npm 客户端)
-g, --git [message] 强制 / 跳过 git 初始化,并可选的指定初始化提交信息
-n, --no-git 跳过 git 初始化
-f, --force 覆写目标目录可能存在的配置
-c, --clone 使用 git clone 获取远程预设选项
-x, --proxy 使用指定的代理创建项目
-b, --bare 创建项目时省略默认组件中的新手指导信息
-h, --help 输出使用帮助信息
3.创建项目
去到指定目录下创建项目(project-name:项目名称)
|
1
|
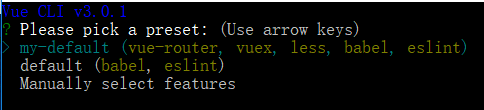
vue create project-name |

my-default 是 我原来保存好的模板;
default 是 使用默认配置
Manually select features 是 自定义配置
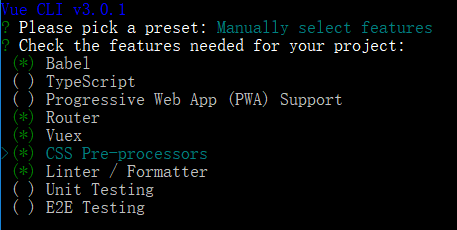
4.选择配置(自定义配置)
5.选择css预编译,这里我选择less
|
1
2
3
4
5
6
|
Please pick a preset: Manually select features Check the features needed for your project: Router, Vuex, CSS Pre-processors, Linter, Unit Pick a CSS pre-processor (PostCSS, Autoprefixer and CSS Modules are supported by default): SCSS/SASS > LESS Stylus |
6.语法检测工具,这里我选择ESLint + Standard config
|
1
2
3
4
5
6
7
8
|
Please pick a preset: Manually select features Check the features needed for your project: Router, Vuex, CSS Pre-processors, Linter, Unit Pick a CSS pre-processor (PostCSS, Autoprefixer and CSS Modules are supported by default): Stylus Pick a linter / formatter config: (Use arrow keys) ESLint with error prevention only ESLint + Airbnb config> ESLint + Standard config ESLint + Prettier |
7.选择语法检查方式,这里我选择保存就检测
|
1
2
3
4
5
6
7
|
Please pick a preset: Manually select features Check the features needed for your project: Router, Vuex, CSS Pre-processors, Linter, Unit Pick a CSS pre-processor (PostCSS, Autoprefixer and CSS Modules are supported by default): Stylus Pick a linter / formatter config: Prettier Pick additional lint features: (Press <space> to select, <a> to toggle all, <i> to invert selection)>( ) Lint on save // 保存就检测 ( ) Lint and fix on commit // fix和commit时候检查 |
8.接下来会问你把babel,postcss,eslint这些配置文件放哪,这里随便选,我选择放在独立文件夹
|
1
2
3
4
5
6
7
8
9
|
Please pick a preset: Manually select features Check the features needed for your project: Router, Vuex, CSS Pre-processors, Linter, Unit Pick a CSS pre-processor (PostCSS, Autoprefixer and CSS Modules are supported by default): Stylus Pick a linter / formatter config: Prettier Pick additional lint features: Lint on save Pick a unit testing solution: Jest Where do you prefer placing config for Babel, PostCSS, ESLint, etc.? (Use arrow keys)> In dedicated config files // 独立文件放置 In package.json // 放package.json里 |
9.键入N不记录,如果键入Y需要输入保存名字,如第一步所看到的我保存的名字为my-default
|
1
2
3
4
5
6
7
8
|
Please pick a preset: Manually select featuresCheck the features needed for your project: Router, Vuex, CSS Pre-processors, Linter, UnitPick a CSS pre-processor (PostCSS, Autoprefixer and CSS Modules are supported by default): StylusPick a linter / formatter config: PrettierPick additional lint features: Lint on savePick a unit testing solution: JestWhere do you prefer placing config for Babel, PostCSS, ESLint, etc.? In dedicated config filesSave this as a preset for future projects? (Y/n) // 是否记录一下以便下次继续使用这套配置。 |
10.确定后,等待下载依赖模块
11.项目创建好后
|
1
2
|
cd project-name // 进入项目根目录run serve // 运行项目 |
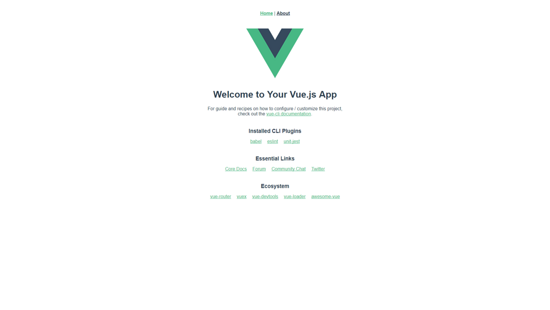
12.浏览器打开 http://localhost:8080
总结
以上所述是小编给大家介绍的vue-cli3.0 脚手架搭建项目的过程详解,希望对大家有所帮助,如果大家有任何疑问请给我留言,小编会及时回复大家的。在此也非常感谢大家对脚本之家网站的支持!