参考文章:http://www.testwo.com/article/311
参考如上文章基本能够完成hello world示例,我来记录下自己操作步骤及不同点,用以备忘,如果能帮助到其他人更好。
以下步骤本人在win10专业版测试成功。
一、需要资源:
1. python: 版本 2.7.10
2. nginx-1.9.4: http://nginx.org/download/nginx-1.9.4.zip
3. webpy: 参考资料 http://webpy.org/install.zh-cn, 最新版下载地址 https://github.com/webpy/webpy/tarball/master
4. flup: https://pypi.python.org/packages/source/f/flup/flup-1.0.3.dev-20110405.tar.gz#md5=a005b072d144fc0e44b0fa4c5a9ba029
二、开始安装配置:
1. 安装python,及webpy、flup;
2. 解压nginx
3. 修改nginx.config
 1     server {
 2         listen       80;
 3         server_name  localhost;
 4
 5         #charset koi8-r;
 6
 7         #access_log  logs/host.access.log  main;
 8
 9         location / {
10             root   html;
11             index  index.html index.htm;
12             include fastcgi.conf;
13             fastcgi_param SCRIPT_FILENAME $fastcgi_script_name;
14             fastcgi_param PATH_INFO $fastcgi_script_name;
15             fastcgi_pass 127.0.0.1:9001;
16         }
17     ...
18     }
三、编写Hello World
1. 运行nginx.exe启动服务;
2. 创建helloWorld.py文件,内容如下:
 1 import web
 2
 3 urls = ('/', 'index')
 4 class index:
 5     def GET(self):
 6         return "Hello, world!"
 7
 8 if __name__ == "__main__":
 9     app = web.application(urls, globals())
10     app.run()
3. 执行下面命令启动helloWorld
1 python helloWorld.py 9001 fastcgi
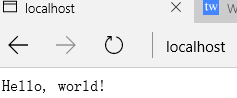
4. 访问http://localhost/验证。