开发、测试、生产都有各自的数据库,这样需要配置的数据源不一样。
每次部署时修改配置过于繁琐,此时,可以使用Spring的Profile来配置多个数据源,运行前指定需要加载的数据源即可。
采用spring结合junit做演示,使用oracle和mysql做数据源区别演示,Profile名指定为oracle和mysql,junit测试时,使用@ActiveProfiles("mysql"),@ActiveProfiles("oracle")来指定需要加载的数据源。
实际工作开发、测试、生产用的同一种数据库,指定Profile名称不同,运行是指定需要加载的Profile即可。
在spring配置文件applicationContext.xml中配置oracle和mysql数据源
applicationContext-profile.xml,在其中配置Spring JdbcTemplate,junit测试查询数据库用。
    <beans profile="oracle">
        <!-- properties file -->
        <bean id="propertyConfigurer" class="org.springframework.beans.factory.config.PropertyPlaceholderConfigurer">
            <property name="locations">
                <list>
                    <value>classpath:oracle.properties</value>
                </list>
            </property>
        </bean>
        <!-- 配置连接池 -->
        <bean id="dataSource" class="com.mchange.v2.c3p0.ComboPooledDataSource">
            <property name="driverClass" value="${oracle.driver}"/>
            <property name="jdbcUrl" value="${oracle.url}"/>
            <property name="user" value="${oracle.username}"/>
            <property name="password" value="${oracle.password}"/>
        </bean>
    </beans>

    <beans profile="mysql">
        <!-- properties file -->
        <!--<bean id="propertyConfigurer" class="org.springframework.beans.factory.config.PropertyPlaceholderConfigurer">
            <property name="locations">
                <list>
                    <value>classpath:mysql.properties</value>
                </list>
            </property>
        </bean>-->
        <context:property-placeholder location="classpath:mysql.properties"/>
        <!-- 配置连接池 -->
        <bean id="dataSource" class="com.mchange.v2.c3p0.ComboPooledDataSource">
            <property name="driverClass" value="${mysql.driver}"/>
            <property name="jdbcUrl" value="${mysql.url}"/>
            <property name="user" value="${mysql.username}"/>
            <property name="password" value="${mysql.password}"/>
        </bean>
    </beans>

    <beans>
        <bean id="jdbcTemplate" class="org.springframework.jdbc.core.JdbcTemplate">
            <property name="dataSource" ref="dataSource"></property>
        </bean>
    </beans>
oracle.properties
oracle.driver=oracle.jdbc.driver.OracleDriver
oracle.url=jdbc:oracle:thin:@localhost:1521:orcl
oracle.username=scott
oracle.password=tiger
mysql.properties
mysql.driver=com.mysql.jdbc.Driver
mysql.url=jdbc:mysql://localhost:3306/test
mysql.username=root
mysql.password=root
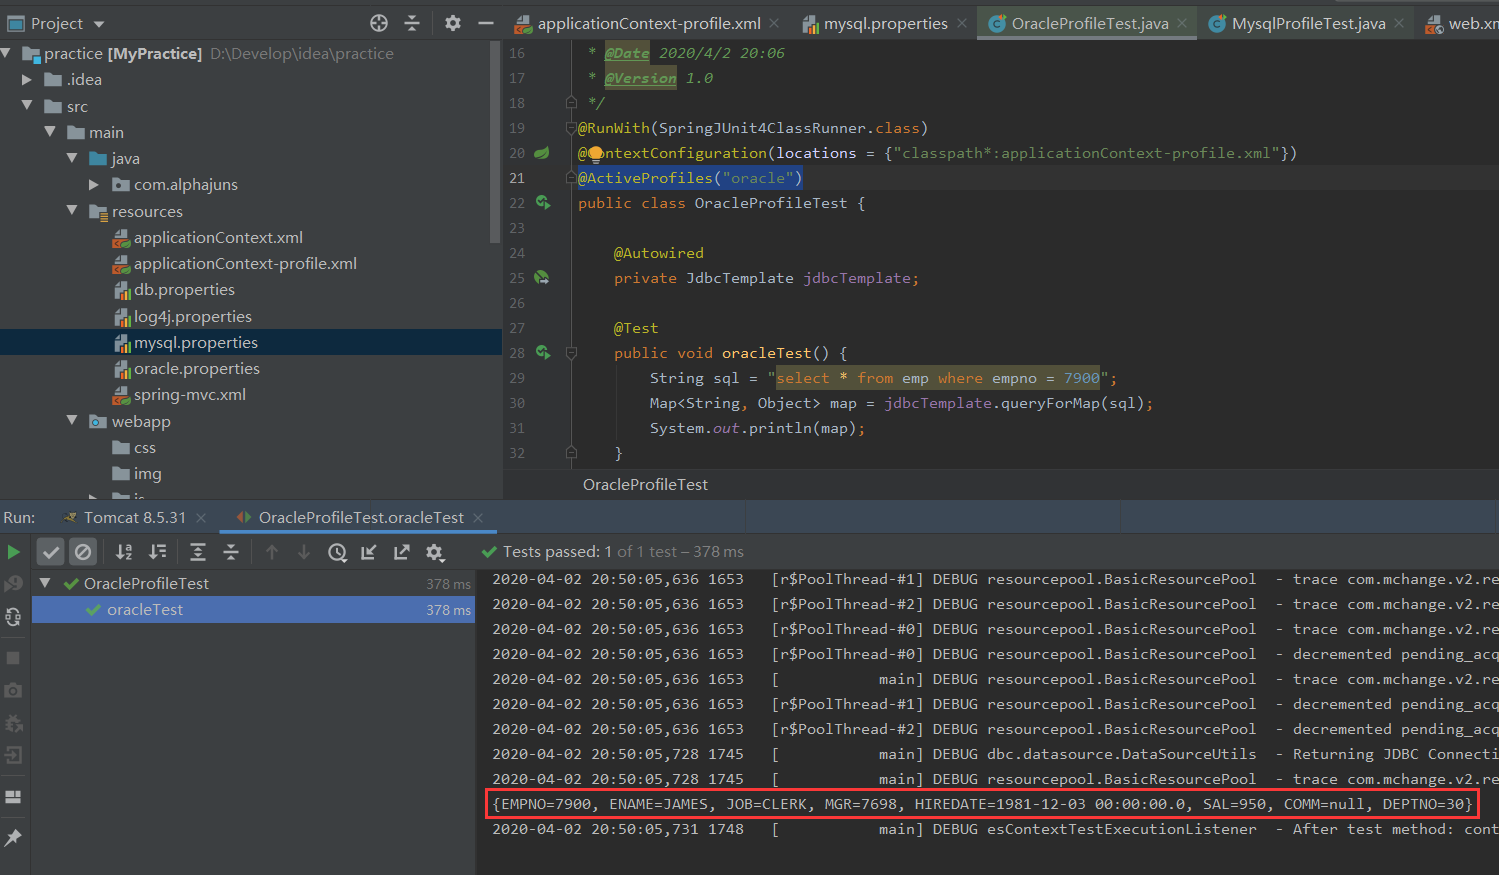
OracleProfileTest.java
import org.junit.Test;
import org.junit.runner.RunWith;
import org.springframework.beans.factory.annotation.Autowired;
import org.springframework.jdbc.core.JdbcTemplate;
import org.springframework.test.context.ActiveProfiles;
import org.springframework.test.context.ContextConfiguration;
import org.springframework.test.context.junit4.SpringJUnit4ClassRunner;

import javax.sql.rowset.JdbcRowSet;
import java.util.Map;

/**
 * @ClassName ProfileTest
 * @Description TODO
 * @Author AlphaJunS
 * @Date 2020/4/2 20:06
 * @Version 1.0
 */
@RunWith(SpringJUnit4ClassRunner.class)
@ContextConfiguration(locations = {"classpath*:applicationContext-profile.xml"})
@ActiveProfiles("oracle")
public class OracleProfileTest {

    @Autowired
    private JdbcTemplate jdbcTemplate;

    @Test
    public void oracleTest() {
        String sql = "select * from emp where empno = 7900";
        Map<String, Object> map = jdbcTemplate.queryForMap(sql);
        System.out.println(map);
    }

}
MysqlProfileTest.java
import org.junit.Test;
import org.junit.runner.RunWith;
import org.springframework.beans.factory.annotation.Autowired;
import org.springframework.jdbc.core.JdbcTemplate;
import org.springframework.test.context.ActiveProfiles;
import org.springframework.test.context.ContextConfiguration;
import org.springframework.test.context.junit4.SpringJUnit4ClassRunner;

import java.util.Map;

/**
 * @ClassName MysqlProfileTest
 * @Description TODO
 * @Author AlphaJunS
 * @Date 2020/4/2 20:14
 * @Version 1.0
 */
@RunWith(SpringJUnit4ClassRunner.class)
@ContextConfiguration(locations = {"classpath*:applicationContext-profile.xml"})
@ActiveProfiles("mysql")
public class MysqlProfileTest {

    @Autowired
    private JdbcTemplate jdbcTemplate;

    @Test
    public void mysqlTest() {
        String sql = "select * from test where id = 1";
        Map<String, Object> map = jdbcTemplate.queryForMap(sql);
        System.out.println(map);
    }

}

其中配置profile时,可以引入数据库配置文件的方式有多种。
配置方法1
<bean id="configProperties" class="org.springframework.beans.factory.config.PropertiesFactoryBean">
    <property name="locations">
        <list>
            <value>classpath:value.properties</value>
        </list>
    </property>
</bean>
配置方法2
<util:properties id="configProperties" location="classpath:value.properties"></util:properties>
配置方式3
<context:property-placeholder location="classpath:mysql.properties"/>
激活指定Profile
junit使用@ActiveProfiles("oracle")
web.xml中配置初始化参数使用spring.profiles.default、spring.profiles.active

参考帖子:
使用PropertyPlaceholderConfigurer指定配置文件和@Value 注解获取properties值