紧接上篇Oracle RAC安装及配置(一),继续进行RAC的配置,本篇演示对ASM磁盘的管理及数据库软件的安装。
一 ASM配置
1、运行命令,打开ASM配置窗口
[grid@node2 ~]$ asmca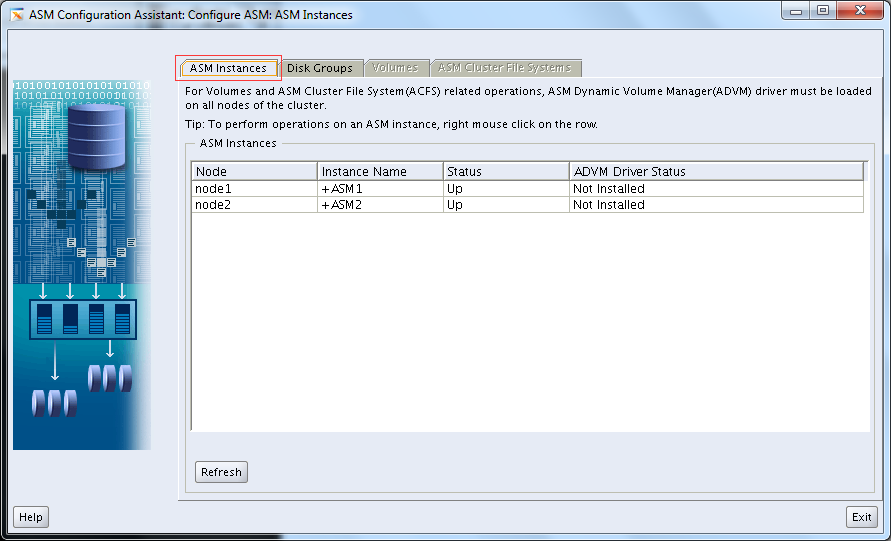
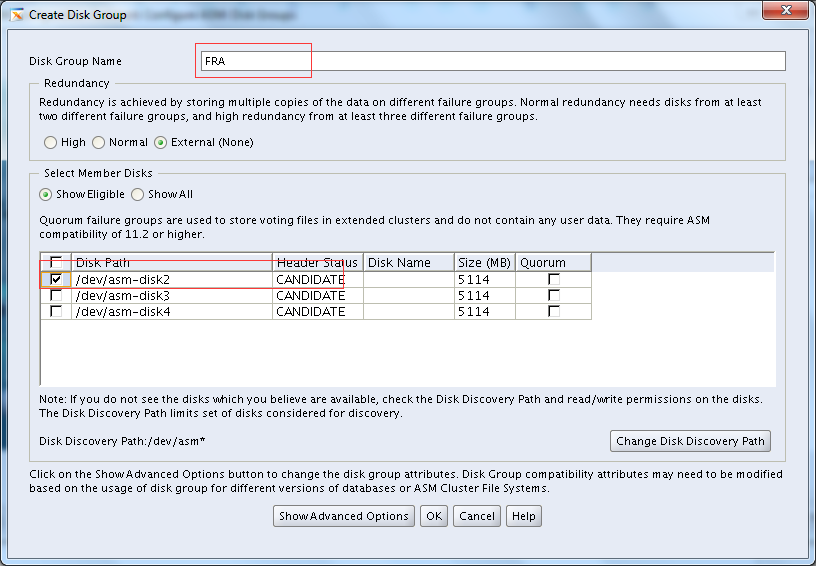
2、切换至磁盘组,并创建FRA磁盘组
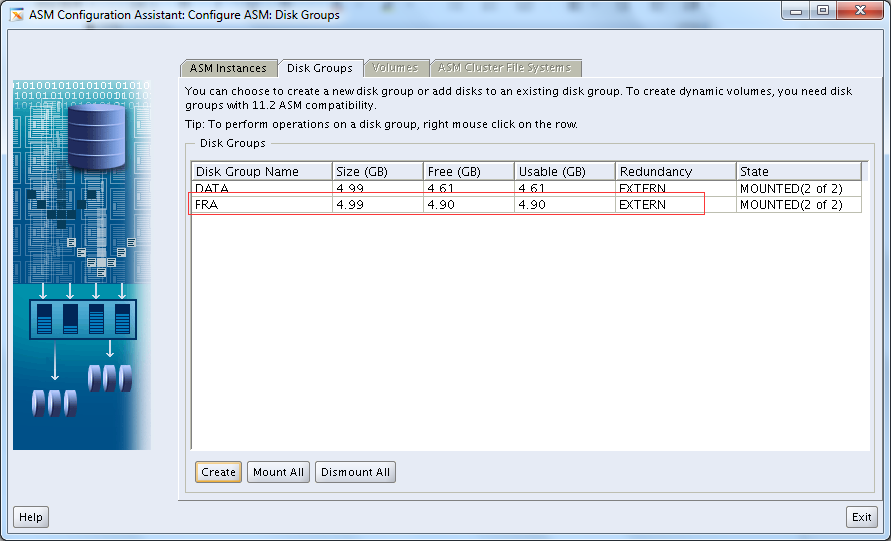
3、创建FRA后
二 数据库软件安装
1、环境变量设置
--Node1和Node2节点都要设置
[oracle@node1 ~]$ vim .bash_profile  --增加以下内容
ORACLE_BASE=/u01/app/oracle
ORACLE_SID=orcl
export ORACLE_BASE ORACLE_SID
[oracle@node1 ~]$ . .bash_profile
[oracle@node1 ~]$ echo $ORACLE_BASE
/u01/app/oracle
2、解压oracle软件
[oracle@node1 ~]$ cd /u01/soft/
[oracle@node1 soft]$ ls
p13390677_112040_Linux-x86-64_1of7.zip  p13390677_112040_Linux-x86-64_2of7.zip
[oracle@node1 soft]$ unzip p13390677_112040_Linux-x86-64_1of7.zip
[oracle@node1 soft]$ unzip p13390677_112040_Linux-x86-64_2of7.zip
3、安装oracle软件
[oracle@node1 soft]$ cd database/
[oracle@node1 database]$ ls
install  readme.html  response  rpm  runInstaller  sshsetup  stage  welcome.html
[oracle@node1 database]$ . runInstaller 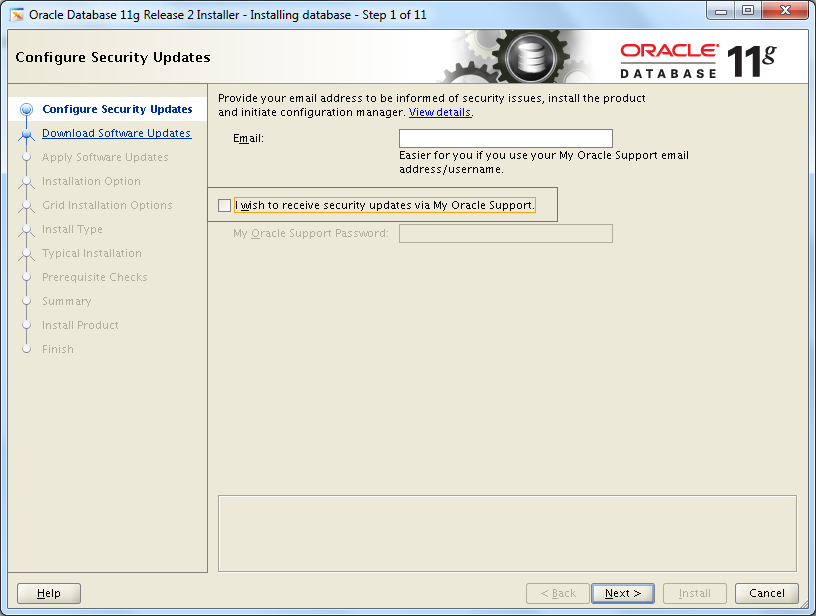
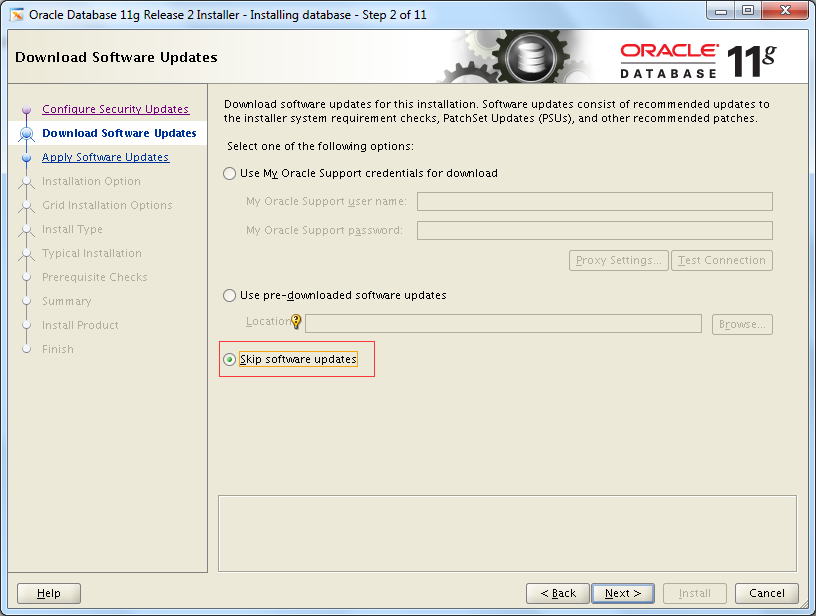
4、下载软件更新页
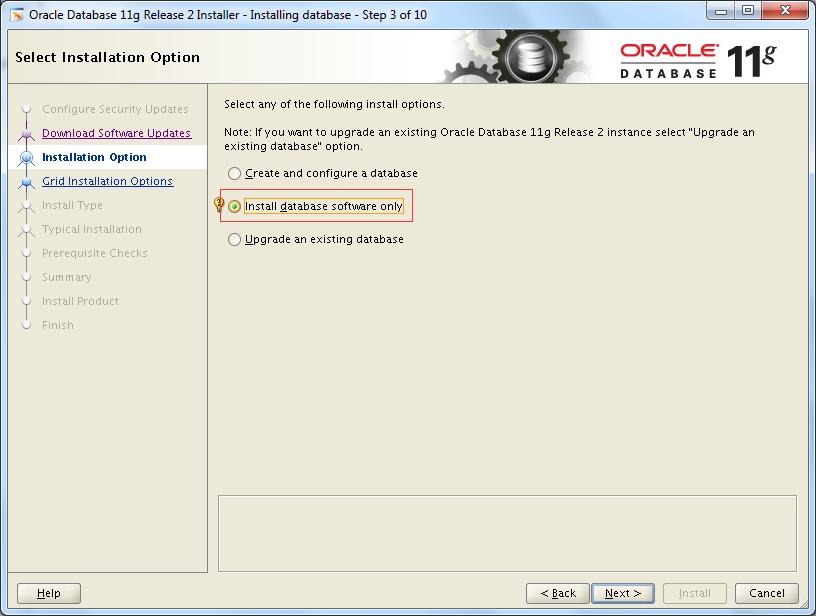
5、安装选项页
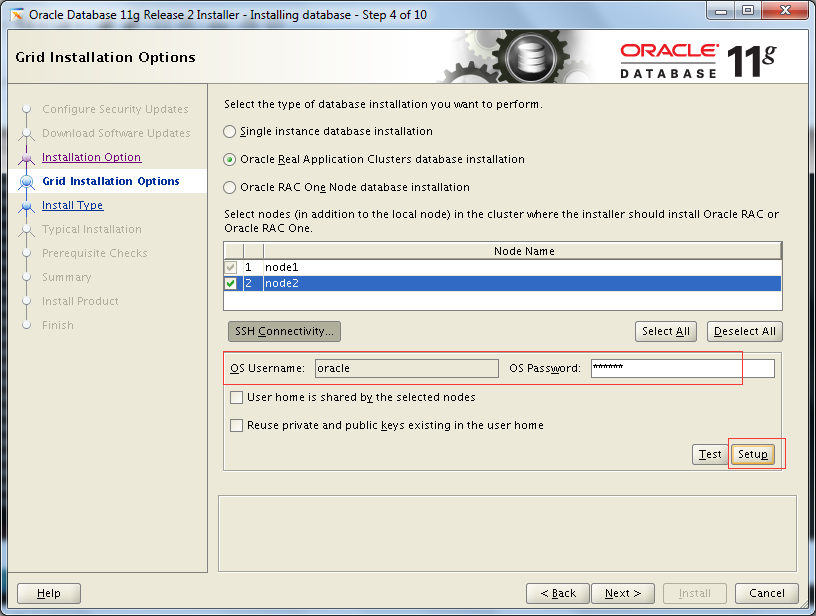
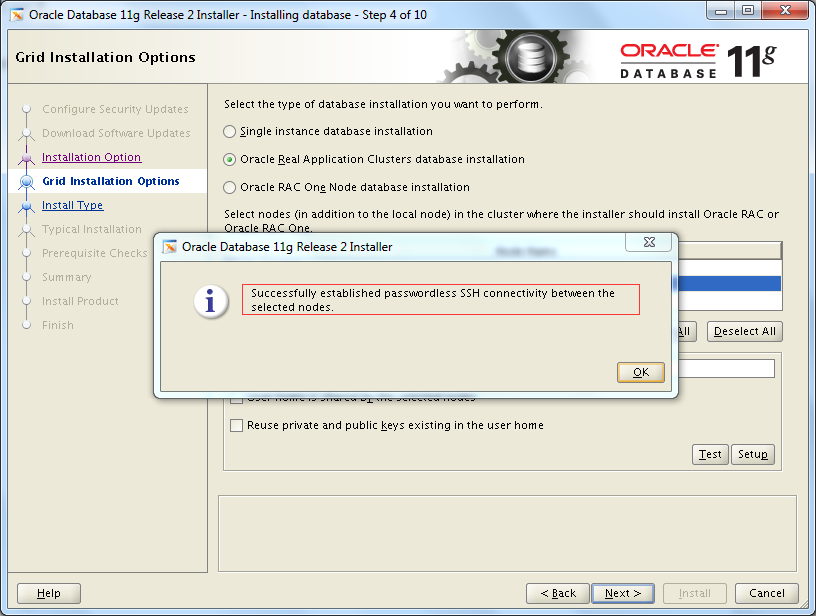
6、Grid安装选项页

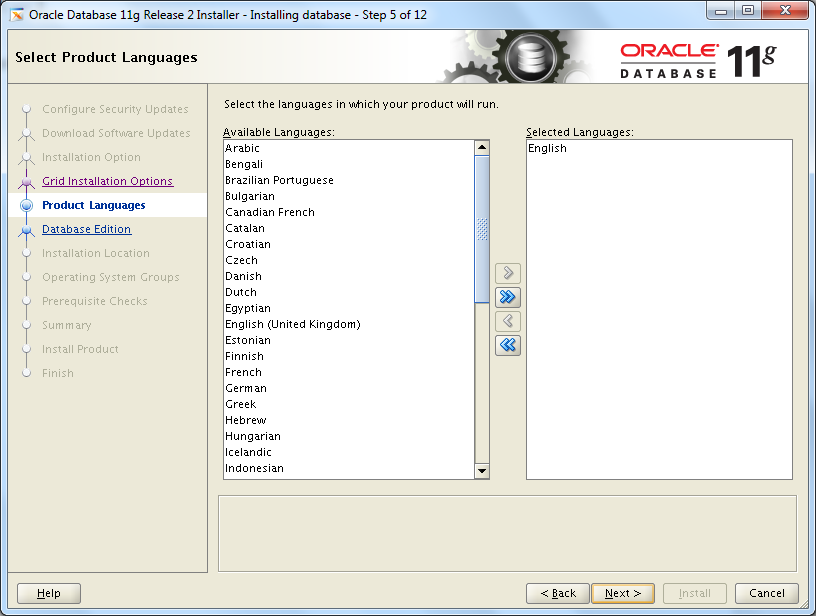
7、选择产品语言
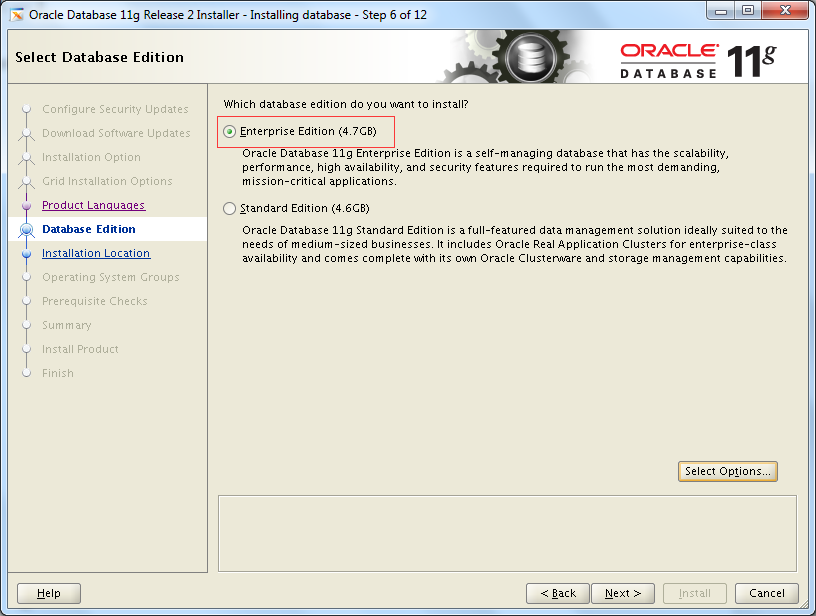
8、选择数据版本
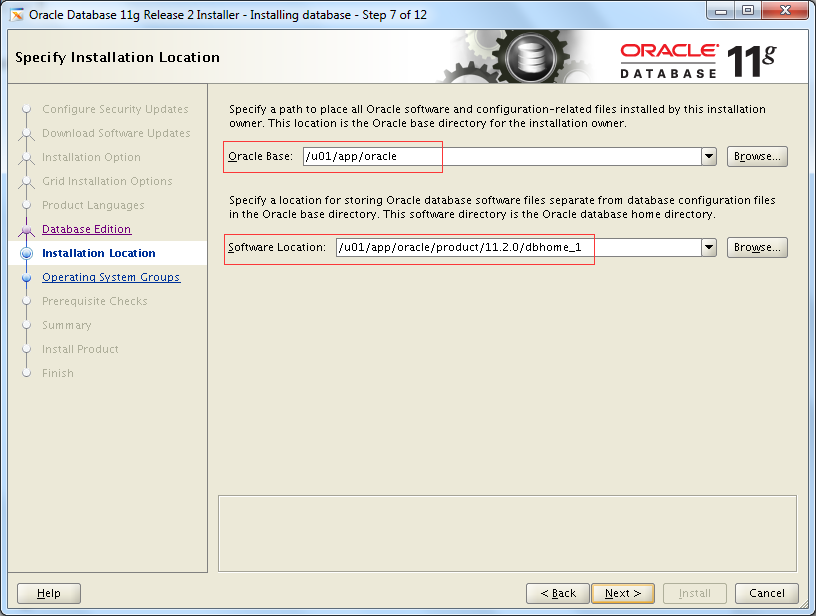
9、指定安装位置
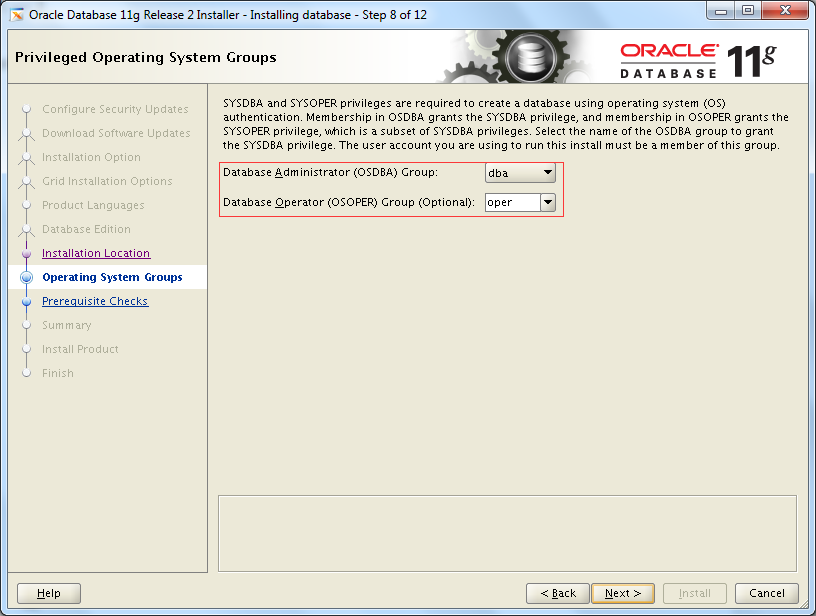
10、权限操作系统组
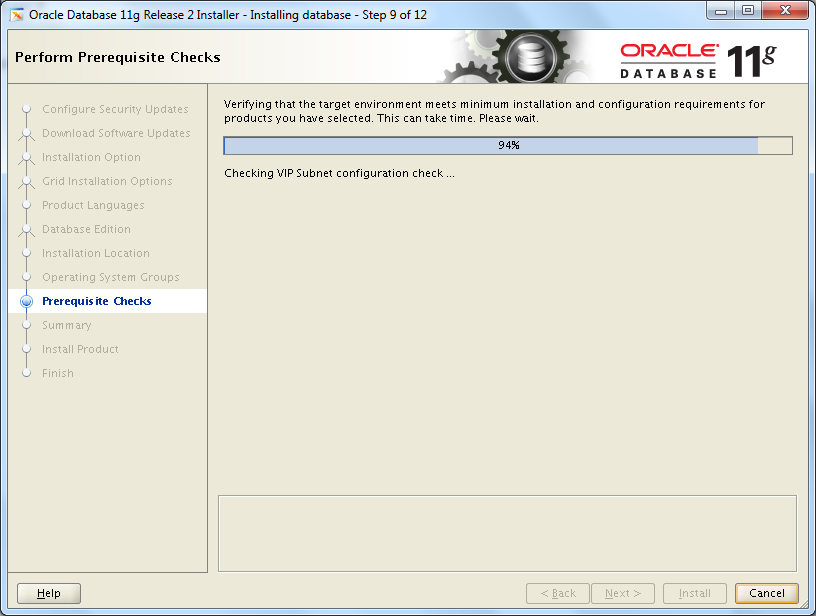
11、执行先决条件检查
12、检查通过出现概要页

13、安装数据库软件
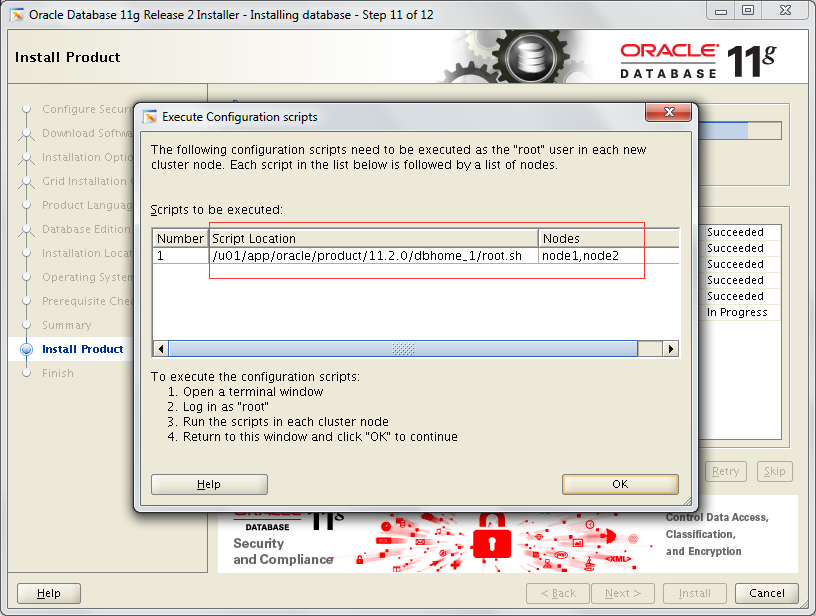
14、执行root脚本
--Node1
[root@node1 ~]# /u01/app/oracle/product/11.2.0/dbhome_1/root.sh
Performing root user operation for Oracle 11g

The following environment variables are set as:
    ORACLE_OWNER= oracle
    ORACLE_HOME=  /u01/app/oracle/product/11.2.0/dbhome_1

Enter the full pathname of the local bin directory: [/usr/local/bin]:
The contents of "dbhome" have not changed. No need to overwrite.
The contents of "oraenv" have not changed. No need to overwrite.
The contents of "coraenv" have not changed. No need to overwrite.

Entries will be added to the /etc/oratab file as needed by
Database Configuration Assistant when a database is created
Finished running generic part of root script.
Now product-specific root actions will be performed.
Finished product-specific root actions.
[root@node1 ~]#
--Node2
[root@node2 ~]# /u01/app/oracle/product/11.2.0/dbhome_1/root.sh
Performing root user operation for Oracle 11g

The following environment variables are set as:
    ORACLE_OWNER= oracle
    ORACLE_HOME=  /u01/app/oracle/product/11.2.0/dbhome_1

Enter the full pathname of the local bin directory: [/usr/local/bin]:
The contents of "dbhome" have not changed. No need to overwrite.
The contents of "oraenv" have not changed. No need to overwrite.
The contents of "coraenv" have not changed. No need to overwrite.

Entries will be added to the /etc/oratab file as needed by
Database Configuration Assistant when a database is created
Finished running generic part of root script.
Now product-specific root actions will be performed.
Finished product-specific root actions.
[root@node2 ~]#
15、oracle软件安装完成

16、环境变量配置
--Node1和Node2均需配置
[oracle@node1 ~]$ vim .bash_profile  -->将下面内容添加至.bash_profile
ORACLE_HOME=/u01/app/oracle/product/11.2.0/dbhome_1
export ORACLE_HOME
PATH=$ORACLE_HOME/bin:$PATH
export PATH
[oracle@node1 ~]$ . .bash_profile
[oracle@node1 ~]$ echo $ORACLE_HOME
/u01/app/oracle/product/11.2.0/dbhome_1
[oracle@node1 ~]$