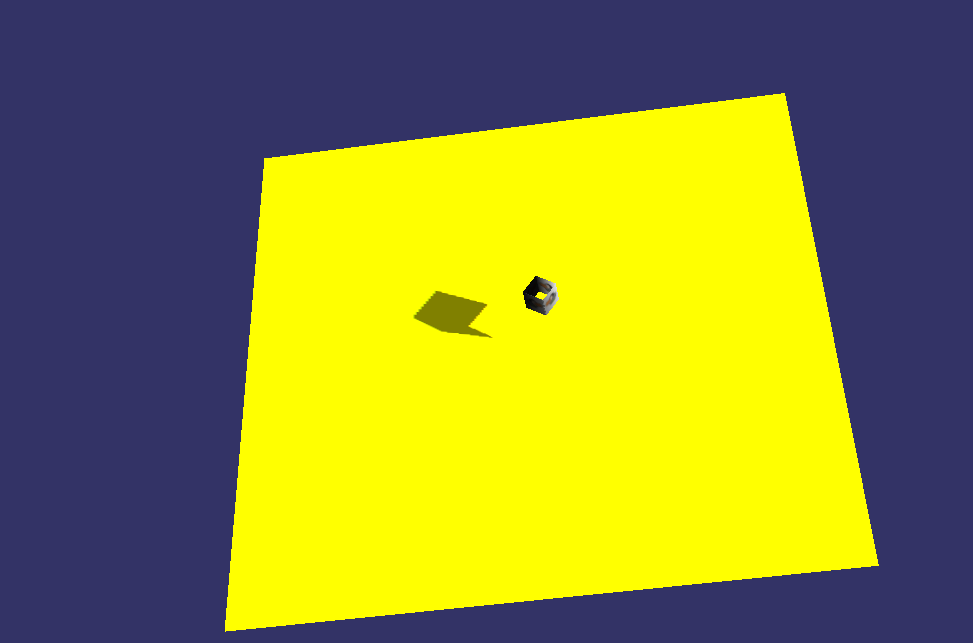
纲要:渲染的时候只要标记出 阴影投影对象 和 阴影接收对象 就行了,其他的交给引擎就可以了。
实现步骤:
- 创建ShadowedScene对象。
- 标明 投射者和被投射者。
- 选择一种阴影渲染技术,如 ShadowMap,ShadowVolume,ShadowTexture,SoftShadowMap等。
- 标明哪个物体是投射着哪个是被投射者。
- 之后将两者及光照添加到ShadowedScene中进行渲染,参照http://www.osgchina.org/show.php?id=54。
#include <osg/Texture2D>
#include <osg/Geometry>
#include <osg/Geode>
#include <osgDB/ReadFile>
#include <osgUtil/SmoothingVisitor>
#include <osgViewer/Viewer>
#include <osg/PositionAttitudeTransform>
#include <osg/MatrixTransform>
#include <osgGA/TrackballManipulator>
#include <osg/Material>

#include <osgShadow/ShadowedScene>
#include <osgShadow/ShadowVolume>
#include <osgShadow/ShadowTexture>
#include <osgShadow/ShadowMap>
#include <osgShadow/SoftShadowMap>
#include <osgShadow/ParallelSplitShadowMap>

#include <osgUtil/Optimizer>

osg::Vec4 lightPos(30.0f,-10.0f,20.0f,1.0f);

//标识阴影接收对象
const int ReceivesShadowTraversalMask = 0x1;
//标识阴影投影对象
const int CastsShadowTraversalMask = 0x2;


class RotateCallback : public osg::NodeCallback
{
public:
    RotateCallback() : _rotateZ(0.0) {}

    virtual void operator()( osg::Node* node, osg::NodeVisitor* nv )
    {
        osg::PositionAttitudeTransform* pat = dynamic_cast<osg::PositionAttitudeTransform*>( node );
        if ( pat )
        {
            osg::Quat quat( osg::DegreesToRadians(_rotateZ), osg::Z_AXIS );
            pat->setAttitude( quat );
            _rotateZ += 1.0;
        }
        traverse( node, nv );
    }

protected:
    double _rotateZ;
};

//创建灯光
void createLight(osg::ref_ptr<osg::Group> lightRoot)
{
    //lightRoot->addChild(node);

    //开启光照
    osg::ref_ptr<osg::StateSet> stateset = new osg::StateSet();
    stateset = lightRoot->getOrCreateStateSet();
    stateset->setMode(GL_LIGHTING,osg::StateAttribute::ON);
    stateset->setMode(GL_LIGHT0,osg::StateAttribute::ON);

    //创建一个Light对象
    osg::ref_ptr<osg::Light> light = new osg::Light();
    light->setLightNum(0);
    //设置方向
    light->setDirection(osg::Vec3(1.0f,1.0f,-1.0f));
    //设置位置
    light->setPosition(lightPos);
    //设置环境光的颜色
    light->setAmbient(osg::Vec4(0.01f,0.01f,0.01f,1.0f));
    //设置散射光的颜色
    light->setDiffuse(osg::Vec4(1.0f,1.0f,1.0f,1.0f));

     ////设置恒衰减指数
     //light->setConstantAttenuation(1.0f);
     ////设置线形衰减指数
     //light->setLinearAttenuation(0.0f);
     ////设置二次方衰减指数
     //light->setQuadraticAttenuation(0.0f);

    //创建光源
    osg::ref_ptr<osg::LightSource> lightSource = new osg::LightSource();
    lightSource->setLight(light.get());

    lightRoot->addChild(lightSource.get());

    return ;
}
//创建墙壁
osg::Drawable* createHouseWall()
{
    // House vertices
    osg::ref_ptr<osg::Vec3Array> vertices = new osg::Vec3Array;
    //前面
    vertices->push_back( osg::Vec3( 0.0, 0.0, 4.0) );  // 0
    vertices->push_back( osg::Vec3( 0.0, 0.0, 0.0) );  // 1
    vertices->push_back( osg::Vec3( 4.0, 0.0, 4.0) );  // 2
    vertices->push_back( osg::Vec3( 4.0, 0.0, 0.0) );  // 3
    //右面
    vertices->push_back( osg::Vec3( 4.0, 4.0, 4.0) );  // 4
    vertices->push_back( osg::Vec3( 4.0, 4.0, 0.0) );  // 5
    //后面
    vertices->push_back( osg::Vec3( 0.0, 4.0, 4.0) );  // 6
    vertices->push_back( osg::Vec3( 0.0, 4.0, 0.0) );  // 7
    //左面
    vertices->push_back( osg::Vec3( 0.0, 0.0, 4.0) );  // 8
    vertices->push_back( osg::Vec3( 0.0, 0.0, 0.0) );  // 9

    // House normals
    osg::ref_ptr<osg::Vec3Array> normals = new osg::Vec3Array( 10 );
    //左前
    (*normals)[0].set(-1.0,-1.0, 0.0 );
    (*normals)[1].set(-1.0,-1.0, 0.0 );
    //右前
    (*normals)[2].set( 1.0,-1.0, 0.0 );
    (*normals)[3].set( 1.0,-1.0, 0.0 );
    //右后
    (*normals)[4].set( 1.0, 1.0, 0.0 );
    (*normals)[5].set( 1.0, 1.0, 0.0 );
    //左后
    (*normals)[6].set(-1.0, 1.0, 0.0 );
    (*normals)[7].set(-1.0, 1.0, 0.0 );
    //左前
    (*normals)[8].set(-1.0,-1.0, 0.0 );
    (*normals)[9].set(-1.0,-1.0, 0.0 );

    // House texture coordinates
    osg::ref_ptr<osg::Vec2Array> texcoords = new osg::Vec2Array( 10 );
    //前面的左0.3
    (*texcoords)[0].set( 0.0, 1.0 );
    (*texcoords)[1].set( 0.0, 0.0 );
    (*texcoords)[2].set( 1.0, 1.0 );
    (*texcoords)[3].set( 1.0, 0.0 );

    //右面0.2
       (*texcoords)[4].set( 0.0, 1.0 );
    (*texcoords)[5].set( 0.0, 0.0 );

    //后面0.3
    (*texcoords)[6].set( 1.0, 1.0 );
    (*texcoords)[7].set( 1.0, 0.0 );
    //左边0.2
    (*texcoords)[8].set( 0.0, 1.0 );
    (*texcoords)[9].set( 0.0, 0.0 );

    // House texture coordinates
    /*osg::ref_ptr<osg::Vec2Array> texcoords2 = new osg::Vec2Array( 10 );


      //右面0.2

    (*texcoords2)[4].set( 0.0, 1.0 );
    (*texcoords2)[5].set( 0.0, 0.0 );


    //后面0.3
    (*texcoords2)[6].set( 1.0, 1.0 );
    (*texcoords2)[7].set( 1.0, 0.0 );
    //左边0.2
    (*texcoords2)[8].set( 0.0, 1.0 );
    (*texcoords2)[9].set( 0.0, 0.0 );*/


    // Create wall geometry
    osg::ref_ptr<osg::Geometry> houseWall = new osg::Geometry;
    houseWall->setVertexArray( vertices.get() );
    houseWall->setTexCoordArray( 0, texcoords.get() );
    // houseWall->setTexCoordArray( 1, texcoords2.get() );
    houseWall->setNormalArray( normals.get() );
    houseWall->setNormalBinding( osg::Geometry::BIND_PER_VERTEX );
    houseWall->addPrimitiveSet( new osg::DrawArrays(osg::DrawArrays::QUAD_STRIP, 0, 10) );

    houseWall->getOrCreateStateSet()->setTextureAttribute( 0,new osg::Texture2D(osgDB::readImageFile("C:\55.jpg")));
    houseWall->getOrCreateStateSet()->setTextureMode(0,GL_TEXTURE_2D,osg::StateAttribute::ON);
    houseWall->setNodeMask(CastsShadowTraversalMask);

    // houseWall->getOrCreateStateSet()->setTextureAttributeAndModes( 1,new osg::Texture2D(osgDB::readImageFile("C:\55.jpg")) );

    return houseWall.release();
}
//创建大地
osg::Geometry* createGround(){

    osg::ref_ptr<osg::Vec3Array> vertices = new osg::Vec3Array;
    vertices->push_back(osg::Vec3(50,-50,-10));
    vertices->push_back(osg::Vec3(50,50,-5));
    vertices->push_back(osg::Vec3(-50,50,-5));
    vertices->push_back(osg::Vec3(-50,-50,-10));

    osg::ref_ptr<osg::Vec3Array> colours = new osg::Vec3Array;
    colours->push_back(osg::Vec3(255,255,0));
    colours->push_back(osg::Vec3(0,255,0));
    colours->push_back(osg::Vec3(0,255,0));
    colours->push_back(osg::Vec3(0,255,0));


    osg::Geometry *ground = new osg::Geometry;
    ground->setVertexArray(vertices);
    ground->addPrimitiveSet(new osg::DrawArrays(osg::DrawArrays::QUADS,0,4));
    ground->setColorArray(colours,osg::Array::BIND_PER_PRIMITIVE_SET);
    ground->setNodeMask(CastsShadowTraversalMask);
    return ground;

}

int main( int argc, char** argv )
{
    osg::ref_ptr<osgViewer::Viewer> viewer = new osgViewer::Viewer();

    osg::ref_ptr<osg::Group> root = new osg::Group();

    //创建一个阴影节点,并标识接收对象和投影对象
    osg::ref_ptr<osgShadow::ShadowedScene> shadowedScene = new osgShadow::ShadowedScene();
    shadowedScene->setReceivesShadowTraversalMask(ReceivesShadowTraversalMask);
    shadowedScene->setCastsShadowTraversalMask(CastsShadowTraversalMask);

    //创建阴影纹理
    osg::ref_ptr<osgShadow::ShadowMap> st = new osgShadow::ShadowMap();
    //osg::ref_ptr<osgShadow::ShadowTexture> st = new osgShadow::ShadowTexture();
    //关联阴影纹理
    shadowedScene->setShadowTechnique(st);

    //添加光照
    osg::ref_ptr<osg::Group> lightRoot = new osg::Group;
    createLight(lightRoot);
    shadowedScene->addChild(lightRoot.get());

    //物体
    osg::ref_ptr<osg::Geode> geode = new osg::Geode;
    geode->addDrawable( createHouseWall() );

    //旋转物体
    osg::ref_ptr<osg::PositionAttitudeTransform> pat = new osg::PositionAttitudeTransform;
    pat->addChild( geode );
    pat->setUpdateCallback( new RotateCallback );

    shadowedScene->addChild(pat);
    shadowedScene->addChild(createGround());

    root->addChild(shadowedScene);

    osgUtil::Optimizer optimizer ;
    optimizer.optimize(root.get()) ;

    viewer->setUpViewInWindow(20,20,400,400);
    viewer->setSceneData(root.get());
    viewer->setCameraManipulator(new osgGA::TrackballManipulator);
    return viewer->run();
}
效果: