学习完python爬虫之后,脑袋发热想实践一下,看看下各位大佬的博客,然后自己也开始做了些测试,以下将介绍scrapy框架爬去腾讯社招网的数据并保存至mongoDB。
首先在搭建好scrapy框架后,首先进入在需要创建项目的路径进入cmd 输入命令:scrapy startproject 项目名,本次demo名字为tecent
接下来开始代码的编写,创建爬虫类:
import scrapy
import scrapy.http
from bs4 import BeautifulSoup
from tecent import items

class tecentSpider(scrapy.Spider):

    # 爬虫名称
    name = 'tecentSpider'
    # 爬取范围
    allowed_domains = ["hr.tencent.com"]
    #起始链接
    start_url = 'https://hr.tencent.com/position.php'
    #拼接URL
    get_url = 'https://hr.tencent.com/'
    #基础链接
    base_url = 'https://hr.tencent.com/position.php?&start='

    def start_requests(self):
        yield scrapy.Request(self.start_url, self.parse)

    def parse(self, response):
        html = BeautifulSoup(response.text, 'lxml')
        #地址列表
        add_list = html.select('#additems > a')
        #类型列表
        type_list = html.select('#searchrow3 > .pl9 > a')
        for add in add_list:
            if  add.get_text() != '全部':
                itemAdd = items.cityItem()
                itemAdd['addressUrl'] = add.attrs.get('href')
                itemAdd['addressName'] = add.get_text()
                yield itemAdd
                yield scrapy.Request(self.get_url+add.attrs.get('href'), self.parse_city_page)

        for type in type_list:
            if type.get_text() != '全部':
                itemType = items.typeItem()
                itemType['typeUrl'] = type.attrs.get('href')
                itemType['typeName'] = type.get_text()
                yield itemType

    def parse_city_page(self,response):
        html = BeautifulSoup(response.text, 'lxml')
        page_list = html.select('.pagenav > a')
        max_page = int(page_list[len(page_list)-2].get_text())+1
        city_url = self.get_url+html.select('#searchrow2 > #additems > .active')[0].attrs.get('href')
        for i in range(1,max_page):
            #获取每页路径
            url = city_url+'&start='+str(int(i-1)*10)
            yield scrapy.Request(url, self.parse_page_data)

    def parse_page_data(self,response):
        html = BeautifulSoup(response.text, 'lxml')
        tr_list = html.select('.tablelist > tr')
        for tr in tr_list:
            item = items.TecentItem()
            if tr.attrs.get('class')[0] != 'h':
                if tr.attrs.get('class')[0] != 'f':
                    item['name'] = tr.select('.square > a')[0].get_text()
                    item['type'] = tr.select('td')[1].get_text()
                    item['personNum'] = tr.select('td')[2].get_text()
                    item['address'] = tr.select('td')[3].get_text()
                    item['time'] = tr.select('td')[4].get_text()
                    item['pageUrl'] = self.get_url+tr.select('.square > a')[0].attrs.get('href')
                    yield item
                    yield scrapy.Request(item['pageUrl'], self.parse_item_detail)

    def parse_item_detail(self,response):
        html = BeautifulSoup(response.text, 'lxml')
        tr_list = html.select('.tablelist > tr')
        item = items.TecentItemDetail()
        item['title'] = tr_list[0].select('td')[0].get_text()
        item['address'] = tr_list[1].select('td')[0].get_text().split(':')[-1]
        item['type'] = tr_list[1].select('td')[1].get_text().split(':')[-1]
        item['num'] = tr_list[1].select('td')[2].get_text().split(':')[-1]
        item['task'] = tr_list[2].select('.squareli')[0].get_text()
        item['require'] = tr_list[3].select('.squareli')[0].get_text()
        yield item
以上代码包含了五个解析方法,分别返回指定的item,解析html界面使用BeautifulSoup,个人觉得还不错,这个可以看个人喜好
接下来创建items文件,scrapy创建项目包含了items.py,我们只需在此文件中编写即可:
# -*- coding: utf-8 -*-

# Define here the models for your scraped items
#
# See documentation in:
# https://doc.scrapy.org/en/latest/topics/items.html

import scrapy

#招聘信息条目
class TecentItem(scrapy.Item):
    #职位名称
    name = scrapy.Field()
    #职位类型
    type = scrapy.Field()
    #招聘人数
    personNum = scrapy.Field()
    #招聘地址
    address = scrapy.Field()
    #发布时间
    time = scrapy.Field()
    #职位链接
    pageUrl = scrapy.Field()

#招聘地址
class cityItem(scrapy.Item):
    #城市招聘信息链接
    addressUrl = scrapy.Field()
    #地址
    addressName = scrapy.Field()

#招聘类型
class typeItem(scrapy.Item):
    #类型招聘信息链接
    typeUrl = scrapy.Field()
    #类型
    typeName = scrapy.Field()

#招聘条目详情
class TecentItemDetail(scrapy.Item):
    #招聘标题
    title = scrapy.Field()
    #工作地点
    address = scrapy.Field()
    #职位类别
    type = scrapy.Field()
    #招聘人数
    num = scrapy.Field()
    #工作职责
    task = scrapy.Field()
    #工作要求
    require = scrapy.Field()
items.py中的item可以根据自己需要爬取的内容定义,我这里是定义了四个,具体可以见注释。
接下来scapy会将处理完的结果返回至pipelines.py文件处理,其处理方式根据自己的业务进行编写,本demo中编写代码如下:
# -*- coding: utf-8 -*-

# Define your item pipelines here
#
# Don't forget to add your pipeline to the ITEM_PIPELINES setting
# See: https://doc.scrapy.org/en/latest/topics/item-pipeline.html
import pymongo
from scrapy.utils.project import get_project_settings
#保存社招条目
class TecentPipeline(object):

    def __init__(self):
        self.settings = get_project_settings()
        # 链接数据库
        self.client = pymongo.MongoClient(host=self.settings['MONGO_HOST'], port=self.settings['MONGO_PORT'])
        # 数据库登录需要帐号密码的话
        # self.client.admin.authenticate(settings['MINGO_USER'], settings['MONGO_PSW'])
        self.db = self.client[self.settings['MONGO_DB']]

    def process_item(self, item, spider):
        data = dict(item)
        if item.__class__.__name__ == 'TecentItem':
            self.coll = self.db[self.settings['MONGO_COLL_ITEM']]
        if item.__class__.__name__ == 'TecentItemDetail':
            self.coll = self.db[self.settings['MONGO_COLL_ITEM_DETAIL']]
        if item.__class__.__name__ == 'cityItem':
            self.coll = self.db[self.settings['MONGO_COLL_ADDRESS']]
        if item.__class__.__name__ == 'typeItem':
            self.coll = self.db[self.settings['MONGO_COLL_TYPE']]

        self.coll.insert(data)
        return item
注意:爬虫类中的解析方法在为item赋完值后,都会使用yield关键词,这个其实很关键,不使用yield关键词你的item在pipelines.py文件中无法获得值。
最后,你还需要做一些配置,比如数据库的配置,开启pipelines.py,这些配置主要在setting.py中,其代码如下:
# -*- coding: utf-8 -*-

# Scrapy settings for tecent project
#
# For simplicity, this file contains only settings considered important or
# commonly used. You can find more settings consulting the documentation:
#
#     https://doc.scrapy.org/en/latest/topics/settings.html
#     https://doc.scrapy.org/en/latest/topics/downloader-middleware.html
#     https://doc.scrapy.org/en/latest/topics/spider-middleware.html

BOT_NAME = 'tecent'

SPIDER_MODULES = ['tecent.spiders']
NEWSPIDER_MODULE = 'tecent.spiders'


# Crawl responsibly by identifying yourself (and your website) on the user-agent
#USER_AGENT = 'tecent (+http://www.yourdomain.com)'

# Obey robots.txt rules
ROBOTSTXT_OBEY = True

MONGO_HOST = "127.0.0.1"  # 主机IP
MONGO_PORT = 27017  # 端口号
MONGO_DB = "tecent"  # 库名
MONGO_COLL_TYPE = "tecent_type"
MONGO_COLL_ADDRESS = "tecent_address"
MONGO_COLL_ITEM = "tecent_item"
MONGO_COLL_ITEM_DETAIL = "tecent_item_detail"

# Configure maximum concurrent requests performed by Scrapy (default: 16)
#CONCURRENT_REQUESTS = 32

# Configure a delay for requests for the same website (default: 0)
# See https://doc.scrapy.org/en/latest/topics/settings.html#download-delay
# See also autothrottle settings and docs
#DOWNLOAD_DELAY = 3
# The download delay setting will honor only one of:
#CONCURRENT_REQUESTS_PER_DOMAIN = 16
#CONCURRENT_REQUESTS_PER_IP = 16

# Disable cookies (enabled by default)
#COOKIES_ENABLED = False

# Disable Telnet Console (enabled by default)
#TELNETCONSOLE_ENABLED = False

# Override the default request headers:
#DEFAULT_REQUEST_HEADERS = {
#   'Accept': 'text/html,application/xhtml+xml,application/xml;q=0.9,*/*;q=0.8',
#   'Accept-Language': 'en',
#}

# Enable or disable spider middlewares
# See https://doc.scrapy.org/en/latest/topics/spider-middleware.html
#SPIDER_MIDDLEWARES = {
#    'tecent.middlewares.TecentSpiderMiddleware': 543,
#}

# Enable or disable downloader middlewares
# See https://doc.scrapy.org/en/latest/topics/downloader-middleware.html
#DOWNLOADER_MIDDLEWARES = {
#    'tecent.middlewares.TecentDownloaderMiddleware': 543,
#}

# Enable or disable extensions
# See https://doc.scrapy.org/en/latest/topics/extensions.html
#EXTENSIONS = {
#    'scrapy.extensions.telnet.TelnetConsole': None,
#}

# Configure item pipelines
# See https://doc.scrapy.org/en/latest/topics/item-pipeline.html
ITEM_PIPELINES = {
    'tecent.pipelines.TecentPipeline': 1,
}

# Enable and configure the AutoThrottle extension (disabled by default)
# See https://doc.scrapy.org/en/latest/topics/autothrottle.html
#AUTOTHROTTLE_ENABLED = True
# The initial download delay
#AUTOTHROTTLE_START_DELAY = 5
# The maximum download delay to be set in case of high latencies
#AUTOTHROTTLE_MAX_DELAY = 60
# The average number of requests Scrapy should be sending in parallel to
# each remote server
#AUTOTHROTTLE_TARGET_CONCURRENCY = 1.0
# Enable showing throttling stats for every response received:
#AUTOTHROTTLE_DEBUG = False

# Enable and configure HTTP caching (disabled by default)
# See https://doc.scrapy.org/en/latest/topics/downloader-middleware.html#httpcache-middleware-settings
#HTTPCACHE_ENABLED = True
#HTTPCACHE_EXPIRATION_SECS = 0
#HTTPCACHE_DIR = 'httpcache'
#HTTPCACHE_IGNORE_HTTP_CODES = []
#HTTPCACHE_STORAGE = 'scrapy.extensions.httpcache.FilesystemCacheStorage'
好了,代码基本已经编写完毕,最后编写启动方法,写在begin.py中,没有的话就在同路径下创建一个:
from scrapy import cmdline

cmdline.execute(['scrapy', 'crawl' ,'tecentSpider'])
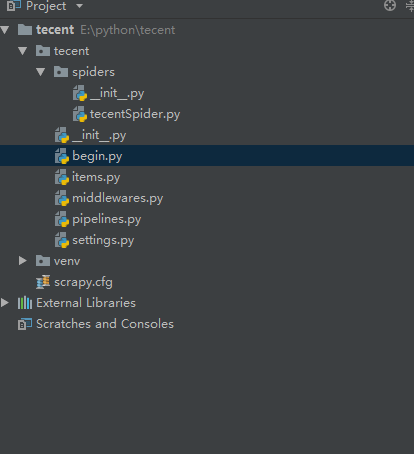
最后是项目的结构图:
代码仅供参考,才疏学浅,望各位多多指教!