安装(mac):关于brew 的问题: http://www.cnblogs.com/adouwt/p/8042201.html
brew install nginx
启动:
brew services start nginx
重启:
brew services restart nginx
停止:
brew services stop nginx
修改配置文件:
安装成功后,会在/etc/nginx 有个 nginx.conf 文件,这里做一些反向代理的操作
http {
    include       mime.types;
    default_type  application/octet-stream;

    #log_format  main  '$remote_addr - $remote_user [$time_local] "$request" '
    #                  '$status $body_bytes_sent "$http_referer" '
    #                  '"$http_user_agent" "$http_x_forwarded_for"';

    #access_log  logs/access.log  main;

    sendfile        on;
    #tcp_nopush     on;

    #keepalive_timeout  0;
    keepalive_timeout  65;

    #gzip  on;

    server {
        listen       80;      // 监听端口
      server_name  localhost;  // 本地访问的域名
      charset utf-8;      // 编码格式
      #access_log  logs/host.access.log  main;
      root   /Users/wangtao/Desktop/my-test-files;  // 访问的根路径  这个是我本地的桌面的某个文件夹的地址
      index  iindex.html iindex.htm;
     // 默认访问的文件, 我把它改了不是 index.html 主要就是想访问的是这个文件夹,不是某个默认的文件

        # 开启目录浏览
        autoindex on;
        autoindex_exact_size off;
        autoindex_localtime on;

        #error_page  404              /404.html;

        # redirect server error pages to the static page /50x.html
        #
        error_page   500 502 503 504  /50x.html;
        location = /50x.html {
            root   html;
        }

        # proxy the PHP scripts to Apache listening on 127.0.0.1:80
        #
        #location ~ .php$ {
        #    proxy_pass   http://127.0.0.1;
        #}

        # pass the PHP scripts to FastCGI server listening on 127.0.0.1:9000
        #
        #location ~ .php$ {
        #    root           html;
        #    fastcgi_pass   127.0.0.1:9000;
        #    fastcgi_index  index.php;
        #    fastcgi_param  SCRIPT_FILENAME  /scripts$fastcgi_script_name;
        #    include        fastcgi_params;
        #}

        # deny access to .htaccess files, if Apache's document root
        # concurs with nginx's one
        #
        #location ~ /.ht {
        #    deny  all;
        #}
    }


    # another virtual host using mix of IP-, name-, and port-based configuration
    #
    #server {
    #    listen       8000;
    #    listen       somename:8080;
    #    server_name  somename  alias  another.alias;

    #    location / {
    #        root   html;
    #        index  index.html index.htm;
    #    }
    #}


    # HTTPS server
    #
    #server {
    #    listen       443 ssl;
    #    server_name  localhost;

    #    ssl_certificate      cert.pem;
    #    ssl_certificate_key  cert.key;

    #    ssl_session_cache    shared:SSL:1m;
    #    ssl_session_timeout  5m;

    #    ssl_ciphers  HIGH:!aNULL:!MD5;
    #    ssl_prefer_server_ciphers  on;

    #    location / {
    #        root   html;
    #        index  index.html index.htm;
    #    }
    #}
    include vhosts/*.conf;  // 这里include 的配置  意思是 同级目录下 vhost 的文件夹下所有 .conf 的配置文件
}
知道这些简单的配置知识,我们就可以进行简单的做一些反向代理了,可以在这个 vhost 下新建我们的配置文件,当然这个文件夹是可以随便取名字的。我们新建一个文件叫myself.conf
server {
  listen 80; // 反向代理的时候,基本都是这个80端口,服务启动的是那个端口就代理哪个端口
  server_name test.itlab.wang;  // 访问的域名

  location / {
    root /Users/wangtao/it-cloud-lab/www-mobile-client-phone/dist; // 访问的根目录地址,我这里是webpack 打包的一个地址
    index index.html; // 默认访问的 index.html 的文件
  }
}
修改配置文件后,需要重新加载下配置nginx文件, nginx -s reload 如果这个nginx 服务是root 权限的时候,加sudo 启动 sudo nginx -s reload ,这时候需要输入计算机密码
这个命令可以按字面意思解释: 保存并重载
启动: /usr/sbin/nginx
停止: sudo nginx -s stop
linux (阿里云服务器):
安装依赖:
yum install -y epel-*
yum install -y pcre pcre-devel
yum install -y zlib zlib-devel
yum install -y openssl openssl-devel


安装nginx
yum install nginx
安装好后就是 修改配置文件 。做一些反向代理的操作
下面的就是 将9000端口的服务代理到80端口,通过访问 csa.scampus.cn 就可以看到程序了
server {
listen 80;
server_name csa.scampus.cn;
location / {
proxy_pass http://127.0.0.1:9000;
}
}
出现问题:
nginx 配置静态文件时候 访问出现403
解决:
尝试授权:
新建的静态文件夹权限不够,授权: chmod a+x /root/static 给static文件夹授权 ,nginx 静态文件配置到static的下面的
windows 安装
一. 下载
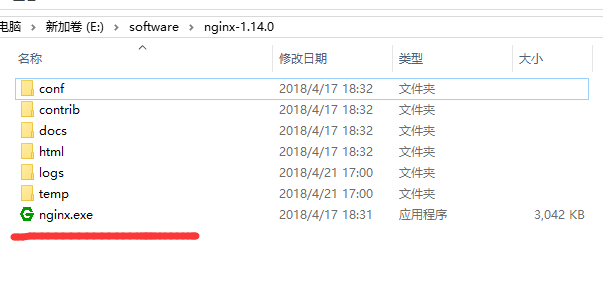
二. 修改配置文件
nginx配置文件在 nginx-1.14.0conf ginx.conf
#user  nobody;
worker_processes  1;

#error_log  logs/error.log;
#error_log  logs/error.log  notice;
#error_log  logs/error.log  info;

#pid        logs/nginx.pid;


events {
    worker_connections  1024;
}


http {
    include       mime.types;
    default_type  application/octet-stream;

    #log_format  main  '$remote_addr - $remote_user [$time_local] "$request" '
    #                  '$status $body_bytes_sent "$http_referer" '
    #                  '"$http_user_agent" "$http_x_forwarded_for"';

    #access_log  logs/access.log  main;

    sendfile        on;
    #tcp_nopush     on;

    #keepalive_timeout  0;
    keepalive_timeout  65;

    #gzip  on;

    server {
        listen       8008;
        server_name  localhost;

        #charset koi8-r;

        #access_log  logs/host.access.log  main;

        location / {
            root   E:vuevue-distdist;
            index  index.html index.htm;
        }

        #error_page  404              /404.html;

        # redirect server error pages to the static page /50x.html
        #
        error_page   500 502 503 504  /50x.html;
        location = /50x.html {
            root   html;
        }

        # proxy the PHP scripts to Apache listening on 127.0.0.1:80
        #
        #location ~ .php$ {
        #    proxy_pass   http://127.0.0.1;
        #}

        # pass the PHP scripts to FastCGI server listening on 127.0.0.1:9000
        #
        #location ~ .php$ {
        #    root           html;
        #    fastcgi_pass   127.0.0.1:9000;
        #    fastcgi_index  index.php;
        #    fastcgi_param  SCRIPT_FILENAME  /scripts$fastcgi_script_name;
        #    include        fastcgi_params;
        #}

        # deny access to .htaccess files, if Apache's document root
        # concurs with nginx's one
        #
        #location ~ /.ht {
        #    deny  all;
        #}
    }


    # another virtual host using mix of IP-, name-, and port-based configuration
    #
    server {
        listen       8000;
        server_name  localhost;

        location / {
            root   E:mystatic_folder;
            index  iindex.html iindex.htm;
            autoindex on;        }
    }


    # HTTPS server
    #
    #server {
    #    listen       443 ssl;
    #    server_name  localhost;

    #    ssl_certificate      cert.pem;
    #    ssl_certificate_key  cert.key;

    #    ssl_session_cache    shared:SSL:1m;
    #    ssl_session_timeout  5m;

    #    ssl_ciphers  HIGH:!aNULL:!MD5;
    #    ssl_prefer_server_ciphers  on;

    #    location / {
    #        root   html;
    #        index  index.html index.htm;
    #    }
    #}

}
三. 启动
nginx -t -c /path/to/nginx.conf 测试nginx配置文件是否正确
关闭nginx:
nginx -s stop :快速停止nginx
nginx -s quit :完整有序的停止nginx
如果遇到报错:
bash: nginx: command not found
有可能是你再linux命令行环境下运行了windows命令,
如果你之前是允许 nginx -s reload报错, 试下 ./nginx -s reload
或者 用windows系统自带命令行工具运行