前言
博客园虽然可定制度高,但是在代码高亮这一块做的并不是很好,默认的配色方案看着很不舒服,而且影响页面的整体协调感。
但正因为博客园的可定制度高,所以我们可以自定义代码高亮的风格。
使用纯 CSS 实现,不需要 JS 权限。
关于博客园的插入代码
本章节只针对博客园的 TinyMce 编辑器讨论,我没有测试其他编辑器(例如 Markdown)的代码高亮解析方案。
博客园的插入代码是有两种方案的。
如图所示。

两种插入代码使用的高亮解析方案不同,各有利弊。我对两种方案都做了适配。
我个人推荐使用第一种高亮方案。
如果想直接取用代码,请跳转到最后一章。
第一种代码插入
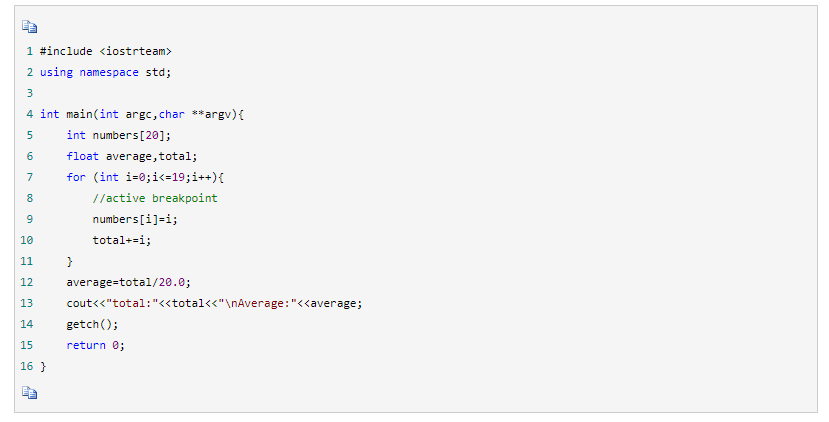
默认效果截图
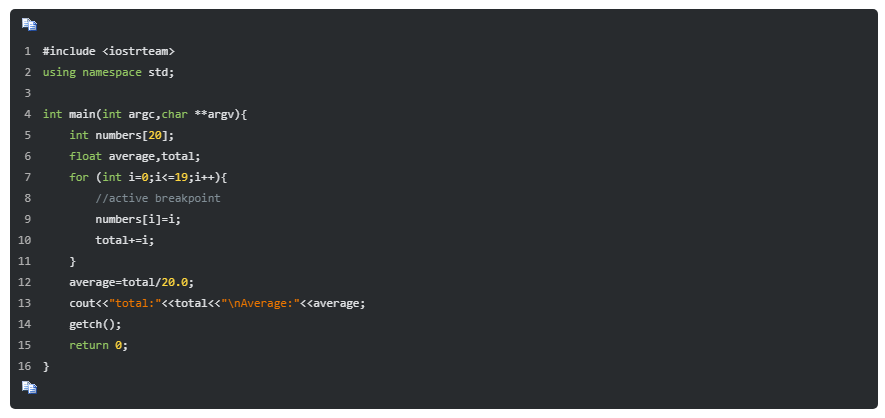
自定义高亮后效果
优缺点
对于代码高亮比较细致,但是复制需要按复制按钮,复制界面和按钮比较丑,格式也不舒服。
如果默认折叠还会有很丑的展开和收缩图标。
这个高亮直接将 CSS 写在了 Style 里面,我迫不得已使用 [style="color:xxx;"] 选择器来匹配。
建议
插入大量代码并且需要读者复制时使用这个,如果需要在手机上阅读,使用这个。
第二种代码插入
默认效果截图
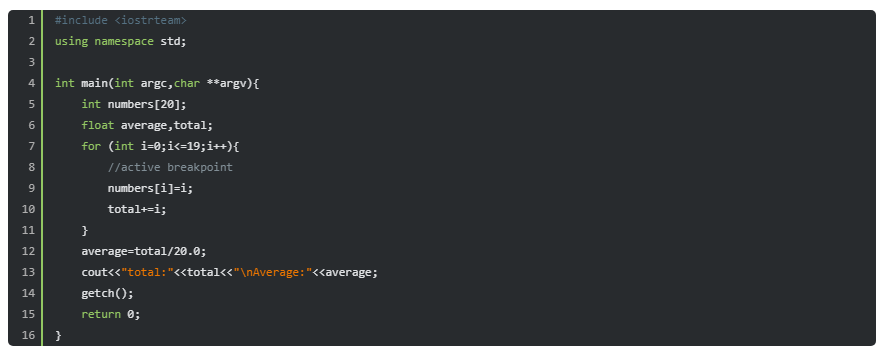
自定义高亮后效果
优缺点
代码高亮不怎么细致(例如数字就没有高亮),在手机上行数栏目会错位,但是整体比较精致。
元素比较多,而且是动态渲染的,代码长的话很占渲染运存。
建议
代码量较少时使用这个,在电脑上阅读使用这个,如果你的博客读者是在手机看的就不要用这个了。
高亮 CSS 代码
这是我目前在使用的高亮。
下面的 CSS 适配了两种插入方式,将下面的代码粘贴到 “博客后台-设置-页面定制CSS代码”中即可。
  1 /*代码高亮*/
  2 .syntaxhighlighter .bold {
  3     font-weight:unset !important;
  4 }
  5 .syntaxhighlighter .line {
  6     background-color: rgb(40, 43, 46)!important;
  7 }
  8 .syntaxhighlighter .line.alt2 {
  9     background-color: rgb(40, 43, 46)!important;
 10 }
 11 .syntaxhighlighter .line.alt1 {
 12     background-color: rgb(40, 43, 46)!important;
 13 }
 14 .syntaxhighlighter .comments, .syntaxhighlighter .comments a {
 15     color: rgb(129, 142, 150)!important;
 16 }
 17 .syntaxhighlighter .keyword {
 18     color: rgb(147, 199, 99)!important;
 19     font-weight: unset !important;
 20 }
 21 .syntaxhighlighter .preprocessor {
 22     color: rgb(85, 113, 130) !important;
 23 }
 24 .syntaxhighlighter .plain, .syntaxhighlighter .plain a {
 25     color: rgb(224, 226, 228)!important;
 26 }
 27 .syntaxhighlighter .color1, .syntaxhighlighter .color1 a {
 28     color: rgb(147, 199, 99)!important;
 29 }
 30 .syntaxhighlighter .string, .syntaxhighlighter .string a {
 31     color: rgb(236, 118, 0)!important;
 32 }
 33 .syntaxhighlighter .functions {
 34     color: rgb(140, 187, 173)!important;
 35 }
 36 .syntaxhighlighter .gutter .line {
 37     border-right: 2px solid rgb(147, 199, 99)!important;
 38 }
 39 .syntaxhighlighter.collapsed .toolbar {
 40     background: rgb(40, 43, 46)!important;
 41     border: none !important;
 42     border-radius: 5px !important;
 43 }
 44 .syntaxhighlighter.collapsed .toolbar a {
 45     color: rgb(147, 199, 99)!important;
 46 }
 47 .syntaxhighlighter.collapsed .toolbar a:hover {
 48     color: rgb(78, 109, 48)!important;
 49 }
 50 .syntaxhighlighter {
 51     border-radius: 5px;
 52 }
 53 /*第一种高亮结束,第二种高亮开始*/
 54 .cnblogs_code div {
 55     background: #282b2e;
 56 }
 57 .cnblogs_code {
 58     background: #282b2e;
 59     border-radius: 5px;
 60     border: none;
 61     font-family: consolas !important;
 62     color: #fff;
 63 }
 64 .cnblogs_code_toolbar {
 65     background: #282b2e !important;
 66 }
 67 .cnblogs_code_toolbar a:hover, .cnblogs_code_toolbar a:link, .cnblogs_code_toolbar a:visited, .cnblogs_code_toolbar a:active, .cnblogs_code_toolbar a:link img, .cnblogs_code_toolbar a:visited img {
 68     background-color: #282b2e !important;
 69     border: none!important;
 70 }
 71 .cnblogs_code pre {
 72     font-family: consolas !important;
 73     padding-left: 3px;
 74     color: rgb(224, 226, 228);
 75 }
 76 .cnblogs_code span[style="color: #000000;"] , .cnblogs_code span[style="color: #ff0000;"]{
 77     color: rgb(224, 226, 228) !important;
 78 }
 79 .cnblogs_code span[style="color: #0000ff;"]{
 80     color: rgb(147, 199, 99)!important;
 81 }
 82 .cnblogs_code span[style="color: #800080;"]{
 83     color: #ffd740 !important;
 84 }
 85 .cnblogs_code span[style="color: #800000;"]{
 86     color: rgb(236, 118, 0)!important;
 87 }
 88 .cnblogs_code span[style="color: #008000;"]{
 89     color: rgb(129, 142, 150)!important;
 90 }
 91 .cnblogs_code span[style="color: #008080;"]{
 92     color: #afafaf!important;
 93     margin-right: 5px;
 94 }
 95 .cnblogs_code_collapse {
 96     border: none;
 97     background: #282b2e;
 98     color: rgb(147, 199, 99);
 99 }
100 .cnblogs_code > pre {
101     border: none !important;
102 }
103 .cnblogs_code > textarea {
104     color: #fff;
105     background: transparent;
106     border: none;
107     outline: none;
108 }
109 /*代码高亮结束*/
欢迎在评论区提出建议。


