li{
    display: inline-block;
    list-style-type: none;
    background-size: 1000px;
    background-color: black;
    color:white;
    border-right:1px solid red;
}
/*设置最后一个没有边框*/
li.last{
    border-right: none;
}
1.属性记录的补充:

<!DOCTYPE html>
<html lang="zh-CN">
<head>
    <link rel="stylesheet" href="01属性补充.css">
    <meta charset="UTF-8">
    <title>属性补充</title>
</head>
<body>
<div s1="good">
    风和日丽
</div>
<div s1="helloo">傅晶晶一一回复速度</div>
<div s1="gonng">付定金JFK就</div>
<div s1="">金发的京津冀</div>
</body>
</html>
1.1匹配属性值里面的所有元素:

[s1]{
    color:red;
    font-size: 34px;
}
1.2匹配符合字符段的所有元素

[s1="helloo"]{
    color:red;
    font-size: 34px;
}
1.3匹配以某个字符结尾的所有元素:

[s1$="o"]{
    color:red;
    font-size: 34px;
}
1.4匹配属性值里面的字符串包含这些字母的所有元素:

[s1*="oo"]{
    color:red;
    font-size: 34px;
}
2.对于一个链接,怎么在制作前端时进行颜色区分浏览过和没有浏览过:
2.1设置一个位流览过网址字体的颜色:

a:link{
    color:red;
}
2.2设置一个浏览过字体的颜色:

a:visited{
    color:green;
}
2.3设置鼠标点上网页名称时有颜色变化的方法:

a:hover{
    color:blue;
}
2.4:点上标签颜色改变的方法:

a:active{
    color:black;
}
2.5:改变输入框背景颜色的方法:

div>input:focus{
    outline:green;
    background-color:red;
}
3.伪代码:
3.1调节某一段落首个字符的样式:

p:first-letter{color:red;
font-size:34px;}
3.2在某个元素的前面加上某个字符:

div>ul>li:before{
    content:'我是';
    color:red;
3.3在某个元素后面添加某些字符:

div>ul>li:after {
    content: '我是';
    color: red;
}
4.通用格式设置中·
4.1要设置字体格式:font-famliy

*{
    font-family: "Microsoft YaHei" ,"微软雅黑","Arial" ;
}
4.2字体粗细设置:font-weight
1.normal 默认值,不过不进行设置系统默认选择这一个。
2.bord粗体。
3.border更粗。
4,lighter:更细。

.c1{
    font-weight: lighter;
}
.43设置字体的颜色格式;

/*直接输入颜色的英文字母*/
.c1{
    color:red;
}
/*输入三个颜色的对比度*/
.c2{
    color:rgb(0,255,0)
}
/*可以加上a透明度范围是从0到1*/
.c3{
    color:rgba(0,255,0,0.3)
}
4.4.文本的对齐方式:

/*文本中间对齐*/
.c1{
    text-align: center;
}
/*文本靠右对齐*/
.c2{
    text-align: right;
}
/*文本靠左对其*/
.c3{
    text-align: left;
}
/*两端对齐*/
.c4{
    text-align: justify;

}
4.5文本的格式样式:

/*给文本添加下划线*/
.c1{
    text-decoration: underline;
}
/*去掉链接上的横线*/
.c2{
    text-decoration: none;
}
/*文本上有一条横线*/
.c3{
    text-decoration: overline;
}
4.6对文本进行首行缩进:

/*给文本进行首行缩进*/
.c1{
    text-indent:12px;

}
4.7背景页面的设置:

/*给文字背景的设置*/
.c1{
 background: red;

}

.header-img{
    height:100px;/*图片样式大小*/
    100px;
    border:5px solid white;/*设置图片背景边框*/
    border-radius:50%;/*把背景边框设置成圆*/
    overflow:hidden;/*把多余的图片部分进行隐藏*/
    margin: 0 auto;
}
.header-img>img{max- 100%  ;
}
4.8 如何把图片背景进行固定:

background-attachment:fixed ;
5.一个背景不动的案例:

<!DOCTYPE html>
<html lang="zh-CN">
<head>
    <link rel="stylesheet" href="背景不动实例.css">
    <meta charset="UTF-8">
    <title>背景不动实例</title>
</head>
<body>
<div class="cl"></div>
<div class="c2"></div>
<div class="c3"></div>
</body>
</html>

.c1{
     height:1000px;
    backgroud-color:red;
    100%;
}
.c2{
    background-image: url('011.jpg') ;
    height: 300px;
    backgroud-attachment:fixed;
}
.c3{
    height:100px;
    background0-color: pink;
    100%
}
6.边框样式的设计:

.c1{
    height:300px;
    200px;
    border:4px solid red;
    borde
}
7.display的方法:

.c1{
    background:red;
     100%;
    display:inline-block;
}
.c2{
    display:block;/*变成块级标签*/
    background: green;
}
1.display none html文档存在,但是在浏览器中不显示。一般和js配合使用
2.display biock 默认沾满整个页面的宽度,如果设定了指定的宽度,则会用margin 填充剩下的部分。
3.display inline 按行内元素显示,此时设置的width、height margin float 属性都不会有影响。(块级标签无法设置高度和width和margin)
4.display inline-block 是元素同时具有行内元素和块级元素的特点。
7.2 display none和visiblity hidden的区别:
visibilty hidden 可以隐藏某个元素,但隐藏的元素还是要占用为隐藏之前一样的空间。也就是说,该元素虽然被隐藏了的但是依然影响布局。
display none 也可以隐藏某个元素,且隐藏后不占据任何空间。也就是说,该元素不仅被隐藏了,而且该元素原本所占据的空间也从布局中消失了。
7.3使用display使列表进行一行展示:

html
<div>
    <ul class="c1">
        <li><a href="">小米</a></li>
        <li><a href="">红米</a></li>
        <li><a href="">大米</a></li>
        <li><a href="">艾米</a></li>
        <li><a href="">霍米</a></li>
    </ul>
</div>
<div>
    <h1>在苍茫的大海上</h1>
css
.c1>li{
    display: inline;
}
注:使用display是列表在一行显示不会出现脱离文档流的问题(脱离文档流的问题值得是进行下一次元素操作时,元素的操作空间会占据脱离文档流所占据的空间)(具体实例在float进行展示)
8.为什么我删除不了最后一个:

.c1{
    background:red;
     100%;
    display:inline-block;
}
.c2{
    display:block;/*变成块级标签*/
    background: green;
}
li{
    display: inline;
    list-style-type: none;
    padding-right: 12px;
    border-right:1px solid red;
}
li.second{
    border-right:none;
}
9.padding :是内容区和边框区之间的距离,margin是两个边框直接的距离
10margin外边距:使用规则是上右下左:(在网页展示的css盒子中如果出现减号则代表没有对此进行设置)

/*设置外边距*/
.c6{
    margin-top:14px;
    margin-right:13px;
    margin-bottom:12px;
    margin-left:15px;
}
/*上面可以简写成如下*/
.c7{
    margin:14px 13px 12px 15px;
}
11.怎么文本框串进行居中显示:

.c7{
    height: 15px;
    15px;
    border: 1px solid green;
    margin: 0 auto;

}
12.。float功能;(浮动的意思就是让其变成脱离文档的流)
在css中,任何元素都是可以进行浮动的,浮动的元素回生成一个块级框,(不管它本身是何种元素)
一个案例:

*{
    margin:0;
    padding:0;
}
.c1{
    height:10px;
    10px;
   border: 1px solid red;

}

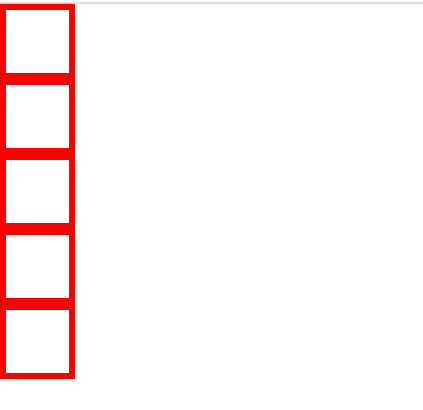
使用浮动让这些边框变成一行:

html
<div class="c1"></div>
<div class="c1"></div>
<div class="c1"></div>
<div class="c1"></div>
<div class="c1"></div>
<div class="c2">海燕</div>
css
*{
    margin:0;
    padding:0;
}
.c1{
    height:10px;
    10px;
   border: 1px solid red;
    float:left;

}
.c2{
    font-size:5px;
    font-weight: lighter;
}
结果为

通过结果我门
12.1浮动框的两个特点;
1.浮动框可以向左或者向右移动,直到碰到外边框或者另一个浮动边框为止。
2.由于浮动边框不在文当的普通流中,所以文档的普通流中的块框表现的浮动框就不复存在了。
12.2浮动的第一个案列;(浮动有三种取值:left(左)、right(右)、none(不浮动)

/*通用布局设置*/
*{
    margin: 0 0;
    padding: 0 0;
}
/*让c1和c2在同一行不同的比例面进行显示*/
.c1{
    height:133px;
    30%;
    background-color:green ;
    float:left
}
.c2{
    height:133px;
    70%;
    background-color: red;
    float:right;
12.3看下面一个程序,发现有什么问题:

*{
    margin: 0 0;
    padding: 0 0;
}
#s1{
    border: 1px solid green;
}
结果为

如果进行以下的程序会有什么结果:

/*通用布局设置*/
*{
    margin: 0 0;
    padding: 0 0;
}
#s1{
    border: 1px solid green;
}
.c1,
.c2{
    float:left;
}

如何进行改进:使用clear:(清除浮动标识)clear只会对自身起作用,为不会影响其他的元素。

#s1:after{
    content:"";
    clear:left;
    display:block;
}

#s1:after{
    content:"";
    clear:right;
    display: block;
}
13.在设置外边框时,有时候里面的内容会溢出边框就需要使用overflow命令:
1.hidden:蒋溢出的内容进行隐藏;
2.scroll 内容会被修减,但是浏览器会以滚动条的形式显示其他内容。
·3.auto 如果内容被修剪,则浏览器会显示滚动条已查看其余内容。

/*如果内容一处边框,采用自动的方式*/
#s1{
    border: 1px solid blue;
    height: 50px;
    60px;
    overflow:auto;
}
.c1{

    color:red;
    font-size:5px;

}
14.定位position:
14.1相对路径:从原来的位置为基准点进行平移:

* {
    margin: 0 0;
    padding: 0 0;
}
.c1{
    height: 100px;
    100px;
    background-color:red;
}
.c2{
    height:150px;
    150px;
    background-color:green;
    position:relative;
    left:200px;
}
.c3{
    height:200px;
    200px;
    background:blue;
}
结果为

14.2fixed进行对象的的定位固定;当出现滚动条时,对象不会随着盾冬而进行滚动,这个层叠关系可以通过z-index属性进行定义,需要注意的是:若是一个元素被设置成position:absoulte:fixed;则该元素就不能设置成float。

*{
    margin: 0 0;
    padding:0 0;
    height:500px;

}
.c1{
    right: 13px;
    bottom:13px;
    position: fixed;
    background-color: white;
    color:red;

}
14.3绝对路径是使用相对于最近一个被定为过的祖宗标签进行决定,如果没有就使用body标签。

* {
    margin: 0 0;
    padding: 0 0;
}
.c1{
    height: 100px;
    100px;
    background-color:red;
}
.c2{
    height:150px;
    150px;
    background-color:green;
    position:absolute;
    left:200px;
}
.c3{
    height:200px;
    200px;
    background:blue;
}
如果使用了绝对路径和固定格式就是脱离文档流,下面的内容会接上去。
15.透明度:opacity(它不仅可以改变背景的透明度还可以字体的透明度,只要属于这一个里面的都可以改变)

*{
    margin:0;
    paddding:0;
}
.c1,
.c2{
    height:300px;
    300px;
    color:red;
    border: 1px solid green;
}
.c1{
    background:black;
    opacity: 0.4;
}
.c2{
    margin-top:20px;

    background:rgba(0,0,0,0.4);
}
结果为

16.z-index只有使用postion才能使用:

.c1{
    height:100px;
    100px;
    background-color: red;
    position: fixed;
    z-index: 5;
}
.c2{
    height:200px;
    200px;
    background-color:green;
    position: relative;
    top:-100px;
}
17.z-index的案例;
