一 安装zabbix
1.1. 环境检查
[root@localhost ~]# cat /etc/redhat-release
CentOS Linux release 7.4.1708 (Core)

[root@localhost ~]# uname -r
3.10.0-693.el7.x86_64

[root@localhost ~]# getenforce    ------->注意不是disable的情况
Disabled

[root@localhost ~]# systemctl status firewalld.service                     ----------->systemctl stop firewalld.service 没有关闭的情况下
 ● firewalld.service - firewalld - dynamic firewall daemon
  Loaded: loaded (/usr/lib/systemd/system/firewalld.service; disabled; vendor preset: enabled)
  Active: inactive (dead)
  Docs: man:firewalld(1)
注意不是disable的情况
1、临时关闭(不用重启机器):
setenforce 0 ##设置SELinux 成为permissive模式

2、修改配置文件需要重启机器:
修改/etc/selinux/config 文件
将SELINUX=enforcing改为SELINUX=disabled

重启机器即可
附
重启命令:
1、reboot
2、shutdown -r now 立刻重启(root用户使用)
3、shutdown -r 10 过10分钟自动重启(root用户使用)
4、shutdown -r 20:35 在时间为20:35时候重启(root用户使用)
关机命令:
1、halt 立刻关机
2、poweroff 立刻关机
3、shutdown -h now 立刻关机(root用户使用)
4、shutdown -h 10 10分钟后自动关机
二 安装zabbix过程
2.1 先安装服务端
#安装zabbix源、aliyun YUM源
curl -o /etc/yum.repos.d/CentOS-Base.repo http://mirrors.aliyun.com/repo/Centos-7.repo
curl -o /etc/yum.repos.d/epel.repo http://mirrors.aliyun.com/repo/epel-7.repo
rpm -ivh http://repo.zabbix.com/zabbix/3.0/rhel/7/x86_64/zabbix-release-3.0-1.el7.noarch.rpm

#安装zabbix
yum install -y zabbix-server-mysql zabbix-web-mysql
#安装启动 mariadb数据库
yum install -y  mariadb-server
systemctl start mariadb.service

# 创建库
[root@localhost ~]# mysql
Welcome to the MariaDB monitor.  Commands end with ; or g.
Your MariaDB connection id is 5
Server version: 5.5.64-MariaDB MariaDB Server

Copyright (c) 2000, 2018, Oracle, MariaDB Corporation Ab and others.

Type 'help;' or 'h' for help. Type 'c' to clear the current input statement.

MariaDB [(none)]> show databases;
+--------------------+
| Database           |
+--------------------+
| information_schema |
| mysql              |
| performance_schema |
| test               |
| zabbix             |
+--------------------+
5 rows in set (0.13 sec)

MariaDB [(none)]> create database zabbix character set utf8 collate utf8_bin;
Query OK, 0 rows affected (0.03 sec)
MariaDB [(none)]> grant all privileges on zabbix.* to zabbix@localhost identified by "zabbix";
Query OK, 0 rows affected (0.03 sec)

MariaDB [(none)]> exit
#导入数据          看自己装的是啥版本
zcat /usr/share/doc/zabbix-server-mysql-3.0.13/create.sql.gz|mysql -uzabbix -pzabbix zabbix
配置zabbix server连接数据库
#配置zabbixserver连接mysql
sed -i.ori '115a DBPassword=zabbix' /etc/zabbix/zabbix_server.conf

#添加时区
sed -i.ori '18a php_value date.timezone  Asia/Shanghai' /etc/httpd/conf.d/zabbix.conf
启动zabbix服务
[root@localhost ~]# systemctl start zabbix-server.service
[root@localhost ~]# systemctl start httpd.service
# 查看启动日志
[root@localhost ~]# tailf /var/log/zabbix/zabbix_server.log
或者
[root@localhost ~]# ps -ef|grep zabbix
注意 有时候还会面临防火墙的事 要一定一定注意
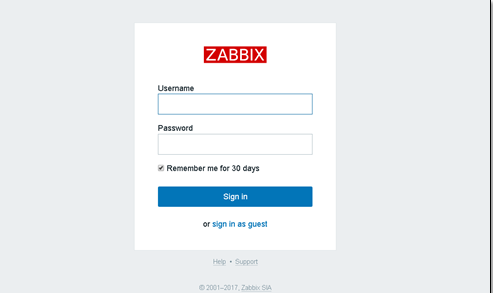
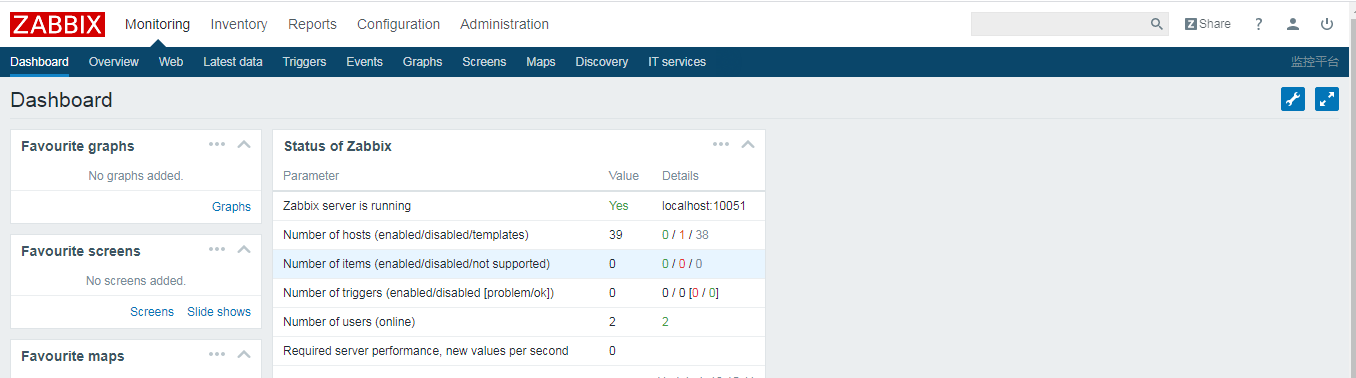
访问 出现下面的图片就成功了
#输出信息
echo "浏览器访问 http://`hostname -I|awk '{print $1}'`/zabbix"
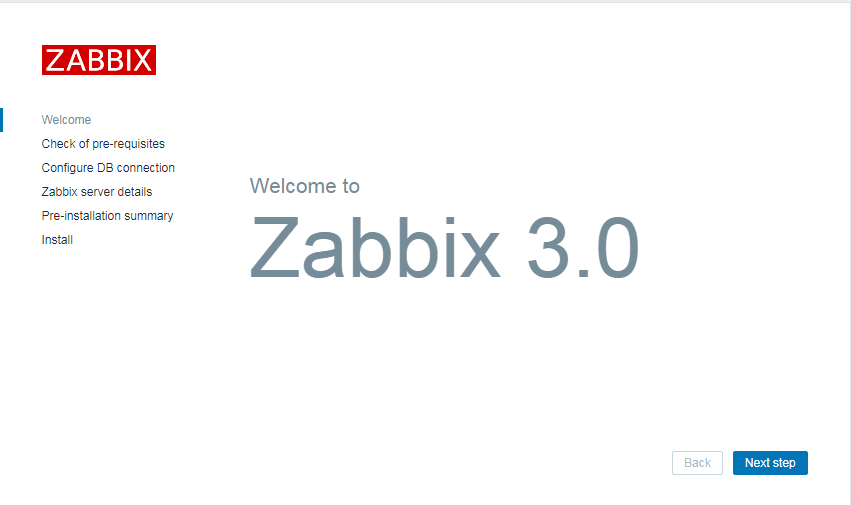
2.2 web端设置
有了上面的图片之后,我们点击 NEXT step
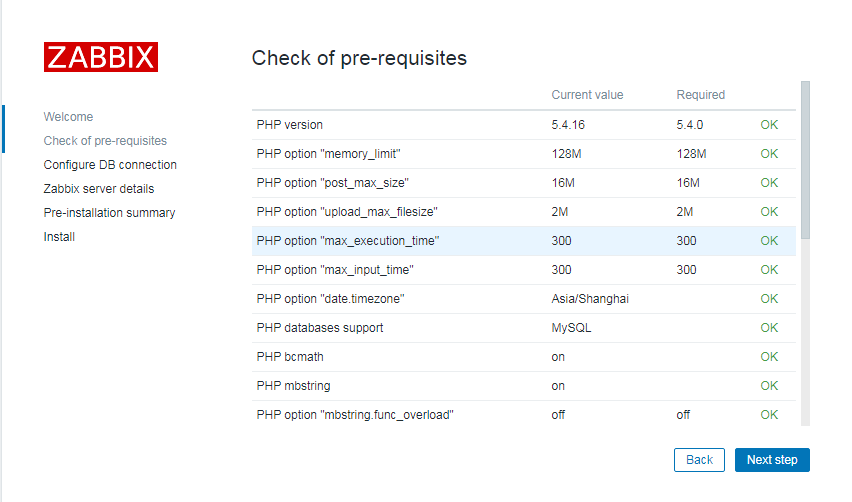
在检测信息时,可查看具体的报错信息进行不同的解决
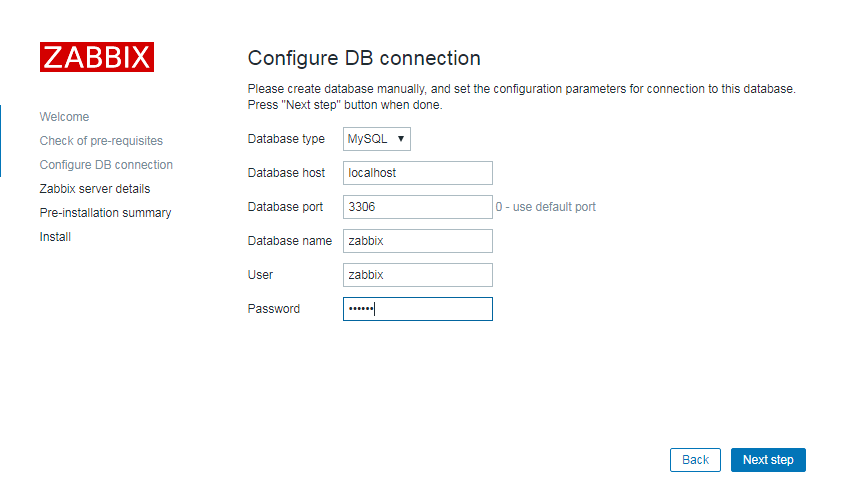
选择mysql数据库,输入密码即可
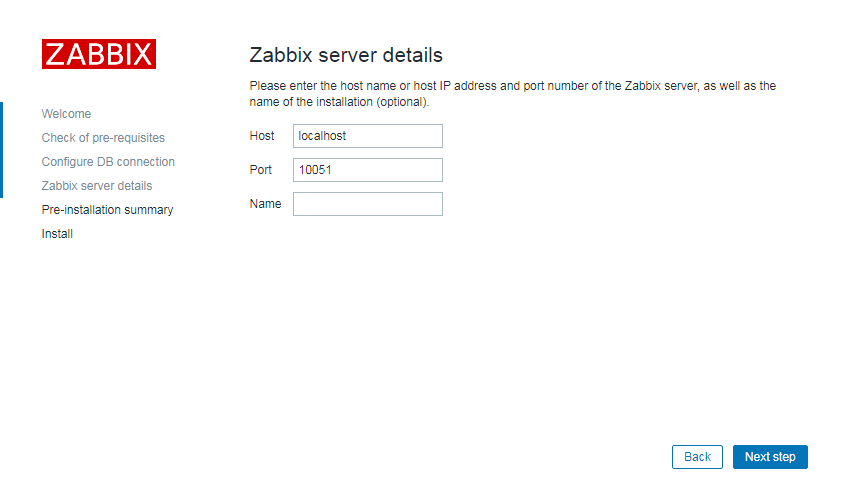
host与port不需要修改,name自定义
确认信息,正确点击下一步

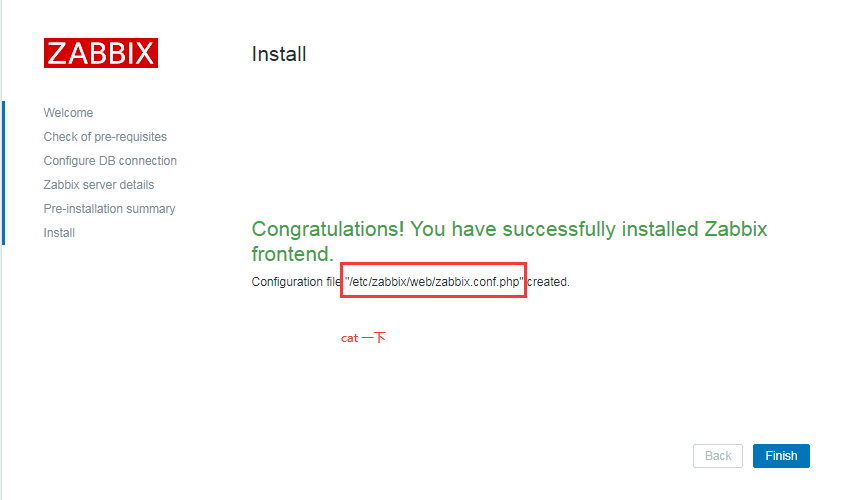
最后一步
进入登陆界面 账号Admin密码zabbix 注意A大写
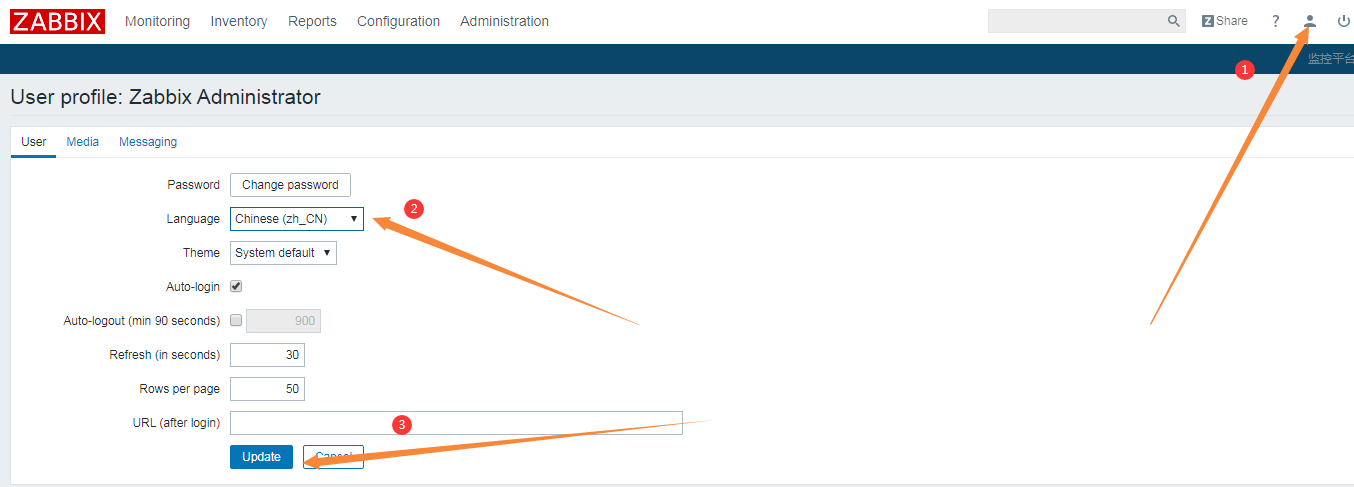
接下来 汉化一下吧