在vmware中为linux系统配置server提供一个iscsi共享服务
如果在linux搭建iscsi服务时,我们需要安装targetcli、iscsi*、device-mapper-multipath三个包。在安装这些包后修改对应的配置文件。
在搭建iscsi服务前,我们准备了虚拟机为真机(只提供安装包等其他),另加4台客户端(nodea、nodeb、nodec、noded)。nodea安装targetcli,nodeb、nodec、noded 都安装iscsi*和device-mapper-multipath
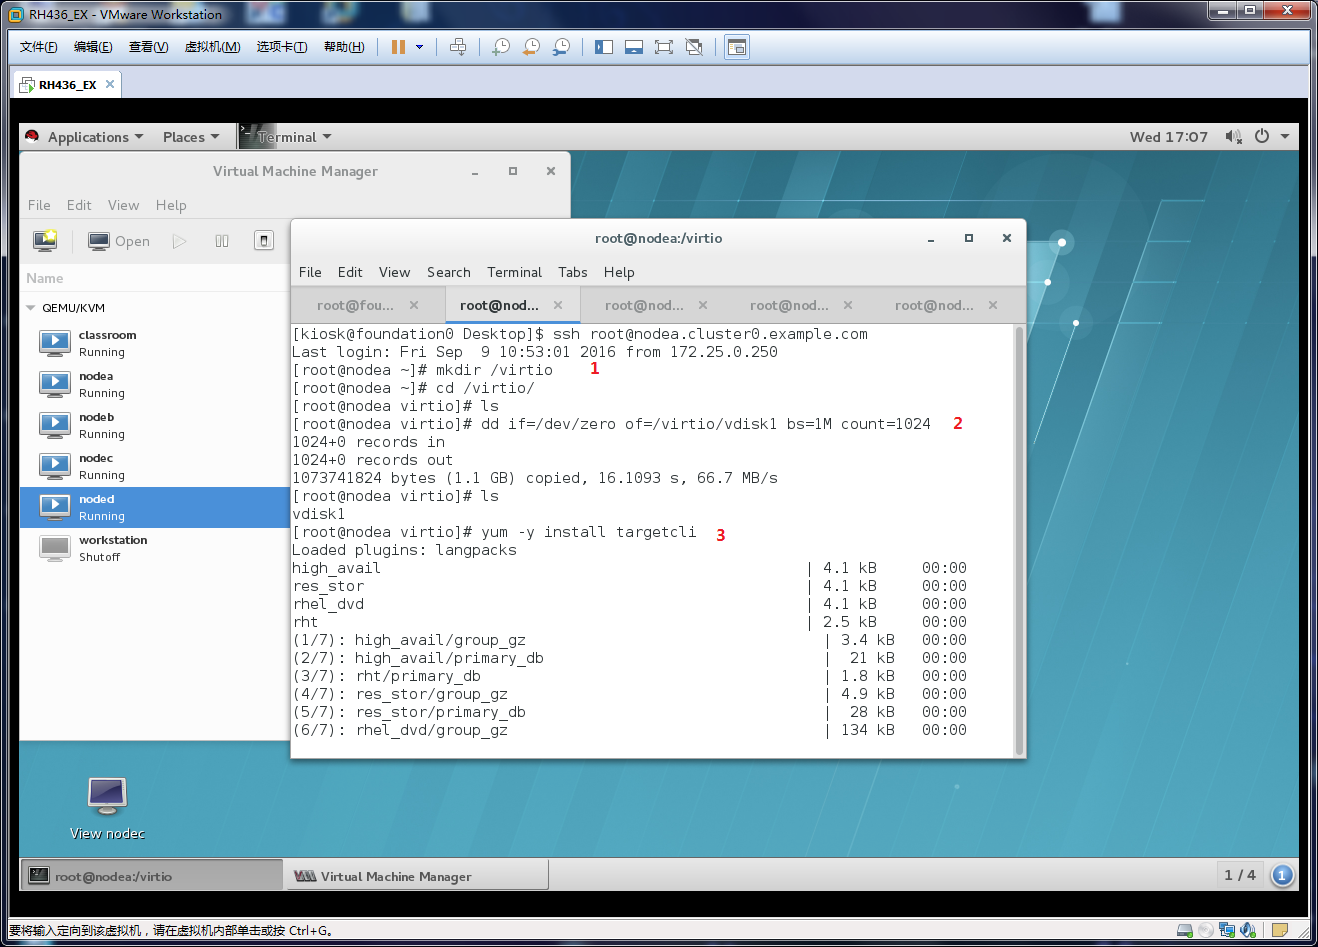
由于nodea没有多余的磁盘便创建一个虚拟磁盘代替
1、创建一个virtio文件夹做存储位置
2、给共享问价划分一个虚拟分区
3、利用yum安装一个targetcli包

安装targetcli包后,用命令systemctl stop firewall ; systemctl disable firewall ;systemctl enable targetcli 将targetcli服务下次自动启动并防火墙
1、targetcli进入(创建一个磁盘)
2、cd backstores/fileio
create iscsi_test /virtio/vdisk1 创建iscsi_test名接vdisk1目录
3、cd iscsi
carate iqn.2016-09.com.example.storage 创建一个磁盘名(用来被发现)
4、cd iqn.2016-09.com.example.storage/tpg1/acls
create iqn.2016-09.com.example:node 创建一个访问控制列表(用来允许客户端连接的密钥 )
5、cd iqn.2016-09.com.example.storage/tpg1/luns
create /backstores/fileio/iscsi_store 标识每一个设备的ID(默认从0开始)
重启服务 systemctl restart target
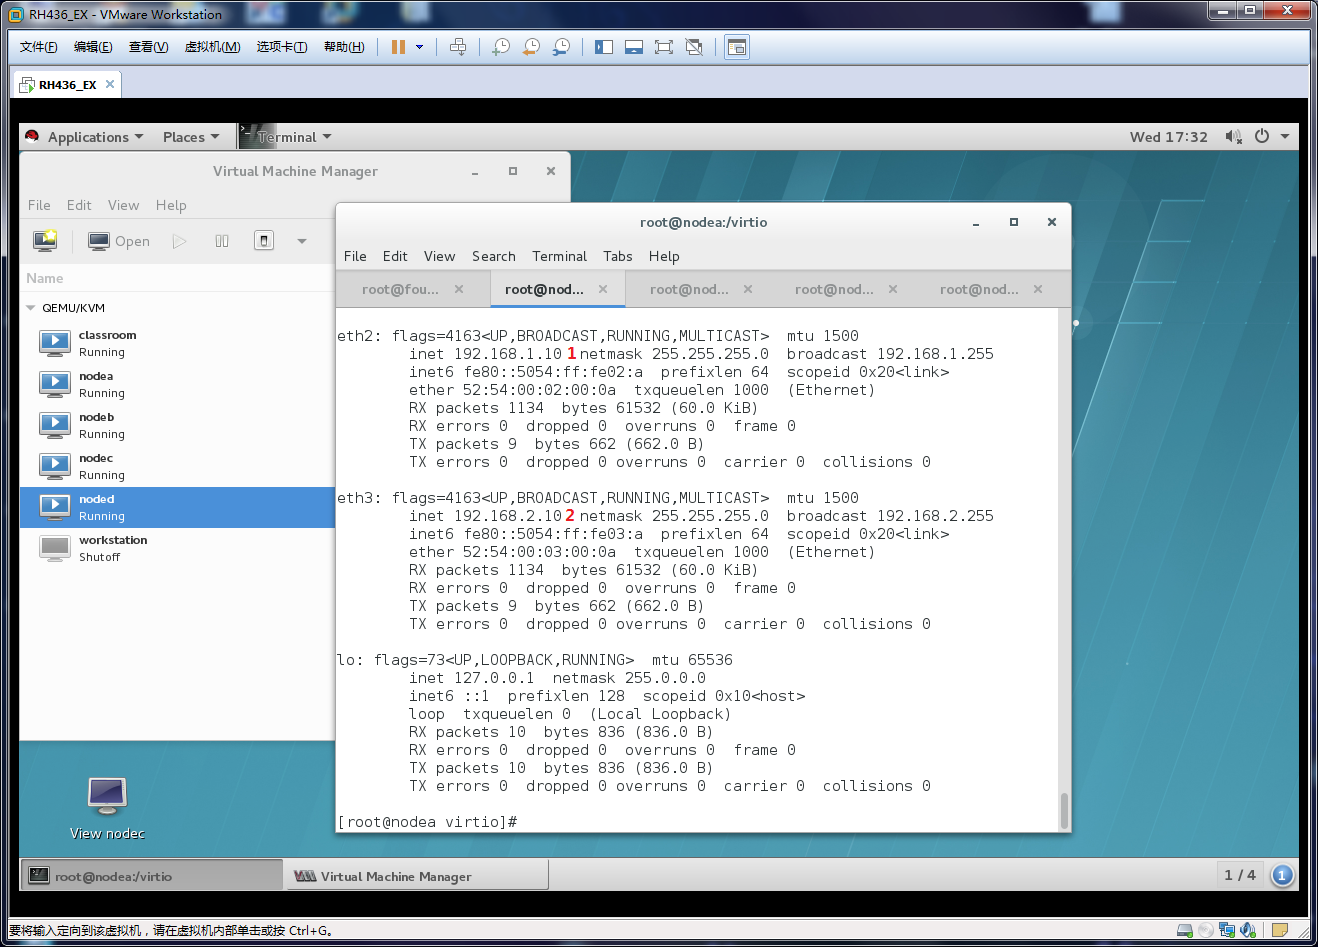
ifconfig查看下nodea的存储IP 地址为eth2:192.168.1.10 / eth3:193.168.2.10
我们先用yum安装好 iscsi*包,
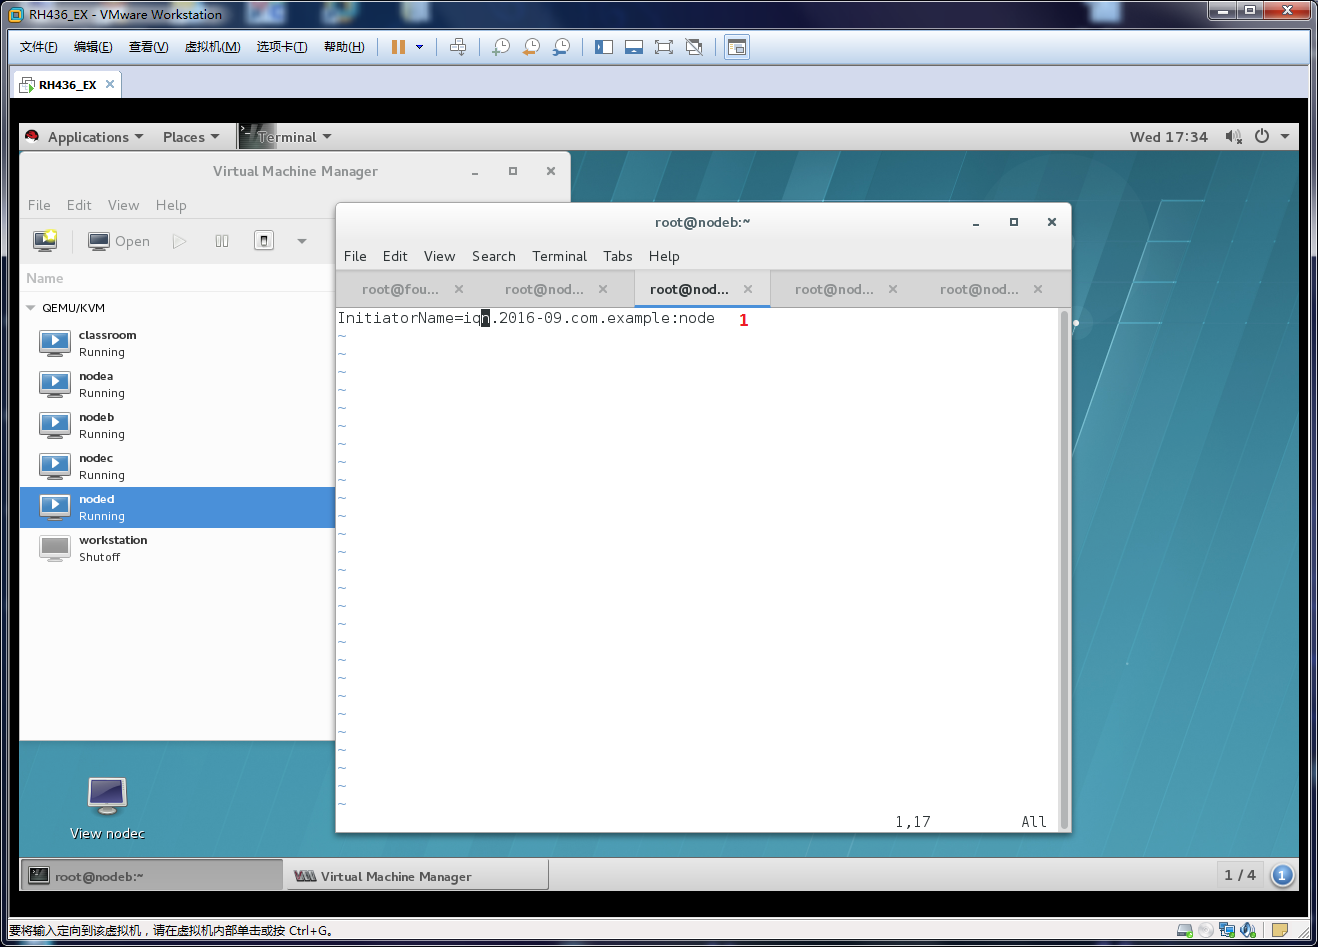
并进入iscsi配置文件 vim /etc/iscsi/initiatorname.iscsi
1、将配置文件修改成InitiatoName=iqn.2016-09.com.example:node对应磁盘的钥匙
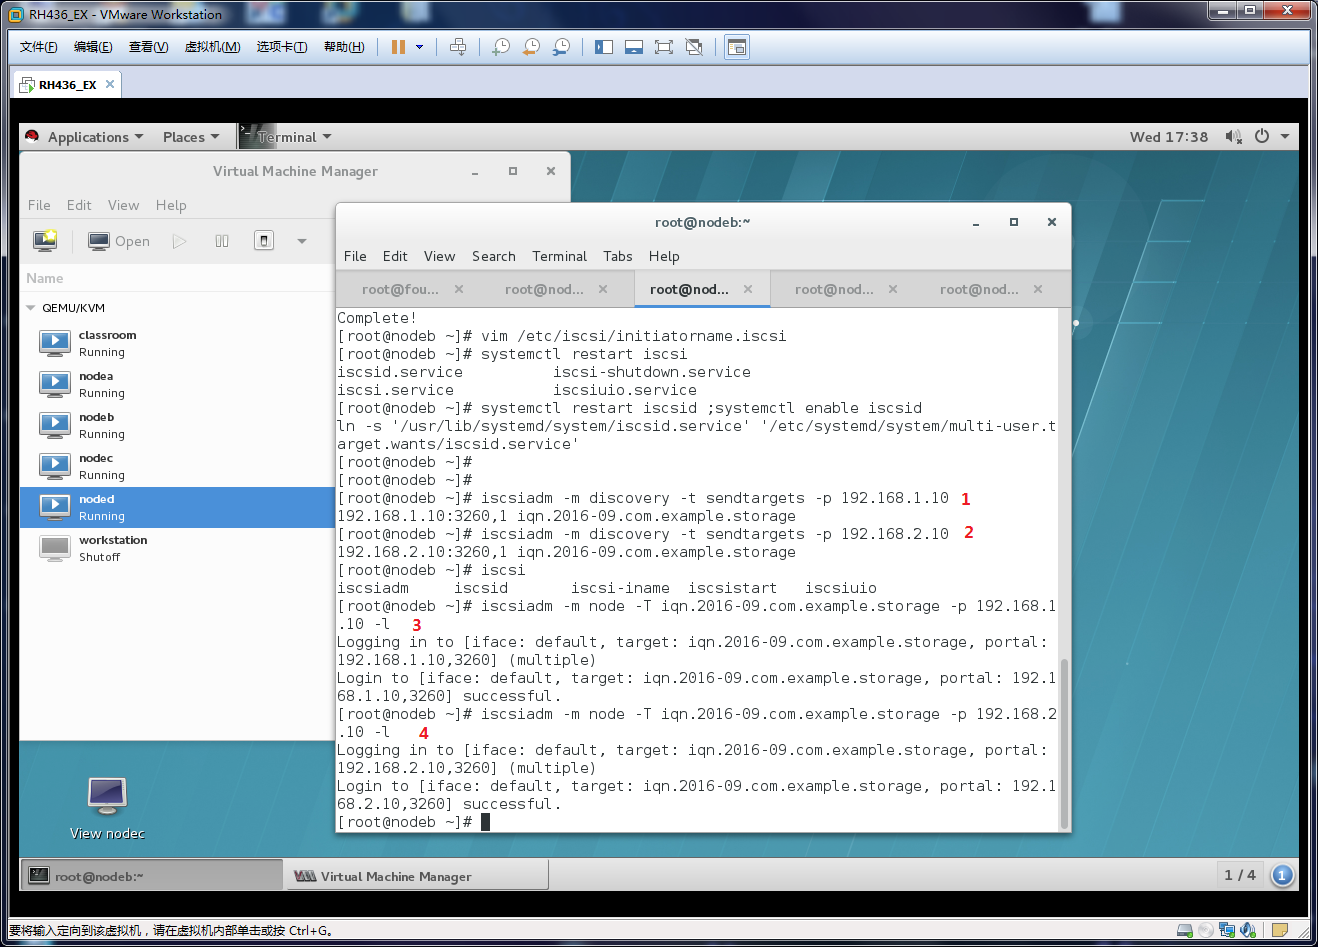
systemctl restart iscsid systemctl enabled iscsid重启服务和下次自动启动
1-2、iscsiadm -m discovery -t sendtargets -p 192.168.1.13/192.168.2.13 首次启动需要初始化
3-4、 iscsiadm -m node -T iqn.2016-09.com.example.storage -p 192.168.1.13/192.168.2.10 -l 将iqn.2016-09.com.example.storage 通过2个网卡都加入会成2个相同的磁盘
参数:
-t:磁盘名
-p:存储PCIP地址 ,nodec/noded的eth2 3网卡(eth2 3网卡为存储)
-l:加入
-u:当前断开
-o delete:下一次开机断开
-U all:断掉当前所有

1-2、加入后用fdisk -l查看可以看到/dev/sda和/dev/sdb的信息
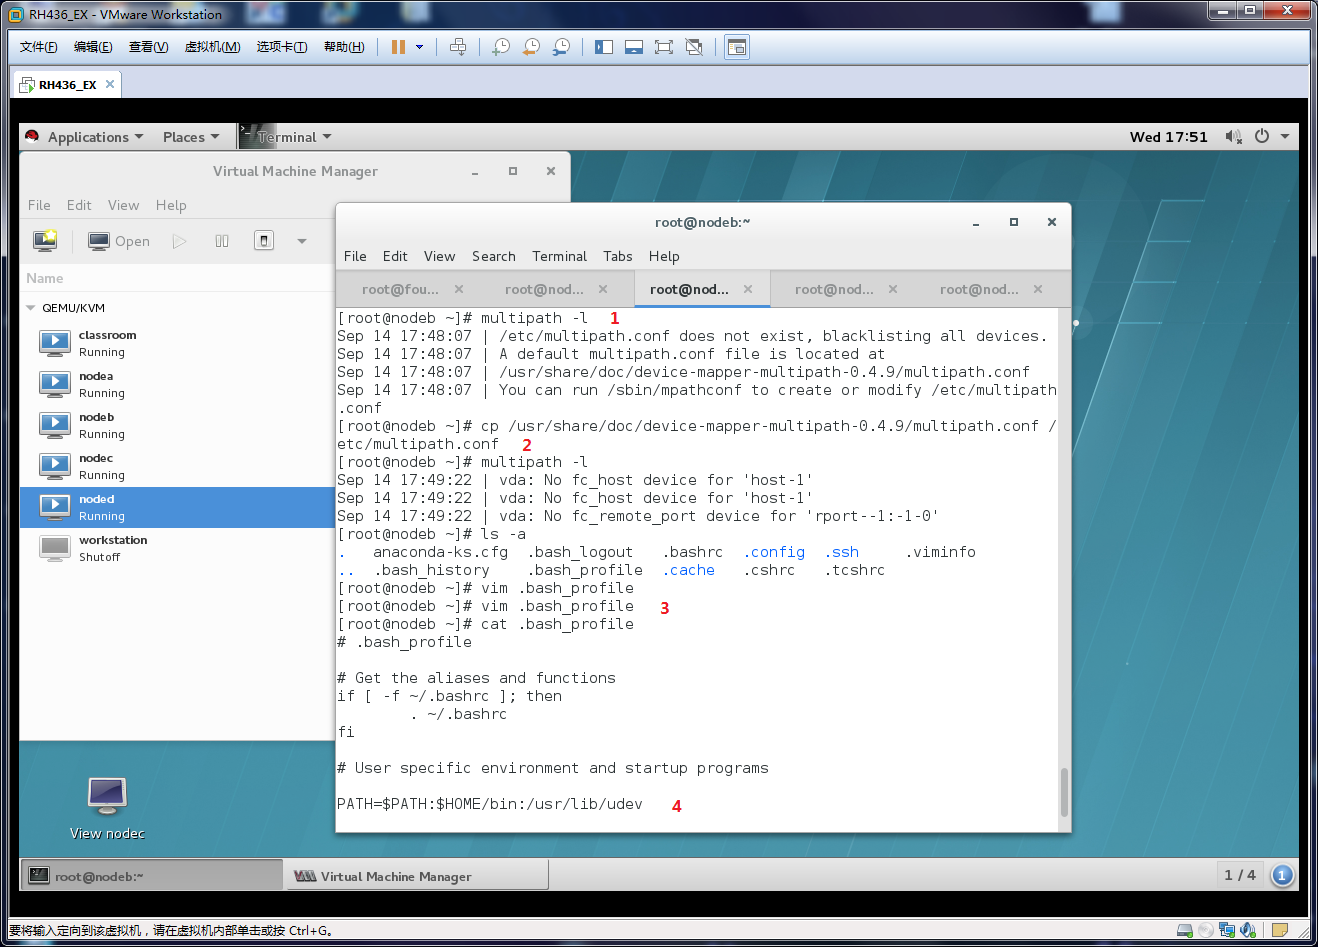
先用yum安装device-mapper-multipath包,由于本机缺少multipath模块,我们用命令modprobe dm_multipath加入模块。并重启multipath服务。
systemctl restart multipathd ;systemctl enable multipathd
1、multipath -l 查看会显示缺少文件,按提示的要求复制
2、将/usr/share/doc/device-mapper-multipath-0.409/multipath.conf覆盖到 /etc/multipath.conf文件
3-4、vim .bash_profile 由于scsi_id命令无法执行,在配置 .bash_profile 加入一条 :/usr/lib/udev。
用命令scsi_id -u -g /dev/sda scsi_id -u -g /dev/sdb 查看sda、sdb的UUID为36001405d7e52369b8ec458ea6f50f4cf
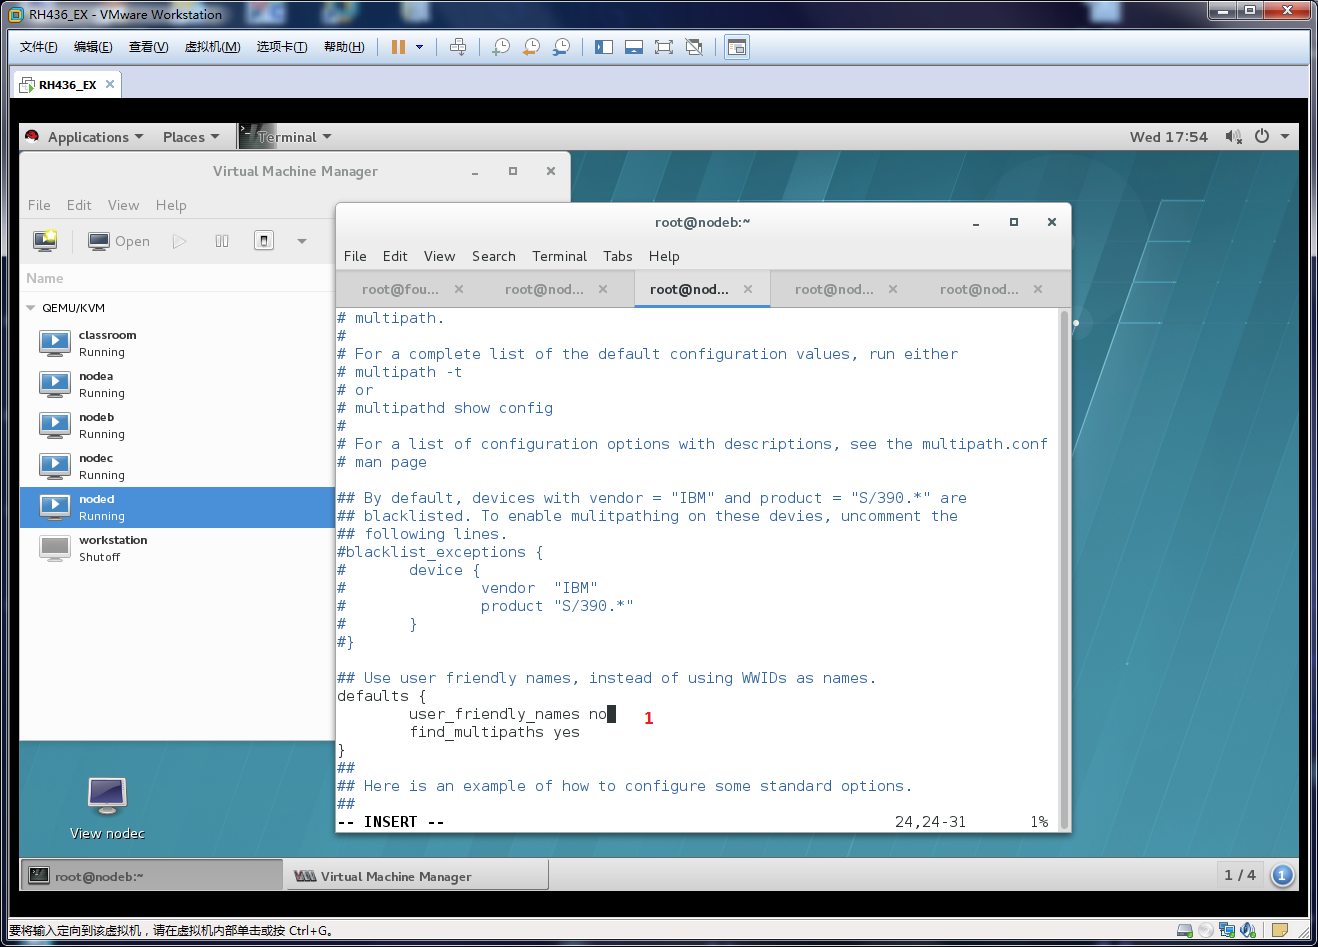
1、 user_friendly_name no 修改成no就是不开启默认命名
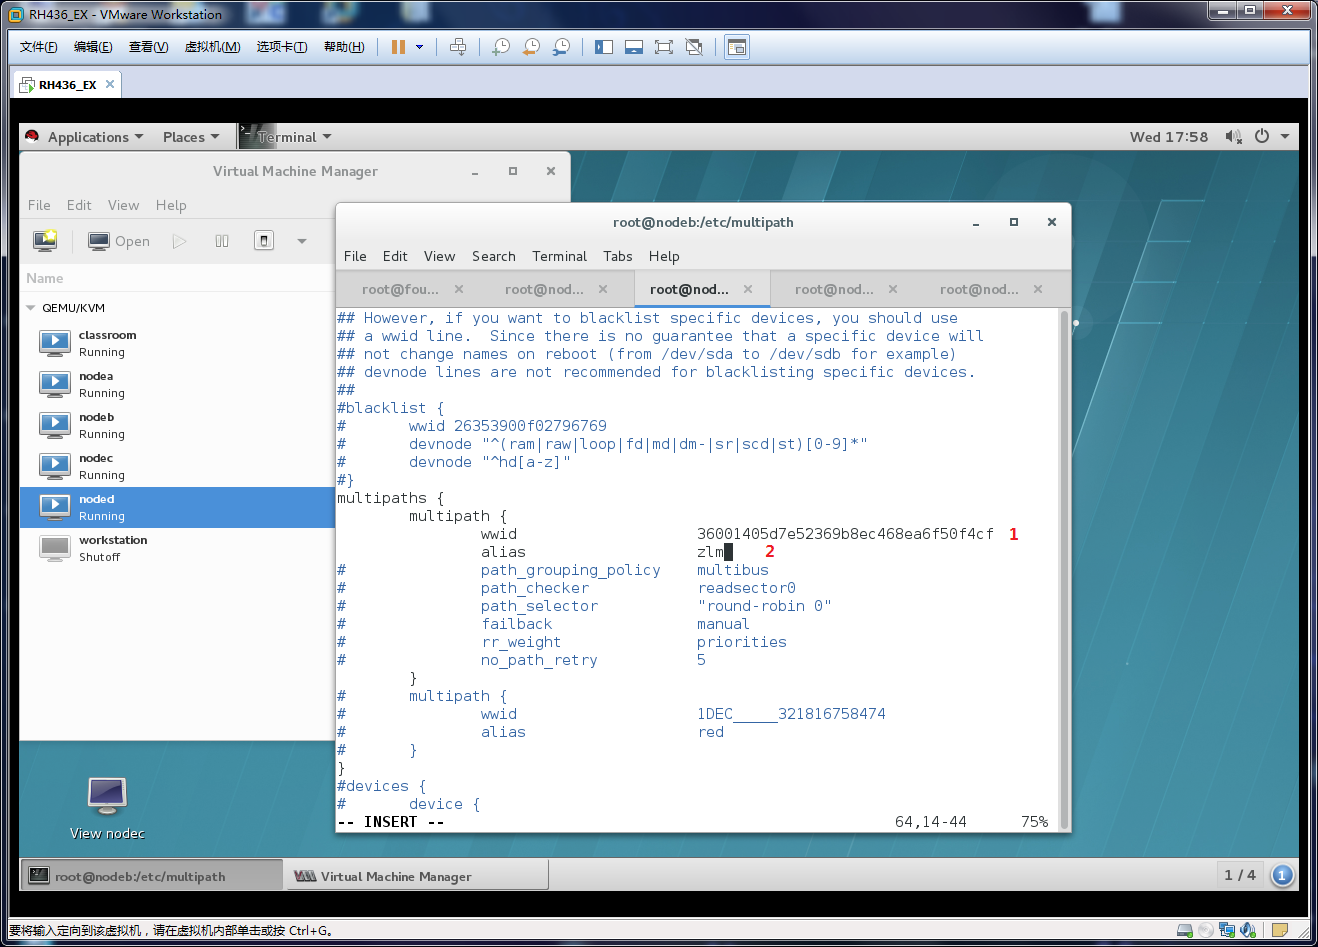
1、wwid=36001405d7e52369b8ec458ea6f50f4cf UUID的序号
2、alias=zlm 自定义匿名
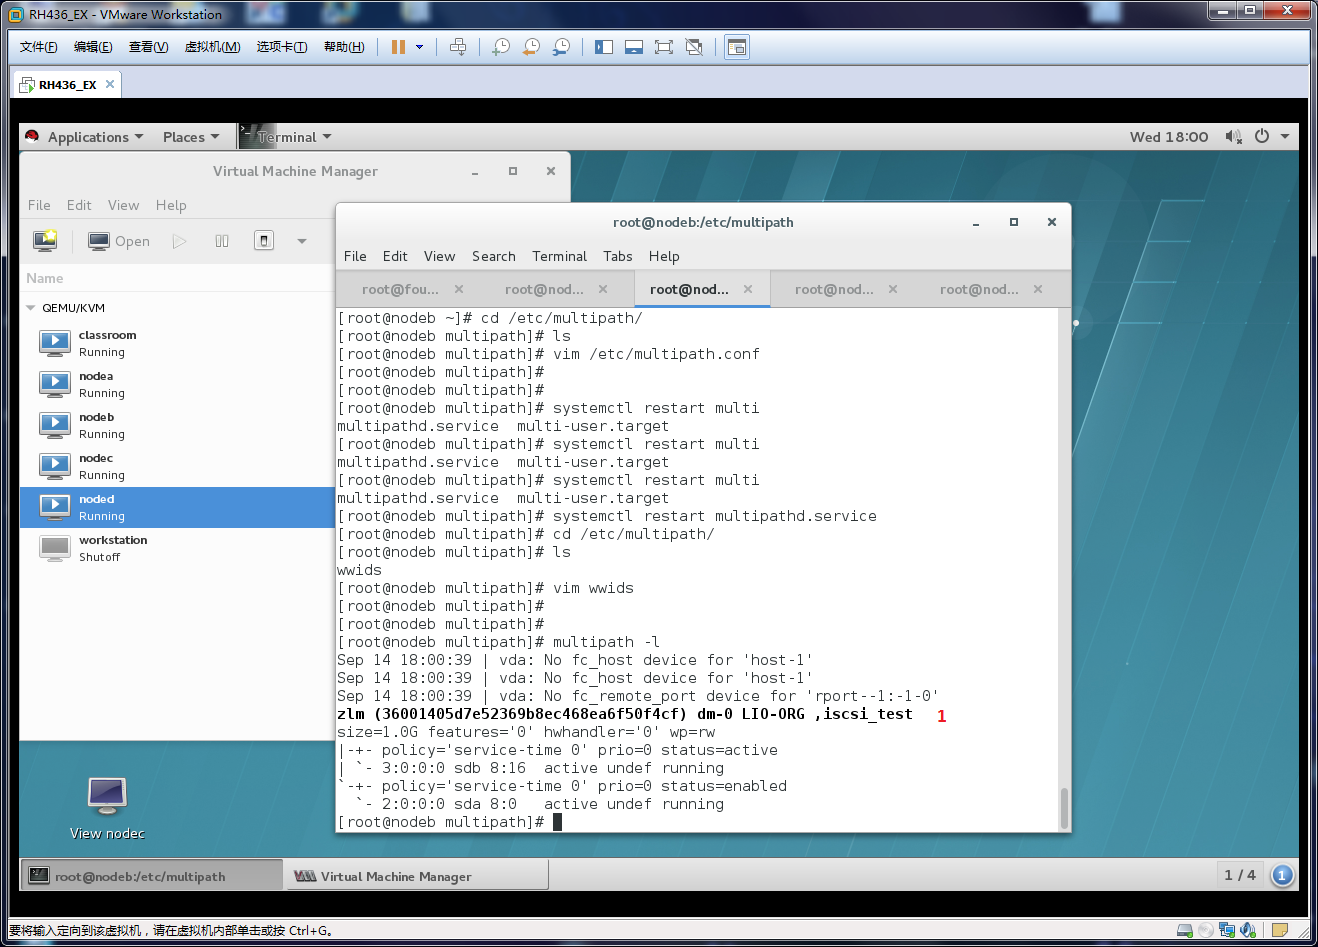
1、修改配置问价后重启服务,在 multipath -l 就会查看到自定义zlm磁盘的信息

磁盘创建后还没有对磁盘划分,用命令fdisk /dev/mapper/zlm划分磁盘,创建一个500M,格式化为xfs,详细信息为图11