NVIDIA显卡选型
显卡性能天梯图:http://www.mydrivers.com/zhuanti/tianti/gpu/
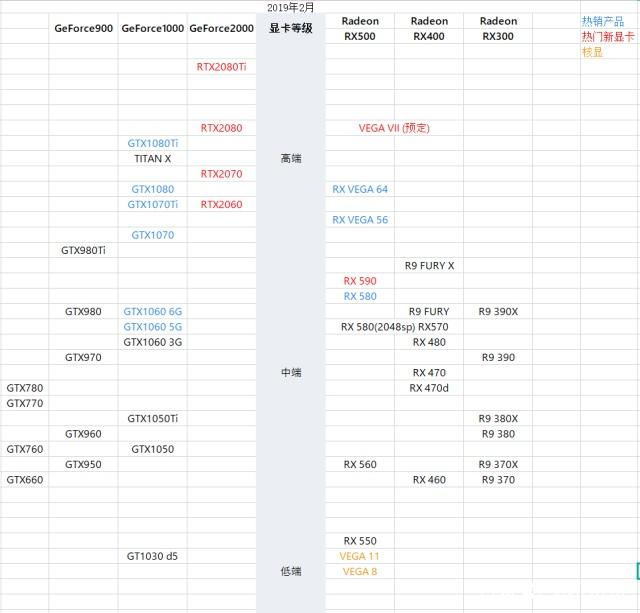
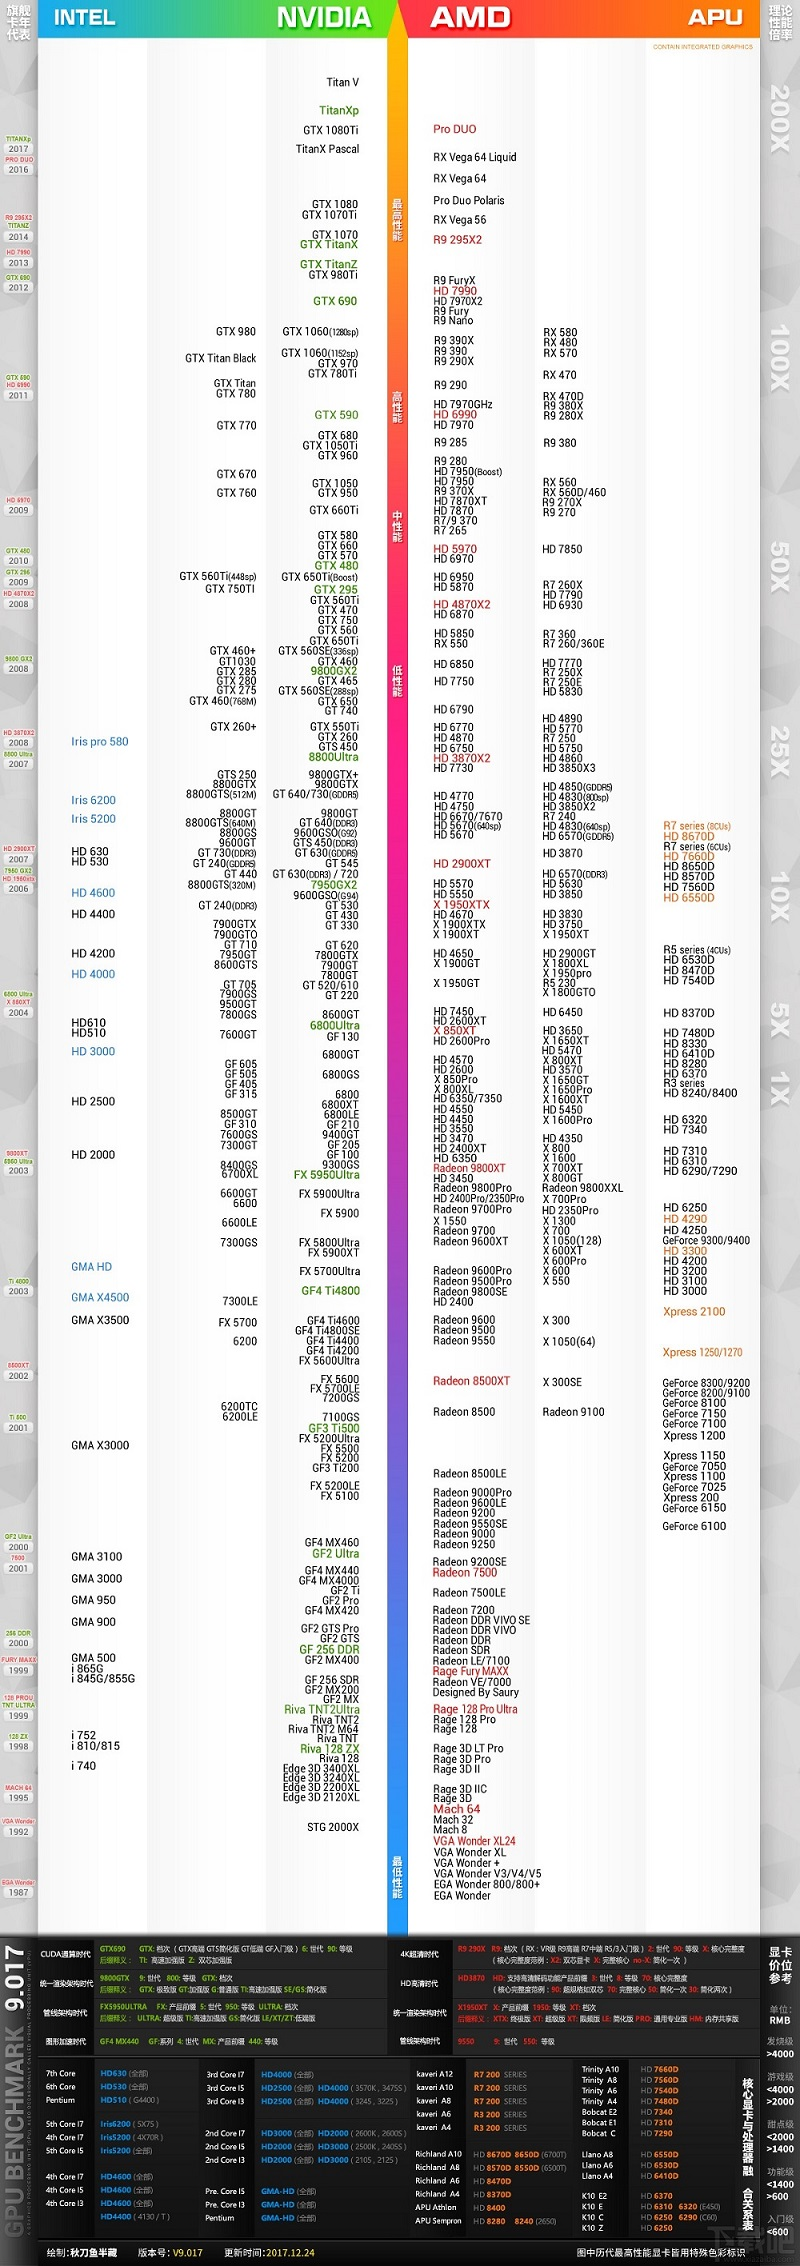
根据显卡天梯图划分的等级排名,对比GTX1060+,GTX1060显卡应当属于高性级别显卡,GTX1070开始才算最高性能级显卡
Tensorflow-GPU环境配置
安装tensoflow-gpu
要求:python是64位的 - python位数确定:

安装 - 通过pip安装
pip install tensorflow-gpu

cuda配置
运行import TensorFlow as tf提示:
ImportError: Could not find 'cudart64_100.dll'. TensorFlow requires that this DLL be installed in a directory that is named in your %PATH% environment variable. Download and install CUDA 10.0 from this URL: https://developer.nvidia.com/cuda-90-download-archive(https://developer.nvidia.com/cuda-10.0-download-archive)
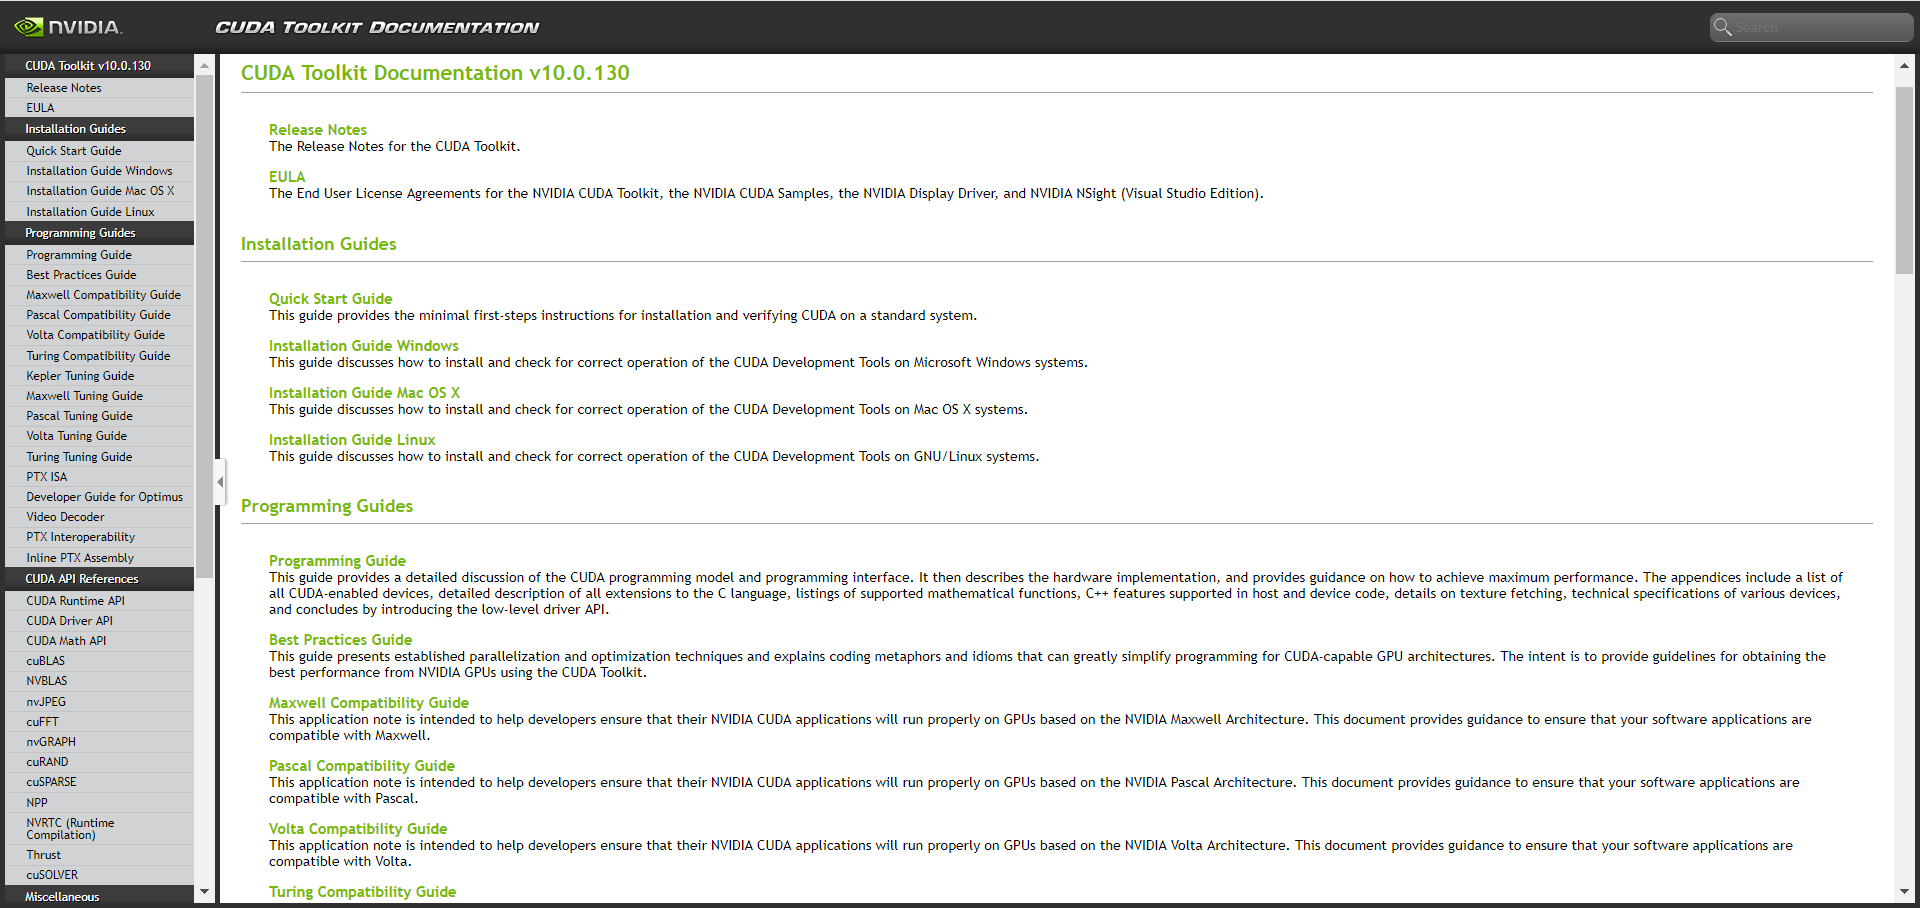
说明Tensorflow-gpu要求使用cuda 9.0.dll/cuda 10.0.dll的内容 --> 下载cuda 9.0对应window10的版本的安装文件(https://developer.nvidia.com/cuda-90-download-archive)- 下载界面:
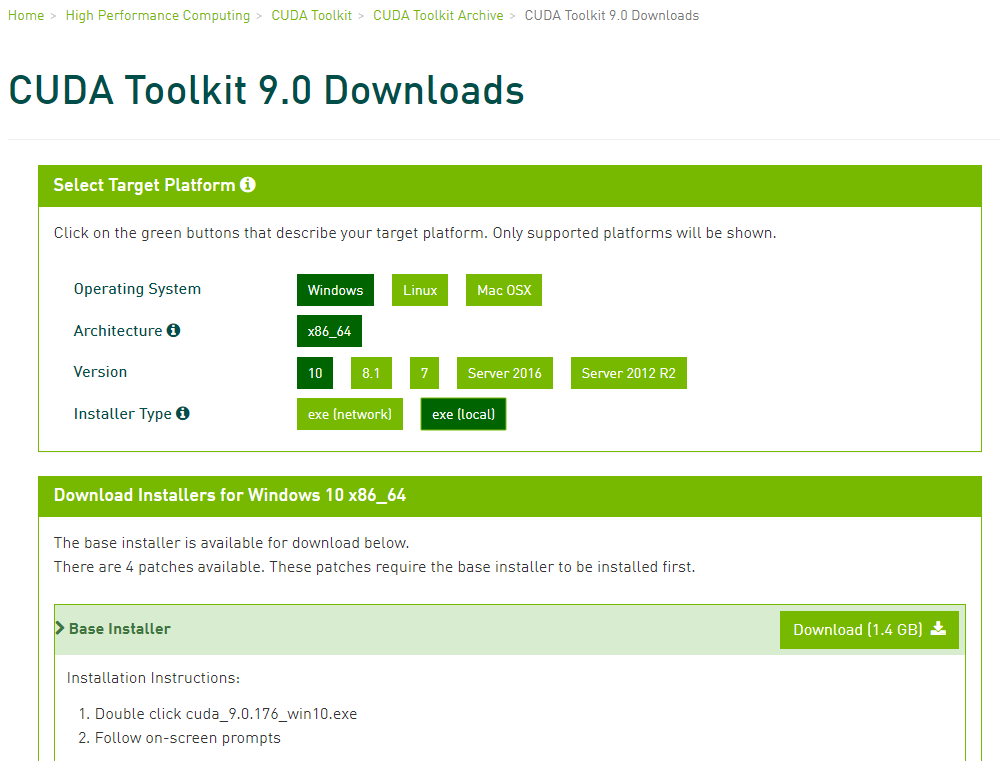
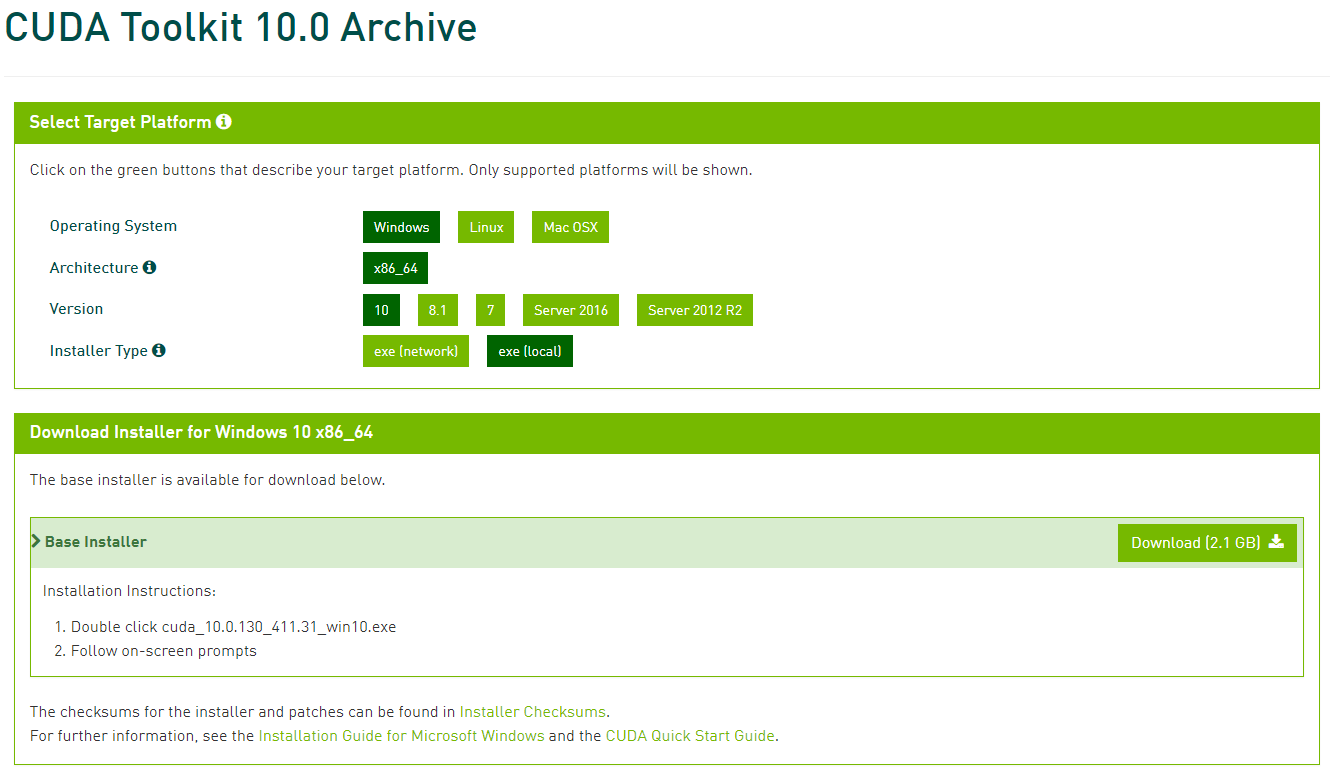
Installer Type选项:exe(network)是在线安装版 - 你执行安装程序需要联网;exe(local)是离线安装版 - 文件比较大
选完后,点击下面Base 的Download进行下载
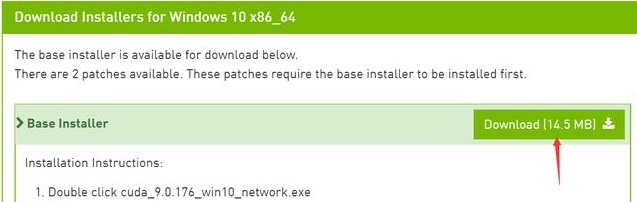
下载完成后,双击exe运行文件

选择OK
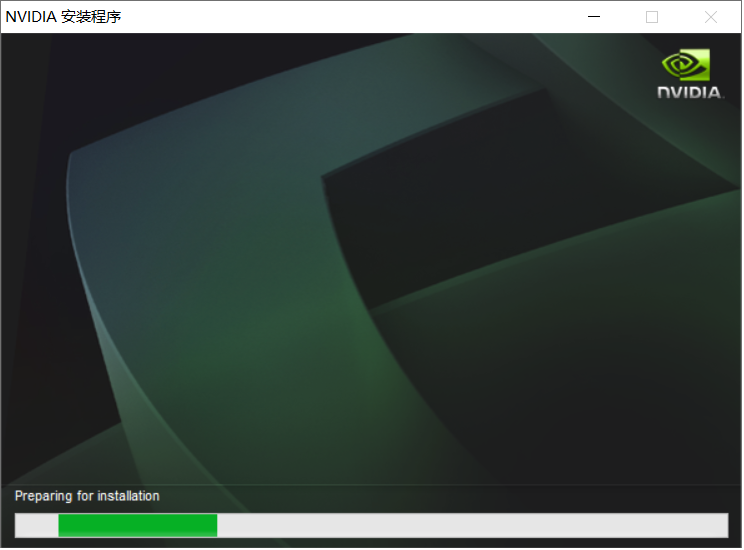
等进度条走完,就会进入安装界面


安装加载界面(V9.0版本不匹配 - 安装V10.0)

检查系统兼容性(如果检测通过,表示显卡可以安装CUDA,如果没有通过,说明显卡不支持tensorflow-gpu加速,则只能pip unistall tensorflow-gpu,然后执行pip install tensorflow,切换为TensorFlow的CPU版本)


点击同意并继续
如果不清楚要安装什么,那么请勾选精简

勾选精简,然后点击下一步
等待安装完成
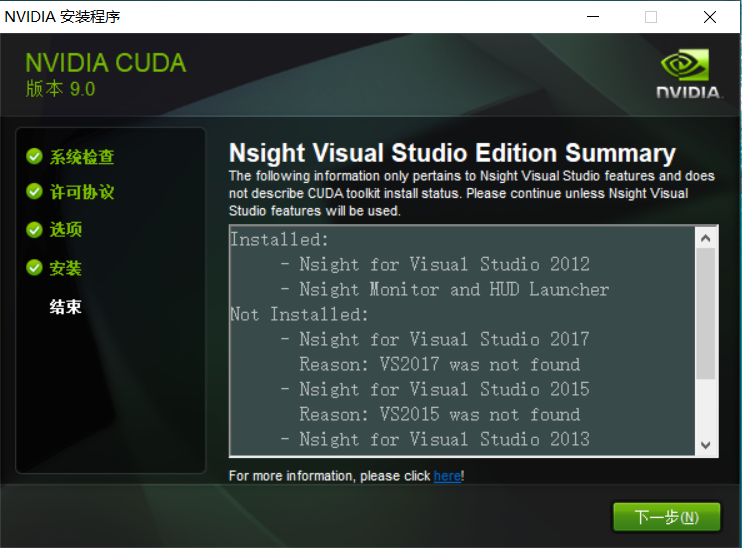
选择 下一步
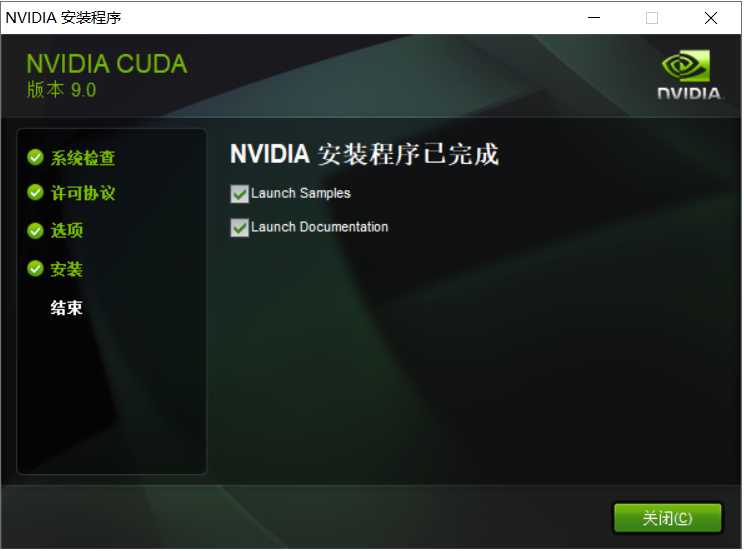
全部勾选,点击关闭
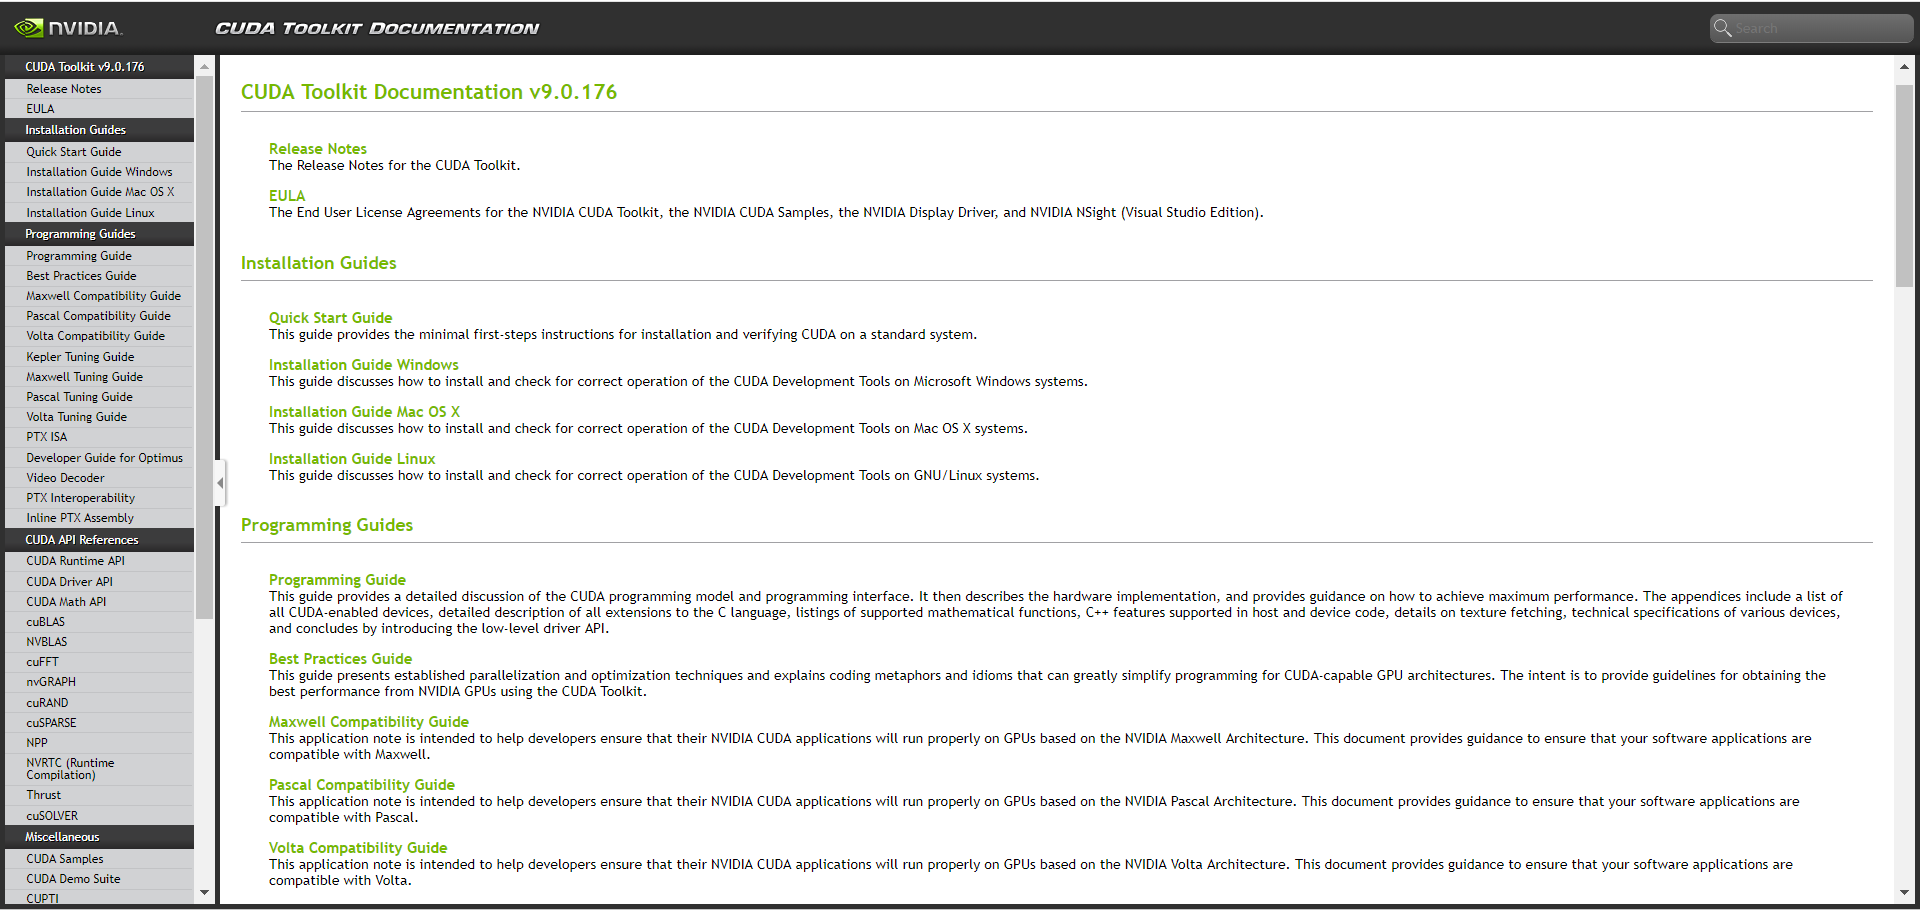
file:///C:/Program%20Files/NVIDIA%20GPU%20Computing%20Toolkit/CUDA/v9.0/doc/html/index.html file:///C:/Program%20Files/NVIDIA%20GPU%20Computing%20Toolkit/CUDA/v10.0/doc/html/index.html
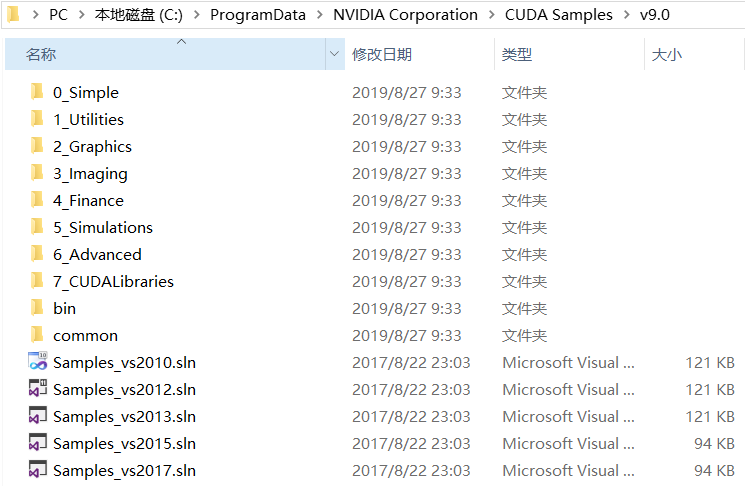
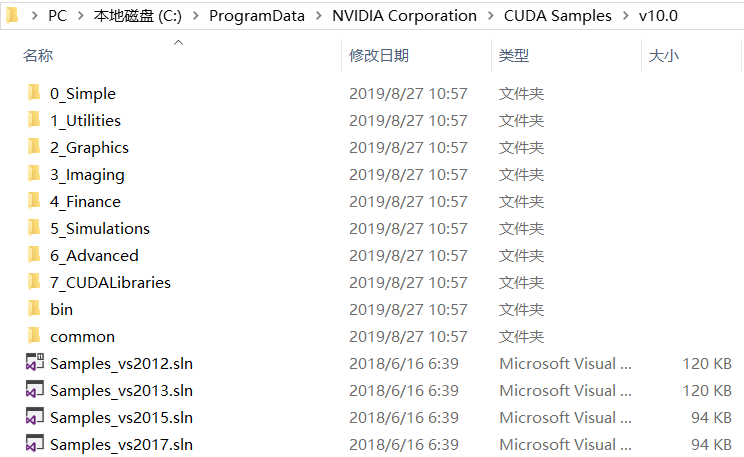
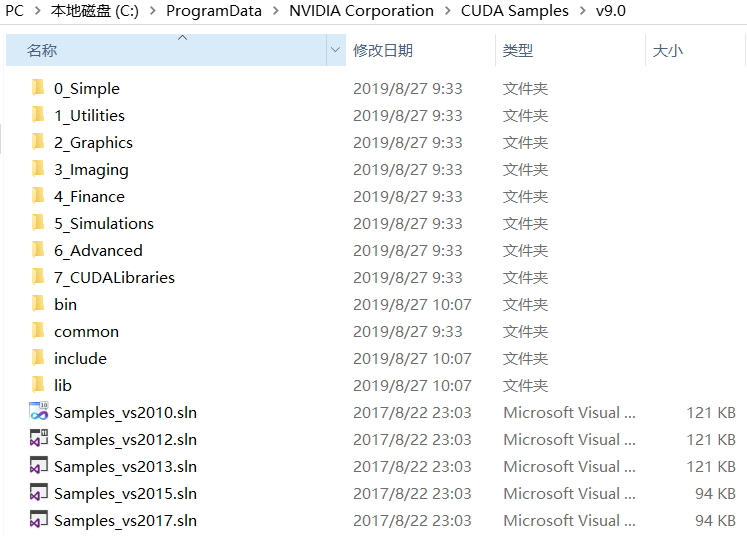
添加环境变量CUDA_PATH=C:ProgramDataNVIDIA CorporationCUDA Samplesv9.0 / C:ProgramDataNVIDIA CorporationCUDA Samplesv10.0
cuDNN配置
对于tensorflow而言,真正实现加速的是cuDNN,然后cuDNN调用的是CUDA显卡驱动 - 要配置cuDNN模块
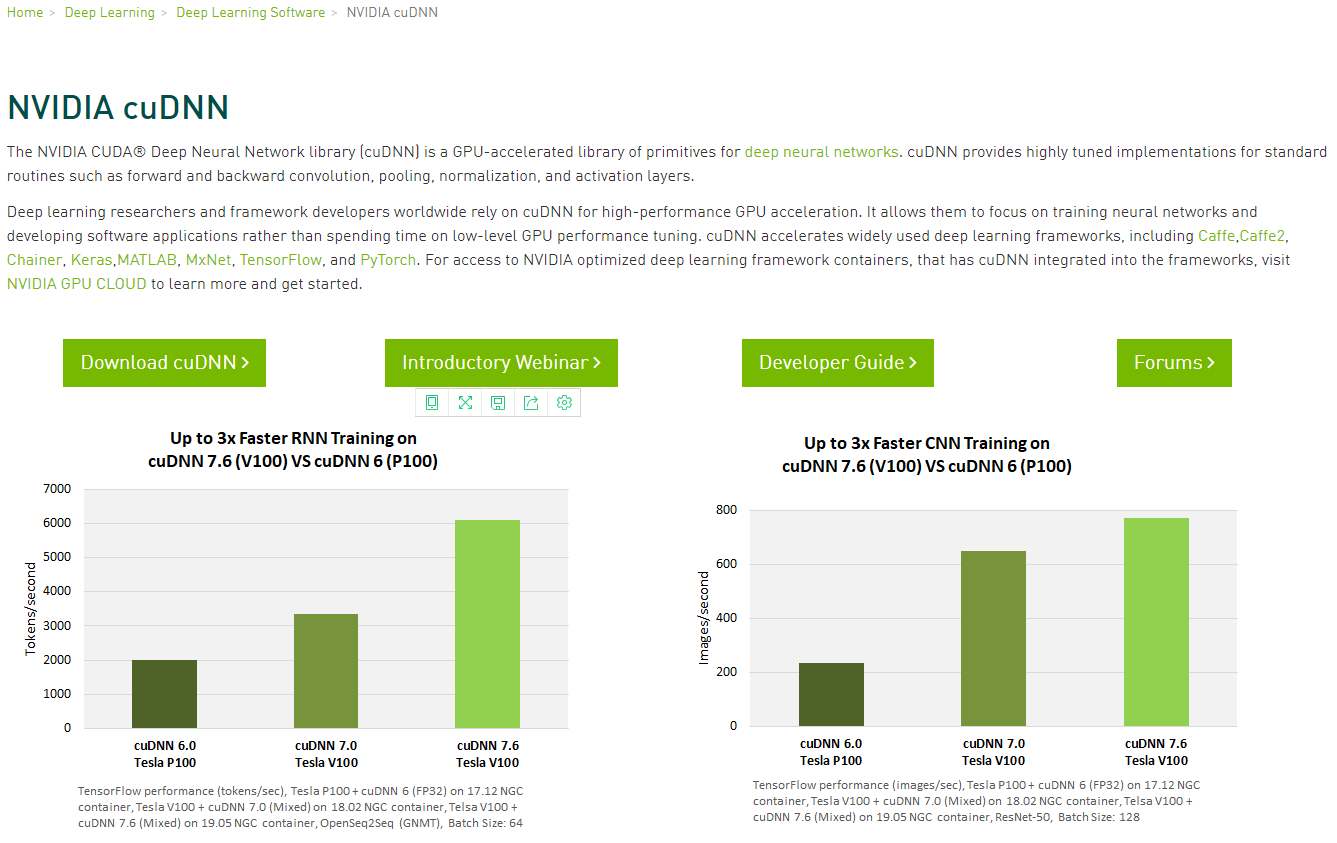
cuDNN的全称为NVIDIA CUDA® Deep Neural Network library,是NVIDIA专门针对深度神经网络(Deep Neural Networks)中的基础操作而设计基于GPU的加速库。cuDNN为深度神经网络中的标准流程提供了高度优化的实现方式,例如convolution、pooling、normalization以及activation layers的前向以及后向过程。
cuDNN只是NVIDIA深度神经网络软件开发包中的其中一种加速库。https://developer.nvidia.com/deep-learning-software全面介绍了NVIDIA深度神经网络加速库中的其他包
1)下载 - https://developer.nvidia.com/cudnn
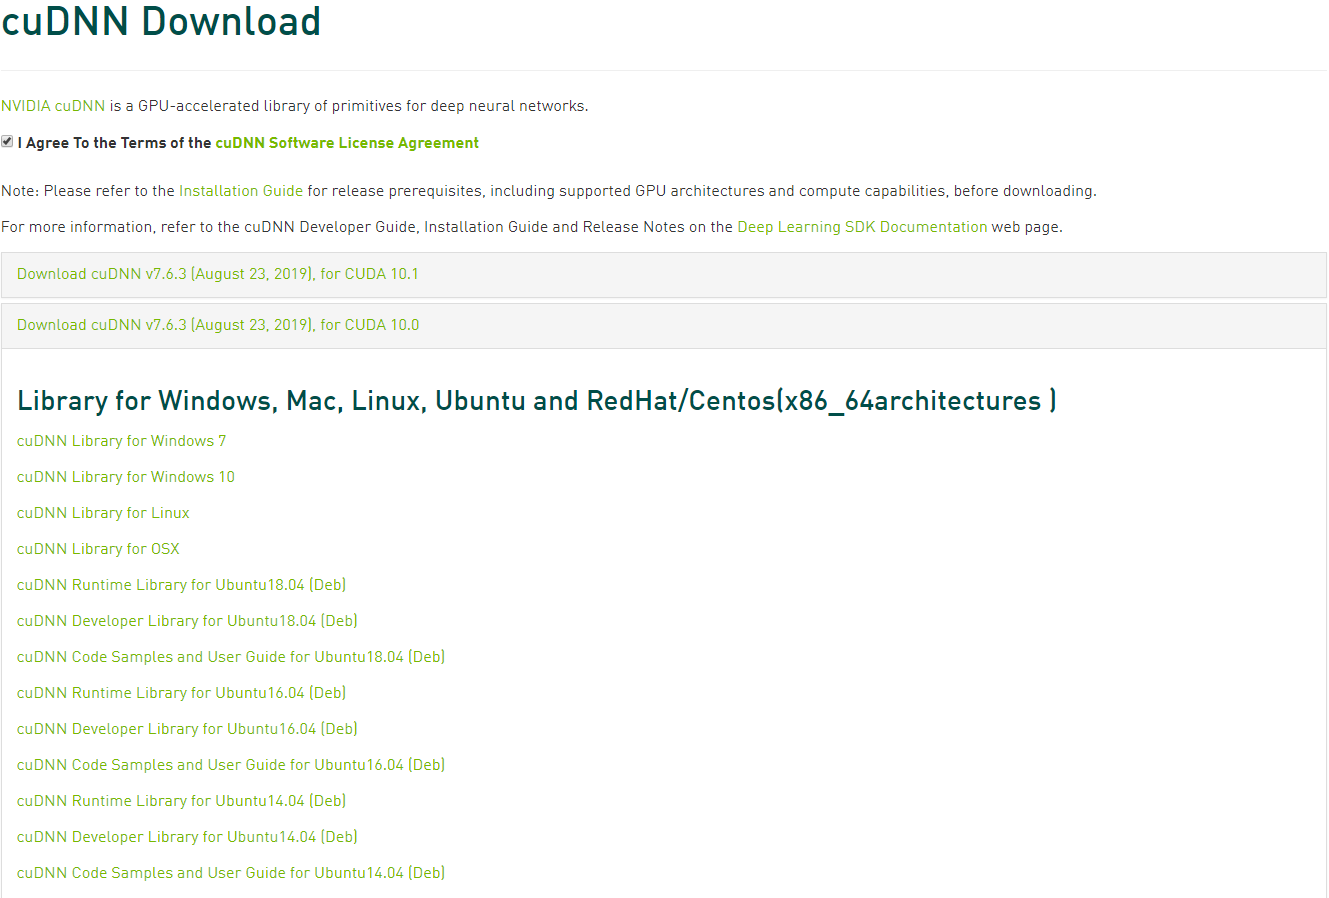
点击Download cuDNN(需要注册/登录 - 支持微信/QQ登录 - 邮箱验证)

勾选I Agree(下载前填写一份调查即可访问下载页面)
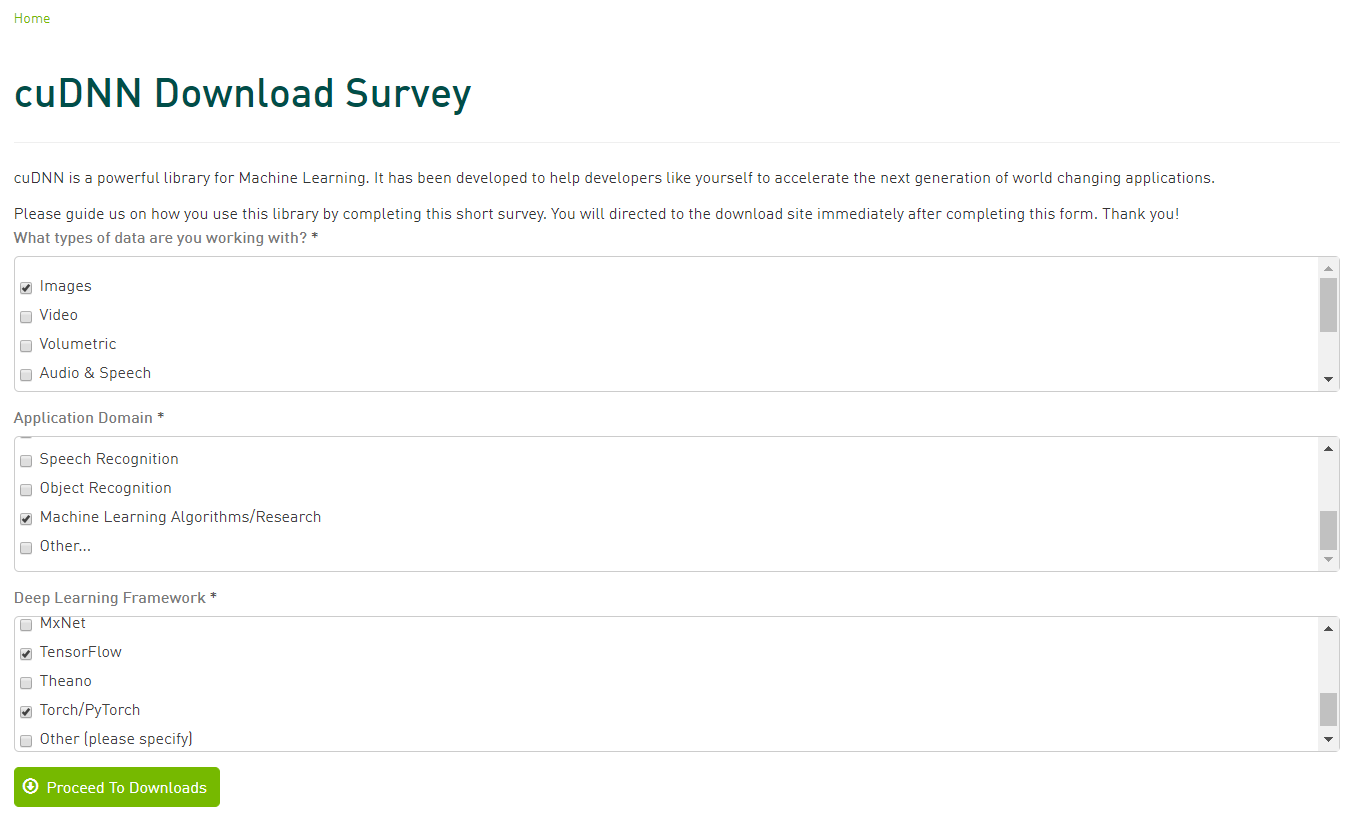
点击Proceed To Downloads(下载cuDNN相应版本的压缩包)
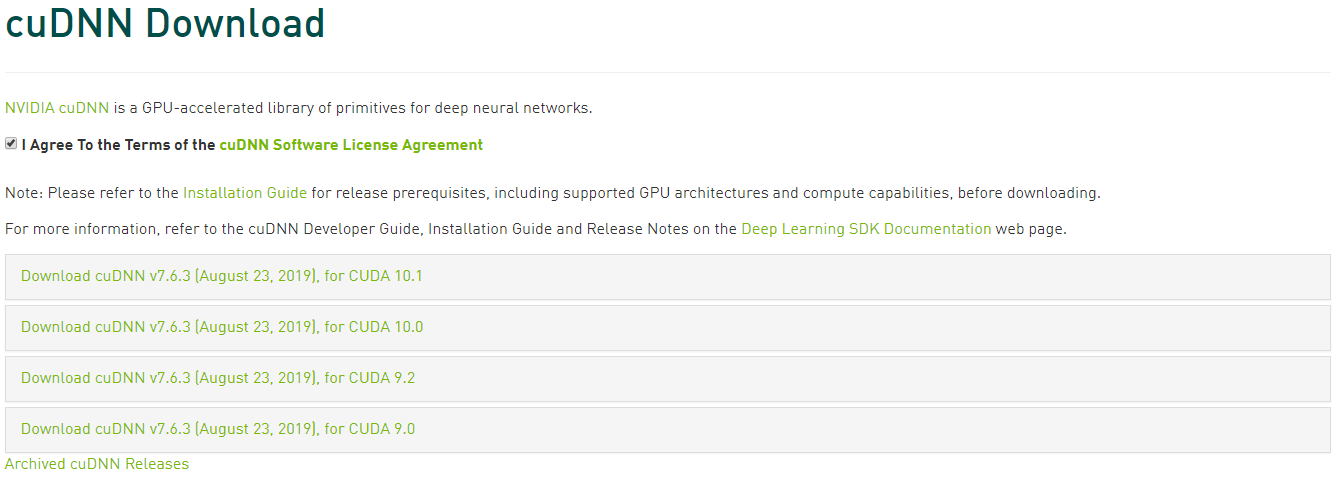
选择 Download cuDNN v7.6.3 (August 23, 2019), for CUDA 9.0 / Download cuDNN v7.6.3 (August 23, 2019), for CUDA 10.0
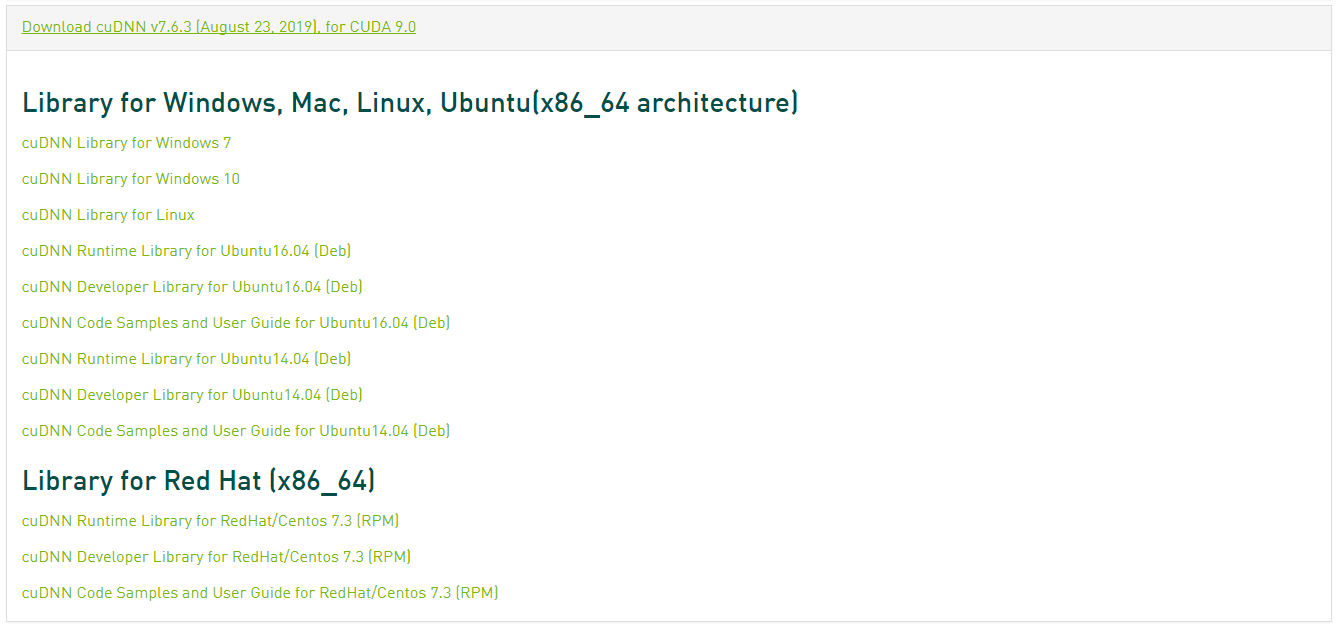
下载 cuDNN Library for Windows 10
解压,得到解压后的文件夹名cuda,文件夹中包含三个文件夹:一个为include,另一个为lib64,还有一个是bin,将三个文件复制到CUDA_PATH对应的CUDA安装目录下
添加环境变量(将解压后的文件中的bin和lib/x64文件夹关联到环境变量的path全局变量中):

![]()
检测
# 运行tensorflow-gpu
#coding=utf-8
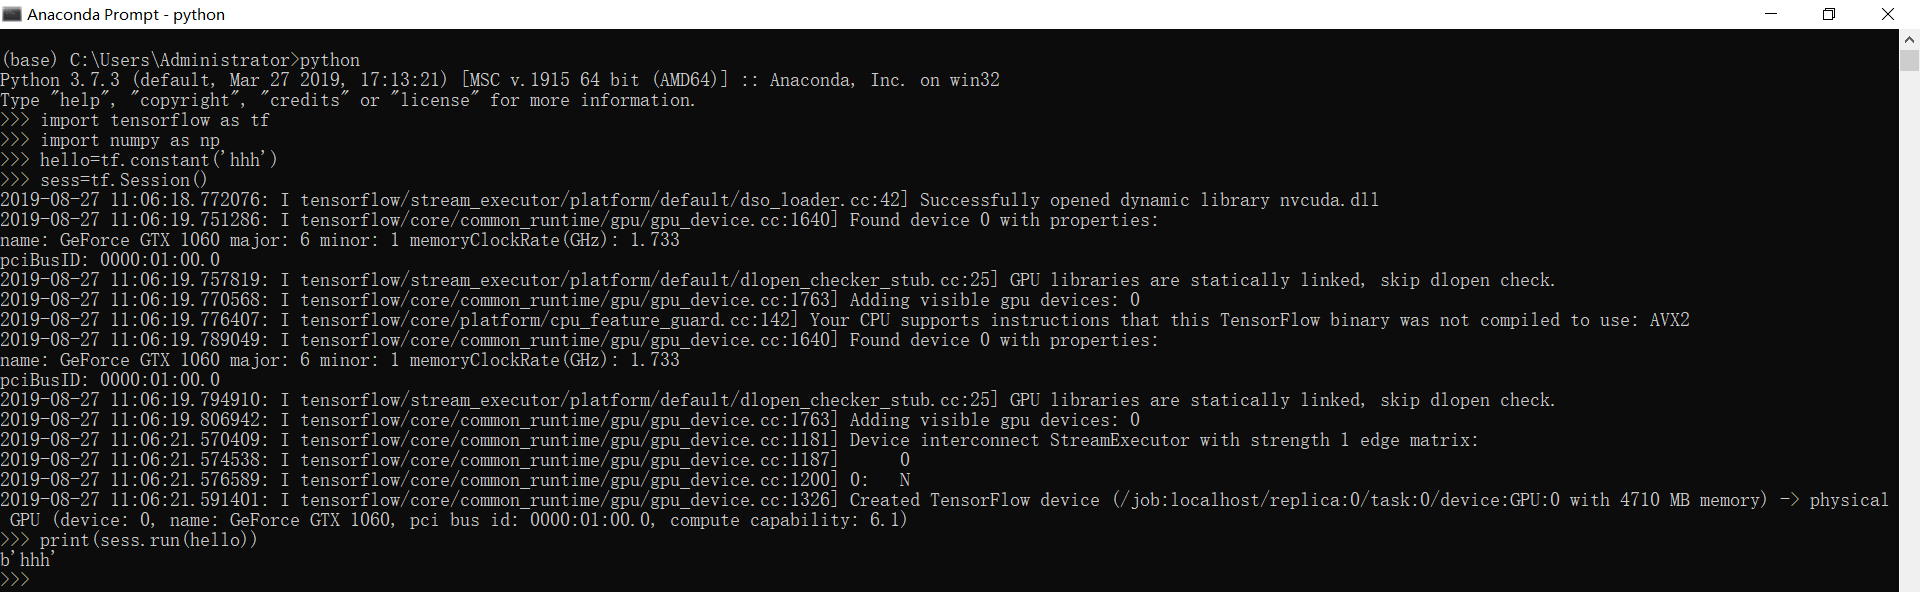
import tensorflow as tf
import numpy as np
hello=tf.constant('hhh')
sess=tf.Session()
print (sess.run(hello))
如果运行没有报错,即表示安装成功!
查看GPU-ID
CMD输入:
nvidia-smi
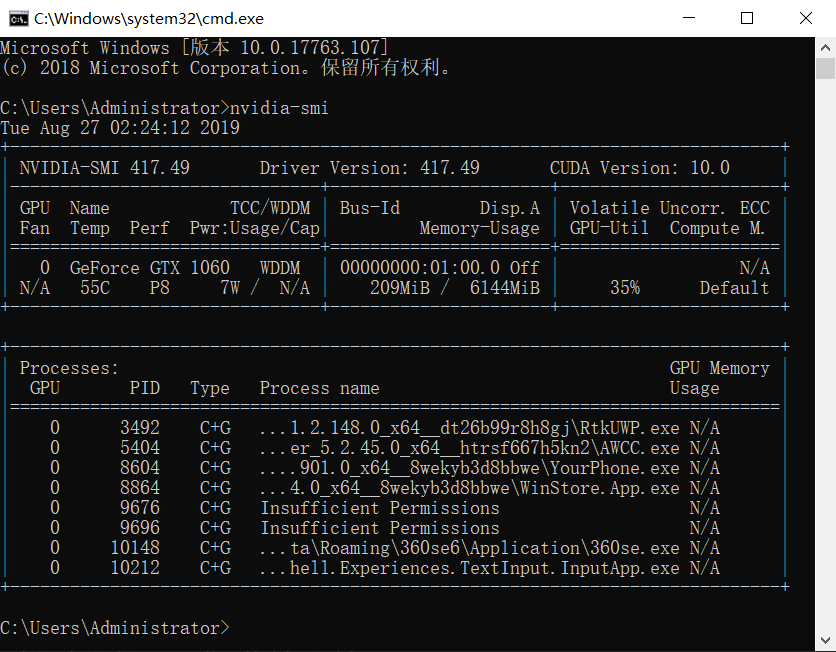
观察到存在序号为0的GPU ID
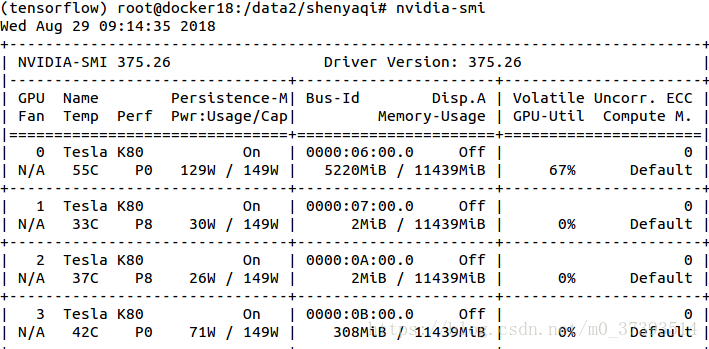
观察到存在序号为0、1、2、3的GPU ID
在终端运行代码时指定GPU
如果电脑有多个GPU,Tensorflow默认全部使用。如果想只使用部分GPU,可以设置CUDA_VISIBLE_DEVICES
命令行输入:
# 指定采用1号GPU运行*.py
CUDA_VISIBLE_DEVICES=1 python *.py
Environment Variable Syntax      Results

CUDA_VISIBLE_DEVICES=1           Only device 1 will be seen
CUDA_VISIBLE_DEVICES=0,1         Devices 0 and 1 will be visible
CUDA_VISIBLE_DEVICES="0,1"       Same as above, quotation marks are optional
CUDA_VISIBLE_DEVICES=0,2,3       Devices 0, 2, 3 will be visible; device 1 is masked
CUDA_VISIBLE_DEVICES=""          No GPU will be visible
在Python代码中指定GPU
import os
os.environ["CUDA_DEVICE_ORDER"] = "PCI_BUS_ID"
os.environ["CUDA_VISIBLE_DEVICES"] = "0" # 选择ID为0的GPU
import os
os.environ["CUDA_VISIBLE_DEVICES"] = "2"
# 通过ID选择GPU
def selectGpuById(id):
    os.environ["CUDA_DEVICE_ORDER"] = "PCI_BUS_ID"
    os.environ["CUDA_VISIBLE_DEVICES"] = "{}".format(id)
如果存在多个GPU,需要明确op操作在哪个GPU上调用 - 可以使用with ... Device语句明确指定那个CPU或GPU将被调用:
with tf.Session() as ses:
    with tf.device("/gpu:1"):
        matrix1=tf.constant([[3.,3.]])
        matrix2=tf.constant([[2.],[2.]])
        product=tf.matmul(matrix1,matrix2)
| 字符 | 对应的操作 |
|---|---|
"/cpu:0" |
The CPU of your machine |
"/gpu:0" |
The GPU of yout machine ,if you have one |
查看TensorFlow是CPU还是GPU版本
Python环境中输入:
import numpy
import tensorflow as tf
a = tf.constant([1.0, 2.0, 3.0, 4.0, 5.0, 6.0], shape=[2, 3], name='a')
b = tf.constant([1.0, 2.0, 3.0, 4.0, 5.0, 6.0], shape=[3, 2], name='b')
c = tf.matmul(a, b)
sess = tf.Session(config=tf.ConfigProto(log_device_placement=True))
print(sess.run(c))
# 显示详细信息
Device mapping:
/job:localhost/replica:0/task:0/device:GPU:0 -> device: 0, name: GeForce GTX 1060, pci bus id: 0000:01:00.0, compute capability: 6.1
2019-08-27 11:08:16.462966: I tensorflow/core/common_runtime/direct_session.cc:296] Device mapping:
MatMul: (MatMul): /job:localhost/replica:0/task:0/device:GPU:0
/job:localhost/replica:0/task:0/device:GPU:0 -> device: 0, name: GeForce GTX 1060, pci bus id: 0000:01:00.0, compute capability: 6.1
a: (Const): /job:localhost/replica:0/task:0/device:GPU:0
b: (Const): /job:localhost/replica:0/task:0/device:GPU:0
2019-08-27 11:08:16.463885: I tensorflow/core/common_runtime/placer.cc:54] MatMul: (MatMul)/job:localhost/replica:0/task:0/device:GPU:0
2019-08-27 11:08:16.464145: I tensorflow/core/common_runtime/placer.cc:54] a: (Const)/job:localhost/replica:0/task:0/device:GPU:0
2019-08-27 11:08:16.464394: I tensorflow/core/common_runtime/placer.cc:54] b: (Const)/job:localhost/replica:0/task:0/device:GPU:0
[[22. 28.]
 [49. 64.]]
禁止使用GPU
CUDA_VISIBLE_DEVICES=""
设置Tensorflow使用的显存大小
(1)定量设置显存
默认tensorflow是使用GPU尽可能多的显存。可以通过下面的方式,来设置使用的GPU显存:
# 分配给Tensorflow的GPU显存大小为:GPU实际显存*0.7
gpu_options = tf.GPUOptions(per_process_gpu_memory_fraction=0.7)
sess = tf.Session(config=tf.ConfigProto(gpu_options=gpu_options))
(2)按需设置显存
# 如果想按需分配,可以使用allow_growth参数
gpu_options = tf.GPUOptions(allow_growth=True)
sess = tf.Session(config=tf.ConfigProto(gpu_options=gpu_options))
限制GPU使用率
Tensorflow为了加速代码的运行速率,在运行的时候会占用一切能用的GPU资源,导致其他程序无法使用GPU
采用tf.ConfigProto(),在创建session的时候对GPU使用率进行参数配置
- tf.ConfigProto(log_device_placement=True):记录设备的指派情况(运行时,获取操作或张量在哪个设备上运行,在终端输出指派的情况)
- tf.ConfigProto(allow_soft_placement=True):自动选择适合的可用的设备(无需指派)
限制代码的GPU使用 - 存在两种限制方法:
(1)第一种是代码在运行的时候动态的申请资源,需要多少拿多少
# 使用最小的GPU资源
config = tf.ConfigProto()
config.gpu_options.allow_growth = True
self.sess=tf.Session(config=config)
(2)第二种是限制GPU的使用率
config = tf.ConfigProto()
config.gpu_options.per_process_gpu_memory_fraction = 0.4 # 占用GPU40%的显存
session = tf.Session(config=config)
Keras多GPU训练
Keras 2.X版本后可以很方便的支持使用多GPU进行训练了,使用多GPU可以提高我们的训练过程,比如加速和解决内存不足问题。有多张GPU卡可用时,使用TnesorFlow后端。
多GPU其实分为两种使用情况:
- 数据并行
- 设备并行
数据并行
数据并行将目标模型在多个设备上各复制一份,并使用每个设备上的复制品处理整个数据集的不同部分数据。Keras在 keras.utils.multi_gpu_model 中提供有内置函数,该函数可以产生任意模型的数据并行版本,最高支持在8片GPU上并行。
from keras.utils import multi_gpu_model

# Replicates `model` on 8 GPUs.
# This assumes that your machine has 8 available GPUs.
parallel_model = multi_gpu_model(model, gpus=8)
parallel_model.compile(loss='categorical_crossentropy', optimizer='rmsprop')

# This `fit` call will be distributed on 8 GPUs.
# Since the batch size is 256, each GPU will process 32 samples.
parallel_model.fit(x, y, epochs=20, batch_size=256)
数据并行利用多块GPU同时训练多个batch数据,运行在每块GPU上的模型为同一个神经网络,网络结构完全一样,并且共享模型参数。
from keras.utils.training_utils import multi_gpu_model   #导入keras多GPU函数

model = get_model()
parallel_model = multi_gpu_model(model, gpus=2) # 设置使用2个gpu,该句放在模型compile之前
parallel_model.compile(loss='categorical_crossentropy', optimizer=Adam(), metrics=['accuracy'])
hist = parallel_model.fit(x_train, y_train, batch_size=batch_size, epochs=epochs_num, validation_data=(x_test, y_test), verbose=1, callbacks=callbacks)
还可以指定要哪几个GPU来跑:
import os
os.environ["CUDA_VISIBLE_DEVICES"] = "3,5"
使用命令“nvidia-smi”可以查看各GPU的使用情况和序号,上面代码就是指定用序号为3和5的两个GPU来跑训练。
报错1:ValueError: Variable batch_normalization_1/moving_mean/biased already exists, disallowed. Did you mean to set reuse=True in VarScope? Originally defined at:
解决:使用单GPU训练的时候没有问题,改成多GPU后出现这个问题。这个问题好解决,将Tensorflow升级到1.4即可。
报错2:TypeError: can't pickle ...(different text at different situation) objects
解决:查找资料后,发现可能源于callbacks.ModelCheckpoint() 并进行多 gpu 并行计算时,使用姿势不对导致callbacks 函数报错。在代码中为了保存最优的训练模型,加了这个callback:
checkpoint = ModelCheckpoint(filepath='./cifar10_resnet_ckpt.h5', monitor='val_acc', verbose=1,save_best_only=True)
而在改为多GPU训练后,每次回调存储的模型变成了parallel_model,这会导致报错,只需要改成依然保存原本的model即可,所以需要改一下:
class ParallelModelCheckpoint(ModelCheckpoint):
    def __init__(self,model,filepath, monitor='val_loss', verbose=0,
                 save_best_only=False, save_weights_only=False,
                 mode='auto', period=1):
        self.single_model = model
        super(ParallelModelCheckpoint,self).__init__(filepath, monitor, verbose,save_best_only, save_weights_only,mode, period)

    def set_model(self, model):
        super(ParallelModelCheckpoint,self).set_model(self.single_model)

checkpoint = ParallelModelCheckpoint(model, filepath='./cifar10_resnet_ckpt.h5', monitor='val_acc', verbose=1, save_best_only=True) # 解决多GPU运行下保存模型报错的问题
其余的不变,也就是改为依然存储原本的model即可。
设备并行
是在不同设备上运行同一个模型的不同部分,当模型含有多个并行结构,例如含有两个分支时,这种方式很适合。 这种并行方法可以通过使用TensorFlow device scopes实现,下面是一个例子:
# Model where a shared LSTM is used to encode two different sequences in parallel
input_a = keras.Input(shape=(140, 256))
input_b = keras.Input(shape=(140, 256))

shared_lstm = keras.layers.LSTM(64)

# Process the first sequence on one GPU
with tf.device_scope('/gpu:0'):
    encoded_a = shared_lstm(tweet_a)
# Process the next sequence on another GPU
with tf.device_scope('/gpu:1'):
    encoded_b = shared_lstm(tweet_b)

# Concatenate results on CPU
with tf.device_scope('/cpu:0'):
    merged_vector = keras.layers.concatenate([encoded_a, encoded_b], axis=-1)
多任务输出数据并行
在Keras版的Faster-RCNN,它由多个输出支路,也就是多个loss,在网络定义的时候一般会给命名,然后编译的时候找到不同支路layer的名字即可,就像这样:
model.compile(optimizer=optimizer,
              loss={'main_output': jaccard_distance_loss, 'aux_output': 'binary_crossentropy'},
              metrics={'main_output': jaccard_distance_loss, 'aux_output': 'acc'},
              loss_weights={'main_output': 1., 'aux_output': 0.5})
其中main_output和aux_output就是认为定义的layer name,但是如果用了keras.utils.training_utils.multi_gpu_model()以后,名字就自动换掉了,变成默认的concatenate_1, concatenate_2等等,因此你需要先model.summary()一下,打印出来网络结构,然后弄明白哪个输出代表哪个支路,然后重新编译网络,如下:
from keras.optimizers import Adam, RMSprop, SGD
model.compile(optimizer=RMSprop(lr=0.045, rho=0.9, epsilon=1.0),
              loss={'concatenate_1': jaccard_distance_loss, 'concatenate_2': 'binary_crossentropy'},
              metrics={'concatenate_1': jaccard_distance_loss, 'concatenate_2': 'acc'},
              loss_weights={'concatenate_1': 1., 'concatenate_2': 0.5})
而且在Keras版的Faster-RCNN中,每个batch里,对RPN进行训练,测试后的结果作为检测网络的输入,来训练,最后把2个模型对参数的训练结果作为一个模型保存下来。
分布式
Keras的分布式是利用TensorFlow实现的,要想完成分布式的训练,你需要将Keras注册在连接一个集群的TensorFlow会话上:
server = tf.train.Server.create_local_server()
sess = tf.Session(server.target)

from keras import backend as K
K.set_session(sess)