JMH(Java Microbenchmark Harness)
官方地址:http://openjdk.java.net/projects/code-tools/jmh/
添加依赖,官方地址:https://mvnrepository.com/artifact/org.openjdk.jmh/jmh-core
<!-- https://mvnrepository.com/artifact/org.openjdk.jmh/jmh-core -->
<dependency>
    <groupId>org.openjdk.jmh</groupId>
    <artifactId>jmh-core</artifactId>
    <version>1.21</version>
</dependency>
添加依赖,官方地址:https://mvnrepository.com/artifact/org.openjdk.jmh/jmh-generator-annprocess
<!-- https://mvnrepository.com/artifact/org.openjdk.jmh/jmh-generator-annprocess -->
<dependency>
    <groupId>org.openjdk.jmh</groupId>
    <artifactId>jmh-generator-annprocess</artifactId>
    <version>1.21</version>
    <scope>test</scope>
</dependency>
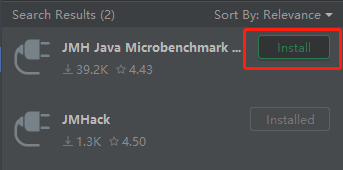
IDEA安装JMH插件和配置

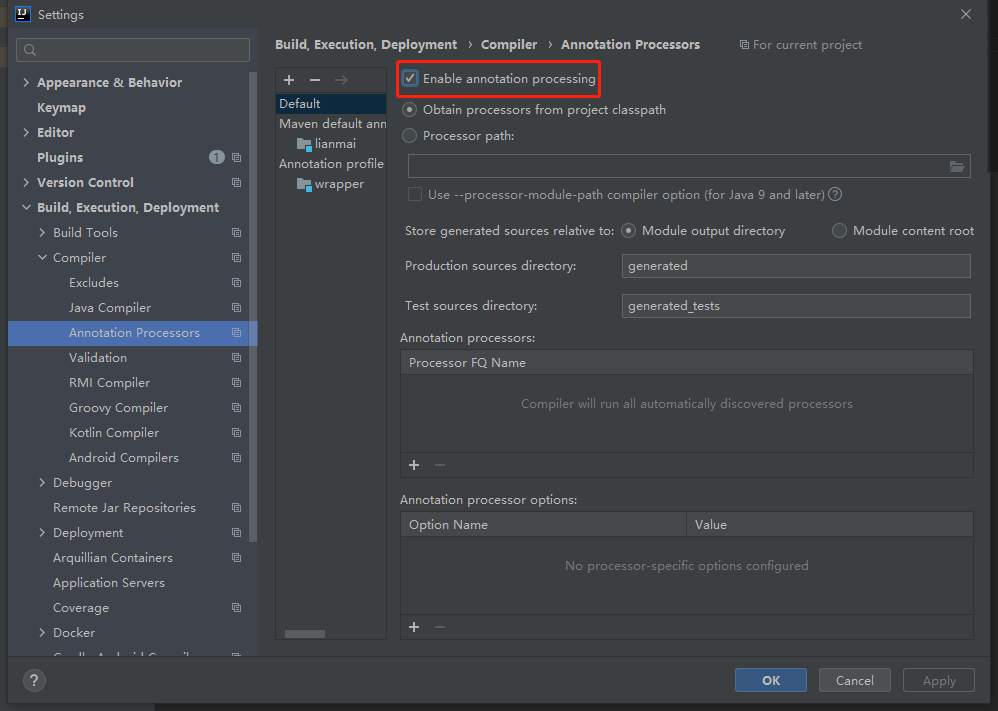
允许JMH对注解进行处理

添加注解测试
public class Test{
  @Benchmark
  @Warmup(iterations = 1, time = 3)
  @Fork(5)
  @BenchmarkMode(Mode.Throughput)
  @Measurement(Iterations = 1, time = 3)
  public void testCode(){
    // coding
  }
}
- benchmark
指定测试哪段代码
- warmup
预热,由于JVM中对于特定代码会存在优化(本地化),预热对于测试结果很重要
- fork
指定线程数
- benchmarkmode
基准测试的模式
- measurement
总共执行多少次
Disruptor
官方地址:http://lmax-exchange.github.io/disruptor/
github地址:https://github.com/LMAX-Exchange/disruptor
特点
对比ConcurrentLinkedQueue
- 链表实现
JDK中没有ConcurrentArrayQueue
Disruptor是数组实现的
- 无锁,高并发,使用环形Buffer,直接覆盖(不用清除)旧的数据,降低GC频率
- 实现了基于事件的生产者消费者模式(观察者模式)
RingBuffer
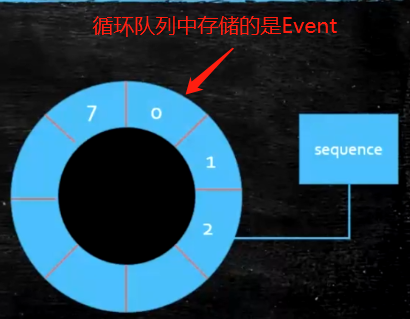
- 环形队列
- RingBuffer的序号,指向下一个可用的元素
采用数组实现,没有首尾指针
对比ConcurrentLinkedQueue,用数组实现的速度更快

假如长度为8,当添加到第12个元素的时候在哪个序号上呢?用12%8决定
当Buffer被填满的时候到底是覆盖还是等待,由Producer决定
长度设为2的n次幂,利于二进制计算,例如:12%8 = 12 & (8 - 1) pos = num & (size -1)
Disruptor开发步骤
定义Event - 队列中需要处理的元素
定义Event工厂,用于填充队列
- 效率:disruptor初始化的时候,会调用Event工厂,对ringBuffer进行内存的提前分配
- GC频率会降低
定义EventHandler(消费者),处理容器中的元素
事件发布模板
long sequence = ringBuffer.next();  // Grab the next sequence
try {
    LongEvent event = ringBuffer.get(sequence); // Get the entry in the Disruptor
    // for the sequence
    event.set(8888L);  // Fill with data
} finally {
    ringBuffer.publish(sequence);
}
使用EventTranslator发布事件
EventTranslator<LongEvent> translator1 = new EventTranslator<LongEvent>() {
  @Override
  public void translateTo(LongEvent event, long sequence) {
  event.set(8888L);
  }
};

ringBuffer.publishEvent(translator1);

//===============================================================
EventTranslatorOneArg<LongEvent, Long> translator2 = new EventTranslatorOneArg<LongEvent, Long>() {
    @Override
    public void translateTo(LongEvent event, long sequence, Long l) {
        event.set(l);
    }
};

ringBuffer.publishEvent(translator2, 7777L);

//===============================================================
EventTranslatorTwoArg<LongEvent, Long, Long> translator3 = new EventTranslatorTwoArg<LongEvent, Long, Long>() {
    @Override
    public void translateTo(LongEvent event, long sequence, Long l1, Long l2) {
        event.set(l1 + l2);
    }
};

ringBuffer.publishEvent(translator3, 10000L, 10000L);

//===============================================================
EventTranslatorThreeArg<LongEvent, Long, Long, Long> translator4 = new EventTranslatorThreeArg<LongEvent, Long, Long, Long>() {
    @Override
    public void translateTo(LongEvent event, long sequence, Long l1, Long l2, Long l3) {
        event.set(l1 + l2 + l3);
    }
};

ringBuffer.publishEvent(translator4, 10000L, 10000L, 1000L);

//===============================================================
EventTranslatorVararg<LongEvent> translator5 = new EventTranslatorVararg<LongEvent>() {

    @Override
    public void translateTo(LongEvent event, long sequence, Object... objects) {
        long result = 0;
        for(Object o : objects) {
            long l = (Long)o;
            result += l;
        }
        event.set(result);
    }
};

ringBuffer.publishEvent(translator5, 10000L, 10000L, 10000L, 10000L);
使用Lamda表达式
package com.test.disruptor;

import com.lmax.disruptor.RingBuffer;
import com.lmax.disruptor.dsl.Disruptor;
import com.lmax.disruptor.util.DaemonThreadFactory;

public class Main03
{
    public static void main(String[] args) throws Exception
    {
        // Specify the size of the ring buffer, must be power of 2.
        int bufferSize = 1024;

        // Construct the Disruptor
        Disruptor<LongEvent> disruptor = new Disruptor<>(LongEvent::new, bufferSize, DaemonThreadFactory.INSTANCE);

        // Connect the handler
        disruptor.handleEventsWith((event, sequence, endOfBatch) -> System.out.println("Event: " + event));

        // Start the Disruptor, starts all threads running
        disruptor.start();

        // Get the ring buffer from the Disruptor to be used for publishing.
        RingBuffer<LongEvent> ringBuffer = disruptor.getRingBuffer();


        ringBuffer.publishEvent((event, sequence) -> event.set(10000L));

        System.in.read();
    }
}
ProducerType生产者线程模式
ProducerType有两种模式
- Producer.MULTI,默认,表示在多线程模式下产生sequence
- Producer.SINGLE
如果确认是单线程生产者,那么可以指定SINGLE,效率会提升
如果是多个生产者(多线程),但模式指定为SINGLE,会出问题
等待策略
- BlockingWaitStrategy:通过线程阻塞的方式,等待生产者唤醒,被唤醒后,再循环检查依赖的sequence是否已经消费
- BusySpinWaitStrategy:线程一直自旋等待,可能比较耗cpu
- LiteBlockingWaitStrategy:线程阻塞等待生产者唤醒,与BlockingWaitStrategy相比,区别在signalNeeded.getAndSet
- 如果两个线程同时访问,一个访问waitfor,一个访问signalAll时,可以减少lock加锁次数
- LiteTimeoutBlockingWaitStrategy:与LiteBlockingWaitStrategy相比,设置了阻塞时间,超过时间后抛异常
- PhasedBackoffWaitStrategy:根据时间参数和传入的等待策略来决定使用哪种等待策略
- TimeoutBlockingWaitStrategy:相对于BlockingWaitStrategy来说,设置了等待时间,超过后抛异常
- YieldingWaitStrategy:尝试100次,然后Thread.yield()让出cpu
- SleepingWaitStrategy:sleep
消费者异常处理
- 默认,disruptor.setDefaultExceptionHandler()
- 覆盖,disruptor.handleExceptionFor().with()