1. 效果图
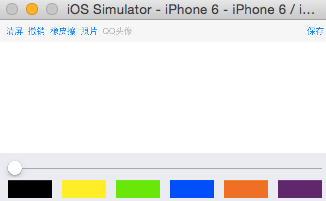
2. 用一个View来描述画图板,给画图板添加拖动的手势
// 从xib中加载- (void)awakeFromNib{[self setUpGesture];}// 代码创建- (instancetype)initWithFrame:(CGRect)frame{if (self = [super initWithFrame:frame]) {[self setUpGesture];}return self;}// 初始化添加拖动手势- (void)setUpGesture{UIPanGestureRecognizer *pan = [[UIPanGestureRecognizer alloc] initWithTarget:self action:@selector(pan:)];[self addGestureRecognizer:pan];self.color = [UIColor blackColor];self.width = 1;}
3. 监听手势方法
1> 判断拖动开始拖动设置为路径的的起始点,添加路径并保存路径,将当前路径添加到数组中
设置路径的相关属性(颜色/宽度/圆角)
2> 拖动过程中的点添加直线重绘
// 监听手势方法- (void)pan:(UIPanGestureRecognizer *)pan{// 获取当前触摸点CGPoint curP = [pan locationInView:self];if (pan.state == UIGestureRecognizerStateBegan) { // 开始拖动// 获取开始点CGPoint startP = curP;// 创建路径LDBezierPath *path = [[LDBezierPath alloc] init];self.path = path;[self.pathArray addObject:path];// 设置宽度[path setLineWidth:self.width];// 设置颜色[path setLineColor:self.color];// 设置圆角[path setLineJoinStyle:kCGLineJoinRound];[path setLineCapStyle:kCGLineCapRound];// 添加起始点[path moveToPoint:startP];} else if (pan.state == UIGestureRecognizerStateChanged) {// 添加直线[self.path addLineToPoint:curP];// 重绘[self setNeedsDisplay];}}
4. 绘制, 遍历数组中的路径,判断是否是图片,如果是图片则将图片绘制上去,反之为路径,直接绘制路径
// 绘制- (void)drawRect:(CGRect)rect {// 变量路径数组重绘for (LDBezierPath *path in self.pathArray) {if (path.class == [UIImage class]) {UIImage *image = (UIImage *)path;[image drawInRect:rect];NSLog(@"%@", image);} else {[path.lineColor set];[path stroke];}}}
5. 图片保存
// 保存- (void)save{if (self.pathArray.count) {// 1.开启位图上下文UIGraphicsBeginImageContextWithOptions(self.bounds.size, NO, 0);// 2.获取当前上下文CGContextRef ref = UIGraphicsGetCurrentContext();// 3.将view的layer渲染到位图上下文总[self.layer renderInContext:ref];// 4.获取位图上下文中的imageUIImage *image = UIGraphicsGetImageFromCurrentImageContext();// 5.关闭位图上下文UIGraphicsEndImageContext();// 6.将图片保存到相册UIImageWriteToSavedPhotosAlbum(image, self, @selector(image:didFinishSavingWithError:contextInfo:), nil);} else {[MBProgressHUD showError:@"没有图片可保存"];}}- (void)image:(UIImage *)image didFinishSavingWithError:(NSError *)error contextInfo:(void *)contextInfo{[MBProgressHUD showSuccess:@"保存成功"];}