一、简介
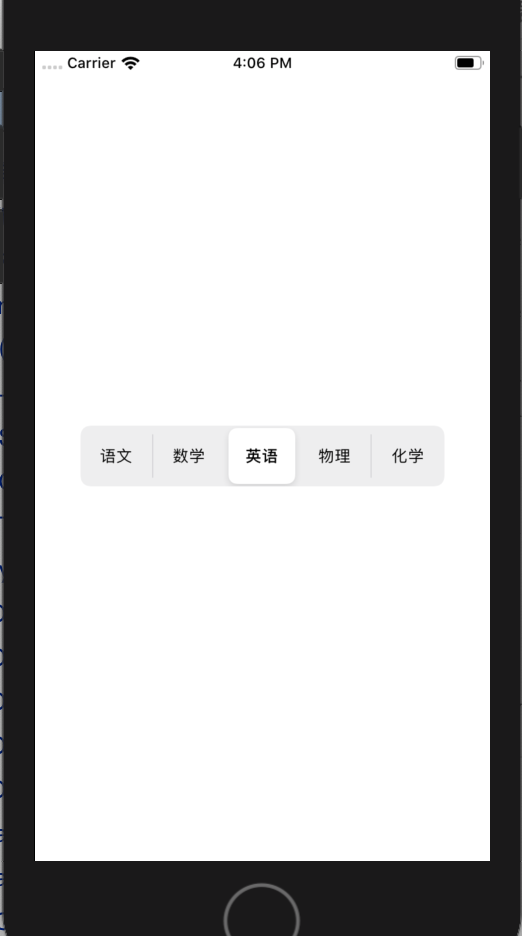
iOS中的UISegmentControl分段控件,可以设置筛选条件来更新视图或者用来切换控制器。同样地,在ReactNative中兼容iOS平台提供了一个SegmentedControlIOS组件。它的用法差不多,现在来看看。
二、API
SegmentedControlIOS组件既提供了属性,也提供了函数可用。示例如下:
//控件的细分按钮的标签文案,数组排列
values: PropTypes.arrayOf(PropTypes.string),

//选中的控件的某一个细分按钮标签
selectedIndex: PropTypes.number,

//用户点击细分按钮时调用的回调;传递段的值作为参数
onValueChange: PropTypes.func,

//用户点击细分按钮时调用的回调;将事件作为参数传递
onChange: PropTypes.func,

//组件是否可以点击,默认为true
enabled: PropTypes.bool,

//组件的强调颜色 【不知为啥该属性不起作用了, 颜色被固定死了】
tintColor: PropTypes.string,

//如果为true,则选择细分不会在视觉上持久。 `onValueChange`回调仍将按预期工作。点击瞬间,选中状态会复原
momentary: PropTypes.bool
SegmentedControlIOS组件内部的高度默认28像素,示例如下:
//默认高度
var styles = StyleSheet.create({
  segmentedControl: {
    height: 28,
  },
});
三、使用
现在来简单使用一下,示例如下:
/**
 * Sample React Native App
 * https://github.com/facebook/react-native
 * @flow
 */

import React, { Component } from 'react';

import {
    AppRegistry,
    StyleSheet,
    View,
    SegmentedControlIOS
} from 'react-native';


export default class ReactNativeDemo extends Component {

    state = { selectedIndex:2 };

    render() {
        return (
            <View style={[styles.flex,styles.bgColor,styles.center]}>
                <SegmentedControlIOS
                    style={{ 300, height:50}}
                    values={["语文","数学","英语","物理","化学"]}
                    selectedIndex={this.state.selectedIndex}
                    onValueChange={ (value) => { console.log('value:'+value) }}
                    onChange={ (event) => { this.setState({selectedIndex: event.nativeEvent.selectedSegmentIndex}); }}
                    enabled={true}
                    tintColor={'#fa0a0f'}
                    momentary={false}
                />
            </View>
        );
    }
}

const styles = StyleSheet.create({
    flex: {
        flex: 1
    },
    bgColor: {
      backgroundColor: 'white'
    },
    center: {
        alignItems: 'center',
        justifyContent: 'center',
    }
});

AppRegistry.registerComponent('ReactNativeDemo', () => ReactNativeDemo);
2020-01-04 16:08:00.228 [info][tid:com.facebook.react.JavaScript] value:数学
2020-01-04 16:08:01.491 [info][tid:com.facebook.react.JavaScript] value:英语
2020-01-04 16:08:01.960 [info][tid:com.facebook.react.JavaScript] value:物理
2020-01-04 16:08:02.621 [info][tid:com.facebook.react.JavaScript] value:化学
2020-01-04 16:08:03.441 [info][tid:com.facebook.react.JavaScript] value:语文
