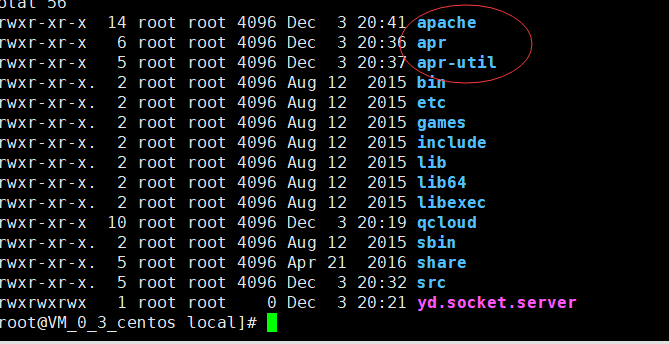
1.先进入/usr/local/中创建三个文件夹 apr apr-util apache
cd /usr/local目录
mkdir apr
mkdir apr-util
mkdir apache

2.再进入 src中 cd src
3.在 src中 下载apr-1.6.5 apr-util-1.6.1 httpd-2.4.37源码包
wget http://archive.apache.org/dist/apr/apr-1.6.5.tar.gz
wget http://archive.apache.org/dist/apr/apr-util-1.6.1.tar.gz
wget http://archive.apache.org/dist/httpd/httpd-2.4.37.tar.gz
4.分别解压它们
tar -zxvf apr-1.6.5.tar.gz
tar -zxvf apr-util-1.6.1.tar.gz
tar -zxvf httpd-2.4.37.tar.gz

5. 先不要急着安装,先确保它所依赖的库是否有,怎样查看软件是否安装(rpm -q xxx),如果没有安装依赖则进行安装(笔者一般安装依赖库直接使用yum 默认安装,这样在软件安装的时候就不需要知道依赖库的安装路径,省去不少麻烦)
需要安装的依赖包有 gcc expat-devel openssl-devel pcre pcre-devel

在src目录下 yum install gcc
yum install -y expat-devel
yum install openssl-devel
yum install -y pcre pcre-devel
yum install pcre-devel
6.接下来就是编译安装了,步骤四步: 下载wget --- 加压tar ------ 编译 make ----安装 make install
进入 apr-1.6.5目录中
cd apr-1.6.5
./configure --prefix=/usr/local/apr/
make && make install
(此时没有报任何error错误)
7. 退出apr-1.6.5目录,进入 apr-util-1.6.1目录中

cd apr-util-1.6.1
./configure --prefix=/usr/local/apr-util --with-apr=/usr/local/apr/
make && make install
(此时也没有任何error错误)
8.下面开始对Apache进行安装配置,可以使用

cd httpd-2.4.37
./configure --prefix=/usr/local/apache/ --with-apr=/usr/local/apr/ --with-apr-util=/usr/local/apr-util/ --enable-so --enable-ssl--enable-deflate=shared --enable-expires=shared --enable-rewrite=shared --enable-static-support
检查无误,然后开始编译安装
make && make install
9.等安装完以后进入到安装目录,开启apache服务
cd /usr/local/apache/bin/
./apachectl start
10. 哎,发现报错
AH00558: httpd: Could not reliably determine the server's fully qualified domain name, using localhost.localdomain. Set the 'ServerName' directive globally to suppress this message
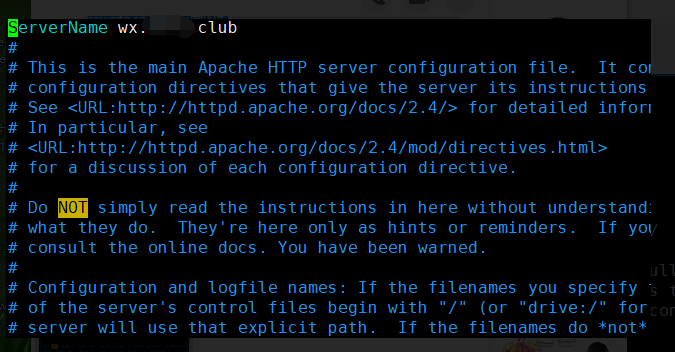
额,原来就是配置文件中没有serverName,那就在httpd.conf 中增加 ServerName
11. vim /usr/local/apache/conf/httpd.conf
#增加
ServerName wx.xxxx.club (就是增加域名)

12. 完了之后再重新启动apache,发现一切正常,然后我们访问下看看是否OK


当输入域名时显示it works! ,就表示apache源码安装就此完成,
记住 想要重启apache 必须切换到
cd /usr/local/apache/bin/ 目录
使用
./apachectl start 开启apache
./apachectl restart 重启apache
./apachectl configtest 检测apache配置文件语法是否正确

补充一下:
安装apr-1.6 rm cannot remove `libtoolT'报错时可以通过以下方式解决
:
1.vim configure
2.进入插入模式,寻找RM即( /RM='$RM' )修改为 RM='$RM -f'
3退出保存再次执行
本文出自——搬砖小伙子