参加学校的国创比赛的时候,我们小组的项目有一部分内容需要用到利用摄像头实现实时检测人脸的表情,因为最近都在看深度学习方面的相关知识,所以就自己动手实现了一下这个小Demo.参考网上的资料,发现大部分是使用CNN和DNN进行学习,经过本人亲自实践,我发现DNN的识别效果更佳~(楼主接下来就要讲的是基于DNN的模型,要是你对CNN的模型感兴趣,欢迎私戳楼主~)
所需环境:opencv + tensorflow1.8 + pycharm
代码以及模型的下载地址:https://github.com/tgpcai/Microexpression_recognition(如果喜欢请帮楼主点个start~)
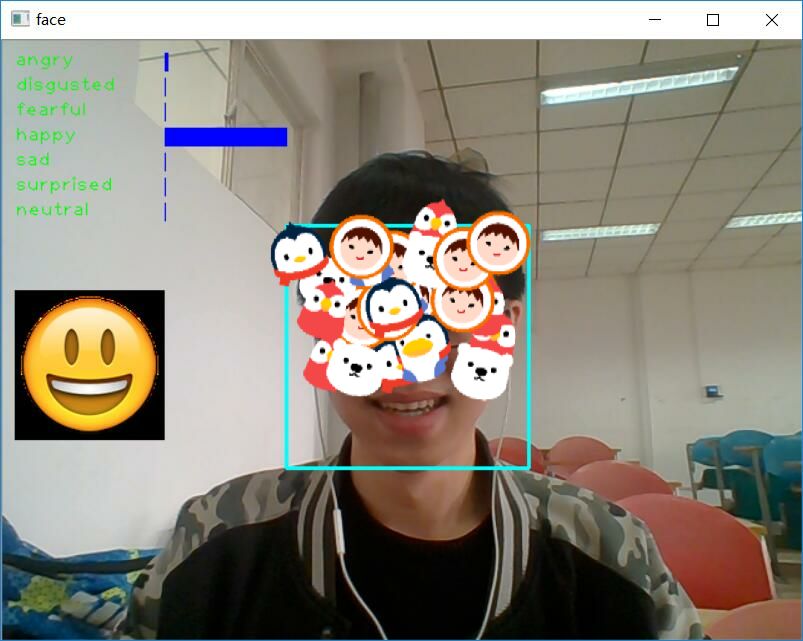
最后实现的结果图:
目录
1.数据集简介
2.代码实现
(0)实现Demo的代码组织结构
(1)数据预处理
(2)训练模型
(3)调用模型实现人脸微表情识别
3.个人遇坑以及总结
1.数据集简介
人脸表情识别程序所采用的数据集为FER2013(facial-expression-recognition 2013)以及中科院的微表情数据,该数据集需要在kaggle网
站上进行下载,下载地址为:https://www.kaggle.com/c/challenges-in-representation-learning-facial-expression-recognition-challenge/data

下载的数据是压缩文件,对其进行手动解压,解压后文件格式是csv,文件名为fer2013.csv,对这个文件进行提取可以得到三个文件,具体的提取过程会在后续进行介绍:

其中train文件的emotion一共有7种,csv文件中每个数字对应一种表情,7种表情包括:0 - 'angry', 1 - 'disgusted',2 - 'fearful', 3 - 'happy', 4 - 'sad', 5 - 'surprised', 6 - 'neutral'(这也是咱们能识别的表情)
打开train.csv文件每一行除了emotion的标记之外,还有一幅影像,只不过在csv文件里,影像用灰度值表示了,csv文件打开之后,里面的内容如下:

不过可能由于FER2013数据集的质量不太好,大部分模型的验证精度只有60%(如googleNet和AlexNet都只有63%)左右,好一点的可以到70%。我自己训练的模型验证经度只有55-56左右!
网上很多参考资料都把灰度值表示的影像变成了.jpg能看的图片,但实际上并不需要这样做,因为你把这灰度值的影像变为.jpg,后面还是需要经过一系列步骤在转换成灰度值,不过我也会贴出如何把这灰度值影响变为.jpg结尾的图片!
中科院的数据集如下:
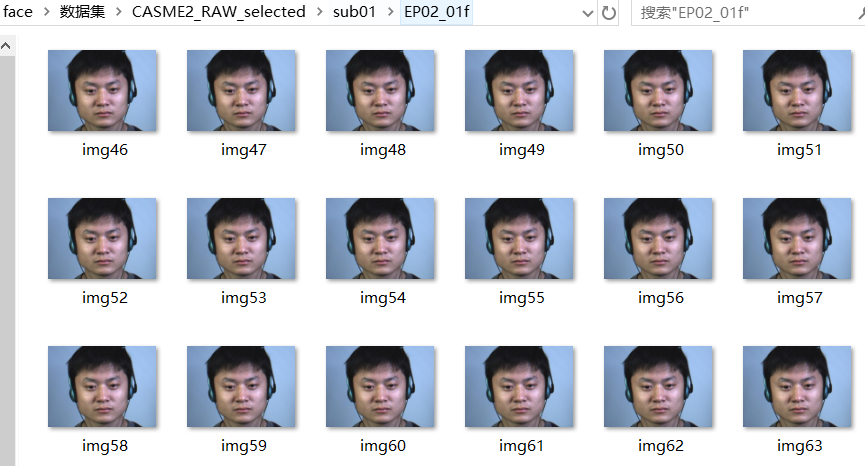
同样对其进行灰度化、图像大小的处理,之后方可当成输入数据进行模型的训练。
2.代码实现
(0)实现Demo的代码组织结构

demo.py 调用系统摄像头完成实时识别人脸微表情
main.py 包含训练模型、测试模型的接口
model.py DNN算法的实现
utils.py 对数据集合的预处理
(1)数据预处理
有两种方式,第一种方式只是为了看看数据集的图片,而不是只能看到灰度值,而真正参与模型的训练的数据处理方式是第二种!
1)把这灰度值的影像变为.jpg
 1 import csv
 2 import os
 3
 4 #数据集路径
 5 database_path = 'C:/Users/tgp/Desktop/Machine Learning/人脸识别/fer2013'
 6
 7 #将路径组合后返回
 8 csv_file = os.path.join(database_path, 'fer2013.csv')
 9 train_csv = os.path.join(database_path, 'train.csv')
10 val_csv = os.path.join(database_path, 'val.csv')
11 test_csv = os.path.join(database_path, 'test.csv')
12
13 with open(csv_file) as f:
14     #使用csv中的reader()打开.csv文件
15     csvr = csv.reader(f)
16
17     #将迭代器指向文件的第二行,因为第一行为标签
18     header = next(csvr)
19     rows = [row for row in csvr]
20
21     #按最后一列的标签将数据集进行分割
22     trn = [row[:-1] for row in rows if row[-1] == 'Training']
23     csv.writer(open(train_csv, 'w+'), lineterminator='
').writerows([header[:-1]] + trn)
24     print(len(trn))
25
26     val = [row[:-1] for row in rows if row[-1] == 'PublicTest']
27     csv.writer(open(val_csv, 'w+'), lineterminator='
').writerows([header[:-1]] + val)
28     print(len(val))
29
30     tst = [row[:-1] for row in rows if row[-1] == 'PrivateTest']
31     csv.writer(open(test_csv, 'w+'), lineterminator='
').writerows([header[:-1]] + tst)
32     print(len(tst))
 1 import csv
 2 import os
 3 from PIL import Image
 4 import numpy as np
 5
 6 database_path = 'C:/Users/tgp/Desktop/Machine Learning/人脸识别/fer2013'
 7
 8 train_csv = os.path.join(database_path, 'train.csv')
 9 val_csv = os.path.join(database_path, 'val.csv')
10 test_csv = os.path.join(database_path, 'test.csv')
11
12 train_set = os.path.join(database_path, 'train')
13 val_set = os.path.join(database_path, 'val')
14 test_set = os.path.join(database_path, 'test')
15
16 for save_path, csv_file in [(train_set, train_csv), (val_set, val_csv), (test_set, test_csv)]:
17     if not os.path.exists(save_path):
18         os.makedirs(save_path)
19
20     num = 1
21     with open(csv_file) as f:
22         csvr = csv.reader(f)
23         header = next(csvr)
24         #使用enumerate遍历csvr中的标签(label)和特征值(pixel)
25         for i, (label, pixel) in enumerate(csvr):
26             #将特征值的数组转化为48*48的矩阵
27             pixel = np.asarray([float(p) for p in pixel.split()]).reshape(48, 48)
28             subfolder = os.path.join(save_path, label)
29             if not os.path.exists(subfolder):
30                 os.makedirs(subfolder)
31             #将该矩阵转化为RGB图像,再通过convert转化为8位灰度图像,L指灰度图模式,L=R*299/1000+G*587/1000+B*114/1000
32             im = Image.fromarray(pixel).convert('L')
33             image_name = os.path.join(subfolder, '{:05d}.jpg'.format(i))
34             print(image_name)
35             im.save(image_name)
执行完上面的代码,你就可以在相应的路径看到如下图:
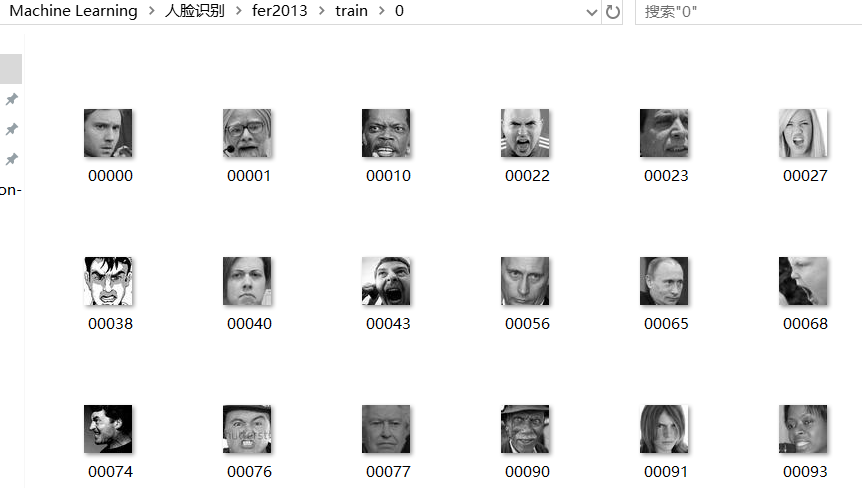
这样就完成了从灰度图到可视化的转变。
2)简便的数据预处理(训练模型时采用的办法)
  1 import collections
  2 import numpy as np
  3 import pandas as pd
  4 from tensorflow.python.framework import dtypes, random_seed
  5
  6
  7 def load_data(data_file):
  8     data = pd.read_csv(data_file)
  9     pixels = data['pixels'].tolist()
 10     width = 48
 11     height = 48
 12     faces = []
 13     for pixel_sequence in pixels:
 14         # 从csv中获取人脸的数据
 15         face = [int(pixel) for pixel in pixel_sequence.split(' ')]
 16         # 把脸的数据变为48*48像素,利用plt.imshow即可打印出图片
 17         face = np.asarray(face).reshape(width, height)
 18         faces.append(face)
 19     # 把faces从列表变为三维矩阵。(35887,)----->(35887,48,48)
 20     faces = np.asarray(faces)
 21     # 添加维度,将faces从(35887,48,48)------>(35887,48,48,1)
 22     faces = np.expand_dims(faces, -1)
 23     # one-hot编码,把属于该类表情置1,其余为0,并转换为矩阵
 24     emotions = pd.get_dummies(data['emotion']).as_matrix()
 25     return faces, emotions
 26
 27
 28 class DataSet(object):
 29     def __init__(self, images, labels, reshape=True, dtype=dtypes.float32, seed=None):
 30         seed1, seed2 = random_seed.get_seed(seed)
 31         np.random.seed(seed1 if seed is None else seed2)
 32         if reshape:
 33             # 将images(35887,48,48,1)变为(35887,2304)
 34             assert images.shape[3] == 1
 35             images = images.reshape(images.shape[0],images.shape[1]*images.shape[2])
 36
 37         # 类型转换,并进行灰度处理
 38         if dtype == dtypes.float32:
 39             images = images.astype(np.float32)
 40             images = np.multiply(images, 1.0 / 255.0)
 41         # 设置私有属性
 42         self._num_examples = images.shape[0]
 43         self._images = images
 44         self._labels = labels
 45         self._epochs_completed = 0
 46         self._index_in_epoch = 0
 47
 48     @property
 49     def images(self):
 50         return self._images
 51
 52     @property
 53     def labels(self):
 54         return self._labels
 55
 56     @property
 57     def num_examples(self):
 58         return self.num_examples
 59
 60     @property
 61     def epochs_completed(self):
 62         self._epochs_completed
 63
 64     # 批量获取训练数据
 65     def next_batch(self, batch_size,shuffle=True):
 66         start = self._index_in_epoch
 67         if self._epochs_completed == 0 and start == 0 and shuffle:
 68             # 打乱顺序
 69             perm0 = np.arange(self._num_examples)
 70             np.random.shuffle(perm0)
 71             self._images = self._images[perm0]
 72             self._labels = self._labels[perm0]
 73
 74         if start + batch_size > self._num_examples:
 75             self._epochs_completed += 1
 76             rest_num_examples = self._num_examples - start
 77             images_rest_part = self._images[start:self._num_examples]
 78             labels_rest_part = self._labels[start:self._num_examples]
 79             # 当剩余的数据不够一次batch_size,就在之前的数据中随机选取并进行组合
 80             if shuffle:
 81                 perm = np.arange(self._num_examples)
 82                 np.random.shuffle(perm)
 83                 self._images = self._images[perm]
 84                 self._labels = self._labels[perm]
 85             start = 0
 86             self._index_in_epoch = batch_size - rest_num_examples
 87             end = self._index_in_epoch
 88             images_new_part = self._images[start:end]
 89             labels_new_part = self._labels[start:end]
 90             return np.concatenate((images_rest_part, images_new_part), axis=0), np.concatenate(
 91                 (labels_rest_part, labels_new_part), axis=0)
 92         else:
 93             self._index_in_epoch += batch_size
 94             end = self._index_in_epoch
 95             return self._images[start:end], self._labels[start:end]
 96
 97
 98 def input_data(train_dir, dtype = dtypes.float32, reshape = True, seed=None):
 99     training_size = 28709
100     validation_size = 3589
101     test_size = 3589
102
103     train_faces, train_emotions = load_data(train_dir)
104     print("Data load success!")
105
106     # 验证数据
107     validation_faces = train_faces[training_size: training_size + validation_size]
108     validation_emotions = train_emotions[training_size: training_size + validation_size]
109
110     # 测试数据
111     test_faces = train_faces[training_size + validation_size:]
112     test_emotions = train_emotions[training_size + validation_size:]
113
114     # 训练数据
115     train_faces = train_faces[: training_size]
116     train_emotions = train_emotions[: training_size]
117
118     Datasets = collections.namedtuple('Datasets', ['train', 'validation', 'test'])
119     train = DataSet(train_faces, train_emotions, reshape=reshape,)
120     validation = DataSet(validation_faces, validation_emotions, dtype=dtype, reshape=reshape, seed=seed)
121     test = DataSet(test_faces, test_emotions, dtype=dtype, reshape=reshape, seed=seed)
122     return Datasets(train=train, validation=validation, test=test)
到此,我们就完成了对fer2013数据的处理。
(2)训练模型
采用的是DNN模型,个人感觉DNN的大致过程和CNN较为相似,楼主有一篇博客就是利用CNN实现手写数字的识别,感兴趣或者对于DNN实现算法不是很理解的,可以跳过去看看。
 1 import os
 2 import cv2
 3 import tensorflow as tf
 4 from utils import *
 5
 6 EMOTIONS = ['angry', 'disgusted', 'fearful', 'happy', 'sad', 'surprised', 'neutral']
 7
 8
 9 def deepnn(x):
10     x_image = tf.reshape(x, [-1, 48, 48, 1])
11     # conv1
12     W_conv1 = weight_variables([5, 5, 1, 64])
13     b_conv1 = bias_variable([64])
14     h_conv1 = tf.nn.relu(conv2d(x_image, W_conv1) + b_conv1)
15     # pool1
16     h_pool1 = maxpool(h_conv1)
17     # norm1
18     norm1 = tf.nn.lrn(h_pool1, 4, bias=1.0, alpha=0.001 / 9.0, beta=0.75)
19
20     # conv2
21     W_conv2 = weight_variables([3, 3, 64, 64])
22     b_conv2 = bias_variable([64])
23     h_conv2 = tf.nn.relu(conv2d(h_pool1, W_conv2) + b_conv2)
24     norm2 = tf.nn.lrn(h_conv2, 4, bias=1.0, alpha=0.001 / 9.0, beta=0.75)
25     h_pool2 = maxpool(norm2)
26
27     # Fully connected layer
28     W_fc1 = weight_variables([12 * 12 * 64, 384])
29     b_fc1 = bias_variable([384])
30     h_conv3_flat = tf.reshape(h_pool2, [-1, 12 * 12 * 64])
31     h_fc1 = tf.nn.relu(tf.matmul(h_conv3_flat, W_fc1) + b_fc1)
32
33     # Fully connected layer
34     W_fc2 = weight_variables([384, 192])
35     b_fc2 = bias_variable([192])
36     h_fc2 = tf.matmul(h_fc1, W_fc2) + b_fc2
37
38     # linear
39     W_fc3 = weight_variables([192, 7])
40     b_fc3 = bias_variable([7])
41     y_conv = tf.add(tf.matmul(h_fc2, W_fc3), b_fc3)
42
43     return y_conv
44
45
46 def conv2d(x, W):
47     return tf.nn.conv2d(x, W, strides=[1, 1, 1, 1], padding='SAME')
48
49
50 def maxpool(x):
51     return tf.nn.max_pool(x, ksize=[1, 3, 3, 1],
52                         strides=[1, 2, 2, 1], padding='SAME')
53
54
55 def weight_variables(shape):
56     initial = tf.truncated_normal(shape, stddev=0.1)
57     return tf.Variable(initial)
58
59
60 def bias_variable(shape):
61     initial = tf.constant(0.1, shape=shape)
62     return tf.Variable(initial)
63
64
65 def train_model(train_data):
66     fer2013 = input_data(train_data)
67     max_train_steps = 30001
68
69     x = tf.placeholder(tf.float32, [None, 2304])
70     y_ = tf.placeholder(tf.float32, [None, 7])
71
72     y_conv = deepnn(x)
73
74     cross_entropy = tf.reduce_mean(
75         tf.nn.softmax_cross_entropy_with_logits(labels=y_, logits=y_conv))
76     train_step = tf.train.AdamOptimizer(1e-4).minimize(cross_entropy)
77     correct_prediction = tf.equal(tf.argmax(y_conv, 1), tf.argmax(y_, 1))
78     accuracy = tf.reduce_mean(tf.cast(correct_prediction, tf.float32))
79
80     with tf.Session() as sess:
81         saver = tf.train.Saver()
82         sess.run(tf.global_variables_initializer())
83
84         for step in range(max_train_steps):
85             batch = fer2013.train.next_batch(25)
86             if step % 100 == 0:
87                 train_accuracy = accuracy.eval(feed_dict={x: batch[0], y_: batch[1]})
88                 print('step %d, training accuracy %g' % (step, train_accuracy))
89             if step + 1 == max_train_steps:
90                 saver.save(sess, './models/emotion_model', global_step=step + 1)
91             train_step.run(feed_dict={x: batch[0], y_: batch[1]})
92
93
94 def image_to_tensor(image):
95     tensor = np.asarray(image).reshape(-1, 2304) * 1 / 255.0
96     return tensor
训练完模型后在你相应的文件夹里面会出现如下图所示:
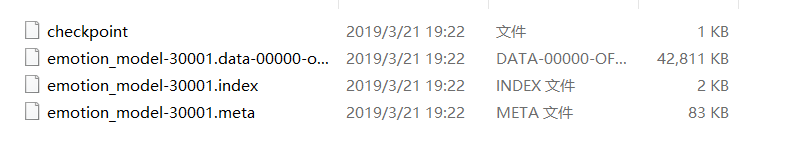
这就是训练模型保存的参数,楼主最后也会贴出自己训练的模型,方便你们下载和使用。
(3)调用模型实现人脸微表情识别
采用的方法是调用摄像头实时识别人脸微表情,具体的过程为:调用opencv自带的人脸识别器,调用系统摄像头拍摄出人脸图片,对人脸图片进行预处理,将处理完成的图片传入模型,最后将模型分析的结果反馈至运行的窗口
如下图所示:这些都是opencv自带的有关脸部识别的识别器。
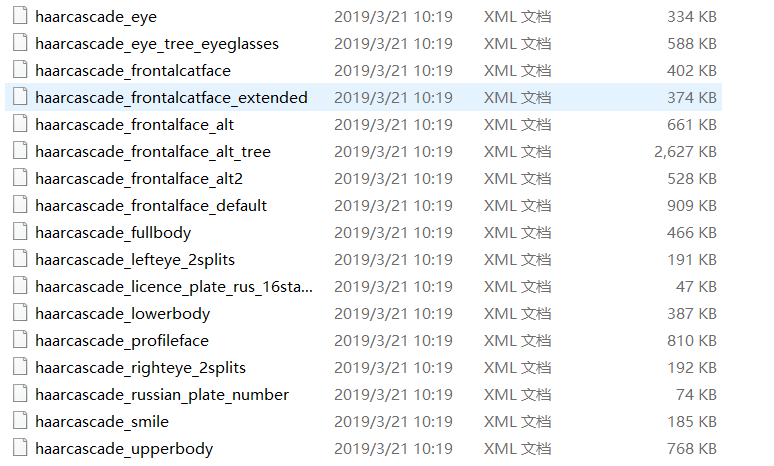
一般采用的是这几个:

其中个人认为_alt2的识别器效果最好。
具体如何调用系统摄像头以及实时别人微表情的代码如下:
  1 import cv2
  2 import numpy as np
  3 import sys
  4 import tensorflow as tf
  5 import PIL.Image as Image
  6 import matplotlib.pyplot as plt
  7 from model import *
  8
  9 # 加载opencv自带的人脸识别器
 10 CASC_PATH = 'D:/Anaconda3/Lib/site-packages/cv2/data/haarcascade_frontalface_alt2.xml'
 11 cascade_classifier = cv2.CascadeClassifier(CASC_PATH)
 12 # 人脸七种微表情
 13 EMOTIONS = ['angry', 'disgusted', 'fearful', 'happy', 'sad', 'surprised', 'neutral']
 14
 15
 16 def format_image(image):
 17     # image如果为彩色图:image.shape[0][1][2](水平、垂直像素、通道数)
 18     if len(image.shape) > 2 and image.shape[2] == 3:
 19         # 将图片变为灰度图
 20         image = cv2.cvtColor(image, cv2.COLOR_BGR2GRAY)
 21         # 它可以检测出图片中所有的人脸,并将人脸用vector保存各个人脸的坐标、大小(用矩形表示)
 22         # 调整scaleFactor参数的大小,可以增加识别的灵敏度,推荐1.1
 23         faces = cascade_classifier.detectMultiScale(image, scaleFactor=1.1, minNeighbors=5)
 24     # 如果图片中没有检测到人脸,则返回None
 25     if not len(faces) > 0:
 26         return None, None
 27     # max_are_face包含了人脸的坐标,大小
 28     max_are_face = faces[0]
 29     # 在所有人脸中选一张最大的脸
 30     for face in faces:
 31         if face[2] * face[3] > max_are_face[2] * max_are_face[3]:
 32             max_are_face = face
 33
 34     # 这两步可有可无
 35     face_coor = max_are_face
 36     image = image[face_coor[1]:(face_coor[1] + face_coor[2]), face_coor[0]:(face_coor[0] + face_coor[3])]
 37     # 调整图片大小,变为48*48
 38     try:
 39         image = cv2.resize(image, (48, 48), interpolation=cv2.INTER_CUBIC)
 40     except Exception:
 41         print("problem during resize")
 42         return None, None
 43
 44     return image, face_coor
 45
 46
 47 def demo(modelPath, showBox=True):
 48     # 调用模型分析人脸微表情
 49 #    tf.reset_default_graph()
 50     face_x = tf.placeholder(tf.float32, [None, 2304])
 51     y_conv = deepnn(face_x)
 52     probs = tf.nn.softmax(y_conv)
 53
 54     # 加载模型
 55     saver = tf.train.Saver()
 56     ckpt = tf.train.get_checkpoint_state(modelPath)
 57     sess = tf.Session()
 58     if ckpt and ckpt.model_checkpoint_path:
 59         saver.restore(sess, ckpt.model_checkpoint_path)
 60         print("Restore model sucsses!!
NOTE: Press 'a' on keyboard to capture face.")
 61
 62     # feelings_facesy用来存储emojis表情
 63     feelings_faces = []
 64     for index, emotion in enumerate(EMOTIONS):
 65         # imread函数(文件路径,读取方式)
 66         # cv2.IMREAD_COLOR:读入一副彩色图片;(1)返回三维矩阵,且为[120,120,3]
 67         # cv2.IMREAD_GRAYSCALE:以灰度模式读入图片;(0)返回二维矩阵,且为[120,120]
 68         # cv2.IMREAD_UNCHANGED:读入一幅图片,并包括其alpha通道(-1)返回三维矩阵,且为[120,120,4]
 69         feelings_faces.append(cv2.imread('D:/Dict/Facial-Expression-Recognition-master/data/emojis/' + emotion + '.png', 1))
 70
 71     # 获取笔记本的摄像头,
 72     video_captor = cv2.VideoCapture(0)
 73
 74     emoji_face = []
 75     result = None
 76     while True:
 77         # 获取摄像头的每帧图片,若获得,则ret的值为True,frame就是每一帧的图像,是个三维矩阵
 78         ret, frame = video_captor.read()
 79
 80         detected_face, face_coor = format_image(frame)
 81         if showBox:
 82             if face_coor is not None:
 83                 # 获取人脸的坐标,并用矩形框出
 84                 [x, y, w, h] = face_coor
 85                 cv2.rectangle(frame, (x, y), (x + w, y + h), (255, 255, 0), 2)
 86
 87         # 每隔10ms刷新一次,并且等当键盘输入a的时候,截取图像,因为是64位系统所以必须要0xFF == ord('a')
 88         if cv2.waitKey(1) & 0xFF == ord('a'):
 89             if detected_face is not None:
 90                 cv2.imwrite('a.jpg', detected_face)
 91                 print(detected_face)
 92                 print("获取成功")
 93                 # 将图片变为tensorflow可以接受的格式
 94                 tensor = image_to_tensor(detected_face)
 95                 result = sess.run(probs, feed_dict={face_x: tensor})
 96                 print(result)
 97
 98         if result is not None:
 99             for index, emotion in enumerate(EMOTIONS):
100                 # 将七种微表情的文字添加到图片中
101                 cv2.putText(frame,emotion,(10,index*20 + 20),cv2.FONT_HERSHEY_PLAIN, 1, (0, 255, 0), 1)
102                 # 将七种微表情的概率用矩形表现出来
103                 cv2.rectangle(frame,(130, index*20 + 10),(130+int(result[0][index]*100), (index + 1) * 20 + 4), (255, 0, 0), -1)
104                 # 获取人脸微表情相应的emojis表情
105                 emoji_face = feelings_faces[np.argmax(result[0])]
106
107             # 将emojis表情添加到图片中的指定位置 方法1:
108             frame[200:320, 10:130, :] = emoji_face[:, :, :]
109             cv2.imwrite('b.jpg', frame)
110             # 将emojis表情添加到图片中的指定位置 方法2:
111             # for c in range(0, 1):
112             #     frame[200:320, 10:130, c] = emoji_face[:, :, c] * (emoji_face[:, :, 3] / 255.0) + frame[200:320, 10:130, c] * (1.0 - emoji_face[:, :, 3] / 255.0)
113
114         cv2.imshow('face', frame)
115         if cv2.waitKey(10) & 0xFF == ord('q'):
116             break
117     # 释放系统摄像头,关闭窗口
118     video_captor.release()
119     cv2.destroyAllWindows()
到此整个Demo就实现完成了。
3.个人遇坑以及总结
(1)数据预处理过程,大多都需要用到pandas和numpy这两个库,所以必须能够较为熟练的掌握这两个库的使用
(2)网上的考察资料中对于调用 cascade_classifier.detectMultiScale这个函数时,对其一个参数scaleFactor设置为1.3,这直接导致对于人脸的识别不够敏感,上网参阅相关资料后,得知这个值一般设置为1.1较为合适,且对于人脸的识别也比较敏感
(3)因为对于opencv这个库使用不够熟练,一开始一直碰壁,所以你要是和我一样,建议先去这个网站了解一下OPENCV的大致使用方法:https://docs.opencv.org/trunk/d6/d00/tutorial_py_root.html
4.该模型的不足以及日后的发展
(1)目前划分的微表情类别较少,难以覆盖人类多种交织的表情。
(2)对于某人表情识别的准备率还不够高,例如厌恶。
(3)模型未能处理多帧连续表情的变化,这将限制我们对少数微表情的识别的准确率。
5.完善算法以及平台的应用
(1)采用LSTM(长短时记忆算法),新增加一个时间维度用于记录多帧微表情的变化,然后在结果DNN模型完善算法。
(2)可以将此项目应用于检测疲劳驾驶以及刑侦等领域
参考资料:https://docs.opencv.org/trunk/d6/d00/tutorial_py_root.html
https://blog.csdn.net/labPqsdr/article/details/80704969
以上就是本次Demo的完成过程以及体会,欢迎交流