自己写人脸识别算法的都是大神,作为一名小白我们可以去调用那些现成的API接口。比如旷世就对外提供接口。
而且还免费,只要注册一个账号就可以用了
先直接上代码吧!
import requests,json,lxml,os

from lxml import etree
from urllib import parse
from uuid import uuid4
import base64
##函数之间的相互调用一定要return否在会返回为空
def get_face_rectangle(imgpath):
        url = 'https://api-cn.faceplusplus.com/facepp/v3/detect'
        data = {'api_key':'自己去注册吧',
                'api_secret':'1分钟就可以注册好','image_url':imgpath,'return_landmark':1
                }
        files = {'image_file':open(imgpath,'rb')}
        response = requests.post(url,data=data,files=files)
        result = response.content.decode('utf-8')
        json_data = json.loads(result)

        face = json_data['faces']
        face_rectangle = face[0]['face_rectangle']
        return face_rectangle

def mixer_face(image_url1,image_url2,image_url,number):
        f1 = get_face_rectangle(image_url1)
        f2 = get_face_rectangle(image_url2)
        print(f1)
        print(f2)
        rectangle1 = str(str(f1['top']) + "," + str(f1['left']) + "," + str(f1['width']) + "," + str(f1['height']))
        rectangle2 = str(str(f2['top']) + "," + str(f2['left']) + "," + str(f2['width']) + "," + str(f2['height']))

        ff1 = open(image_url1,'rb')
        f1_base64 = base64.b64encode(ff1.read())
        ff1.close()
        ff2 = open(image_url2,'rb')
        f2_base64 = base64.b64encode(ff2.read())
        ff2.close()
        url = 'https://api-cn.faceplusplus.com/imagepp/v1/mergeface'
        data = {'api_key':'自己注册',
                'api_secret':'自己注册',
                'template_base64':f1_base64,'template_rectangle':rectangle1,#传入格式必须是字典格式
                'merge_base64':f2_base64,'merge_rectangle':rectangle2,
                'merge_rate':number
                }
        response = requests.post(url,data=data)
        result = response.content.decode('utf-8')
        print(result)
        res = json.JSONDecoder().decode(result)
        final_result = res['result']
        imagedata = base64.b64decode(final_result)

        file = open(image_url,'wb')
        file.write(imagedata)
        file.close()


if __name__ == '__main__':
        image_url1 = r'image2.jpg'
        image_url2 = r'image1.jpg'
        image_url = r'mixerimage.jpg'
        mixer_face(image_url1,image_url2,image_url,100)
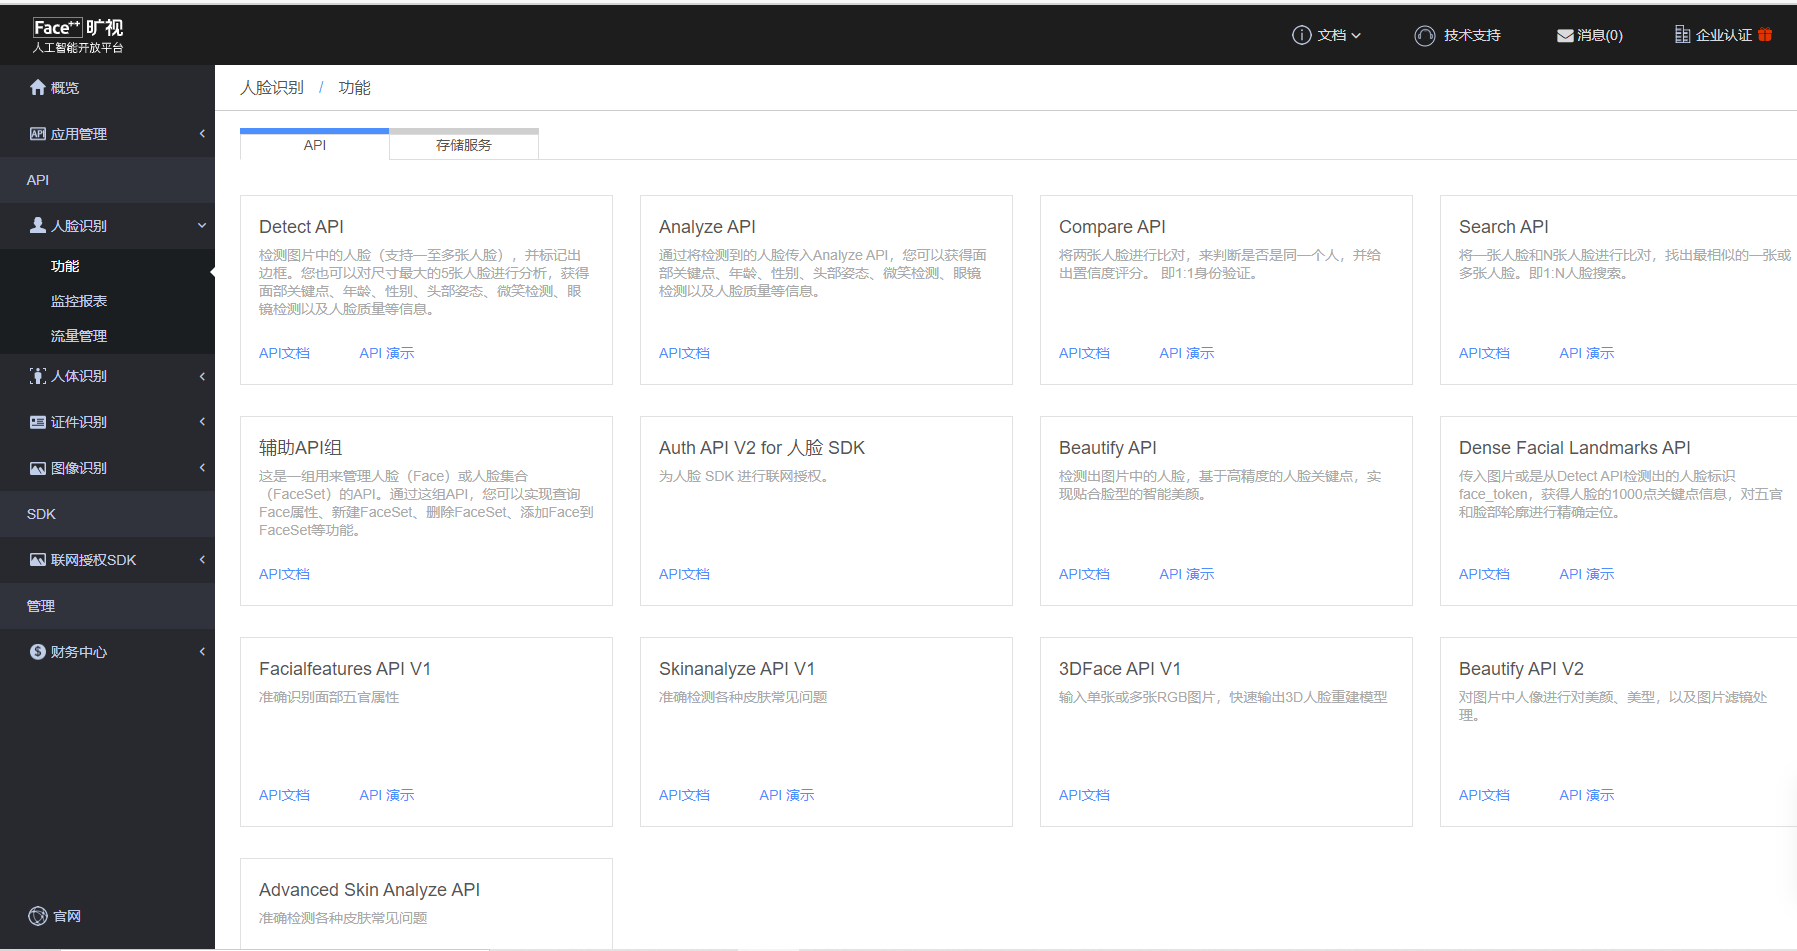
我们首先打开旷世的官网,可以看到它提供了很多类型的API接口

这里我们用它提供的换脸接口:https://api-cn.faceplusplus.com/facepp/v3/detect
当然了,既然使用的是别人家提供的东西,那我们就得按照他们给定的规则来使用。具体每一个接口的规则旷世官网都有,可以自行查找。
这个换脸思路其实很简单也很好理解,我们首先需要截取image1的脸部矩形和image2的脸部矩形,再将image2的脸放到image1脸上并生成一张新的图像
这里我们使用post请求该url,post请求可以携带我们算需要上传的数据和它要求的参数
参数中包括api_key和api_screct这些都是注册后给你的,在调用时用这个来识别身份。
之后需要上传image_url即图片的路径信息用下面三种那种都可以

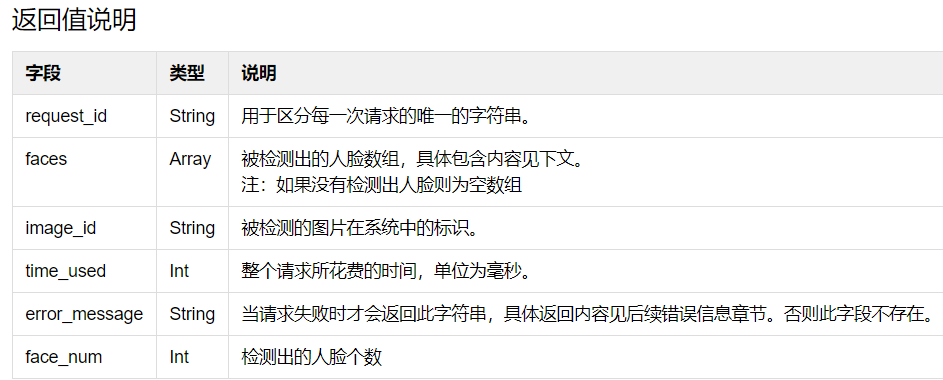
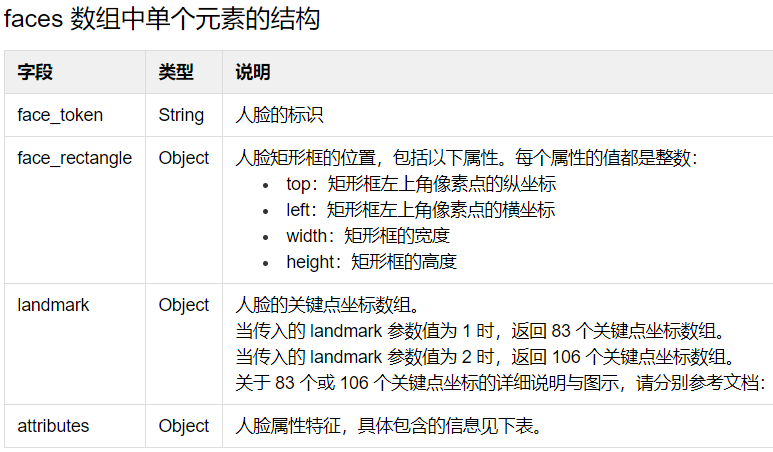
请求完后会返回一个它会返回一个字典,具体含义如下


这里我们只需要faces里面的rectangle并返回
1 response = requests.post(url,data=data,files=files)
2         result = response.content.decode('utf-8')
3         json_data = json.loads(result)
4         face = json_data['faces']
5         face_rectangle = face[0]['face_rectangle']
6         return face_rectangle
内容如下

现在我们解决了如何去识别脸部的部分了,接下来我们就把两个脸拼接到一起
这里我们用旷世提供的另一个api接口就可以完成这项工作了url:https://api-cn.faceplusplus.com/imagepp/v1/mergeface
然后同理我们用post请求这个url,同时携带我们的image1和image2
两张image分别调用get_face_rectangle()函数,得到他们的脸部矩形信息
因为上传的图像需要是base64编码的图像,所以我们需要将图片做以下编码处理
1         rectangle1 = str(str(f1['top']) + "," + str(f1['left']) + "," + str(f1['width']) + "," + str(f1['height']))
2         rectangle2 = str(str(f2['top']) + "," + str(f2['left']) + "," + str(f2['width']) + "," + str(f2['height']))
3
4         ff1 = open(image_url1,'rb')
5         f1_base64 = base64.b64encode(ff1.read())
6         ff1.close()
7         ff2 = open(image_url2,'rb')
8         f2_base64 = base64.b64encode(ff2.read())
9         ff2.close()
这里的字符串拼接是应为上传的数据里面必须是一个字符型
1 data = {'api_key':'xxxxxxx',
2                 'api_secret':'xxxxxxxx',
3                 'template_base64':f1_base64,'template_rectangle':rectangle1,#传入格式必须是字典格式
4                 'merge_base64':f2_base64,'merge_rectangle':rectangle2,
5                 'merge_rate':number
6                 }
这里的mergr_rate参数代表的图片合成的像素质量
然后就是用post请求,然后他会将我们合成的那张图像返回在result里面,是一个base64编码的图像,我们需要再解码一次,再将图片保存到我们本地
 1      response = requests.post(url,data=data)
 2         result = response.content.decode('utf-8')
 3         print(result)
 4         res = json.JSONDecoder().decode(result)
 5         final_result = res['result']
 6         imagedata = base64.b64decode(final_result)
 7
 8         file = open(image_url,'wb')
 9         file.write(imagedata)
10         file.close()
到这里就结束了
颜值评分是第一个url下返回的一个返回值,还有很多别的返回,具体可以去阅读下官方的文档
原理和上面的基本上相同,我得分81哈哈哈
 1 import requests,json,lxml,os
 2 from lxml import etree
 3 from urllib import parse
 4 from uuid import uuid4
 5 import base64
 6 ##函数之间的相互调用一定要return否在会返回为空
 7 def get_beauitiful():
 8         image_url = r'image2.jpg'
 9         url = 'https://api-cn.faceplusplus.com/facepp/v3/detect'
10         data = {'api_key':'xxxxxx',
11                 'api_secret':'xxxxxx','image_url':image_url,'return_attributes':'beauty'
12         }
13         files = {'image_file':open(image_url,'rb')}
14         response = requests.post(url,data=data,files=files)
15         result =response.content.decode('utf-8')
16         result = json.loads(result)
17         faces_data = result['faces']
18         beauty = faces_data[0]
19         print(beauty['attributes']['beauty'])
20 get_beauitiful()