1、剃须刀模板razor的使用
1)混编
循环语法
@model List<MVCStudy.Models.Student>
@{
    ViewBag.Title = "List";
}

<h2>List</h2>
<!--循环遍历数组内容 c#与HTML混编-->
<ul>

    @foreach (var stu in Model)
    {
        <li>@stu.Name</li>
    }

</ul>
 1         public ActionResult List()
 2         {
 3             return View(new List<Student> {
 4                 new Student()
 5                 {
 6                     Id = 1,
 7                     Name = "Micky",
 8                     Age = 10
 9                 },
10                 new Student()
11                 {
12                     Id = 2,
13                     Name = "Jese",
14                     Age = 18
15                 },
16                 new Student()
17                 {
18                     Id = 3,
19                     Name = "Nick",
20                     Age = 18
21                 }
22             }); ;
23         }
razor模板的核心是@
@符号在最上面:声明
@+大括号:c#代码,内部可以声明变量等等
@model List<MVCStudy.Models.Student>
@{
    ViewBag.Title = "List";
    int a = 100;
}

<h2>List</h2>
<!--循环遍历数组内容 c#与HTML混编-->
<ul>

    @foreach (var stu in Model)
    {
        @(a+22) //需要加括号才能进行表达式的处理
        <li>@stu.Name</li>
    }

</ul>
如果就想输出一个@,怎么做?请写两个@进行转移
输出一段html:
@model List<MVCStudy.Models.Student>
@{
    ViewBag.Title = "List";
    int a = 100;
    string html = @"<p style='color:red;'>你好<p>";
}

<h2>List</h2>
<!--循环遍历数组内容 c#与HTML混编-->
<ul>
    @@
    @foreach (var stu in Model)
    {
        @(a+8)
        <li>@stu.Name</li>
    }

</ul>
@Html.Raw(html)
@*注释内容*@
2、区域
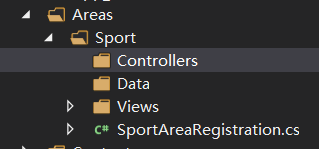
1)项目右键-添加-添加已搭建基架的新项-MVC-MVC5区域-命名新建
添加后区域相当于一个单独的MVC

我们添加控制器与视图后可以访问到它,但是原首页的路由出现了多个,无法访问,进行如下修改
找到项目的路由配置RouteConfig.cs文件修改
1             routes.MapRoute(
2                 name: "Default",
3                 url: "{controller}/{action}/{id}",
4                 defaults: new { controller = "Home", action = "Index", id = UrlParameter.Optional },
5                 namespaces:new string[]
6                 {
7                     "MVCStudy2.Controllers"
8                 }
9             );
添加namespaces,一个字符串数组,里面的值是项目的命名空间
2)区域路由跳转
链接名称,路由名称(在区域的路由文件内查看,跳转参数)
@{
    ViewBag.Title = "Home Page";
}

    <h1>项目首页</h1>
@Html.RouteLink("体育板块", "Sport_default", new { controller="Home",action="Index"})
3) 行为跳转
@{
    ViewBag.Title = "Home Page";
}

    <h1>项目首页</h1>
@Html.RouteLink("体育板块", "Sport_default", new { controller="Home",action="Index"})
@Html.ActionLink("行为跳转","About",new {需传送参数},htmlAttributes:new {所需html属性})
如果要使用a标签进行行为跳转,需要进行跳转连接的确定(Url.Action)
@{
    ViewBag.Title = "Home Page";
}

    <h1>项目首页</h1>
@Html.RouteLink("体育板块", "Sport_default", new { controller="Home",action="Index"})
@Html.ActionLink("行为跳转","About")
<a href="@Url.Action("About",new { from = "Index"})">跳转至About</a>
与上面类似,进行路由跳转也可以用a标签:
@{
    ViewBag.Title = "Home Page";
}

    <h1>项目首页</h1>
@Html.RouteLink("体育板块", "Sport_default", new { controller="Home",action="Index"})
@Html.ActionLink("行为跳转","About")
<a href="@Url.Action("About",new { from = "Index"})">跳转至About</a>
<a href="@Url.RouteUrl("Admin_default", new { controller="Home",action="Index",param="u can also add param"})">跳转至Admin路由</a>