在开发项目时,有多数据源的需求。在网上查阅资料后,实现了。由于本人经验不足,且需求本身要求不高,所以采用手动控制,非自动切换。
概览
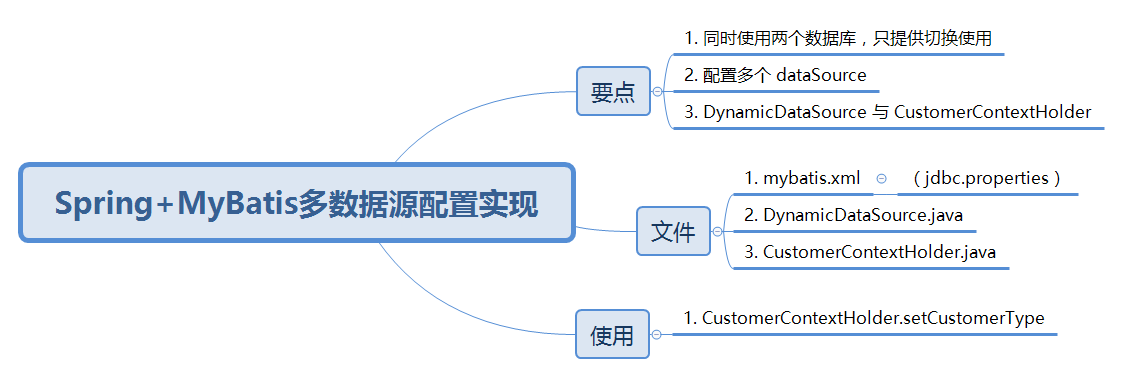
使用技术
IOC容器:Spring
Web框架:SpringMVC
ORM框架:Mybatis
文件
注意,以下改动是基于单数据源实现成功后。
Spring 容器(XML)
<?xml version="1.0" encoding="UTF-8"?>
<beans xmlns="http://www.springframework.org/schema/beans"
      xmlns:xsi="http://www.w3.org/2001/XMLSchema-instance"
      xmlns:context="http://www.springframework.org/schema/context"
      xmlns:aop="http://www.springframework.org/schema/aop"
      xmlns:tx="http://www.springframework.org/schema/tx"
      xsi:schemaLocation="http://www.springframework.org/schema/beans
http://www.springframework.org/schema/beans/spring-beans.xsd
http://www.springframework.org/schema/context
http://www.springframework.org/schema/context/spring-context.xsd
http://www.springframework.org/schema/aop
http://www.springframework.org/schema/aop/spring-aop.xsd
http://www.springframework.org/schema/tx
http://www.springframework.org/schema/tx/spring-tx.xsd">

   <!--加载数据库配置文件-->
   <context:property-placeholder location="classpath:jdbc.properties"/>

   <!-- ===============第一个数据源MySQL的配置=============== -->
   <!--配置数据源 c3p0 连接池-->
   <bean id="dataSource2MySQL" class="com.mchange.v2.c3p0.ComboPooledDataSource" >
       <property name="driverClass" value="${jdbc.mysql.driver}"/>
       <property name="jdbcUrl" value="${jdbc.mysql.url}"/>
       <property name="user" value="${jdbc.mysql.username}"/>
       <property name="password" value="${jdbc.mysql.password}"/>
       <!--以下皆为连接池参数,依实际情况配置-->
       <property name="maxPoolSize" value="200"/>
       <property name="minPoolSize" value="10"/>
       <!--初始化时获取的连接数,取值应在minPoolSize与maxPoolSize之间。Default: 3 -->
       <property name="initialPoolSize" value="10"/>
       <property name="checkoutTimeout" value="60"/>
       <property name="unreturnedConnectionTimeout" value="25"/>
       <property name="maxIdleTimeExcessConnections" value="20"/>
       <property name="maxConnectionAge" value="20"/>
       <property name="idleConnectionTestPeriod" value="50"/>
       <property name="maxStatements" value="0"/>

   </bean>

   <!-- ===============第二个数据源SQLServer的配置=============== -->

   <!--配置数据源 c3p0 连接池-->
   <bean id="dataSource2SQLServer" class="com.mchange.v2.c3p0.ComboPooledDataSource" >
       <property name="driverClass" value="${jdbc.sqlserver.driver}"/>
       <property name="jdbcUrl" value="${jdbc.sqlserver.url}"/>
       <property name="user" value="${jdbc.sqlserver.username}"/>
       <property name="password" value="${jdbc.sqlserver.password}"/>
       <!--以下皆为连接池参数,依实际情况配置-->
       <property name="maxPoolSize" value="200"/>
       <!--初始化时获取的连接数,取值应在minPoolSize与maxPoolSize之间。Default: 3 -->
       <property name="initialPoolSize" value="10"/>
       <property name="minPoolSize" value="10"/>
       <property name="checkoutTimeout" value="60"/>
       <property name="unreturnedConnectionTimeout" value="25"/>
       <property name="maxIdleTimeExcessConnections" value="20"/>
       <property name="maxConnectionAge" value="20"/>
       <property name="idleConnectionTestPeriod" value="50"/>
       <property name="maxStatements" value="0"/>
   </bean>

   <!--将DynamicDataSource Bean加入到Spring的上下文xml配置文件中去,同时配置DynamicDataSource的targetDataSources(多数据源目标)属性的Map映射。-->

   <bean id="dataSource" class="com.system.util.DynamicDataSource">
       <property name="targetDataSources">
           <map key-type="java.lang.String">
               <entry key="dataSource2MySQL" value-ref="dataSource2MySQL"/>
               <entry key="dataSource2SQLServer"  value-ref="dataSource2SQLServer" />
           </map>
       </property>
       <property name="defaultTargetDataSource" ref="dataSource2MySQL"/>
   </bean>

   <!--配置SqlSessionFactory-->
   <bean id="sessionFactory" class="org.mybatis.spring.SqlSessionFactoryBean">
       <!--加载mybatis配置文件-->
       <property name="configLocation" value="classpath:mybatis/mybatis.cfg.xml"/>
       <!--数据源-->
       <property name="dataSource" ref="dataSource"/>
   </bean>

   <!--Mapper批量扫描,从Mapper包扫描接口,自动创建代理对象,并在Spring容器中自动注册
   使用 Mybatis与Spring整合包的这个 Mapper 扫描器后, Mybatis 配置文件里的扫描器,就可以取消掉了
   遵循的规范 不变
   自动扫描出来的Mapper的bean的id为Mapper类名(首字母小写)
   -->
   <bean class="org.mybatis.spring.mapper.MapperScannerConfigurer">
       <!--如果需要扫描多个报下的mapper,每个包中间使用半角逗号分开-->
       <property name="basePackage" value="com.system.mapper"/>
       <property name="sqlSessionFactoryBeanName" value="sessionFactory"/>
   </bean>
</beans>
在 Spring 容器中配置两个数据源。
CustomerContextHolder
public class CustomerContextHolder {
   //MySQL
   public static final String DATA_SOURCE_MYSQL = "dataSource2MySQL";
   //SQLServer
   public static final String DATA_SOURCE_MSSQL = "dataSource2SQLServer";
   //用ThreadLocal来设置当前线程使用哪个dataSource
   private static final ThreadLocal<String> contextHolder = new ThreadLocal<String>();
   public static void setCustomerType(String customerType) {
       contextHolder.set(customerType);
   }
   public static String getCustomerType() {
       String dataSource = contextHolder.get();
       if (StringUtils.isEmpty(dataSource)) {
           return DATA_SOURCE_MYSQL;
       }else {
           return dataSource;
       }
   }
   public static void clearCustomerType() {
       contextHolder.remove();
   }
}
获得和设置上下文环境,为一线程安全的 ThreadLocal 。
DynamicDataSource
public class DynamicDataSource extends AbstractRoutingDataSource {
   @Override
   protected Object determineCurrentLookupKey() {
       return CustomerContextHolder.getCustomerType();
   }
}
DynamicDataSource 动态数据源类,扩展 Spring 的 AbstractRoutingDataSource 抽象类,实现动态数据源, AbstractRoutingDataSource 中的抽象方法 determineCurrentLookupKey 是实现数据源的 route 的核心.这里对该方法进行 Override 。
使用
   //切换数据源至SQLServer
   CustomerContextHolder.setCustomerType(CustomerContextHolder.DATA_SOURCE_MSSQL);
   //切换数据源至MySQL
   CustomerContextHolder.setCustomerType(CustomerContextHolder.DATA_SOURCE_MYSQL);