这篇文章你可以学习到:
了解什么是Vue的插件
学习b站大佬后做的笔记整理和源码实现
使用官方的Vue-router
通过vue-cli脚手架初始化一个项目
下载vue-router
ps: vue-cli脚手架生成的时候可以选择:是否安装vue-router
下面是手动安装过程:
-
就是npm install vue-router之后,通过import引入了
-
然后通过Vue.use() 引入
-
之后定义一个路由表routes
-
然后new VueRouter 就可以得到一个实例
-
新建了Home和About两个组件
得到代码:
router/index.js
import Vue from 'vue' import Router from 'vue-router' import Home from '@/components/home' import About from '@/components/about' Vue.use(Router) export default new Router({ routes: [ { path: '/', name: 'Home', component: Home }, { path: '/about', name: 'About', component: About } ] })
导入到main.js中
import Vue from 'vue' import App from './App' import router from './router' Vue.config.productionTip = false new Vue({ el: '#app', router, components: { App }, template: '<App/>' })
在new Vue添加这个配置项
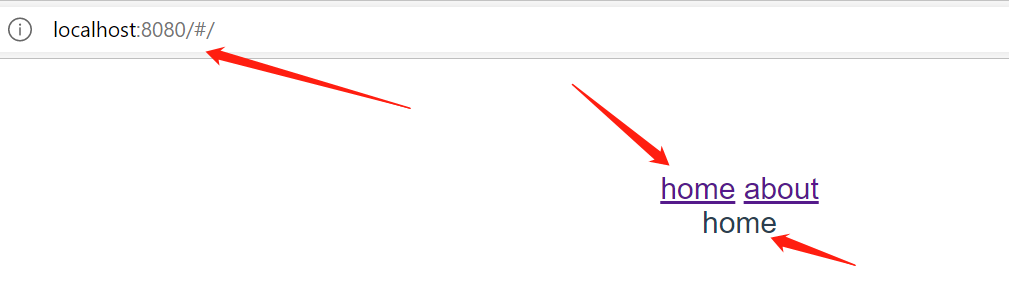
使用router-link和router-view
App.vue
<template>
  <div id="app">
    <router-link to="/">home</router-link>
    <router-link to="/about">about</router-link>
    <router-view/>
  </div>
</template>
效果:

自己写一个vue-router
老规矩,先上源码
没注释版本:


let Vue; class VueRouter { constructor(options) { this.$options = options; let initial = window.location.hash.slice(1) || "/"; Vue.util.defineReactive(this, "current", initial); window.addEventListener("hashchange", () => { this.current = window.location.hash.slice(1) || "/"; }) } } VueRouter.install = (_Vue) => { Vue = _Vue; Vue.mixin({ beforeCreate() { if (this.$options.router) { Vue.prototype.$router = this.$options.router; } } }); Vue.component("router-link", { props: { to: { type: String, required: true, } }, render(h) { return h("a", { attrs: { href: `#${this.to}` }, }, this.$slots.default ); } }); Vue.component("router-view", { render(h) { let component = null; const current = this.$router.current; const route = this.$router.$options.routes.find( (route) => route.path === current ) if (route) component = route.component; return h(component); } }) } export default VueRouter;
有个人注释版本:
// 1、实现一个插件 // 2、两个组件 // Vue插件怎么写 // 插件要么是function 要么就是 对象 // 要求插件必须要实现一个install方法,将来被vue调用的 let Vue; // 保存Vue的构造函数,在插件中要使用 class VueRouter { constructor(options) { this.$options = options; // 只有把current变成响应式数据之后,才可以修改之后重新执行router-view中的render渲染函数的 let initial = window.location.hash.slice(1) || "/"; Vue.util.defineReactive(this, "current", initial); window.addEventListener("hashchange", () => { // 获取#后面的东西 this.current = window.location.hash.slice(1) || "/"; }) } } VueRouter.install = (_Vue) => { Vue = _Vue; // 1、挂载$router属性(这个获取不到router/index.js中new 出来的VueRouter实例对象, // 因为Vue.use要更快指向,所以就在main.js中引入router,才能使用的 // this.$router.push() // 全局混入(延迟下面的逻辑到router创建完毕并且附加到选项上时才执行) Vue.mixin({ beforeCreate() { // 注意此钩子在每个组件创建实例的时候都会被调用 // 判断根实例是否有该选项 if (this.$options.router) { /** * 因为每一个Vue的组件实例,都会继承Vue.prototype上面的方法,所以这样就可以 * 在每一个组件里面都可以通过this.$router来访问到router/index.js中初始化的new VueRouter实例了 */ Vue.prototype.$router = this.$options.router; } } }); // 实现两个组件:router-link、router-view // <router-link to="/">Hone</router-link> 所以我们要把这个router-link标签转换成:<a href="/">Home</a> /** * 第二个参数其实是一个template,也就是一个渲染组件dom * 我们这里使用的是渲染函数,也就是返回一个虚拟DOM */ Vue.component("router-link", { props: { to: { type: String, required: true, } }, render(h) { return h("a", { attrs: { // 为了不重新更新页面,这里通过锚点 href: `#${this.to}` }, }, // 如果要获取Home的话,可以是下面这样 this.$slots.default ); } }); Vue.component("router-view", { render(h) { let component = null; // 由于上面通过混入拿到了this.$router了,所以就可以获取当前路由所对应的组件并将其渲染出来 const current = this.$router.current; const route = this.$router.$options.routes.find( (route) => route.path === current ) if (route) component = route.component; return h(component); } }) } export default VueRouter;
一步一步分析——从零开始
首先,有几个问题
问题一:
router/index.js中
import Router from 'vue-router'
Vue.use(Router)
我们知道,通过Vue.use( ) 是个Vue引入了一个插件
那么这个插件vue-router 内部做了什么?
问题二:
router/index.js中
import Router from 'vue-router' export default new Router({ routes: [ { path: '/', name: 'Home', component: Home }, { path: '/about', name: 'About', component: About } ] })
-
初始化了一个引入的vue-router插件对象
-
括号里面传入的是一个{ } 对象,其实就是一个配置项
-
配置项里面包含了一个routes路由表
-
之后在main.js中
import Vue from 'vue' import App from './App' import router from './router' Vue.config.productionTip = false new Vue({ el: '#app', router, components: { App }, template: '<App/>' })
在new Vue实例的时候,把导出的router作为了配置项传入,这个又是为什么?
问题三:router-link 和 router-view
-
在组件中使用router-link组件实现路由跳转
-
使用router-view组件作为路由的出口
那么,这两个组件内部是怎么样实现的呢?
为什么,其他组件都是要在Component里面声明才可以使用的,但是这两个组件直接使用,就说明这两个组件肯定在某个地方进行了全局注册
拓展:大概的思路:
其实在jquery中是这样实现:就是监听当前哈希值hash的变换 或者是 history的变化,就可以得到一个触发的事件,然后就可以拿到当前的地址了(就是要跳转的地址),然后通过这个地址,就可以到我们router/index.js中定义的路由表,也就是匹配path,得到component,这样就可以拿到组件了,然后就要拿到真实的DOM,,然后追加到我们的router-view里面,也就是把之前的router-view里面的内容清空掉,然后把最新的DOM压入到router-view中进行显示的,这个就是一个很典型的dom操作
但是vue中有一个新东西:Vue的响应式原理,所以就可以用响应式来监听路由的变化
什么是Vue的插件
学习自:
-
插件内部为什么要实现一个install方法
vue的插件应该暴露出一个install方法,这个方法的e第一个参数是Vue构造器,第二个参数是一个可选的选项对象——这个是Vue官方对Vue插件的规范,
install函数可以做些什么?
install内部怎么实现的?
插件在install中到底做了什么?
经典三连问~
install在vue-router等插件中的处理
抛出问题:
-
为什么在项目中可以直接使用 $router 来获取其中的值以及一些方法
-
为什么这些插件都要先用Vue.use 引入,然后才创建实例,并且之后在Vue实例中引入
使用vue-router举例
class Router { constructor(options) { ... } } Router.install = function(_Vue) { _Vue.mixin({ beforeCreate() { if (this.$options.router) { _Vue.prototype.$router = this.$options.router } } }) } export default Router;
-
_Vue.mixin全局混入是什么呢?相当于在所有的组件中混入这个方法; -
beforeCreate是什么呢?当然是Vue的一个生命周期,在create之前执行;
所以:
-
Vue-Router是在install函数使用了一个全局混入,在beforeCreate生命周期触发的时候把this.$option.router挂载到Vue的原型上了,那么这样就可以使用this.$router来调用router实例啦
-
那么this.$options.router又是什么
-
全局混入中的this.$options是我们在 在main.js中 new Vue({})的时候 { } 大括号里面传入的配置项,所以我们main.js传入的router,在这里就可以通过this.$options.router来获取到我们在router/index.js中new的vue-router实例了
为什么要这样设计:因为在router/index.js中
import Vue from 'vue' import Router from 'vue-router' import Home from '@/components/home' import About from '@/components/about' Vue.use(Router) export default new Router({ routes: [ { path: '/', name: 'Home', component: Home }, { path: '/about', name: 'About', component: About } ] })
是先执行了Vue.use 之后再进行new vue-router对象的操作,所以如果要在插件的install中使用到这个vue-router实例的话,就要把实例传入到main.js的new Vue({})配置项里面,这样的话,我们就可以用依赖注入的方式,把new Router({})里面定义的路由表获取到了,
我们把 Vue.prototype.$router = this.$options.router; 所以其他组件就可以通过this.$router获取访问到我们定义的路由表了,所以为什么可以用this.$router.push()添加路由,一部分的原因就是,this.$router路由表是一个数组,所以可以通过push操作的
-
-
Vue.use的时候主要调用了 插件内部的install方法,并把Vue实例作为了参数进行传入
插件install在vue中的内部实现
下面是Vue.use的源码
export function initUse (Vue: GlobalAPI) { // 注册一个挂载在实例上的use方法 Vue.use = function (plugin: Function | Object) { // 初始化当前插件的数组 const installedPlugins = (this._installedPlugins || (this._installedPlugins = [])) // 如果这个插件已经被注册过了,那就不作处理 if (installedPlugins.indexOf(plugin) > -1) { return this } ... // 重点来了哦!!! if (typeof plugin.install === 'function') { // 当插件中install是一个函数的时候,调用install方法,指向插件,并把一众参数传入 plugin.install.apply(plugin, args) } else if (typeof plugin === 'function') { // 当插件本身就是一个函数的时候,把它当做install方法,指向插件,并把一众参数传入 plugin.apply(null, args) } // 将插件放入插件数组中 installedPlugins.push(plugin) return this } }
看到这里大家对插件应该有了一定的认识了,坚持!!
开始实现
-
首先:因为router/index 初始化了插件的实例,所以该插件可以用一个class表示,并且还要实现一个install方法
class VueRouter { } VueRouter.install = (_Vue) => { }
上面也说了,插件的install方法,第一个参数就是Vue实例本身
优化
后面其他地方也要用到vue实例的,所以我们就在插件声明一个全局的vue,用来保存这个传入的vue实例
并且:也是一个保证插件和vue的独立性,有了这个操作之后,当我们打包该插件的时候,就不会把vue也打包到插件了
并且把从new Vue({router})的配置项router,挂载到Vue实例原型对象上
let Vue; class VueRouter { } VueRouter.install = (_Vue) => { Vue = _Vue; Vue.mixin({ beforeCreate() { if (this.$options.router) { Vue.prototype.$router = this.$options.router; } } }) }
不仅如此,我们还在install函数中,实现了两个组件 router-link 和 router-view
原理:
<router-link to="/">Home</router-link> 所以我们要把这个router-link标签转换成:Home
-
接收一个to属性
-
并且返回的是一个render渲染函数,也就是返回一个虚拟DOM
那么怎么获得router-link中间的文字Home呢?
拓展:Vue.$slots

所以因为router-link里面只有home文字,所以可以直接通过 vue.$slots.default获取即可了
let Vue; class VueRouter { } VueRouter.install = (_Vue) => { Vue = _Vue; Vue.mixin({ beforeCreate() { if (this.$options.router) { Vue.prototype.$router = this.$options.router; } } }); Vue.component("router-link", { props: { to: { type: String, required: true, } }, render(h) { return h("a", { attrs: { // 为了不重新更新页面,这里通过锚点 href: `#${this.to}` }, }, // 如果要获取Home的话,可以是下面这样 this.$slots.default ); } }); }
上面就是router-link具体实现了
下面是router-view实现
原理:获取到当前路由,并从路由表找到对应的component并进行渲染
注意:我们在install方法中,通过全局混入,把在router/index.js中实例化的vue-router实例,挂载到了vue原型对象上的$router上了
-
那么:我们就可以在组件中通过this.$router来获取到我们的实例化组件
下面就要实现:该插件的类class怎么实现
我们在router/index.js中,通过
new Router({
  routes: [
    {
      path: '/',
      name: 'Home',
      component: Home
    },
    {
      path: '/about',
      name: 'About',
      component: About
    }
  ]
})
传入了一个路由表,作为这个插件实例的配置项
所以就可以在该类的构造函数中,通过参数获取到这个配置项了,为了可以在其他组件中获取到路由表,我们把配置项挂载到该类本身
class VueRouter {
    constructor(options) {
        this.$options = options
    }
}
为什么要这样做?
这样的话,在router-view这些组件中
就可以通过 this.$router.$options访问到我们在router/index里面new的vue-router类中传入的配置项里面的路由表了
class VueRouter {
    constructor(options) {
        this.$options = options
        this.current = window.location.hash.slice(1) || "/";
        window.addEventListener("hashchange", () => {
            // 获取#后面的东西
            this.current = window.location.hash.slice(1) || "/";
        })
    }
}
初始化current,并通过onhashchange来监听路由的变化,并赋值给current
通过slice(1)是为了获取到#后面的值
这样的话,就可以实现router-view组件了
let Vue; class VueRouter { constructor(options) { this.$options = options this.current = window.location.hash.slice(1) || "/"; window.addEventListener("hashchange", () => { // 获取#后面的东西 this.current = window.location.hash.slice(1) || "/"; }) } } VueRouter.install = (_Vue) => { Vue = _Vue; Vue.mixin({ beforeCreate() { if (this.$options.router) { Vue.prototype.$router = this.$options.router; } } }); Vue.component("router-link", { props: { to: { type: String, required: true, } }, render(h) { return h("a", { attrs: { // 为了不重新更新页面,这里通过锚点 href: `#${this.to}` }, }, // 如果要获取Home的话,可以是下面这样 this.$slots.default ); } }); Vue.component("router-view", { render(h) { let component = null; // 由于上面通过混入拿到了this.$router了,所以就可以获取当前路由所对应的组件并将其渲染出来 const current = this.$router.current; const route = this.$router.$options.routes.find( (route) => route.path === current ) if (route) component = route.component; return h(component); } }) }
所以目前代码是这样的
但是,我们可以发现current改变了,router-view不变,这是因为此时的current并不是一个响应式数据,所以current变化的时候,router-view里面的render函数并不会再次执行并重新渲染
所以下面就要对class类里面的current变成是响应式数据了
拓展:Vue.util.defineReactive
Vue.util.defineReactive(obj,key,value,fn)
obj: 目标对象,
key: 目标对象属性;
value: 属性值
fn: 只在node调试环境下set时调用
其实底层就是一个Object.defineProperty()
依赖通过dep收集,通过Observer类,添加ob属性
class VueRouter { constructor(options) { this.$options = options; // 只有把current变成响应式数据之后,才可以修改之后重新执行router-view中的render渲染函数的 let initial = window.location.hash.slice(1) || "/"; Vue.util.defineReactive(this, "current", initial); window.addEventListener("hashchange", () => { // 获取#后面的东西 this.current = window.location.hash.slice(1) || "/"; }) } }
所以完整代码就是:
// 1、实现一个插件 // 2、两个组件 // Vue插件怎么写 // 插件要么是function 要么就是 对象 // 要求插件必须要实现一个install方法,将来被vue调用的 let Vue; // 保存Vue的构造函数,在插件中要使用 class VueRouter { constructor(options) { this.$options = options; // 只有把current变成响应式数据之后,才可以修改之后重新执行router-view中的render渲染函数的 let initial = window.location.hash.slice(1) || "/"; Vue.util.defineReactive(this, "current", initial); window.addEventListener("hashchange", () => { // 获取#后面的东西 this.current = window.location.hash.slice(1) || "/"; }) } } VueRouter.install = (_Vue) => { Vue = _Vue; // 1、挂载$router属性(这个获取不到router/index.js中new 出来的VueRouter实例对象, // 因为Vue.use要更快指向,所以就在main.js中引入router,才能使用的 // this.$router.push() // 全局混入(延迟下面的逻辑到router创建完毕并且附加到选项上时才执行) Vue.mixin({ beforeCreate() { // 注意此钩子在每个组件创建实例的时候都会被调用 // 判断根实例是否有该选项 if (this.$options.router) { /** * 因为每一个Vue的组件实例,都会继承Vue.prototype上面的方法,所以这样就可以 * 在每一个组件里面都可以通过this.$router来访问到router/index.js中初始化的new VueRouter实例了 */ Vue.prototype.$router = this.$options.router; } } }); // 实现两个组件:router-link、router-view // <router-link to="/">Hone</router-link> 所以我们要把这个router-link标签转换成:<a href="/">Home</a> /** * 第二个参数其实是一个template,也就是一个渲染组件dom * 我们这里使用的是渲染函数,也就是返回一个虚拟DOM */ Vue.component("router-link", { props: { to: { type: String, required: true, } }, render(h) { return h("a", { attrs: { // 为了不重新更新页面,这里通过锚点 href: `#${this.to}` }, }, // 如果要获取Home的话,可以是下面这样 this.$slots.default ); } }); Vue.component("router-view", { render(h) { let component = null; // 由于上面通过混入拿到了this.$router了,所以就可以获取当前路由所对应的组件并将其渲染出来 const current = this.$router.current; const route = this.$router.$options.routes.find( (route) => route.path === current ) if (route) component = route.component; return h(component); } }) } export default VueRouter;