一、点赞次数的优化
新建一个unitFormat.wxs文件,定义一个函数,拿到一个数字之后进行处理
记得要提供一个对外的借口
toFixed(n)就是说明保留n位小数了
并且要注意了,定义模块名字的话,是唯一性的,也就是不能重复的
这里设置的是k,假如后面超过了上万的话,也可以设置是w这个单位了

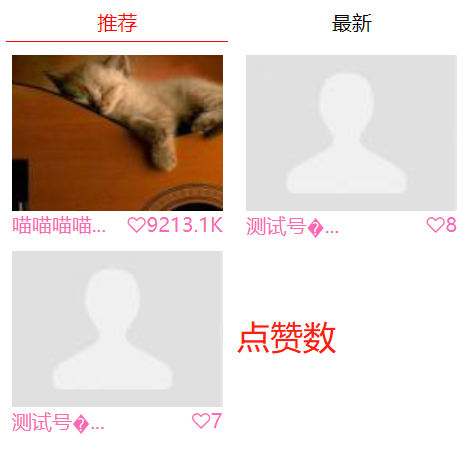
17-首页推荐与最新功能实现
因为在推荐中的排序顺序,其实是按照点赞的次序了进行的,
最新的就是按照用户注册的时间了定的
还有就是要定义一个变量和制定现在是在推荐页面还是在最新页面的
Current设置位links也就是说,他的初始值是根据点整数来进行排序的
对“推荐”和“最新”
通过在index.js里面定义一个current变量,当==links的时候就是active推荐,反之
在index.wxml中
<view class="{{ current == 'links' ? 'active' : ''}}">推荐</view>
        <view class="{{ current == 'time' ? 'active' : ''}}">最新</view>
在index.js中
通过 current : 'time' 当然现在在js里面的current是写死的,如果他是avtive的话,最新就会激活,反之就是推荐
所以现在要进行的就是,可以通过点击事件来进行替换的,这里是通过一个自定义的属性和方法来完成的
通过添加data-curent这个自定义属性和handleCurrent这个方法
      <view class="{{ current == 'links' ? 'active' : ''}}"
        data-current="links" bindtap="handleCurrent">推荐</view>
        <view class="{{ current == 'time' ? 'active' : ''}}"
        data-current="time" bindtap="handleCurrent">最新</view>
在js的handleCurrent中式可以通过ev.target.dataset拿到我们在wxml中自定义的属性的
在index.js中的handleCurrent函数
  handleCurrent(ev){
    let current = ev.target.dataset.current;
    if( current == this.data.current){
      return false;
    }
    this.setData({
      current = current
    });
  }
效果就是,可以通过点击事件来切换 推荐和最新


之后就是,切换完了之后,关键就是数据还要变化的
切换“推荐”和“最新”的时候,式通过初始的links来获取最新的数据的
这个时候要一开始就对数据进行获取的话,就要用到index.js里面的onready了,就要靠点赞数和注册时间来让数据按顺序的反馈过来
在开发文档里面-》云开发-》collection.orderBy 是专门来进行排序的,指定查询的排序条件
https://developers.weixin.qq.com/miniprogram/dev/wxcloud/reference-sdk-api/database/collection/Collection.orderBy.html
示例代码demo
db.collection('todos').orderBy('progress', 'asc')
  .get()
  .then(console.log)
  .catch(console.error)
示例代码:按多个字段排序
先按 progress 排降序(progress 越大越靠前)、再按 description 排升序(字母序越前越靠前)取待办事项:

db.collection('todos')
  .orderBy('progress', 'desc')
  .orderBy('description', 'asc')
  .get()
  .then(console.log)
  .catch(console.error)
在原先的onready中
onReady: function () {
    db.collection('users').field({
      userPhoto : true,
      nickName : true,
      links : true
    }).get().then((res)=>{
      // console.log(res.data)
      this.setData({
        listData : res.data
      });
    });
  },
在.field的后面 get前面
  onReady: function () {
    db.collection('users')
    .field({
      userPhoto : true,
      nickName : true,
      links : true
    })
    .orderBy(this.data.current , 'desc' )
    .get()
    .then((res)=>{
      // console.log(res.data)
      this.setData({
        listData : res.data
      });
    });
  },
desc就是按升序的,progress就是按降序的
效果就是:

但是上面的只是对点赞数的数量进行搞得,如果是点击了最新得话就要发送“最新”这个请求了
上面暂时写得onready其实是一个复用的方法,因为“推荐“和”最新“都是要用到他的,所以就可以把上面的onready封装一下
变成一个getListData的方法:
getListData(){
    db.collection('users')
      .field({
        userPhoto: true,
        nickName: true,
        links: true
      })
      .orderBy(this.data.current, 'desc')
      .get()
      .then((res) => {
        // console.log(res.data)
        this.setData({
          listData: res.data
        });
      });
  }
在Onready中调用,之后在handleCurrent的最最后面也调用一下,就是为了在点击切换了之后,直接调用,就不用等到重新编译onready的时候再进行
更新了1(可以在异步中调用这个函数,在回调中调用

三、详情页 detail(是所有用户的通用页面
(还要通过不同用户的ID来决定渲染的内容)
所以在点击这个用户的头像的时候,要吧这个用户的唯一标示(userID带进去,以得到不同的详情页面)
首先给首页中的用户图片加上 点击事件 handleDetail(然后通过自定义属性的方式,来得到用户的id,也就是吧这个id传入到点击事件函数中)
 <image  mode="aspectFill" src='{{ item.userPhoto }}'
          data-id="{{ item._id }}" bindtap="handleDetail"/>
之后就可以在index.js页面中写这个方法了
在这个方法里面拿到了这个用户的id之后,就可以用编程式路由来找到这个详情页了,并且在用navigator的时候跳转到的url后面
要加上参数,也就是用户的id
 handleDetail(ev){
    let id = ev.target.dataset.id;
    wx.navigateTo({
      url: '/pages/detail/detail?userID=' + id
    })
  }
跳转到页面之后,那怎么样得到我们刚刚在URL后面传递的id值呢?

其实我们在跳转之后,console中会提示一个这样的东西,后面带的就是这个用户的ID值了
如果想要得到这个id值的话,在detail.js中的onLoad中
我们把传入到这个onload函数的options参数,打印出来,看看结果是怎么样的

可以看到打印出来的东西,就是我们刚刚传进去的id了
存了这个userid之后就可以开始对数据库进行操作了
小技巧:为了后面不用再点进详情页面了,可以添加编译模式

可以对这个详情页面直接传如一个用户的id
(就不用再从首页点击进入了)
  onLoad: function (options) {
    // console.log( options );
    let userId = options.userId;
    db.collection('users').doc(userId).get().then((res)=>{

    });
  },
通过这样子就可以得到这个用户的所有在数据库里面的信息了
(我们就可以吧这些信息写入到一个对象里面)---放在detail这个对象里面,还要有一个功能就是“判断点入的这个用户和你是不是好友关系”
所有就在detail.js的data里面定义一个判断是不是好友的变量
然后就可以开始构造wxml页面了‘
在wxml页面中,给用户提示一下当前这个人是他的好友还是不是他的好友
在js文件中记得要把结果赋值为我们设置的detail对象
 this.setData({
        detail : res.data
      });
之后就是wxml:
<!--miniprogram/pages/detail/detail.wxml-->
<view class="detail">
  <button wx:if="{{ isFriend }}">已是好友</button>
  <button wx:else>添加好友</button>

  <view>
    <text>昵称:</text>
    <text>{{ detail.nickName }}</text>
  </view>
   <view>
    <text>头像:</text>
   <image src="{{ detail.userPhoto }}" />
  </view>
   <view>
    <text>个性签名:</text>
    <text>{{ detail.signature }}</text>
  </view>
   <view>
    <text>手机号:</text>
    <text>{{ detail.phoneNumber }}</text>
  </view>
   <view>
    <text>微信号:</text>
    <text>{{ detail.weixinNumber }}</text>
  </view>
</view>
效果图:

之后就是对样式进行优化了,不然太丑了
效果图:
