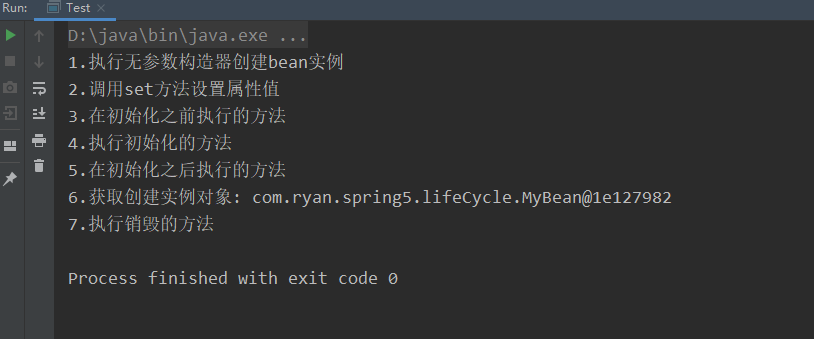
Bean的生命周期就是对象从创建到销毁的过程, 一共有七步:
- 通过构造器创建bean实例(无参数构造);
- 设置bean的属性值和对其他bean引用(调用set方法);
- 把bean实例传递给bean后置处理器的方法postProcessBeforeInitialization
- 调用bean的初始化的方法(需要配置初始化方法);
- 把bean实例传递给bean后置处理器的方法postProcessAfterInitialization
- bean可以使用了(获取到了对象);
- 当容器关闭的时候, 调用bean的销毁方法(需要配置销毁方法)
实例演示如下:
创建MyBean类:
public class MyBean {

    //创建无参数构造器
    public MyBean() {
        System.out.println("1.执行无参数构造器创建bean实例");
    }

    private String name;
    public void setName(String name) {
        this.name = name;
        System.out.println("2.调用set方法设置属性值");
    }

    //创建初始化的执行方法
    public void initMethod(){
        System.out.println("4.执行初始化的方法");
    }

    //创建销毁的执行方法
    public void destroyMethod(){
        System.out.println("7.执行销毁的方法");
    }
}
创建MyBeanPost类:(实现BeanPostProcessor接口)
public class MyBeanPost implements BeanPostProcessor {
    @Override
    public Object postProcessBeforeInitialization(Object bean, String beanName) throws BeansException {
        System.out.println("3.在初始化之前执行的方法");
        return bean;
    }

    @Override
    public Object postProcessAfterInitialization(Object bean, String beanName) throws BeansException {
        System.out.println("5.在初始化之后执行的方法");
        return bean;
    }
}
创建配置文件:(实现了BeanPostProcessor的bean就是后置处理器, 在配置文件中配好后, Spring会为配置文件中的所有bean添加此后置处理器)
<?xml version="1.0" encoding="UTF-8"?>
<beans xmlns="http://www.springframework.org/schema/beans"
       xmlns:xsi="http://www.w3.org/2001/XMLSchema-instance"
       xsi:schemaLocation="http://www.springframework.org/schema/beans http://www.springframework.org/schema/beans/spring-beans.xsd">

    <bean id="myBean" class="com.ryan.spring5.lifeCycle.MyBean" init-method="initMethod" destroy-method="destroyMethod">
        <property name="name" value="张辽"></property>
    </bean>

    <!--配置后置处理器-->
    <bean id="myBeanPost" class="com.ryan.spring5.lifeCycle.MyBeanPost"></bean>
</beans>
测试:
public class Test {
    public static void main(String[] args) {

        ApplicationContext context = new ClassPathXmlApplicationContext("file:src\com\ryan\spring5\lifeCycle\bean.xml");
        MyBean myBean = context.getBean("myBean", MyBean.class);
        System.out.println("6.获取创建实例对象: " + myBean);

        //手动销毁bean实例, 需要强转成ClassPathXmlApplicationContext类型才能调用close方法
        //*强转成ClassPathXmlApplicationContext需要加载配置文件时使用ClassPathXmlApplicationContext方法
        ((ClassPathXmlApplicationContext)context).close();
    }
}
输出:
