一、harbor搭建
前提
docker已经安装完毕
1.查看安装版本
root@master:~# docker info
Containers: 36
 Running: 19
 Paused: 0
 Stopped: 17
Images: 15
Server Version: 17.12.1-ce
Storage Driver: overlay2
 Backing Filesystem: extfs
 Supports d_type: true
 Native Overlay Diff: true
Logging Driver: json-file
Cgroup Driver: cgroupfs
Plugins:
 Volume: local
 Network: bridge host macvlan null overlay
 Log: awslogs fluentd gcplogs gelf journald json-file logentries splunk syslog
Swarm: inactive
Runtimes: runc
Default Runtime: runc
Init Binary: docker-init
containerd version: 9b55aab90508bd389d7654c4baf173a981477d55
runc version: 9f9c96235cc97674e935002fc3d78361b696a69e
init version: v0.13.0 (expected: 949e6facb77383876aeff8a6944dde66b3089574)
Security Options:
 apparmor
 seccomp
  Profile: default
Kernel Version: 5.8.0-43-generic
Operating System: Ubuntu 20.04.2 LTS
OSType: linux
Architecture: x86_64
CPUs: 8
Total Memory: 7.774GiB
Name: master
ID: VM7X:I7P6:3E5G:WXHB:XR34:E53E:QHY5:ICU7:WMGB:FPJ4:JPEY:KHLH
Docker Root Dir: /var/lib/docker
Debug Mode (client): false
Debug Mode (server): false
Registry: https://index.docker.io/v1/
Labels:
Experimental: false
Insecure Registries:
 master:5000
 127.0.0.0/8
Registry Mirrors:
 https://7hgbbnxx.mirror.aliyuncs.com/
Live Restore Enabled: false
2、查看加速仓库
root@master:~# cat /etc/docker/daemon.json
{
  "registry-mirrors": ["https://7hgbbnxx.mirror.aliyuncs.com"],
  "insecure-registries":["master:5000"]
}
root@master:~#
1、安装docker-compose
1.1查看docker-compose版本
https://github.com/docker/compose/
1.2下载安装包
wget https://github.com/docker/compose/releases/download/1.29.2/docker-compose-$(uname -s)-$(uname -m)
1.3线下安装
mv docker-compose-Linux-x86_64 /usr/local/bin/docker-compose
chmod +x /usr/local/bin/docker-compose
ln -s /usr/local/bin/docker-compose /usr/bin/docker-compose
1.4查看安装版本
root@master:/usr/bin# docker-compose --version
docker-compose version 1.29.2, build 5becea4c
2、下载harbor包
2.1查看harbor包
https://github.com/goharbor/harbor/releases
2.2下载harbor包
wget https://github.com/goharbor/harbor/releases/download/v2.1.3/harbor-offline-installer-v2.1.3.tgz
2.3解压安装包
tar -zxvf harbor-offline-installer-v2.1.3.tgz -C /usr/local/
2.4修改yml文件
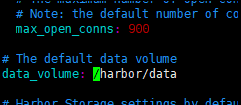
hostname = 192.168.100.204 #修改harbor的启动ip,这里需要依据系统ip设置

port: 80 #harbor的端口,有两个端口,http协议(80)和https协议(443)

harbor_admin_password = harbor12345   #修改harbor的admin用户的密码

data_volume: /harbor/data #修改harbor存储位置
2.5安装
root@master:/k8s/pod/image/harbor# ./prepare
prepare base dir is set to /k8s/pod/image/harbor
Unable to find image 'goharbor/prepare:v2.3.1' locally
v2.3.1: Pulling from goharbor/prepare
2f0af7491ce3: Pull complete
7dd5e4229ec6: Pull complete
cda5f8f8a1f8: Pull complete
3404538ae5c9: Pull complete
991d1829b2c3: Pull complete
73acb2531ec7: Pull complete
52707cc5b93e: Pull complete
3104331c643d: Pull complete
Digest: sha256:ad8c463ad05e7c16c9ffd518704ce32e5361effa18c467317b87446aac0199f0
Status: Downloaded newer image for goharbor/prepare:v2.3.1
WARNING:root:WARNING: HTTP protocol is insecure. Harbor will deprecate http protocol in the future. Please make sure to upgrade to https
Generated configuration file: /config/portal/nginx.conf
Generated configuration file: /config/log/logrotate.conf
Generated configuration file: /config/log/rsyslog_docker.conf
Generated configuration file: /config/nginx/nginx.conf
Generated configuration file: /config/core/env
Generated configuration file: /config/core/app.conf
Generated configuration file: /config/registry/config.yml
Generated configuration file: /config/registryctl/env
Generated configuration file: /config/registryctl/config.yml
Generated configuration file: /config/db/env
Generated configuration file: /config/jobservice/env
Generated configuration file: /config/jobservice/config.yml
Generated and saved secret to file: /data/secret/keys/secretkey
Successfully called func: create_root_cert
Generated configuration file: /compose_location/docker-compose.yml
Clean up the input dir
./install.sh
Creating network "harbor_harbor" with the default driver
Creating harbor-log ... done
Creating harbor-db     ... done
Creating harbor-portal ... done
Creating registry      ... done
Creating redis         ... done
Creating registryctl       ... done
Creating harbor-core   ... done
Creating nginx             ... done
Creating harbor-jobservice ... done
✔ ----Harbor has been installed and started successfully.----
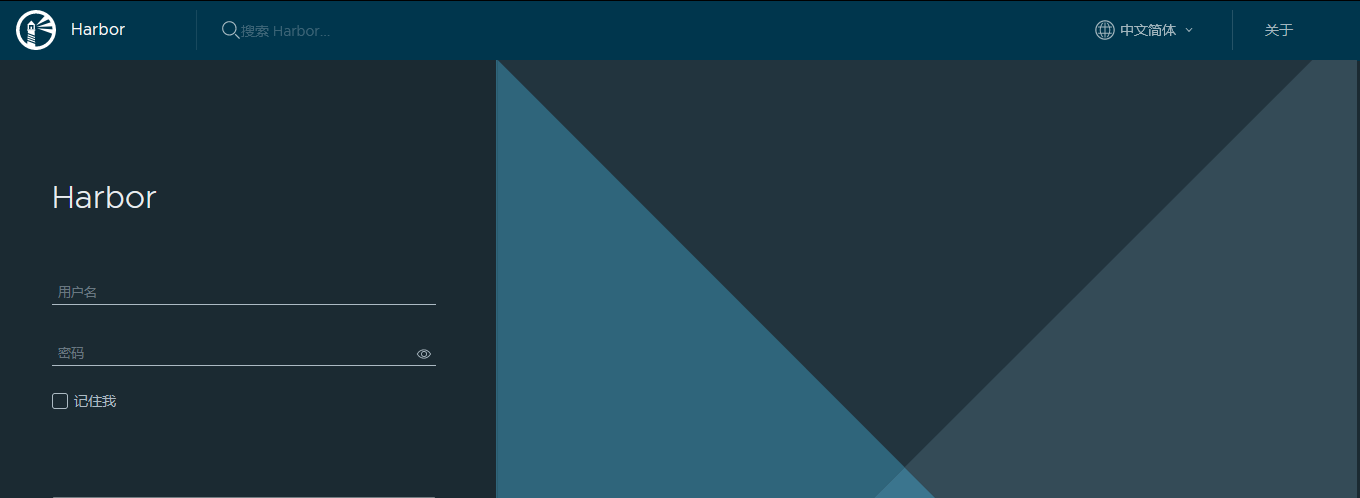
2.6登录
2.7 设置开机自启文件
[Unit]

Description=Harbor

After=docker.service systemd-networkd.service systemd-resolved.service

Requires=docker.service

Documentation=http://github.com/vmware/harbor

[Service]

Type=simple

Restart=on-failure

RestartSec=5

#需要注意harbor的安装位置

ExecStart=/usr/bin/docker-compose -f  /k8s/harbor/harbor/docker-compose.yml up

ExecStop=/usr/bin/docker-compose -f /k8s/harbor/harbor/docker-compose.yml down

[Install]

WantedBy=multi-user.target
2.8设置开机自启
systemctl enable harbor
错误解决方案
1、错误:ssl_cert not set
harbor.yml文件中关于https内容隐去
2、 harbor-db 启动时报initdb: directory "/var/lib/postgresql/data" exists but is not empty
找到docker-compose.yml
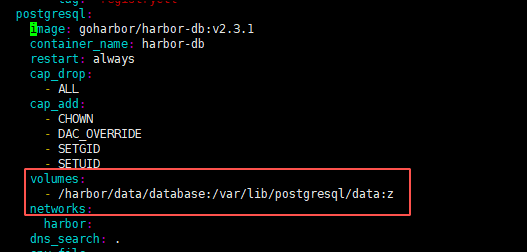
删除database下东西
再将容器删除docker-compose down ,docker-compose up -d ,将容器重启,发现harbor-db启动成功了
3、harbor-db启动报initdb: could not change permissions of directory "/var/lib/postgresql/data": Operation not permitted
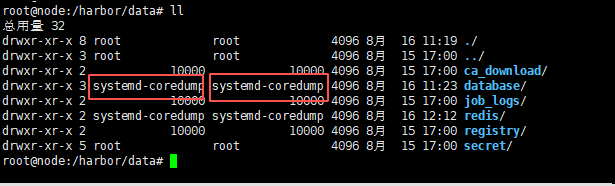
法一:查看database权限,并修改
法二:修改yml文件挂载路径(harbor.yml)
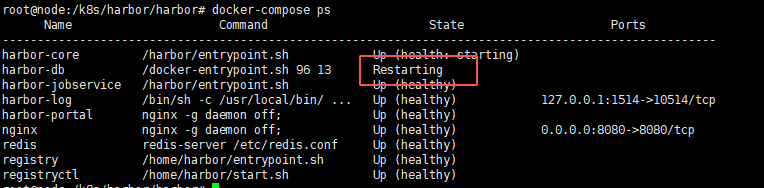
2.9查看启动状况
[root@node harbor]# docker-compose ps
      Name                     Command                       State                     Ports
------------------------------------------------------------------------------------------------------
harbor-core         /harbor/entrypoint.sh            Up (health: starting)
harbor-db           /docker-entrypoint.sh 96 13      Up (health: starting)
harbor-jobservice   /harbor/entrypoint.sh            Up (health: starting)
harbor-log          /bin/sh -c /usr/local/bin/ ...   Up (healthy)            127.0.0.1:1514->10514/tcp
harbor-portal       nginx -g daemon off;             Up (health: starting)
nginx               nginx -g daemon off;             Up (health: starting)   0.0.0.0:8080->8080/tcp
redis               redis-server /etc/redis.conf     Up (health: starting)
registry            /home/harbor/entrypoint.sh       Up (health: starting)
registryctl         /home/harbor/start.sh            Up (health: starting)
二、registry搭建
前提
docker 环境已经安装完成
1、下载registry镜像
docker pull registry
2、运行一个Registry镜像仓库的容器实例
docker run -d -v /registry:/var/lib/registry -p 5000:5000 --restart=always --name registry registry:latest
-d :代表后台运行
-v:代表将本地目录与仓库目录关联
-p:代表映射的端口
--restart:代表一直启动
--name:代表仓库名字
最后一个代表仓库镜像
3、在客户端查看镜像仓库中的所有镜像
curl http://your-server-ip:5000/v2/_catalog
4、设置配置私有仓库的可信任
vim /etc/docker/daemon.json


{
    "insecure-registries" : [ "your-server-ip:5000" ]
}
5、启动docker服务
systemctl restart docker
6、为镜像打标签
docker tag your-image-name:tagname your-server-ip:5000/your-image-name:tagname
7、上传镜像
docker push your-registry-server-ip:5000/your-image-name:tagname
8、下载镜像
docker pull your-server-ip:5000/your-image-name:tagname