接下来我们介绍新内容,OAuth2.0叫做授权码(authorization code),在OpenID Connect中则属于OpenId Connect Flow,称为授权码流程(Authorization Code Flow),这种方式主要场景:
- 保密客户端,服务器端的web应用
例如asp.net core mvc,这种由后端处理逻辑后,模板渲染的web框架
另外,这种方式主要是需要先去IdentityServer申请一个授权码,然后再用授权码获取token。这种方式广泛用于大厂的开放平台,如微信、华为等等。
这种方式的安全性最高,因为它是server-server,即web应用的后端与IdentityServer交互通信,token都是存储在后端。基本流程如下:
- 1.请求IdentityServer的oauth/authorize? response_type=code&client_id=CLIENT_ID&redirect_uri=CALLBACK_URL&scope=read
redirect_uri为需要授权的应用的url
- 2.callback?code=AUTHORIZATION_CODE
重定向至redirect_uri,且会在uri后增加授权码
- 3.后端请求oauth/token?client_id=CLIENT_ID&client_secret=CLIENT_SECRET&
grant_type=authorization_code&code=AUTHORIZATION_CODE&redirect_uri=CALLBACK_URL
再携带code,去token端点,获取token
在IdentityServer4中,大致也是这个流程,但是其中会有一些变化,为了安全,IdentityServer4是带有PKCE支持的授权码模式,后续我们会讲到,先让我们实践一下,感受一下。
1.IdentityServer增加UI
上两篇文章,主要针对的是客户端凭证和密码凭证,我们继续在IdentityServer项目中进行增量开发。
1.1 增加MVC UI模板代码
cd .srcIdentityServer
dotnet new is4ui
1.2 MVC生效
在依赖注入和管道中使mvc生效
- Startup.ConfigureServices
// uncomment, if you want to add an MVC-based UI
services.AddControllersWithViews();
- Startup.Configure
// uncomment if you want to add MVC
app.UseStaticFiles();
app.UseRouting();

app.UseIdentityServer();

// uncomment, if you want to add MVC
app.UseAuthorization();
app.UseEndpoints(endpoints =>
{
    endpoints.MapDefaultControllerRoute();
});
ps:
is4inmem模板包含了基本的IdentityServer,同时也包含了标准UI界面(也就是上面添加的模板代码)
1.3 修改launchSettings.json
{
  "profiles": {
    "MVCClient": {
      "commandName": "Project",
      "launchBrowser": true,
      "applicationUrl": "http://localhost:6002",
      "environmentVariables": {
        "ASPNETCORE_ENVIRONMENT": "Development"
      }
    }
  }
}
1.4 增加客户端配置
new Client
                     {
                        ClientId="mvc",
                        ClientSecrets={ new Secret("secret-mvc".Sha256())},
                        AllowedGrantTypes = GrantTypes.Code,
                        RequireConsent=true,

                        // where to redirect to after login
                        RedirectUris = { "http://localhost:6002/signin-oidc" },

                        // where to redirect to after logout
                        PostLogoutRedirectUris = { "http://localhost:6002/signout-callback-oidc" },

                        AllowedScopes = new List<string>
                        {
                            "api1",
                            IdentityServerConstants.StandardScopes.OpenId,
                            IdentityServerConstants.StandardScopes.Profile
                        }
                     }
2.创建新的asp.net core mvc客户端
2.1 新建项目
cd .src
dotnet new mvc -n MVCClient
dotnet sln add .MVCClientMVCClient.csproj
2.2 添加nuget引用
ASP.NET Core middleware that enables an application to support the OpenID Connect authentication workflow.
cd .MVCClient
dotnet add package Microsoft.AspNetCore.Authentication.OpenIdConnect
2.3 注册OpenId Connect
using System.IdentityModel.Tokens.Jwt;

// ...

JwtSecurityTokenHandler.DefaultMapInboundClaims = false;

services.AddAuthentication(options =>
    {
        options.DefaultScheme = "Cookies";
        options.DefaultChallengeScheme = "oidc";
    })
    .AddCookie("Cookies")
    .AddOpenIdConnect("oidc", options =>
    {
        options.Authority = "http://localhost:5001";

        options.ClientId = "mvc";
        options.ClientSecret = "secret";
        options.ResponseType = "code";

        options.SaveTokens = true;
        options.Scope.Add("api1");
    });
AddAuthentication:添加身份认证服务options.DefaultScheme=Cookies:我们使用cookie记录本地登录用户options.DefaultChallengeScheme=oidc:需要用户登录,将使用OpenID Connect协议
AddCookie:添加cookies的处理器AddOpenIdConnect:配置执行OpenID Connect协议的处理器相关参数options.Authority:标识所信赖的token服务地址options.ClientId和options.ClientSecret:标识MVC客户端options.SaveTokens:保存从IdentityServer获取的token至cookie,ture标识ASP.NETCore将会自动存储身份认证session的access和refresh token
2.4 添加身份认证
 app.UseStaticFiles();

 app.UseRouting();
 app.UseAuthentication();
 app.UseAuthorization();

 app.UseEndpoints(endpoints =>
 {
     endpoints.MapControllerRoute(
         name: "default",
         pattern: "{controller=Home}/{action=Index}/{id?}").RequireAuthorization();
 });
2.5 增加用户退出
最后一步,是增加用户退出操作。
对于像IdentityServer这样的身份认证服务,清除本地应用程序cookie是不够的。还需要往返于IdentityServer以清除中央单点登录的session。
在控制器中增加退出操作代码:
public IActionResult Logout()
{
    return SignOut("Cookies", "oidc");
}
在视图层_Layout.cshtml增加退出按钮
 <div class="navbar-collapse collapse d-sm-inline-flex flex-sm-row-reverse">
                    <ul class="navbar-nav flex-grow-1">
                        <li class="nav-item">
                            <a class="nav-link text-dark" asp-area="" asp-controller="Home" asp-action="Index">Home</a>
                        </li>
                        <li class="nav-item">
                            <a class="nav-link text-dark" asp-area="" asp-controller="Home" asp-action="Privacy">Privacy</a>
                        </li>
                        <li class="nav-item">
                            <a class="nav-link text-dark" asp-area="" asp-controller="Home" asp-action="Logout">LoginOut</a>
                        </li>
                    </ul>
                </div>
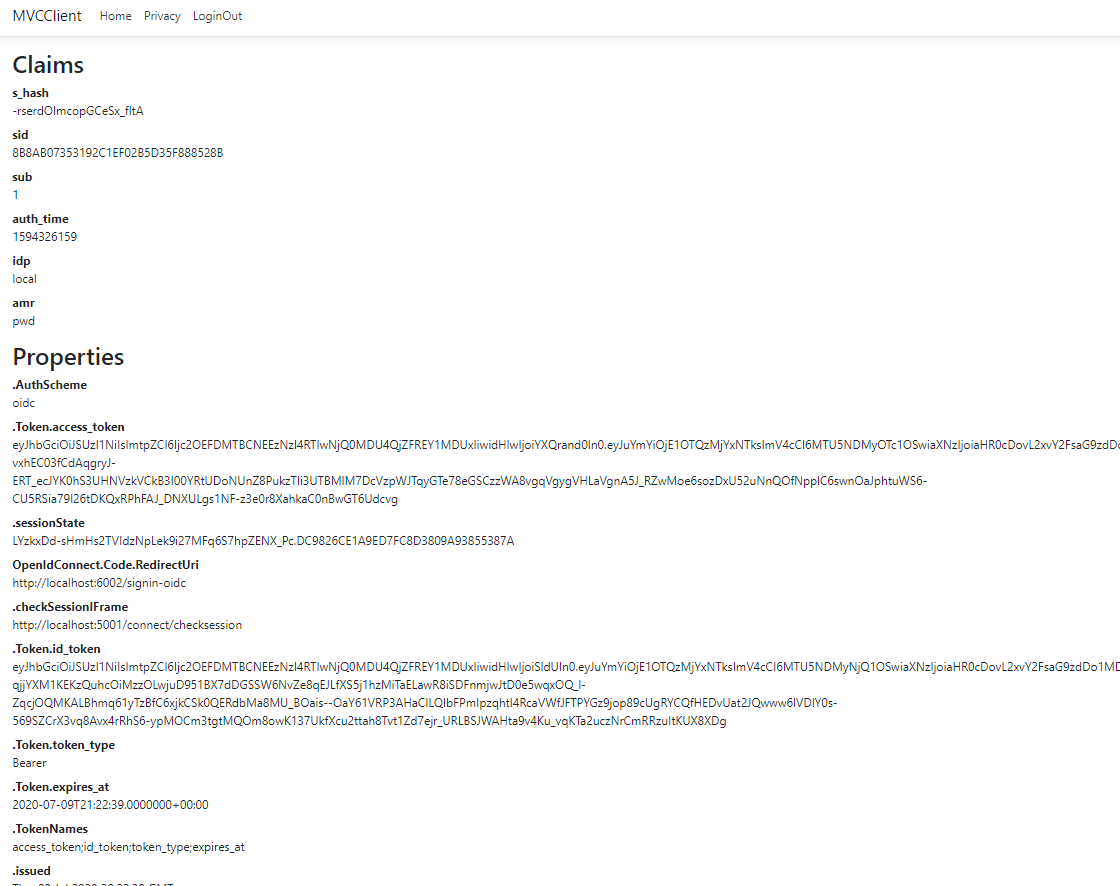
2.6 修改Home/Index.cshtml
为了测试效果,修改小标题所示的视图,让其展示认证授权后的User.Claims
@using Microsoft.AspNetCore.Authentication

<h2>Claims</h2>

<dl>
    @foreach (var claim in User.Claims)
    {
        <dt>@claim.Type</dt>
        <dd>@claim.Value</dd>
    }
</dl>

<h2>Properties</h2>

<dl>
    @foreach (var prop in (await Context.AuthenticateAsync()).Properties.Items)
    {
        <dt>@prop.Key</dt>
        <dd>@prop.Value</dd>
    }
</dl>
2.测试
启动IdentityServer
cd .IdentityServer
dotnet run
用vs启动MVCClient
- 首先页面进入MVCClient起始页http://localhost:6002
- 由于没有登录,将会跳转至登录页http://localhost:5001/Account/Login
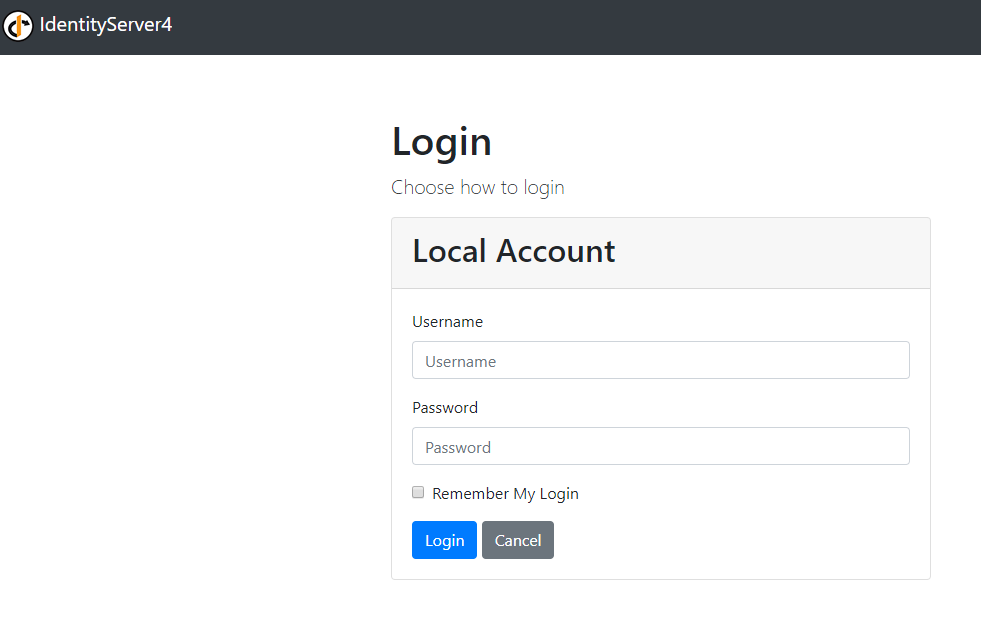
- 键入正确的用户名和密码,又会重定向至http://localhost:6002