Nginx
nginx是一个反向代理服务器,作用是把http请求分发给服务器,它是开源,简单,消耗资源少,稳定,支持大并发,低成本
安装
对于nginx安装可以yum无脑安装也可以如下,下载nginx安装包
安装解压 pcre nginx
./configure
make
make install
php编译
--with-http stub status module模块可以在监控使用(打开ip/status)没加的重新编译(其他配置请自行百度)
详细说下配置
conf目录下nginx.conf配置:
-----------------------------------
下面是简单配置
-----------------------------------
#user  nobody;

user root;

worker_processes  4;

#error_log  logs/error.log;

#error_log  logs/error.log  notice;

#error_log  logs/error.log  info;

#pid        logs/nginx.pid;

events {

    worker_connections  102400;

}

http {

    include       mime.types;

    default_type  application/octet-stream;

    #log_format  main  '$remote_addr - $remote_user [$time_local] "$request" '

    #                  '$status $body_bytes_sent "$http_referer" '

    #                  '"$http_user_agent" "$http_x_forwarded_for"';

    #access_log  logs/access.log  main;

    sendfile        on;

    #tcp_nopush     on;

    #keepalive_timeout  0;

    keepalive_timeout  65;

    #gzip  on;

   upstream Servers {

         server   ip:port weight=10;

         server   ip:port weight=10;

    }

        server {

        listen       80;

        server_name   localhost;

        #charset koi8-r;

        #access_log  logs/host.access.log  main;

        location / {

          #反向代理服务器ip

         #   proxy_pass        http://Servers;

            root   html;

            index  index.html index.htm;

        }

        #error_page  404              /404.html;

        # redirect server error pages to the static page /50x.html

        #

        error_page   500 502 503 504  /50x.html;

        location = /50x.html {

            root   html;

        }

        # proxy the PHP scripts to Apache listening on 127.0.0.1:80

        #

        #location ~ .php$ {

        #    proxy_pass   http://127.0.0.1;

        #}

        # pass the PHP scripts to FastCGI server listening on 127.0.0.1:9000

        #

        #location ~ .php$ {

        #    root           html;

        #    fastcgi_pass   127.0.0.1:9000;

        #    fastcgi_index  index.php;

        #    fastcgi_param  SCRIPT_FILENAME  /scripts$fastcgi_script_name;

        #    include        fastcgi_params;

        #}

        # deny access to .htaccess files, if Apache's document root

        # concurs with nginx's one

        #

        #location ~ /.ht {

        #    deny  all;

     #}

 }

}
-------------------------------------
下面是详细复杂版
--------------------------------------
user nginx nginx ;        #Nginx用户及组:用户 组。window下不指定
worker_processes 8;        #工作进程:数目。根据硬件调整,通常等于CPU数量。
#error_log logs/error.log notice;
error_log logs/error.log info;
pid logs/nginx.pid;
worker_rlimit_nofile 204800;     #指定进程可以打开的最大描述符:数目。 -n)与nginx进程数相除,但是nginx分配请求并不是那么均匀,所以最好与ulimit -n 的值保持一致。现在在Linux 2.6内核下开启文件打开数为65535,worker_rlimit_nofile就相应应该填写65535。这是因为nginx调度时分配请求到进程并不是那么的均衡,所以假如填写10240,总并发量达到3-4万时就有进程可能超过10240了,这时会返回502错误。

events
{
use epoll;            #使用epoll的I/O 模型。linux建议epoll,FreeBSD建议采用kqueue,window下不指定。
#补充说明:
#与apache相类,nginx针对不同的操作系统,有不同的事件模型
#A)标准事件模型
#Select、poll属于标准事件模型,如果当前系统不存在更有效的方法,nginx会选择select或poll
#B)高效事件模型
#Kqueue:使用于FreeBSD 4.1+, OpenBSD 2.9+, NetBSD 2.0 和 MacOS X.使用双处理器的MacOS X系统使用kqueue可能会造成内核崩溃。
#Epoll:使用于Linux内核2.6版本及以后的系统。
#Eventport:使用于Solaris 10。 为了防止出现内核崩溃的问题, 有必要安装安全补丁。

worker_connections 204800;       #没个工作进程的最大连接数量。根据硬件调整,和前面工作进程配合起来用,尽量大,但是别把cpu跑到100%就行。每个进程允许的最多连接数,理论上每台nginx服务器的最大连接数为。worker_processes*worker_connections

keepalive_timeout 60;        #keepalive超时时间。

client_header_buffer_size 4k;    #客户端请求头部的缓冲区大小。这个可以根据你的系统分页大小来设置,一般一个请求头的大小不会超过1k,不过由于一般系统分页都要大于1k,所以这里设置为分页大小。分页大小可以用命令getconf PAGESIZE 取得。但也有client_header_buffer_size超过4k的情况,但是client_header_buffer_size该值必须设置为“系统分页大小”的整倍数。

open_file_cache max=65535 inactive=60s;       #这个将为打开文件指定缓存,默认是没有启用的,max指定缓存数量,建议和打开文件数一致,inactive是指经过多长时间文件没被请求后删除缓存。

open_file_cache_valid 80s;             #这个是指多长时间检查一次缓存的有效信息。

open_file_cache_min_uses 1;          #open_file_cache指令中的inactive参数时间内文件的最少使用次数,如果超过这个数字,文件描述符一直是在缓存中打开的,如上例,如果有一个文件在inactive时间内一次没被使用,它将被移除。
}


##负载均衡配置
upstream bakend {
server 127.0.0.1:8027;

server 127.0.0.1:8028;

server 127.0.0.1:8029;

hash $request_uri;
}
#nginx的upstream目前支持5种方式的分配
#1、轮询(默认)
#每个请求按时间顺序逐一分配到不同的后端服务器,如果后端服务器down掉,能自动剔除。
#2、weight
#指定轮询几率,weight和访问比率成正比,用于后端服务器性能不均的情况。
#例如:
upstream bakend {
server 192.168.0.14 weight=80;
server 192.168.0.15 weight=10;
}
#3、ip_hash
#每个请求按访问ip的hash结果分配,这样每个访客固定访问一个后端服务器,可以解决session的问题。
#例如:
upstream bakend {
ip_hash;
server 192.168.0.14:88;
server 192.168.0.15:80;
}
#4、fair(第三方)
#按后端服务器的响应时间来分配请求,响应时间短的优先分配。
upstream backend {
server server1;
server server2;
fair;
}
#5、url_hash(第三方)
#按访问url的hash结果来分配请求,使每个url定向到同一个后端服务器,后端服务器为缓存时比较有效。
#例:在upstream中加入hash语句,server语句中不能写入weight等其他的参数,hash_method是使用的hash算法
upstream backend {
server squid1:3128;
server squid2:3128;
hash $request_url;
hash_method crc32;
}

upstream bakend{        #定义负载均衡设备的Ip及设备状态
ip_hash;
server 127.0.0.1:9090 down;
server 127.0.0.1:8080 weight=2;
server 127.0.0.1:6060;max_fails:10 fail_timeout:10
server 127.0.0.1:7070 backup;
}
#在需要使用负载均衡的server中增加
proxy_pass http://bakend/;

#每个设备的状态设置为:
#1.down表示单前的server暂时不参与负载
#2.weight为weight越大,负载的权重就越大。
#3.max_fails:允许请求失败的次数默认为1.当超过最大次数时,返回proxy_next_upstream模块定义的错误
#4.fail_timeout:max_fails次失败后,暂停的时间。
#5.backup: 其它所有的非backup机器down或者忙的时候,请求backup机器。所以这台机器压力会最轻。
#nginx支持同时设置多组的负载均衡,用来给不用的server来使用。

#client_body_in_file_only设置为On 可以讲client post过来的数据记录到文件中用来做debug
#client_body_temp_path设置记录文件的目录 可以设置最多3层目录
#location对URL进行匹配.可以进行重定向或者进行新的代理 负载均衡


##设定http服务器,利用它的反向代理功能提供负载均衡支持

http

{
server_tokens off;     #并不会让nginx执行的速度更快,但它可以关闭在错误页面中的nginx版本数字,这样对于安全性是有好处的。
sendfile on;       #可以让sendfile()发挥作用。sendfile()可以在磁盘和TCP socket之间互相拷贝数据(或任意两个文件描述符)。Pre-sendfile是传送数据之前在用户空间申请数据缓冲区。之后用read()将数据从 文件拷贝到这个缓冲区,write()将缓冲区数据写入网络。sendfile()是立即将数据从磁盘读到OS缓存。因为这种拷贝是在内核完成 的,sendfile()要比组合read()和write()以及打开关闭丢弃缓冲更加有效(更多有关于sendfile)。
tcp_nopush on;     # 告诉nginx在一个数据包里发送所有头文件,而不一个接一个的发送。
tcp_nodelay on;      # 告诉nginx不要缓存数据,而是一段一段的发送--当需要及时发送数据时,就应该给应用设置这个属性,这样发送一小块数据信息时就不能立即得到返回值。

keepalive_timeout 10;       #给客户端分配keep-alive链接超时时间。服务器将在这个超时时间过后关闭链接。我们将它设置低些可以让ngnix持续工作的时间更长。
client_header_timeout 10;    # 设置请求头和请求体(各自)的超时时间。我们也可以把这个设置低些。
client_body_timeout 10;
reset_timedout_connection on;    #告诉nginx关闭不响应的客户端连接。这将会释放那个客户端所占有的内存空间
send_timeout 10;         #指定客户端的响应超时时间。这个设置不会用于整个转发器,而是在两次客户端读取操作之间。如果在这段时间内,客户端没有读取任何数据,nginx就会关闭连接。

gzip on;           #是告诉nginx采用gzip压缩的形式发送数据。这将会减少我们发送的数据量。
gzip_disable "msie6";     #为指定的客户端禁用gzip功能。我们设置成IE6或者更低版本以使我们的方案能够广泛兼容
# gzip_static on;       # 告诉nginx在压缩资源之前,先查找是否有预先gzip处理过的资源。这要求你预先压缩你的文件,从而允许你使用最高压缩比,这样nginx就不用再压缩这些文件了。
gzip_proxied any;       #允许或者禁止压缩基于请求和响应的响应流。我们设置为any,意味着将会压缩所有的请求。
gzip_min_length 1000;        #设置对数据启用压缩的最少字节数。如果一个请求小于1000字节,我们最好不要压缩它,因为压缩这些小的数据会降低处理此请求的所有进程的速度。
gzip_comp_level 4;       #设置数据的压缩等级。这个等级可以是1-9之间的任意数值,9是最慢但是压缩比最大的。我们设置为4,这是一个比较折中的设置。
gzip_types text/plain text/css application/json application/x-javascript text/xml application/xml application/xml+rss text/javascript; #设置需要压缩的数据格式


include mime.types;       #设定mime类型,类型由mime.type文件定义

default_type application/octet-stream;

log_format main '$remote_addr - $remote_user [$time_local] "$request" '

'$status $body_bytes_sent "$http_referer" '

'"$http_user_agent" "$http_x_forwarded_for"';

log_format log404 '$status [$time_local] $remote_addr $host$request_uri $sent_http_location';

#日志格式设置。
#$remote_addr与$http_x_forwarded_for用以记录客户端的ip地址;
#$remote_user:用来记录客户端用户名称;
#$time_local: 用来记录访问时间与时区;
#$request: 用来记录请求的url与http协议;
#$status: 用来记录请求状态;成功是200,
#$body_bytes_sent :记录发送给客户端文件主体内容大小;
#$http_referer:用来记录从那个页面链接访问过来的;
#$http_user_agent:记录客户浏览器的相关信息;
通常web服务器放在反向代理的后面,这样就不能获取到客户的IP地址了,通过$remote_add拿到的IP地址是反向代理服务器的iP地址。反向代理服务器在转发请求的http头信息中,可以增加x_forwarded_for信息,用以记录原有客户端的IP地址和原来客户端的请求的服务器地址。

access_log logs/host.access.log main;
access_log logs/host.access.404.log log404;    #用了log_format指令设置了日志格式之后,需要用access_log指令指定日志文件的存放路径;

server_names_hash_bucket_size 128;          #保存服务器名字的hash表是由指令server_names_hash_max_size 和server_names_hash_bucket_size所控制的。
#参数hash bucket size总是等于hash表的大小,并且是一路处理器缓存大小的倍数。在减少了在内存中的存取次数后,使在处理器中加速查找hash表键值成为可能。如果hash bucket size等于一路处理器缓存的大小,
#那么在查找键的时候,最坏的情况下在内存中查找的次数为2。第一次是确定存储单元的地址,第二次是在存储单元中查找键 值。因此,如果Nginx给出需要增大hash max size 或 hash bucket size的提示,
#那么首要的是增大前一个参数的大小.

client_header_buffer_size 4k;            #客户端请求头部的缓冲区大小。这个可以根据你的系统分页大小来设置,一般一个请求的头部大小不会超过1k,不过由于一般系统分页都要大于1k,所以这里设置为分页大小。分页大小可以用命令getconf PAGESIZE取得。

large_client_header_buffers 8 128k;           #客户请求头缓冲大小。nginx默认会用client_header_buffer_size这个buffer来读取header值,如果header过大,它会使用large_client_header_buffers来读取。

open_file_cache max=102400 inactive=20s;      #这个指令指定缓存是否启用。

client_max_body_size 300m;              #设定通过nginx上传文件的大小

sendfile on;                      #sendfile指令指定 nginx 是否调用sendfile 函数(zero copy 方式)来输出文件,对于普通应用,必须设为on。如果用来进行下载等应用磁盘IO重负载应用,可设置为off,以平衡磁盘与网络IO处理速度,降低系统uptime。

tcp_nopush on;#此选项允许或禁止使用socke的TCP_CORK的选项,此选项仅在使用sendfile的时候使用

proxy_connect_timeout 90;             #后端服务器连接的超时时间_发起握手等候响应超时时间

proxy_read_timeout 180;                  #连接成功后_等候后端服务器响应时间_其实已经进入后端的排队之中等候处理(也可以说是后端服务器处理请求的时间)

proxy_send_timeout 180;              #后端服务器数据回传时间_就是在规定时间之内后端服务器必须传完所有的数据

proxy_buffer_size 256k;              #设置从被代理服务器读取的第一部分应答的缓冲区大小,通常情况下这部分应答中包含一个小的应答头,默认情况下这个值的大小为指令proxy_buffers中指定的一个缓冲区的大小,不过可以将其设置为更小

proxy_buffers 4 256k;                #设置用于读取应答(来自被代理服务器)的缓冲区数目和大小,默认情况也为分页大小,根据操作系统的不同可能是4k或者8k

proxy_busy_buffers_size 256k;

proxy_temp_file_write_size 256k;          #设置在写入proxy_temp_path时数据的大小,预防一个工作进程在传递文件时阻塞太长

proxy_temp_path /data0/proxy_temp_dir;      #proxy_temp_path和proxy_cache_path指定的路径必须在同一分区

proxy_cache_path /data0/proxy_cache_dir levels=1:2 keys_zone=cache_one:200m inactive=1d max_size=30g;  #设置内存缓存空间大小为200MB,1天没有被访问的内容自动清除,硬盘缓存空间大小为30GB。
keepalive_timeout 120;                #keepalive超时时间。

tcp_nodelay on;

client_body_buffer_size 512k;            #如果把它设置为比较大的数值,例如256k,那么,无论使用firefox还是IE浏览器,来提交任意小于256k的图片,都很正常。如果注释该指令,使用默认的client_body_buffer_size设置,也就是操作系统页面大小的两倍,8k或者16k,问题就出现了。
#无论使用firefox4.0还是IE8.0,提交一个比较大,200k左右的图片,都返回500 Internal Server Error错误


proxy_intercept_errors on;              #表示使nginx阻止HTTP应答代码为400或者更高的应答。


##配置虚拟机
server
{
listen 80;                  #配置监听端口

server_name image.***.com;          #配置访问域名
location ~* .(mp3|exe)$ {             #对以“mp3或exe”结尾的地址进行负载均衡

proxy_pass http://img_relay$request_uri;      #设置被代理服务器的端口或套接字,以及URL

proxy_set_header Host $host;

proxy_set_header X-Real-IP $remote_addr;

proxy_set_header X-Forwarded-For $proxy_add_x_forwarded_for;  #以上三行,目的是将代理服务器收到的用户的信息传到真实服务器上

}

location /face {

if ($http_user_agent ~* "xnp") {

rewrite ^(.*)$ http://211.151.188.190:8080/face.jpg redirect;

}

proxy_pass http://img_relay$request_uri;

proxy_set_header Host $host;

proxy_set_header X-Real-IP $remote_addr;

proxy_set_header X-Forwarded-For $proxy_add_x_forwarded_for;
error_page 404 502 = @fetch;
}
location @fetch {
access_log /data/logs/face.log log404;
rewrite ^(.*)$ http://211.151.188.190:8080/face.jpg redirect;
}
location /image {
if ($http_user_agent ~* "xnp") {
rewrite ^(.*)$ http://211.151.188.190:8080/face.jpg redirect;
}
proxy_pass http://img_relay$request_uri;
proxy_set_header Host $host;
proxy_set_header X-Real-IP $remote_addr;
proxy_set_header X-Forwarded-For $proxy_add_x_forwarded_for;
error_page 404 502 = @fetch;
}
location @fetch {
access_log /data/logs/image.log log404;
rewrite ^(.*)$ http://211.151.188.190:8080/face.jpg redirect;
}
}
#设定Nginx状态访问地址
location /NginxStatus {
stub_status on;
access_log on;
auth_basic "NginxStatus";
#auth_basic_user_file conf/htpasswd;
}
}
--------------------------------------------------------------
之后
运行sbin下./nginx -t 测试conf文件是否有问题
successful后查看端口是否被占用
之后运行./nginx
重启nginx
/usr/local/nginx/sbin/nginx -s reload

nginx简单的配置一台tomcat(这里我把nginx和tomcat安装在一台服务器上)
nginx和tomcat在一台机器上
启动tomcat端口号是8080
更改nginx配置文件:
user root;

worker_processes  1;

#error_log  logs/error.log;

#error_log  logs/error.log  notice;

#error_log  logs/error.log  info;

#pid        logs/nginx.pid;

events {

    worker_connections  102400;

}

http {

    include       mime.types;

    default_type  application/octet-stream;

    #log_format  main  '$remote_addr - $remote_user [$time_local] "$request" '

    #                  '$status $body_bytes_sent "$http_referer" '

    #                  '"$http_user_agent" "$http_x_forwarded_for"';

    #access_log  logs/access.log  main;

    sendfile        on;

    #tcp_nopush     on;

    #keepalive_timeout  0;

    keepalive_timeout  65;

    #gzip  on;

#注意到下面这里写tomcat1的服务器名字和端口号

   upstream Servers {

         server   {ip地址}:8080  weight=10;

    }

        server {

        listen       80;

        server_name {ip地址};

        #charset koi8-r;

        #access_log  logs/host.access.log  main;

#注意到下面一行proxy_pass 配置请求转发地址

        location / {

            proxy_pass        http://localhost:8080;

            root   html;

          # index  index.html index.htm;

        }

        #error_page  404              /404.html;

        # redirect server error pages to the static page /50x.html

        #

        error_page   500 502 503 504  /50x.html;

        location = /50x.html {

            root   html;

        }

        # proxy the PHP scripts to Apache listening on 127.0.0.1:80

        #

        #location ~ .php$ {

        #    proxy_pass   http://127.0.0.1;

        #}

        # pass the PHP scripts to FastCGI server listening on 127.0.0.1:9000

        #

        #location ~ .php$ {

        #    root           html;

        #    fastcgi_pass   127.0.0.1:9000;

        #    fastcgi_index  index.php;

        #    fastcgi_param  SCRIPT_FILENAME  /scripts$fastcgi_script_name;

        #    include        fastcgi_params;

        #}

        # deny access to .htaccess files, if Apache's document root

        # concurs with nginx's one

        #

        #location ~ /.ht {

        #    deny  all;

     #}

 }

}
nginx简单的配置两台tomcat (在这里我把两个tomcat和nginx装在一台服务器上,设置了tomcat设置了两个端口号)
配置文件如下:
user root;

worker_processes  1;

#error_log  logs/error.log;

#error_log  logs/error.log  notice;

#error_log  logs/error.log  info;

#pid        logs/nginx.pid;

events {

    worker_connections  102400;

}

http {

    include       mime.types;

    default_type  application/octet-stream;

    #log_format  main  '$remote_addr - $remote_user [$time_local] "$request" '

    #                  '$status $body_bytes_sent "$http_referer" '

    #                  '"$http_user_agent" "$http_x_forwarded_for"';

    #access_log  logs/access.log  main;

    sendfile        on;

    #tcp_nopush     on;

    #keepalive_timeout  0;

    keepalive_timeout  65;

    #gzip  on;

#注意到下面这里写tomcat1的服务器名字和端口号

   upstream Servers {

         server   {ip}:{端口号1}  weight=10;

                 server {ip}:{端口号2} weight=10;

}

        server {

        listen       80;

        server_name {ip};

        #charset koi8-r;

        #access_log  logs/host.access.log  main;

#注意到下面一行proxy_pass 配置请求转发地址

        location / {

            proxy_pass        http://Servers;     #对应upstream的 Servers集群

            root   html;

          # index  index.html index.htm;

        }

        #error_page  404              /404.html;

        # redirect server error pages to the static page /50x.html

        #

        error_page   500 502 503 504  /50x.html;

        location = /50x.html {

            root   html;

        }

        # proxy the PHP scripts to Apache listening on 127.0.0.1:80

        #

        #location ~ .php$ {

        #    proxy_pass   http://127.0.0.1;

        #}

        # pass the PHP scripts to FastCGI server listening on 127.0.0.1:9000

        #

        #location ~ .php$ {

        #    root           html;

        #    fastcgi_pass   127.0.0.1:9000;

        #    fastcgi_index  index.php;

        #    fastcgi_param  SCRIPT_FILENAME  /scripts$fastcgi_script_name;

        #    include        fastcgi_params;

        #}

        # deny access to .htaccess files, if Apache's document root

        # concurs with nginx's one

        #

        #location ~ /.ht {

        #    deny  all;

     #}

 }

}
http强制跳转到https↓

配置文件解释:
user nobody 在ps -ef 下会启动子进程;在ps -ef | grep nginx 中查看
 启动的进程个数,取决于有多少个cpu,如果是一个cpu那就填1
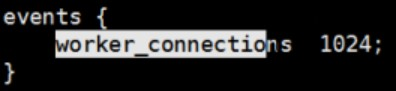 进程能处理多少请求,目前能处理的请求是 1*1024 1表示上面cpu的颗粒数,如果是5个cpu那就是5乘以最大连接数1024(其表示nginx承受的最大连接数)
 日志默认格式
include mime.types 对应的映射关系
 root指的时路径,是nginx下的html路径,指定访问时找的文件
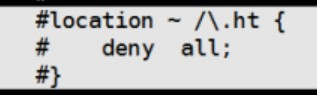 拒绝所有的访问,可以把不需要访问项目的目录放在下面
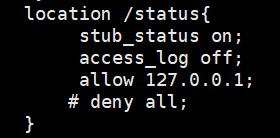 ./configure --with-http_stub_status_module 安装时带上status这个东西 并在配置文件中加上以下这个东西 就可以在之后访问nginx时 观察到它的运行情况,加在server-location / {}
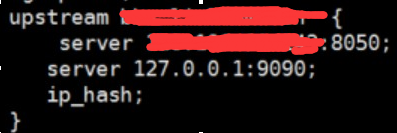 upsteam 服务名字,server 是转到哪个端口上
 出错配置,有需要可配置
nginx启动命令
./nginx -s reload 对用户是无感的重启刷新
./nginx -h 帮助
./nginx -t 测试配置
./nginx -p 指定路径
./nginx -c 指定配置文件
nginx负载均衡策略
1、轮询(默认)
每个请求按时间顺序逐一分配到不同的后端服务器,如果后端服务器down掉,能自动剔除
(两台服务器,第一台宕机,第二台接受第一台的工作)
upstream backserver {
server 192.168.0.14;
server 192.168.0.15; }
2、weight
指定轮询几率,weight和访问比率成正比,用于后端服务器性能不均的情况。
(一半一半吧)
upstream
backend {
server 192.168.0.14 weight=10;
server 192.168.0.15 weight=10;
}
3、ip_hash
每个请求按访问ip的hash结果分配,这样每个访客固定访问一个后端服务器,可以解决session的问题。第一次随机访问,再次刷新时 在时效内,会判断session是否存在,存在则直接访问那台
(访问后记录session下次访问直接进入那个有session的服务器~)
upstream
backend {
ip_hash;
server xxx.xxxx.xxx.xxx:88;
server xxxx.xxx.xxx.xxx:80;
}
4、fair(第三方)
按后端服务器的响应时间来分配请求,响应时间短的优先分配。
复制代码代码如下:
(空闲多的直接分配上去)
upstream backend {
server server1.linuxany.com;
server server2.linuxany.com;
fair;
}
5、url_hash(第三方)
按访问url的hash结果来分配请求,使每个url定向到同一个后端服务器,后端服务器为缓存时比较有效。
upstream backserver {
server squid1:3128;
server squid2:3128;
hash $request_uri;
hash_method crc32;
}
版权声明:本文原创发表于 博客园,作者为 RainBol 本文欢迎转载,但未经作者同意必须保留此段声明,且在文章页面明显位置给出原文连接,否则视为侵权。