1、绘制手势截屏
-
具体实现代码见 GitHub 源码 QExtension
-
QTouchClipView.h
@interface QTouchClipView : UIView /** * 创建手势截屏视图控件,获取截屏结果 * * @param view 截取图片的视图控件 * @param result 手势截屏结果 * * @return 手势截屏视图控件 */ + (instancetype)q_touchClipViewWithView:(UIView *)view clipResult:(void (^)(UIImage * _Nullable image))result; @end -
QTouchClipView.m
@interface QTouchClipView () /// 截取图片的视图控件 @property (nonatomic, strong) UIView *baseView; /// 滑动手势结果 @property (nonatomic, copy) void (^resultBlock)(UIImage * _Nullable); /// 触摸开始结束点 @property (nonatomic, assign) CGPoint startP; @property (nonatomic, assign) CGPoint endP; @end @implementation QTouchClipView /// 创建手势截屏视图控件,获取截屏结果 + (instancetype)q_touchClipViewWithView:(UIView *)baseView clipResult:(void (^)(UIImage * _Nullable image))result { QTouchClipView *clipView = [[self alloc] initWithFrame:baseView.frame]; clipView.baseView = baseView; clipView.resultBlock = result; return clipView; } /// 初始化 - (instancetype)initWithFrame:(CGRect)frame { if (self = [super initWithFrame:frame]) { self.backgroundColor = [[UIColor blackColor] colorWithAlphaComponent:0.5]; } return self; } /// 触摸开始 - (void)touchesBegan:(NSSet<UITouch *> *)touches withEvent:(nullable UIEvent *)event { // 获取触摸起始点位置 CGPoint startPoint = [touches.anyObject locationInView:self]; self.startP = startPoint; } /// 触摸移动 - (void)touchesMoved:(NSSet<UITouch *> *)touches withEvent:(nullable UIEvent *)event { // 获取触摸点位置 CGPoint touchPoint = [touches.anyObject locationInView:self]; self.endP = touchPoint; // 刷新视图 [self setNeedsDisplay]; } /// 触摸结束 - (void)touchesEnded:(NSSet<UITouch *> *)touches withEvent:(nullable UIEvent *)event { // 截取屏幕图片 UIGraphicsBeginImageContextWithOptions(self.baseView.bounds.size, NO, 0); CGContextRef ctx = UIGraphicsGetCurrentContext(); [self.baseView.layer renderInContext:ctx]; UIImage *image = UIGraphicsGetImageFromCurrentImageContext(); UIGraphicsEndImageContext(); // 切割图片 CGFloat x = self.startP.x; CGFloat y = self.startP.y; CGFloat w = self.endP.x - x; CGFloat h = self.endP.y - y; CGRect cutRect = CGRectMake(x * 2, y * 2, w * 2, h * 2); CGImageRef cgImage = CGImageCreateWithImageInRect(image.CGImage, cutRect); UIImage *newImage = [[UIImage alloc] initWithCGImage:cgImage]; CGImageRelease(cgImage); // 返回截取结果 if (self.resultBlock) { self.resultBlock(newImage); } // 移除截取视图控件 [self removeFromSuperview]; self.startP = CGPointZero; self.endP = CGPointZero; // 刷新视图 [self setNeedsDisplay]; } /// 触摸取消 - (void)touchesCancelled:(NSSet *)touches withEvent:(nullable UIEvent *)event { [self touchesEnded:touches withEvent:event]; } /// 绘制触摸区域 - (void)drawRect:(CGRect)rect { CGFloat x = self.startP.x; CGFloat y = self.startP.y; CGFloat w = self.endP.x - x; CGFloat h = self.endP.y - y; CGRect clipRect = CGRectMake(x, y, w, h); UIBezierPath *path = [UIBezierPath bezierPathWithRect:clipRect]; [[[UIColor whiteColor] colorWithAlphaComponent:0.2] setFill]; [path fill]; } @end -
ViewController.m
// 创建手势截屏视图 QTouchClipView *touchClipView = [QTouchClipView q_touchClipViewWithView:self.imageView clipResult:^(UIImage * _Nullable image) { // 获取处理截屏结果 if (image) { UIImageWriteToSavedPhotosAlbum(image, self, @selector(image:didFinishSavingWithError:contextInfo:), nil); } }]; // 添加手势截屏视图 [self.view addSubview:touchClipView]; -
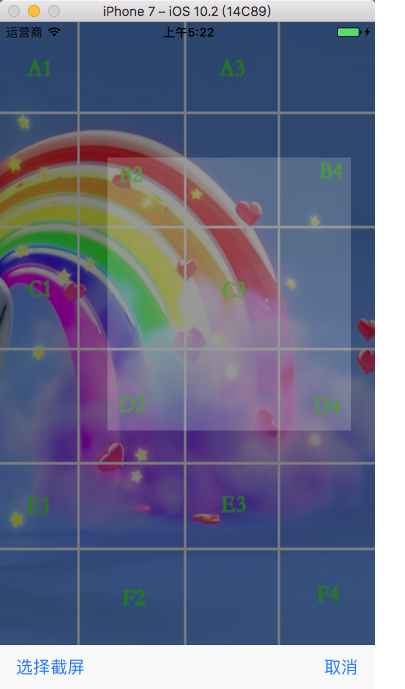
效果