原预制体以及脚本的下载地址:https://download.csdn.net/download/qq_15017279/10404010
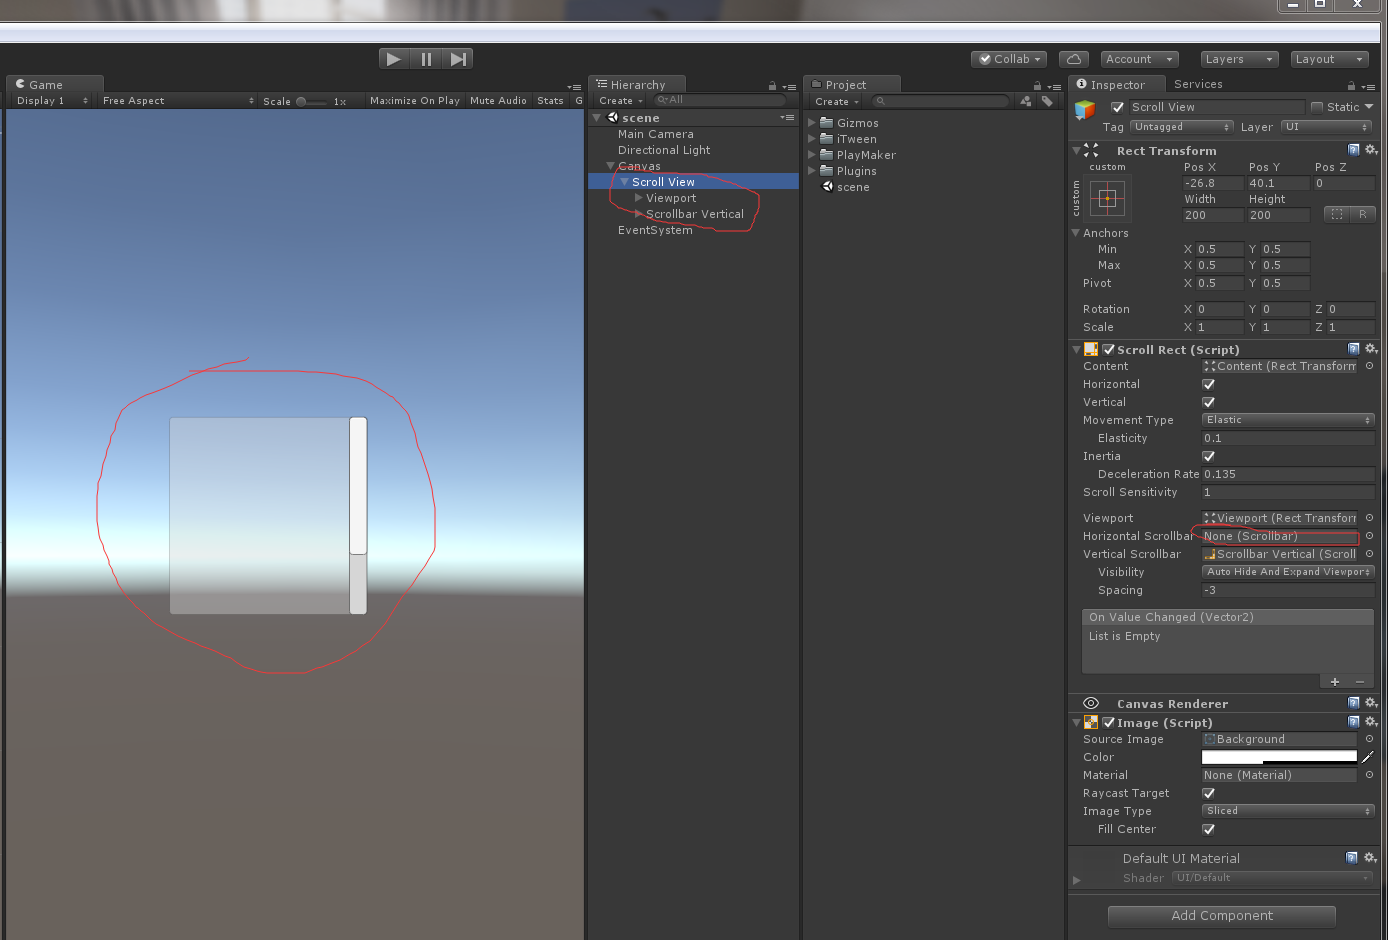
1.新建一个Scroll View,删掉横向的滚动条,并且把Scroll View的Scroll Rect组件的Horizontal Scrollbar设置为None,如图:
2.我想弄一个显示3行3列的,所以Scroll View得Height改为240(3的倍数),Width改为400(没特殊要求),Viewport和Content也要大小设置合适.

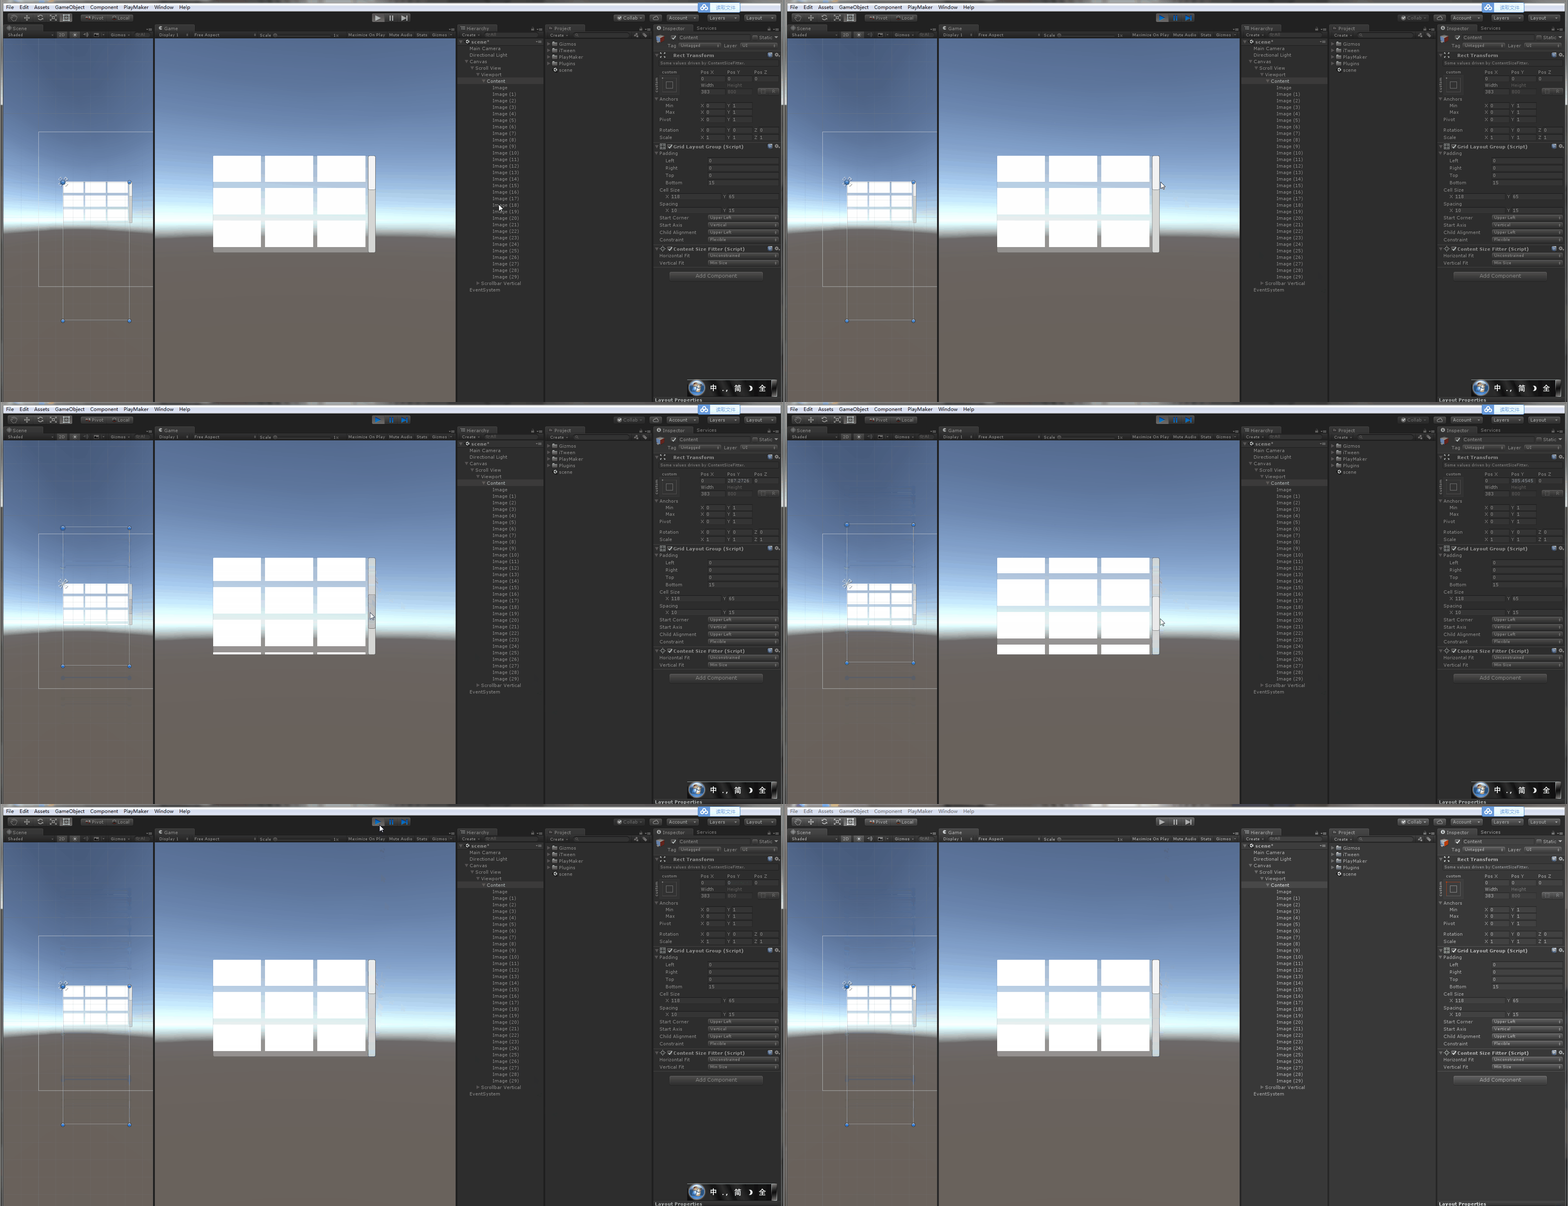
3.给Content加一个GridLayoutGroup和ContentSizeFitter,ContentSizeFitter的VerticalFit设置为MinSize,GridLayoutGroup的Spacing设置为(10,15),Bottom也要设置为15.cellSizeY 的大小计算:(Y+15)*3=240(Scroll View的高度),cellSizeX自己看着调,在Content下添加30个image,如图:
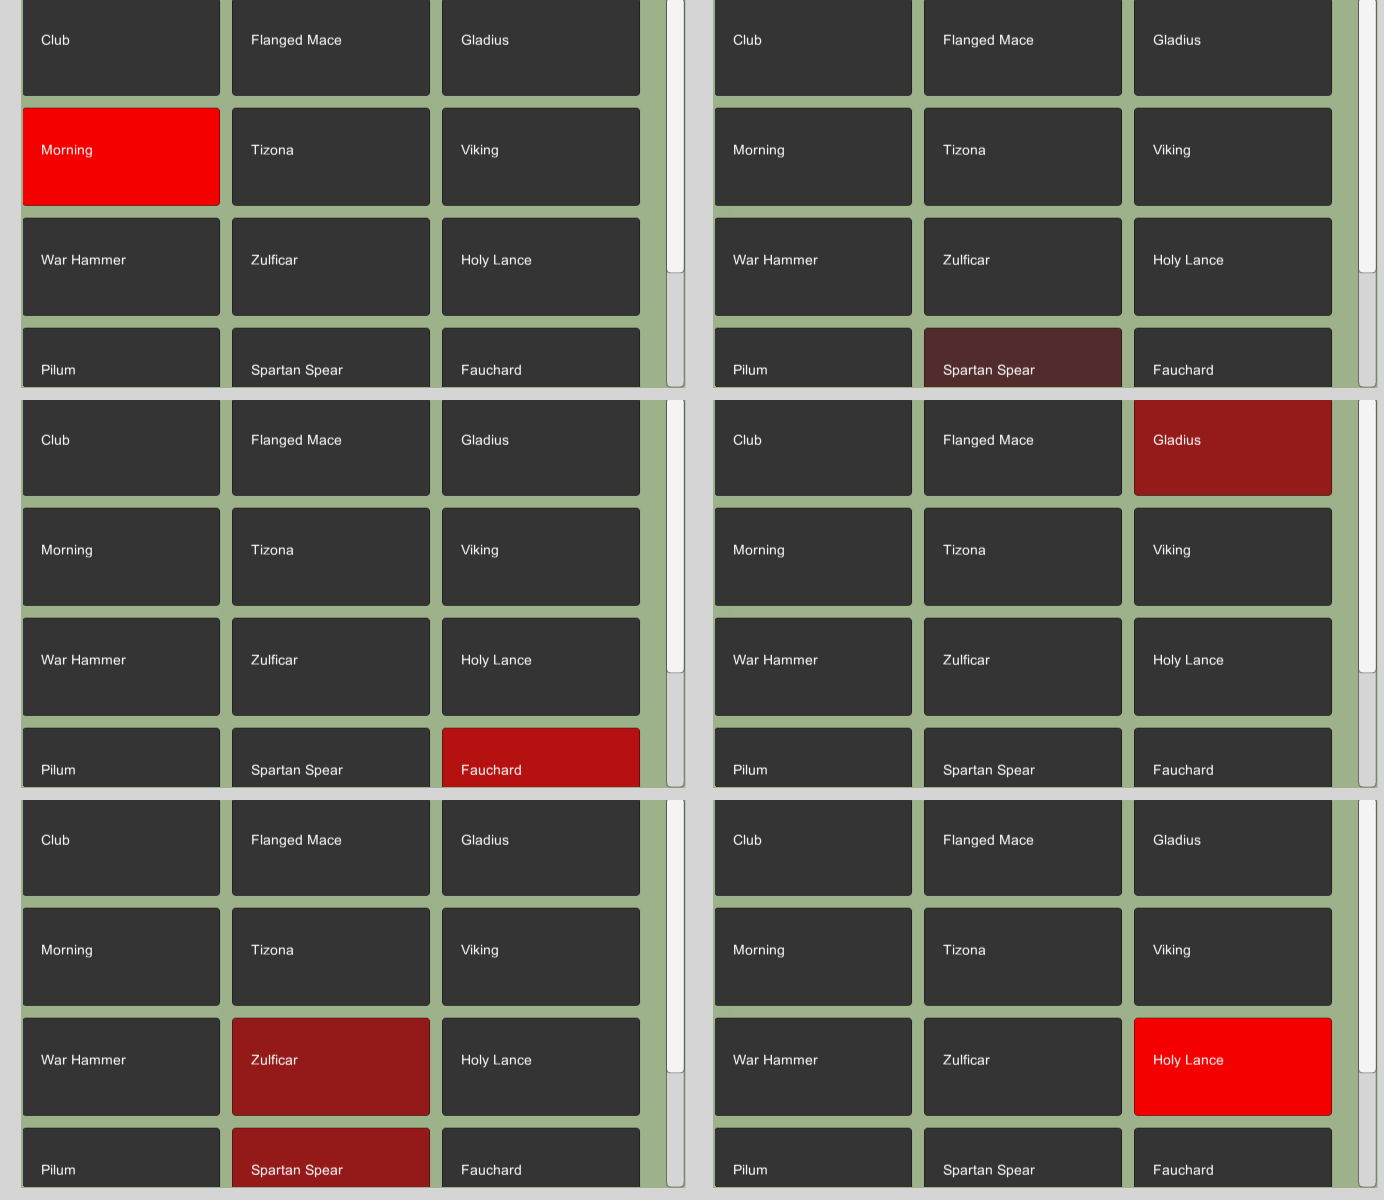
4.给image们加上Button组件,这样才能选中.,加完之后,现在运行,用手柄或者键盘控制大概是下面左图这样的,当移动到窗口之外的Image上就看不到了,它不会自动滚动.我们这个是3*3的所以当移动到最下边一个时候再往下移动,滚动条就要移动使之显示连续的下边三个,当移动到最上面一个的时候在往上移动就显示上面那三个.,就像下面右图那样.
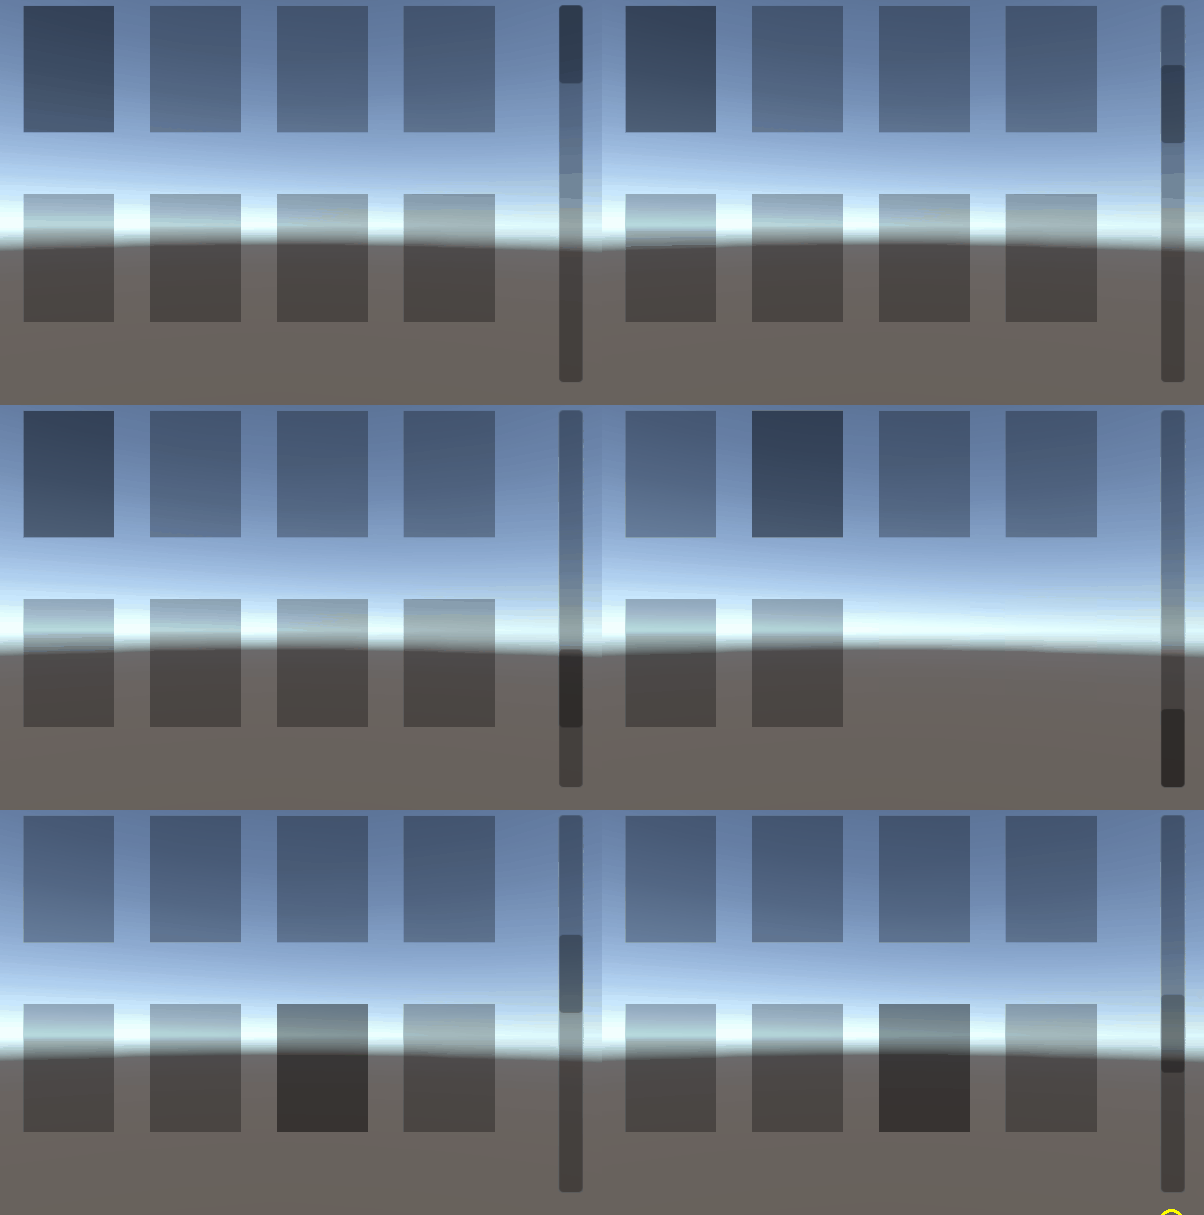
5.解决办法就是:在上面弄一个位置a,下面弄一个位置b,每当被选中的Image换了,就拿到被选中的image的位置c,用c.y和a.y、b.y比较,比a.y大滚动条就向上动一定距离,比b.y小就向下动一定距离,这个距离是经过计算的,一会再说计算方法.
如图,我用小的Image弄了两个位置:
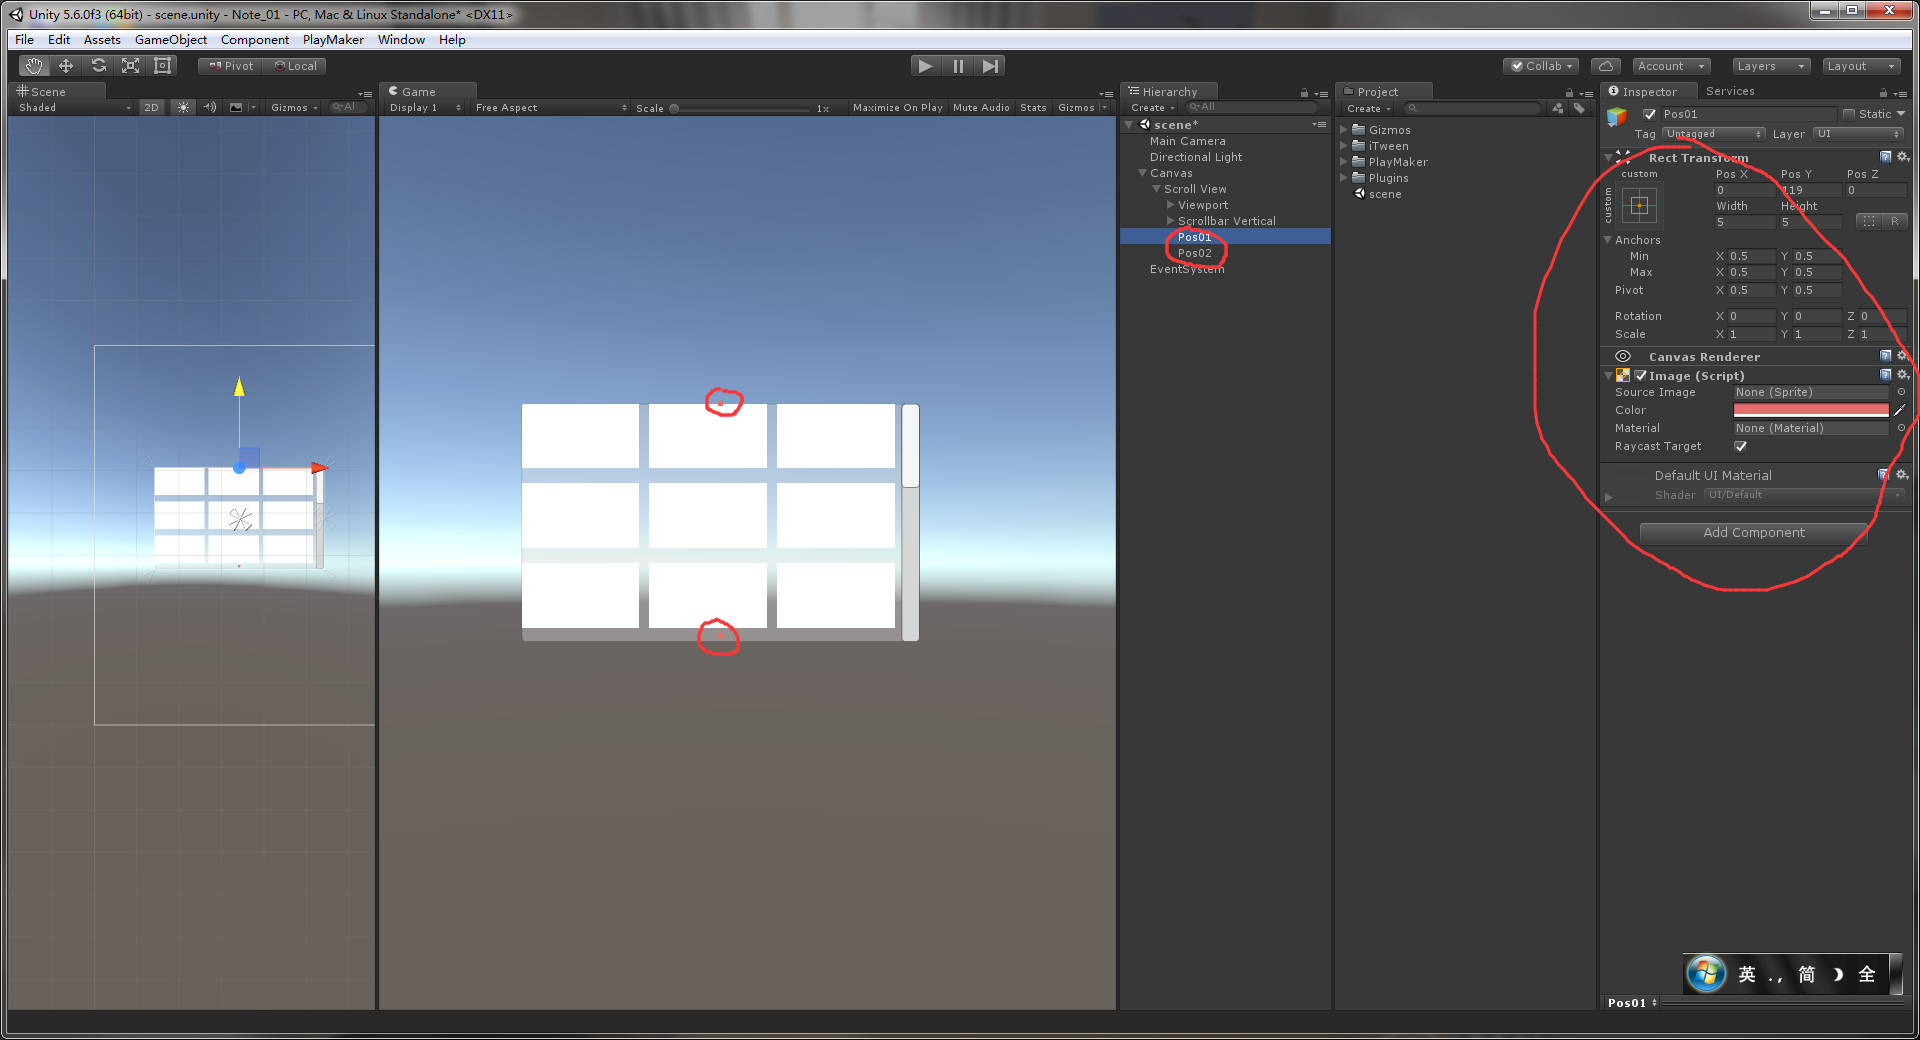
6.开始计算每次滚动条移动的距离:

7.新建一个脚本,代码如下:
using System.Collections;
using System.Collections.Generic;
using UnityEngine;
using UnityEngine.UI;

public class MoveScrollbar : MonoBehaviour {

    // 拿到 scrollBar的value 用
    public Scrollbar scrollBar;
    // 所有 image的父物体 (拿到所有的Image,计算Image个数用)
    public RectTransform content;
    Button[] buttons;
    /// <summary>
    /// 上边的位置
    /// </summary>
    public Transform pos1;
    /// <summary>
    /// 下边的位置
    /// </summary>
    public Transform pos2;
    float pos1_y;
    float pos2_y;

    [Header("列数(自定义的)")]
    public int columnNumber;
    [Header("每次显示多少行(自定义的)")]
    public int lineNumberForShow;
    /// <summary>
    /// 行数
    /// lineNumber = buttons.Length / columnNumber (进一取整)
    /// </summary>
    int lineNumber;
    /// <summary>
    /// 步子大小(scrollBar.value每次移动的大小)
    /// step = 1 / (lineNumber / lineNumberForShow)
    /// </summary>
    public float step;
    // 记录当前选中的Image(有的时候可能用得到吧)
    public Button currentButton;

    public void InitMoveScrollbar()
    {
        buttons = content.GetComponentsInChildren<Button>();
// 第一个设置为选上的(运行之后,不用鼠标点击,就会选上这个Button)
buttons[0].Select();
//行数=按钮个数/列数,进一取整
        lineNumber = (int)Mathf.Ceil(buttons.Length / (float)columnNumber);
        step = lineNumberForShow / (float)(lineNumber - lineNumberForShow);

        pos1_y = pos1.position.y;
        pos2_y = pos2.position.y;
    }
    // Use this for initialization
    void Start () {
        // 设置为1,使它一开始的时候显示最上面三行
        scrollBar.value = 1f;
        InitMoveScrollbar();
    }

    /// <summary>
    /// 拿到当前选中的按钮,并对比位置,以判断是否/怎么移动
    /// </summary>
    /// <param name="button"></param>
    public void GetButton(Button button)
    {
        currentButton = button;

        float y = button.transform.position.y;

        if (y> pos1_y)
        {
            scrollBar.value += step;
        }
        if (y < pos2_y)
        {
            scrollBar.value -= step;
        }
    }
}
8.挂到Scroll View上,把对应的变量拖进去或者填上,pos01和pos02的image组件的颜色弄成透明的,这样就看不到了,Raycast Target对勾去掉(这样就不会影响点击了):


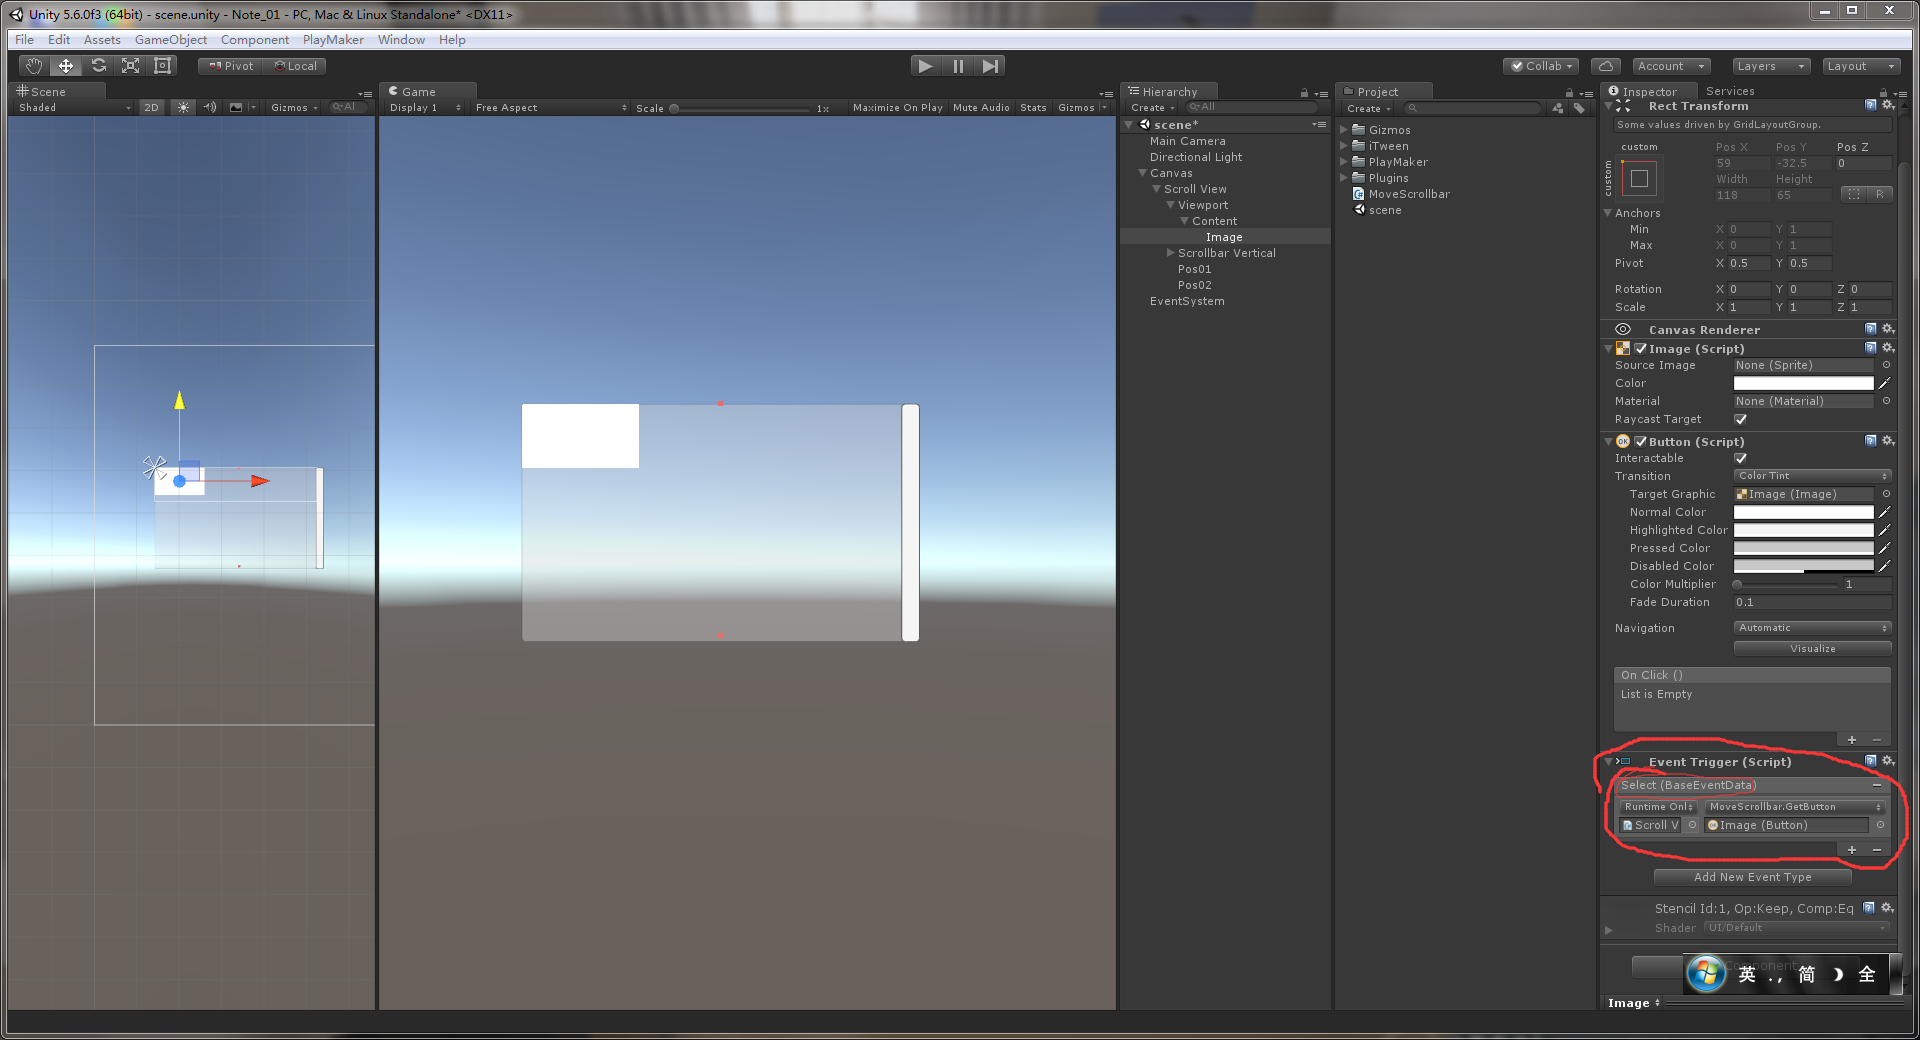
9.这时,删掉后29个image,给剩下的一个没删的image添加一个EventTrigger组件,设置成如图的样子,每当被选中就会执行Select.
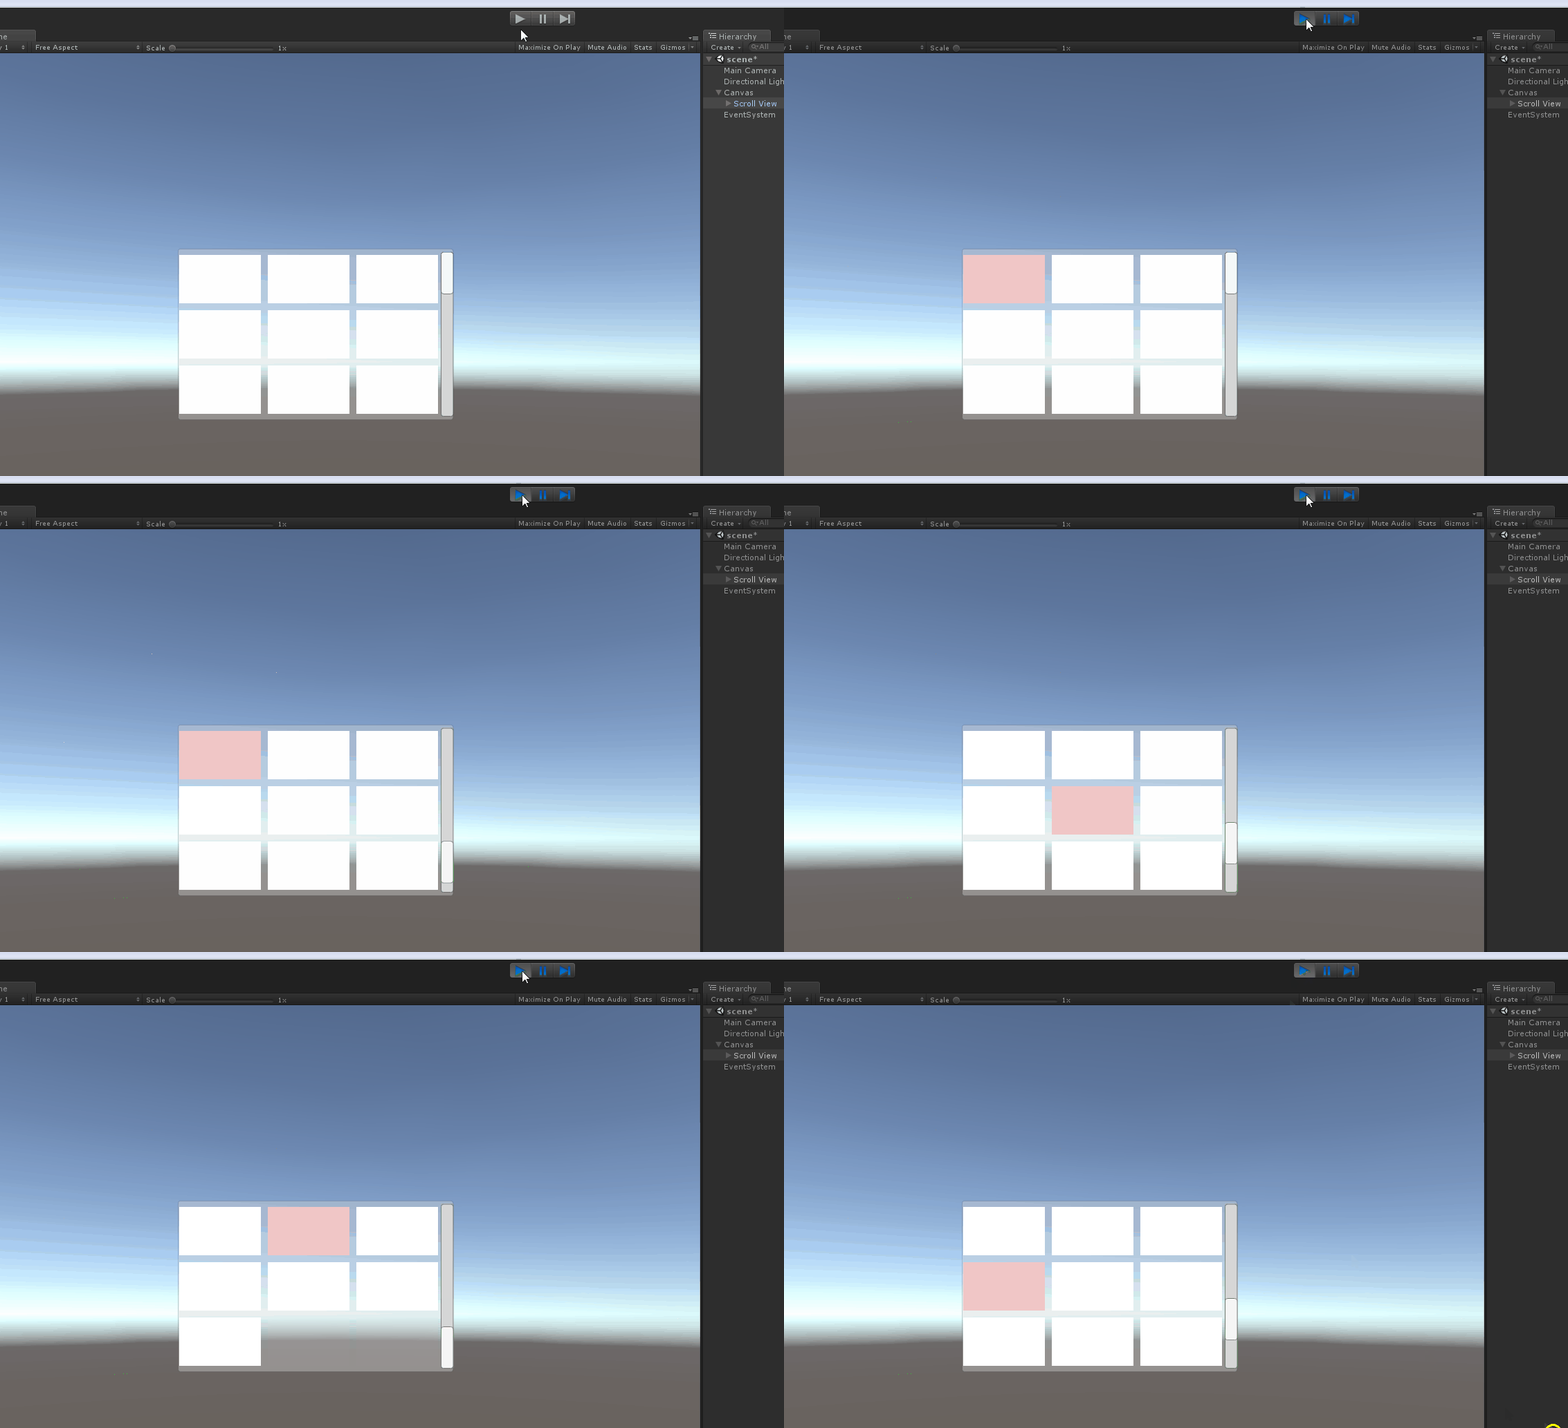
10.然后再复制出来另外29个Image,就可以了,运行试一试,下面是我做的结果,当然,可以自己改,使之变为3*4,4*4 等的都可以.
注意:
CellSize(a,b), Spacing(c,d), Buttom:e,Top:f, Left:g, Right:h, Scroll View的Height , Scroll View的Width, 之间的关系一定要满足下面:
(b+d)*窗口显示的行数 + f = Height,
(a+c)*窗口显示的列数+g+h <= Width
e = d.
MoveScrollbar脚本中的行数和列数也别忘记改.
原预制体以及脚本的下载地址:https://download.csdn.net/download/qq_15017279/10404010