第一步
在app.json文件找到“tarBar”对象,然后添加一个属性,代码如下:
"tabBar": {
    "custom": true, //添加这个属性
    "color": "#707070",
    "selectedColor": "#00c4cc",
    "list": [
      {
        "pagePath": "pages/home/index",
        "iconPath": "/static/img/home_def.png",
        "selectedIconPath": "/static/img/home_sel.png",
        "text": "首页"
      },
      {
        "pagePath": "pages/catetory/index",
        "iconPath": "/static/img/type_def.png",
        "selectedIconPath": "/static/img/type_sel.png",
        "text": "分类"
      },
      {
        "pagePath": "pages/home/index",
        "iconPath": "/static/img/my_def.png",
        "selectedIconPath": "/static/img/my_sel.png",
        "text": "我的"
      }
    ]
  }
第二步
在pages文件夹同级目录下,新建一个文件夹,文件夹名称为 “custom-tab-bar” ,就跟自定义组件一样创建,然后自己写基本样式,
主要通过fixed定位到底部就行(其实也可以直接去微信公众平台下载示例代码):
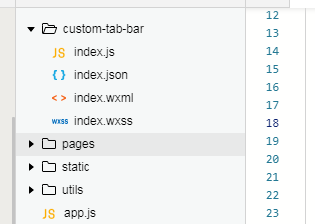
custom-tab-bar组件的基本代码如下:
index.wxml代码
<!--miniprogram/custom-tab-bar/index.wxml-->
<cover-view class="tab-bar">
  <cover-view class="tab-bar-border"></cover-view>
  <cover-view wx:for="{{list}}" wx:key="index" class="tab-bar-item" data-path="{{item.pagePath}}" data-index="{{index}}" bindtap="switchTab">
    <cover-image src="{{selected === index ? item.selectedIconPath : item.iconPath}}"></cover-image>
    <cover-view style="color: {{selected === index ? selectedColor : color}}">{{item.text}}</cover-view>
  </cover-view>
</cover-view>
index.js代码
Component({
  data: {
    selected: 0,
    color: "#707070",
    selectedColor: "#00c4cc",
    list: [{
      pagePath: "/pages/home/index",
      iconPath: "/static/img/home_def.png",
      selectedIconPath: "/static/img/home_sel.png",
      text: "首页"
    }, {
        pagePath: "/pages/catetory/index",
        iconPath: "/static/img/type_def.png",
        selectedIconPath: "/static/img/type_sel.png",
      text: "分类"
      }
      // ,{
      //   pagePath: "/pages/home/index",
      //   iconPath: "/static/img/my_def.png",
      //   selectedIconPath: "/static/img/my_sel.png",
      //   text: "我的"
      // }
      ]
  },
  attached() {
  },
  methods: {
    switchTab(e) {
      const data = e.currentTarget.dataset
      const url = data.path
      wx.switchTab({url})
      console.log(data.index)
      this.setData({
        selected: data.index
      })
    }
  }
})
到这里,自定义导航基本能在页面展示出来了,需要注意的是,每个tab页面,都要开启“usingComponents ”项,或者直接在app.json中全局设置。
虽然能展示出来了,但你试着切换导航,会发现一个问题,样式总是对应不上,比如 1 2 3有这三个导航,你点了2之后,选中的样式是1,点3后,选中的样式是2,
有点异步的感觉,解决方法是:在每一个tab页面,在周期函数onShow里添加如下代码:
if (typeof this.getTabBar === 'function' &&
      this.getTabBar()) {
      this.getTabBar().setData({
        selected: 1
      })
    }
注意每个tab页面的selected值不同,对应“custom-tab-bar”中data的list数组中的下标,this.getTabBar()其实返回的就是自定义的那个导航组件“custom-tab-bar” (可自行打印查看),然后执行setData去修改selected的值,从而让样式正常显示。。