专题一
一、创建私有索引库
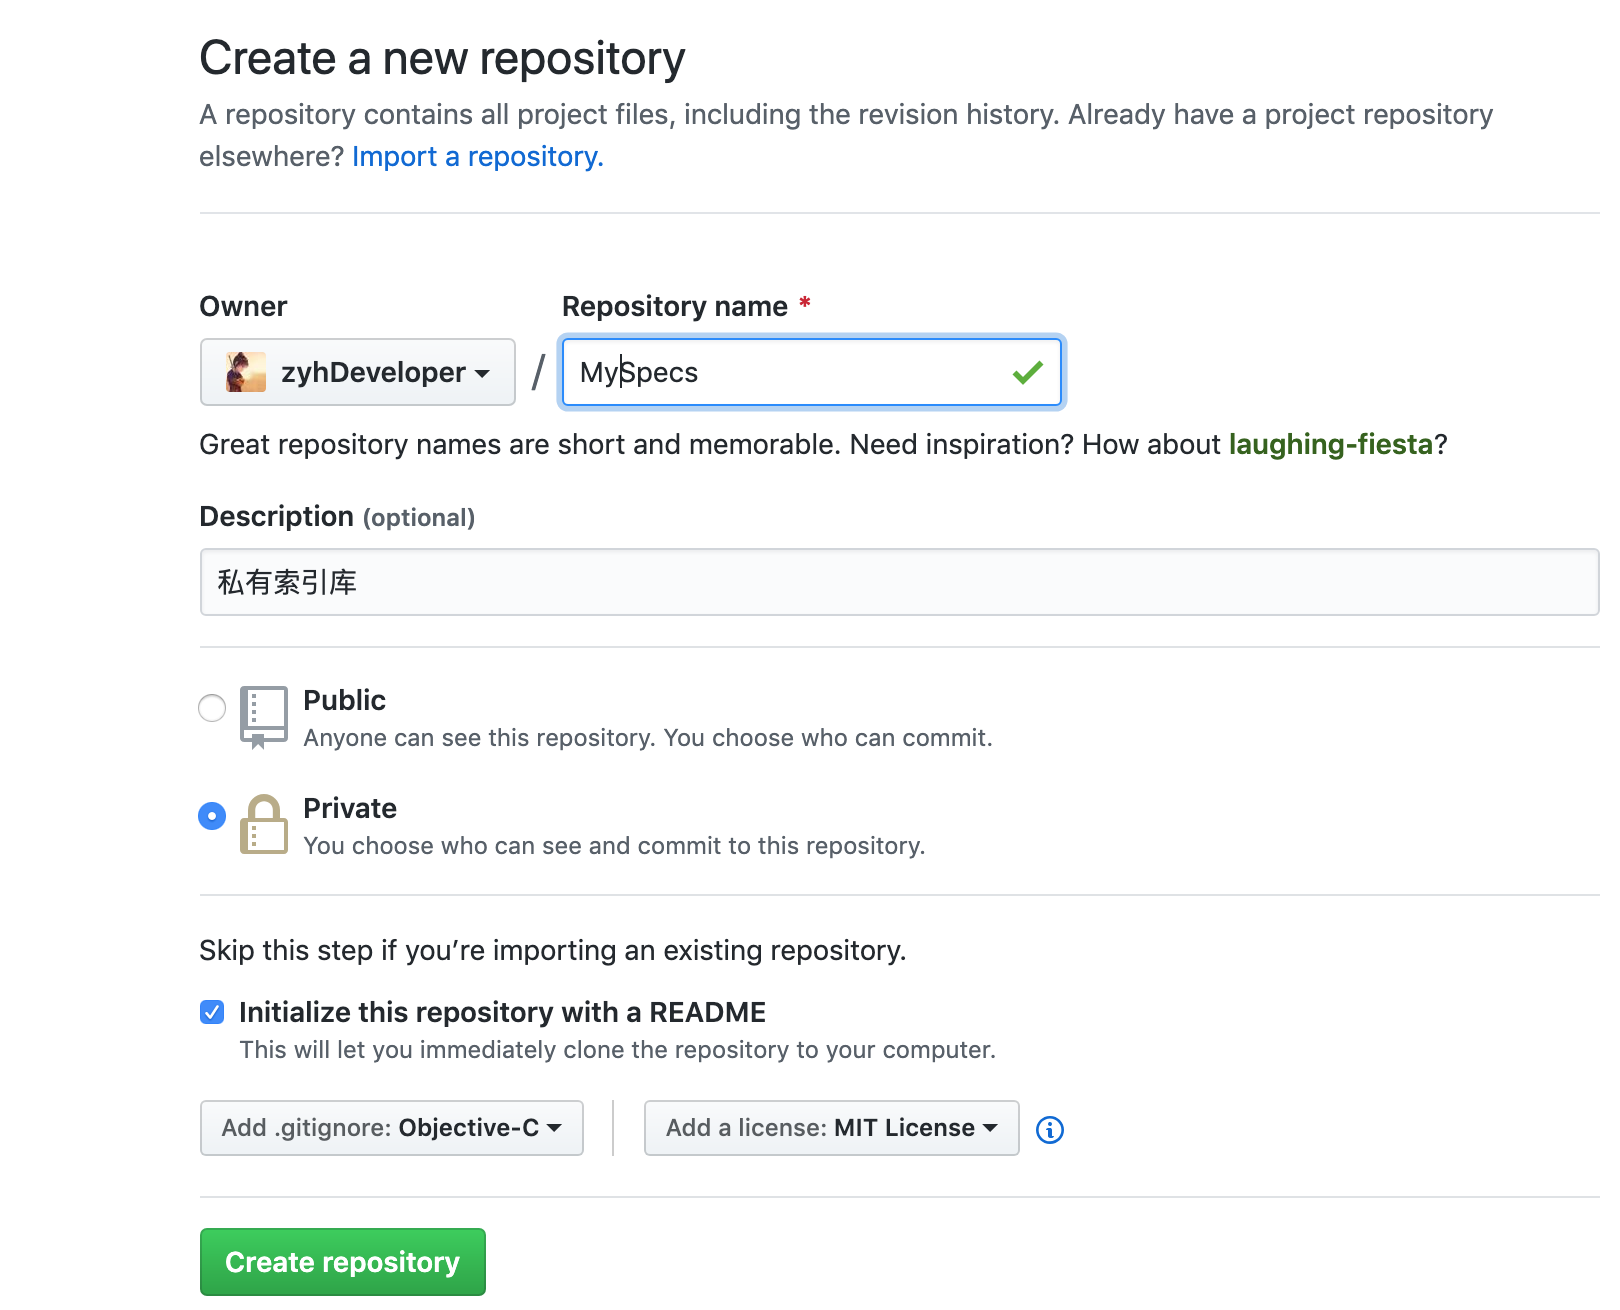
选Github或者码云都可以,本例以Github为例。创建私有索引库用来作为自己组件库的索引:
二、本地添加私有索引库
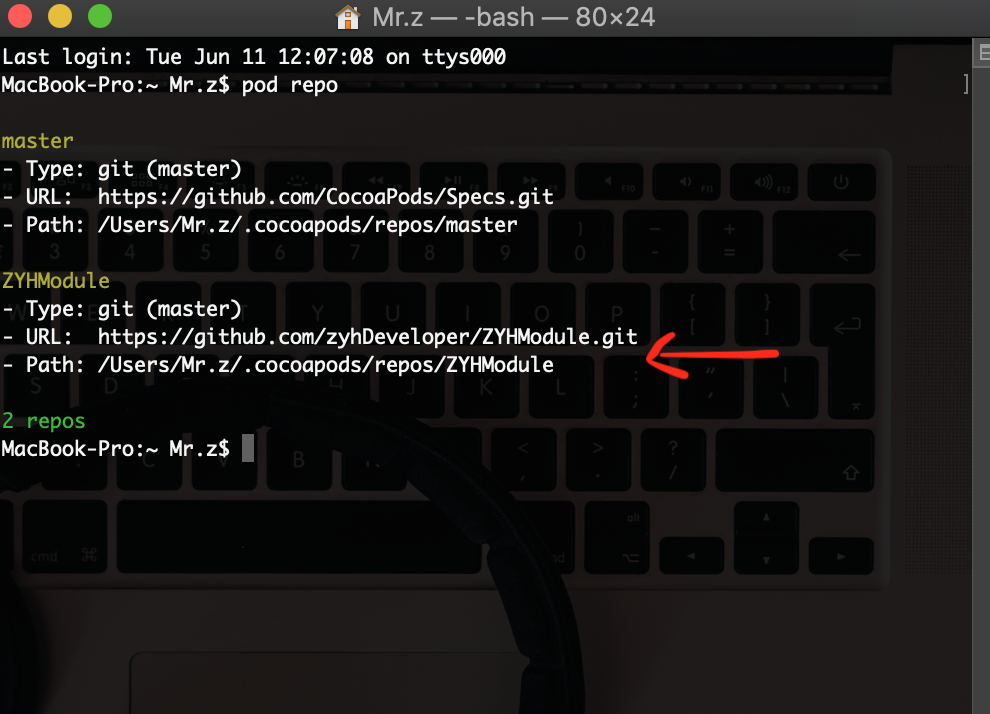
添加:pod repo add 索引库名称 索引库地址
例:pod repo add ZYHModule https://github.com/zyhDeveloper/ZYHModule.git
查询:pod repo
三、创建组件库(同步骤一操作,在Github或者码云上创建)
四、创建组件工程
1、快速创建模版库
在命令行工具里cd进入桌面文件夹
执行:pod lib create 组件名
例:pod lib create XXModules

2、添加组件内容
我们把基础组件相关的东西丢到Classes文件夹中,并且把ReplaceMe.m文件删除

执行:
git rm XXModule/Classes/ReplaceMe.m
git add .
3、安装与测试本地库
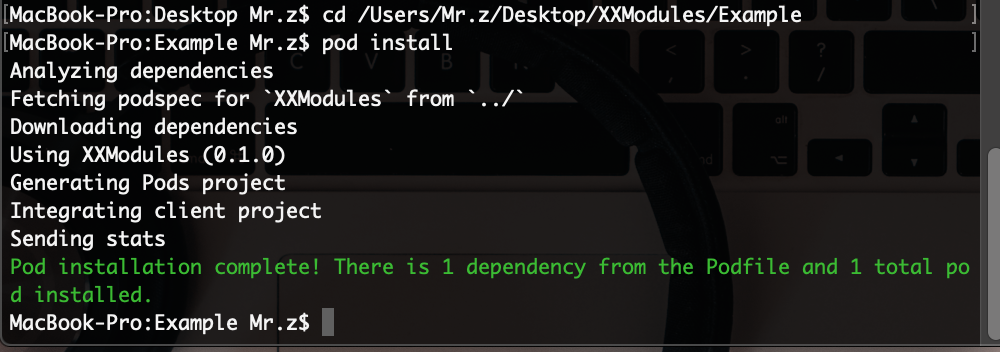
在Example项目的Podfile文件中可以看到 “ pod 'LXFBase', :path => '../' ”,模板库已经默认帮我们在Podfile中指定了LXFBase.podspec的位置,我们无需操作,直接在命令行工具里cd到Example文件夹,执行pod install
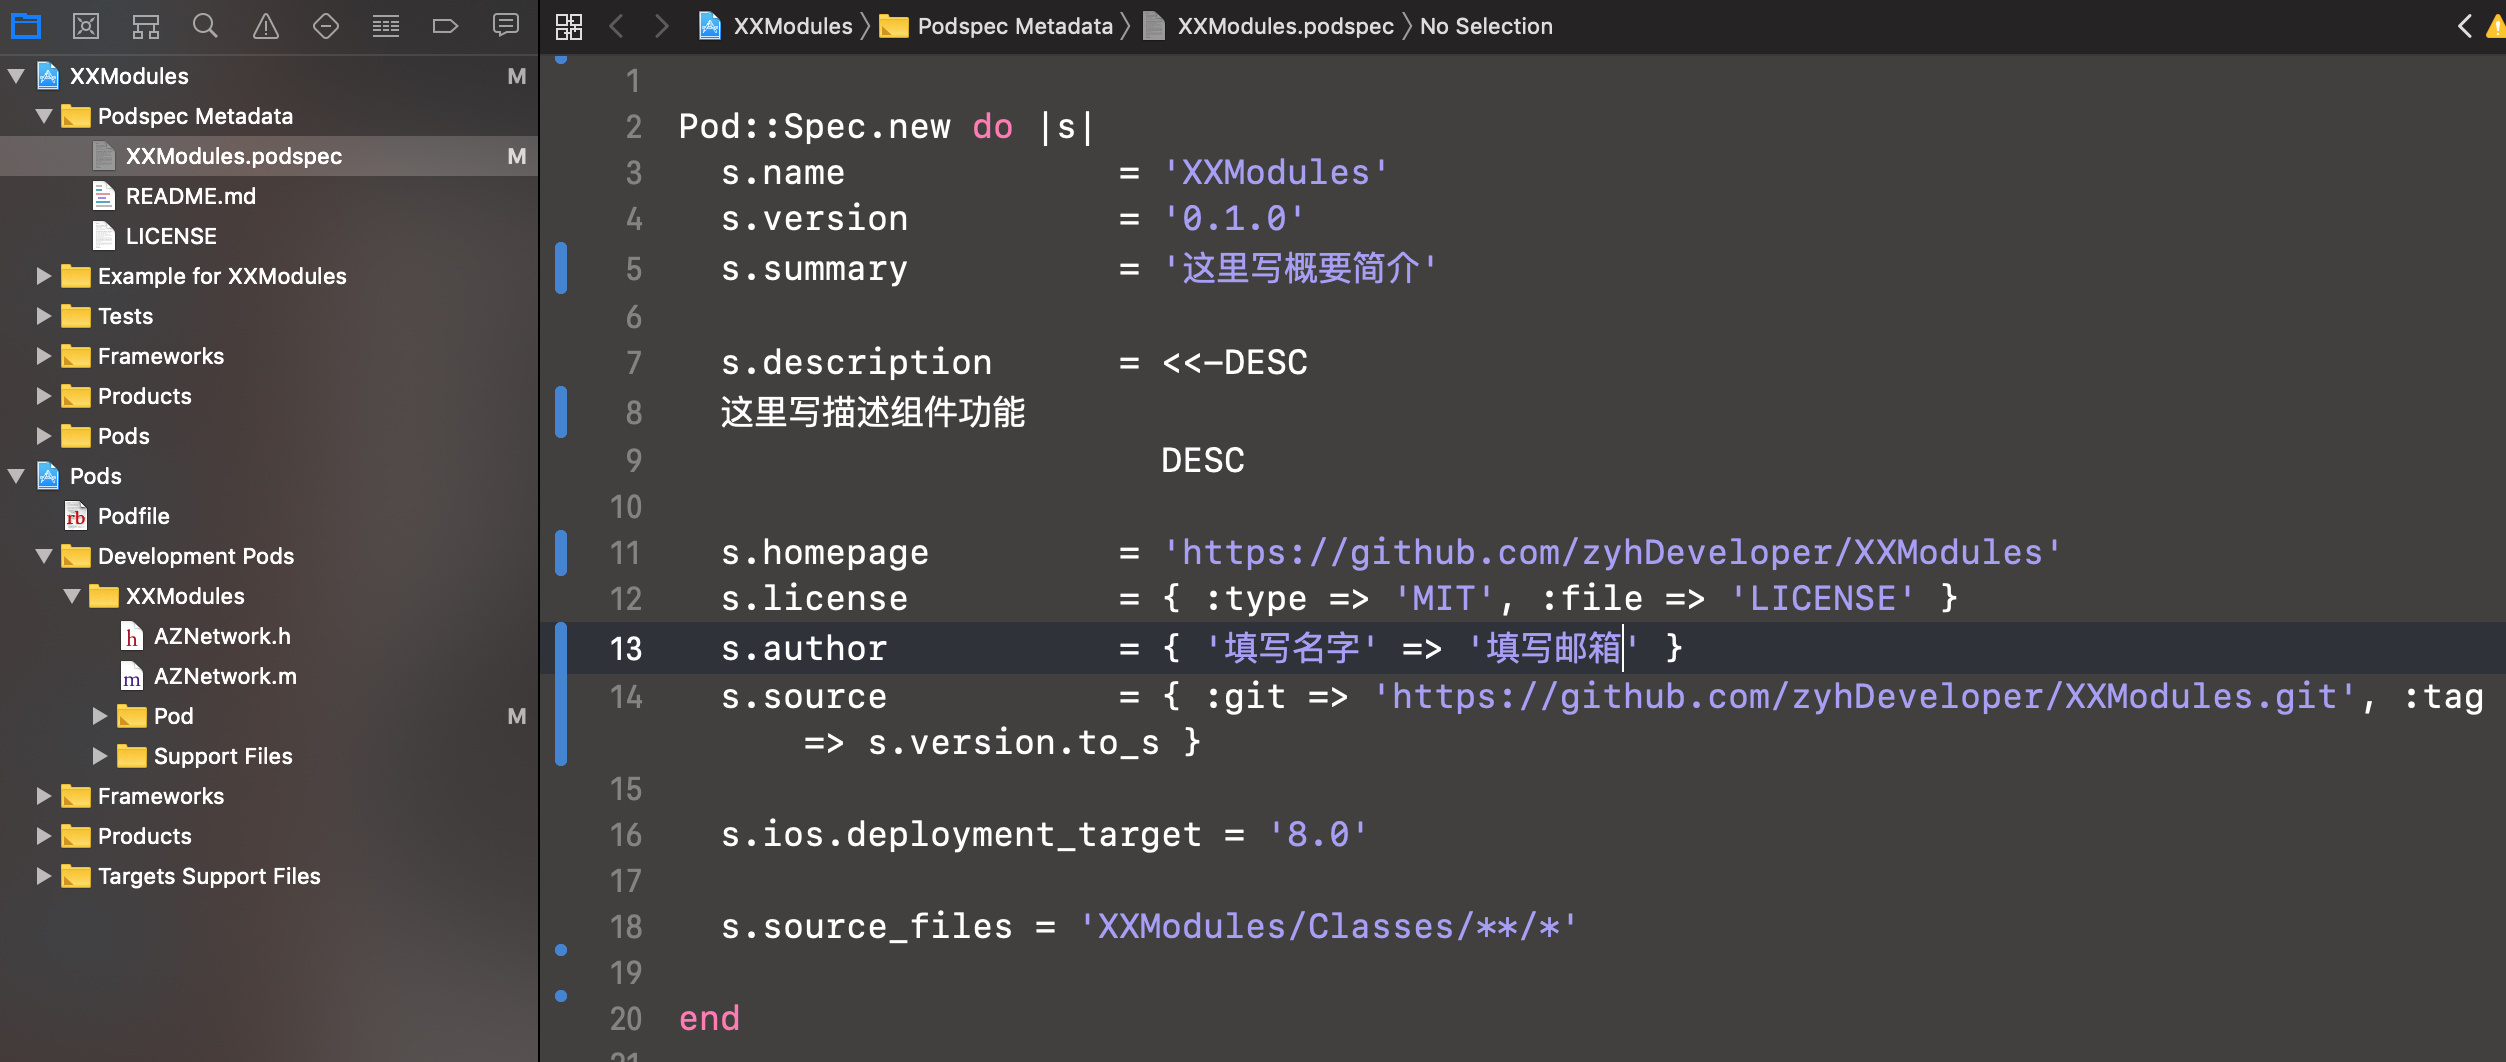
4、 修改Spec
五、上传组件代码
1、将代码提交到组件仓库
2、打标签
标签与spec中的s.version保持一致
git tag -a 0.1.0 -m "Release version 0.1.0"
git push origin --tags
六、提交podspec到私有索引库
先做个本地和远程验证
1、本地验证
pod lib lint --allow-warnings
2、远程验证
3、提交podspec
七、使用私有库
测试下搜索我们的组件:pod search XXModules
1、添加Podfile文件
cd到开发的项目工程文件
执行:pod init
2、在Podfile的最顶部添加如下描述
// 第二行是为了保证公有库的正常使用
source 'https://github.com/zyhDeveloper/ZYHModule.git'
source 'https://github.com/CocoaPods/Specs.git'
添加:pod 'XXModules'
3、安装组件
执行:pod install
专题二
一、私有库的更新迭代
更新远程私有仓库
1、代码变动更新
组件库当有新增文件或者发生修改或者删除时,更新迭代执行:
删除:git rm XXXX
git add .
git commit -m '更新描述'
git push origin master
2、版本更新
版本更新 这一步非常重要,为更新索引库做准备
git tag -a 0.2.0 -m "Release version 0.2.0"
git push origin --tags
修改描述文件并更新索引库
1、修改spec文件
打开你的xx.podspec文件,将原本的版本号改为0.2.0,与刚刚的tag保持一致
git add .
git commit -m '更新描述'
2、验证Spec
pod spec lint --allow-warnings
3、更新索引库
// pod repo push 索引库名称 xxx.podspec
pod repo push ZYHModule XXModule.podspec --allow-warnings
最终需更新使用
pod update
二、子库Subspecs的使用
如果我们只需要用到SDWebImage中的GIF功能,那么并不需要将整个SDWebImage都下载下来,在Podfile中将~~pod 'SDWebImage'~~ 改为 pod SDWebImage/GIF即可单独使用这一功能。
子库格式
s.subspec '子库名称' do |别名|
end
使用说明:
s.source_files = 'XXModule/Classes/*'
# s.dependency 'SDWebImage', '~> 4.3.3'主库的依赖库
s.subspec 'Cache' do |c|
c.source_files = 'XXModule/Classes/Manager/**/*'
c.dependency 'SDWebImage', '~> 4.3.3' 子库的依赖库
end s.subspec 'Manager' do |m|
m.source_files = 'XXModule/Classes/Category/**/*'
end修改后再按之前的步骤更新索引库和组件库就可以了
pod spec lint --allow-warnings(如果文件路径没问题,出现The`source_files` pattern did not match any file可尝试新设置tag)
pod repo push ZYHModule XXModule.podspec --allow-warnings
pod update
如需在某个工程添加子库,可执行:
pod 'XXModule/Manager'
pod install
专题三
资源文件的使用
资源文件都放在Assets文件夹中

一、修改Spec
将关于资源加载的注释去掉
s.resource_bundles = {
# 'LXFMain' => ['LXFMain/Assets/*.png']
改为:'LXFMain' => ['LXFMain/Assets/*']
}
二、修改加载资源代码
使用[UIImage imageNamed:@"图片名称"]加载不出来图片
使用以下代码:
如果是直接在xib中拖入一个imageView控件来设置图片的加载,我们则需要在图片名字前加上当前bundle名称 XXXX.bundle/图片名字
专题四
本地私有索引库路径:/Users/Mr.z/.cocoapods/repos
删除私有索引库:
pod repo remove [索引库名称] //移除本地索引库