显示图片只是在多媒体课上看着bmp格式图片的突发奇想,然后就实现在了我自己的操作系统
Antz系统更新地址
Linux内核源码分析地址
Github项目地址
效果图:

显示图片的原理
在之前显卡操作时,屏幕上的像素点我们是直接赋予一个颜色值的。
0xa0000是显示屏左上角第一个像素的地址,我们只需要根据地址赋予相应图片的rgb值即可实现图片的显示。Antz使用的显卡模式只能支持255种颜色,也就是bmp中24色的图片。
所以我们需要先将一个24色bmp格式的图片进行rgb值读取,然后再将rgb的值赋予到显卡的相应位置。
图片rgb读取
read.cpp
#include<cstdlib>
#include<cstdio>
#include<cmath>
#include<iomanip>
#include"read.h"

using namespace std;
unsigned int **out_r;
unsigned int **out_g;
unsigned int **out_b;

void getRGB()
{

	char readPath[] = "a.bmp";
	readBmp(readPath);
	// 输出整体图像信息
	cout << "
width=" << bmpWidth << "
height=" << bmpHeight << "
biBitCount=" << biBitCount << endl;
	// 图像的字节数
	int linebyte1 = (bmpWidth*biBitCount / 8 + 3) / 4 * 4;
	int n = 0, m = 0, count_xiang_su = 0;
	int i ;
	out_r = new unsigned int *[bmpHeight];
	for (i= 0; i<bmpHeight; i++)
		out_r[i] = new unsigned int[bmpWidth];

	out_g = new unsigned int *[bmpHeight];
	for (i = 0; i<bmpHeight; i++)
		out_g[i] = new unsigned int[bmpWidth];

	out_b = new unsigned int *[bmpHeight];
	for (i = 0; i<bmpHeight; i++)
		out_b[i] = new unsigned int[bmpWidth];


	//初始化原始像素的数组。

	if (biBitCount == 8)
	{
		for (int i = 0; i<bmpHeight / 2; i++)
		{
			for (int j = 0; j<bmpWidth / 2; i++)
				*(pBmpBuf + i*linebyte1 + j) = 0;
		}
	}

	if (biBitCount == 24)
	{
		for (int i = 0; i<bmpHeight; i++)
		{
			for (int j = 0; j<bmpWidth; j++)
			{
				for (int k = 0; k<3; k++)//每像素RGB三个分量分别置0才变成黑色
				{
					m = *(pBmpBuf + i*linebyte1 + j * 3 + k);
					count_xiang_su++;
				}
				n++;
			}
		}
		cout << "总的像素个素为:" << n << endl;
		cout << "----------------------------------------------------" << endl;
	}


	if (biBitCount == 24)
	{
		for (int i = 0; i<bmpHeight; i++)
		{
			for (int j = 0; j<bmpWidth; j++)
			{
				out_r[bmpHeight - 1 - i][j] = pBmpBuf[j * 3 + 2 + bmpWidth*i * 3];
				out_g[bmpHeight - 1 - i][j] = pBmpBuf[j * 3 + 1 + bmpWidth *i * 3];
				out_b[bmpHeight - 1 - i][j] = pBmpBuf[j * 3 + bmpWidth *i * 3];
			}
		}
	}

	//---------------------------------------------------------------------------------------
	//将像素数据存入TXT文件。
	ofstream outfile;
	char out_rgb[100] ;
    int ai,ji;
	outfile.open("rrbmp.txt", ios::in | ios::trunc);
	if(!outfile) cout << "error" << endl;
	for (ai = 0; ai<bmpHeight; ai++)
	{
        for (ji = 0; ji<bmpWidth; ji++)
        {

            int rgb_num = 16 + out_r[ai][ji]/43 + 6* (out_g[ai][ji]/43) + 36* (out_b[ai][ji]/43) ;
            sprintf(out_rgb,"%d,",rgb_num);
            outfile << out_rgb <<endl;
        }
	}
	outfile.close();

	char writePath[] = "b.bmp";
	saveBmp(writePath, pBmpBuf, bmpWidth, bmpHeight, biBitCount, pColorTable);

	//清除缓冲区
	delete[]pBmpBuf;
	if (biBitCount == 8)
		delete[]pColorTable;

}

int main()
{
	getRGB();
	return 0;
}
read.h
#include<fstream>
#include<windows.h>
#include<iostream>

using namespace std;


unsigned char *pBmpBuf;//读入图像数据的指针
int bmpWidth;//图像的宽
int bmpHeight;//图像的高
RGBQUAD *pColorTable;//颜色表指针
int biBitCount;//图像类型,每像素位数


//显示位图文件头信息
void showBmpHead(BITMAPFILEHEADER pBmpHead){
	cout << "
位图文件头:" << endl;
	cout << "文件大小:" << pBmpHead.bfSize << endl;
	cout << "保留字_1:" << pBmpHead.bfReserved1 << endl;
	cout << "保留字_2:" << pBmpHead.bfReserved2 << endl;
	cout << "实际位图数据的偏移字节数:" << pBmpHead.bfOffBits << endl << endl;
}
//显示位图信息头信息
void showBmpInforHead(BITMAPINFOHEADER pBmpInforHead){
	cout << "
位图信息头:" << endl;
	cout << "结构体的长度:" << pBmpInforHead.biSize << endl;
	cout << "位图宽:" << pBmpInforHead.biWidth << endl;
	cout << "位图高:" << pBmpInforHead.biHeight << endl;
	cout << "biPlanes平面数:" << pBmpInforHead.biPlanes << endl;
	cout << "biBitCount采用颜色位数:" << pBmpInforHead.biBitCount << endl;
	cout << "压缩方式:" << pBmpInforHead.biCompression << endl;
	cout << "biSizeImage实际位图数据占用的字节数:" << pBmpInforHead.biSizeImage << endl;
	cout << "X方向分辨率:" << pBmpInforHead.biXPelsPerMeter << endl;
	cout << "Y方向分辨率:" << pBmpInforHead.biYPelsPerMeter << endl;
	cout << "使用的颜色数:" << pBmpInforHead.biClrUsed << endl;
	cout << "重要颜色数:" << pBmpInforHead.biClrImportant << endl;
}
//给定一个图像位图数据、宽、高、颜色表指针及每像素所占的位数等信息,将其写到指定文件中
bool readBmp(char *bmpName)
{
	FILE *fp = fopen(bmpName, "rb");//二进制读方式打开指定的图像文件
	if (fp == 0)
		return 0;

	//跳过位图文件头结构BITMAPFILEHEADER
	fseek(fp, sizeof(BITMAPFILEHEADER), 0);
	//定义位图信息头结构变量,读取位图信息头进内存,存放在变量head中
	BITMAPINFOHEADER infohead;
	fread(&infohead, sizeof(BITMAPINFOHEADER), 1, fp); //获取图像宽、高、每像素所占位数等信息
	bmpWidth = infohead.biWidth;
	bmpHeight = infohead.biHeight;
	biBitCount = infohead.biBitCount;//定义变量,计算图像每行像素所占的字节数(必须是4的倍数)
	showBmpInforHead(infohead);//显示信息头


	int lineByte = (bmpWidth * biBitCount / 8 + 3) / 4 * 4;//灰度图像有颜色表,且颜色表表项为256
	if (biBitCount == 8)
	{
		//申请颜色表所需要的空间,读颜色表进内存
		pColorTable = new RGBQUAD[256];
		fread(pColorTable, sizeof(RGBQUAD), 256, fp);
	}

	//申请位图数据所需要的空间,读位图数据进内存
	pBmpBuf = new unsigned char[lineByte * bmpHeight];
	fread(pBmpBuf, 1, lineByte * bmpHeight, fp);
	fclose(fp);//关闭文件
	return 1;//读取文件成功
}
//保存图片
bool saveBmp(char *bmpName, unsigned char *imgBuf, int width, int height, int biBitCount, RGBQUAD *pColorTable)
{

	//如果位图数据指针为0,则没有数据传入,函数返回
	if (!imgBuf)
		return 0;
	//颜色表大小,以字节为单位,灰度图像颜色表为1024字节,彩色图像颜色表大小为0
	int colorTablesize = 0;
	if (biBitCount == 8)
		colorTablesize = 1024;

	//待存储图像数据每行字节数为4的倍数
	int lineByte = (width * biBitCount / 8 + 3) / 4 * 4;

	//以二进制写的方式打开文件
	FILE *fp = fopen(bmpName, "wb");

	if (fp == 0)
		return 0;
	//申请位图文件头结构变量,填写文件头信息
	BITMAPFILEHEADER fileHead;
	fileHead.bfType = 0x4D42;//bmp类型

	//bfSize是图像文件4个组成部分之和
	fileHead.bfSize = sizeof(BITMAPFILEHEADER) + sizeof(BITMAPINFOHEADER) + colorTablesize + lineByte*height;
	fileHead.bfReserved1 = 0;
	fileHead.bfReserved2 = 0;

	//bfOffBits是图像文件前3个部分所需空间之和
	fileHead.bfOffBits = 54 + colorTablesize;
	//写文件头进文件
	fwrite(&fileHead, sizeof(BITMAPFILEHEADER), 1, fp);

	//申请位图信息头结构变量,填写信息头信息
	BITMAPINFOHEADER infohead;
	infohead.biBitCount = biBitCount;
	infohead.biClrImportant = 0;
	infohead.biClrUsed = 0;
	infohead.biCompression = 0;
	infohead.biHeight = height;
	infohead.biPlanes = 1;
	infohead.biSize = 40;
	infohead.biSizeImage = lineByte*height;
	infohead.biWidth = width;
	infohead.biXPelsPerMeter = 0;
	infohead.biYPelsPerMeter = 0;

	//写位图信息头进内存
	fwrite(&infohead, sizeof(BITMAPINFOHEADER), 1, fp);
	//如果灰度图像,有颜色表,写入文件
	if (biBitCount == 8)
		fwrite(pColorTable, sizeof(RGBQUAD), 256, fp);

	//写位图数据进文件
	fwrite(imgBuf, height*lineByte, 1, fp);

	//关闭文件
	fclose(fp);
	return 1;

}
这样就可以获得一张图片的rgb值了,部分如下:
16,
16,
16,
16,
52,
52,
16,
16,
16,
16,
16,
16,
16,
16,
16,
16,
16,
52,
52
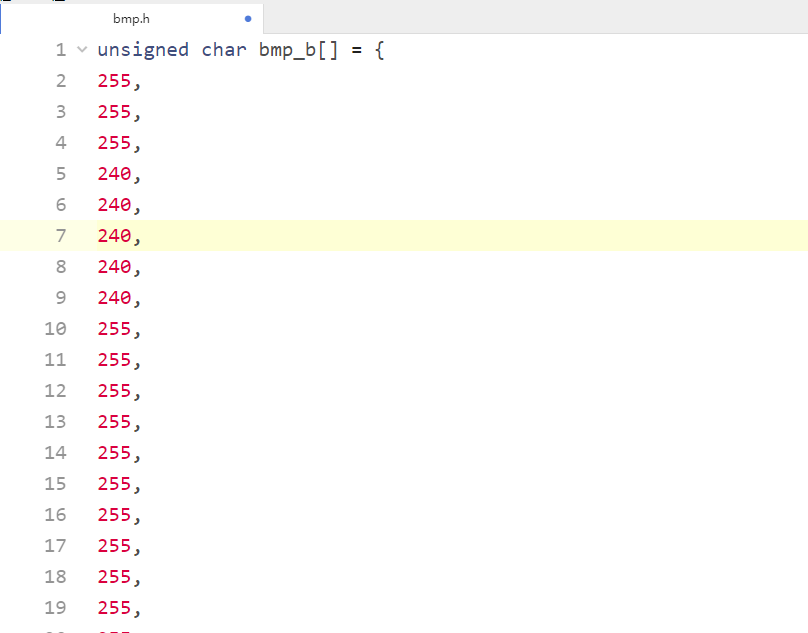
因为目前还没有实现磁盘驱动,没有文件系统,我们只能把值硬编码进系统中。
bmp.h

一个数万项的unsigned char数组,再上面程序中我们同样可以得到图片的长宽信息,那么下一步就是在系统中显示图片了。
#include <bmp.h>

void to_printf_dijkstra(int sx,int sy){
  // sx,sy是屏幕分辨率
  int x, y;
  int k = 0 ;
  for (y = 0; y < 115; y++) {  //图片宽100,高115个像素
    for (x = 0; x < 100; x++){
      printf_(sx , bmp_b[k] , x+sx-100, y, x+sx-100, y);
      k++;
    }
  }
}
只需要在一个命令响应中调用这个函数即可了,这就是效果了(真机测试也是同样)。

不知道你有没有考虑到这个问题,这个115x100的图片有11500个像素点,这是一张很小很小的图片了,如果我们用一张正常一点的尺寸较大的图片,比如500x400,那就是200000个像素点了,这对没有实现磁盘驱动,靠硬编码进系统的antz压力非常大,所以此处加载图片虽然成功了,但实际上还远不能入此,这只是一个思想,当我可以实现硬盘驱动和文件系统之后,我们可以把上面bmp文件的rgb读取的程序直接放在内核中成为API,然后调用起来就方便很多了,对于那种超大图片,可以靠这样实现分步显示。