css选择方式1——元素选择符
通配符:对所有元素都使用
*{
background-color: whitesmoke;
}
类选择符:
.ll{
color: red;
}
id选择符:
#hh{
color: blue;
}
类型选择符(标签选择符):
p{
color: yellow;
}
代码如下:
<!DOCTYPE html>
<html>
<head>
<meta charset="UTF-8">
<title></title>
<link rel="stylesheet" href="css/css02.css" />
<style>
*{
background-color: whitesmoke;
}
.ll{
color: red;
}
#hh{
color: blue;
}
p{
color: yellow;
}
</style>
</head>
<body>
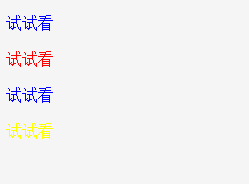
<p id="hh" class="ll">试试看</p>
<p class="ll">试试看</p>
<p id="hh" >试试看</p>
<p >试试看</p>
</body>
</html>
结果如图所示:
css选择方式2——子元素、兄弟、相邻、包含
子元素选择符:父>子
h3>p{
color: red;
}
兄弟选择符:你自己~你的兄弟(第一个不变色,其他都变色)
p~p{
color: red;
}
相邻选择符:E+F(E后面一个F变色)
p+p{
color: red;
}
包含选择符:E F(E里面的所有F变色)
h3 p{
color: red;
}
代码如下:
<!DOCTYPE html>
<html>
<head>
<meta charset="UTF-8">
<style>
h3 p{
color: red;
}
</style>
</head>
<body>
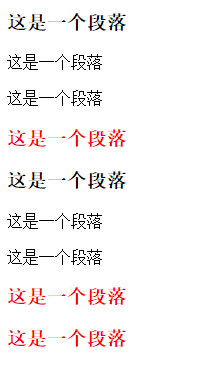
<h3>这是一个段落</h3>
<p>这是一个段落</p>
<p>这是一个段落</p>
<h3>
<p>这是一个段落</p>
</h3>
<h3>这是一个段落</h3>
<p>这是一个段落</p>
<p>这是一个段落</p>
<h3>
<p>这是一个段落</p>
<p>这是一个段落</p>
</h3>
</body>
</html>
结果如图所示:
css选择方式3——属性选择符
方法1、元素[属性]{}
a[href]{
color: red;
}
方法2、元素[属性=“属性值”]{}
a[href="css01.html"]{
color:greenyellow;
}
css选择方式4——伪类选择符
标签:状态{}
link为未点击
visited为点击以后
hover为放置鼠标
active为点击以后但鼠标未离开
代码如下:
<!DOCTYPE html>
<html>
	<head>
		<meta charset="UTF-8">
		<title></title>
		<style>
			a[href]{
				color: red;
			}http://127.0.0.1:8020/css/css02-1.html
			a[href="css01.html"]{
				color:greenyellow;
			}
			a:link{
				color: blue;
			}
			a:visited{
				color: yellow;
			}
			a:hover{
				color: green;
			}
			a:active{
				color: red;
			}
		</style>
	</head>
	<body>
		<a href="css01.html">css01.html</a>
		<a href="css02-1.html">css02-1.html</a>
		<a href="css02-2.html">css02-2.html</a>
		<a href="css03-1.html">css03-1.html</a>
	</body>
</html>
选择器的优先级:
!important>内联>ID>类>标签[伪类]属性选择符>伪对象>继承>通配符
选择器 优先级数
!important 无穷大
内联 1000
ID 100
类 10
标签 1
演示代码如下:
<!DOCTYPE html>
<html>
	<head>
		<meta charset="UTF-8">
		<title></title>
		<style>
			span{
				/*1*/
				color: red ;/*!important;*/
			}
			p span{
				/*1+1=2*/
				color: blueviolet;
			}
			p .dd{
				/*1+10=11*/
				color: green;
			}
			p #gg{
				/*1+100=101*/
				color: orange;
			}
		</style>
	</head>
	<body>
		<p>
			<span class="dd" id="gg">优先级</span>
			<span class="dd" >优先级</span>
			<span >优先级</span>
		</p>
			<span>优先级</span>
	</body>
</html>