1.文件上传
2.拦截器
3.数据校验
(1)使用springmvc完成文件上传
步骤1.加入Fileupload 相关的jar 包

步骤2.编写上传文件的表单(注意:表单必须是post 提交方式,编码必须是multipart/form-data 文件上传文本框必须起名)
<%@ page language="java" contentType="text/html; charset=UTF-8"
    pageEncoding="UTF-8"%>
<!DOCTYPE html>
<html>
<head>
<meta charset="UTF-8">
<title>Insert title here</title>
</head>
<body>
<form action="upload" method="post" enctype="multipart/form-data">
    请选择上传到文件:<input type="file" name="myfile"><br>
    <input type="submit" value="提交">
</form>
</body>
</html>
步骤3.在springmvc中配置文件上传解析器
<?xml version="1.0" encoding="UTF-8"?>
<beans xmlns="http://www.springframework.org/schema/beans"
    xmlns:xsi="http://www.w3.org/2001/XMLSchema-instance"
    xmlns:context="http://www.springframework.org/schema/context"
    xmlns:mvc="http://www.springframework.org/schema/mvc"
    xsi:schemaLocation="http://www.springframework.org/schema/mvc http://www.springframework.org/schema/mvc/spring-mvc-4.2.xsd
        http://www.springframework.org/schema/beans http://www.springframework.org/schema/beans/spring-beans.xsd
        http://www.springframework.org/schema/context http://www.springframework.org/schema/context/spring-context-4.2.xsd">
    <!-- 扫描包 -->
    <context:component-scan base-package="com.zhiyou100.ydb.controller"></context:component-scan>
    <!-- 开启 -->
    <mvc:annotation-driven />
    <!-- 释放静态资源 -->
    <mvc:default-servlet-handler/>
    <!-- 配置文件上传解析器 -->
    <bean id="multipartResolver" class="org.springframework.web.multipart.commons.CommonsMultipartResolver">
        <property name="maxUploadSize" value="2097135820"></property>
    </bean>

    <bean class="org.springframework.web.servlet.view.InternalResourceViewResolver">
        <property name="prefix" value="/WEB-INF/veiws/"></property>
        <property name="suffix" value=".jsp"></property>
    </bean>

</beans>
步骤4.在控制层处理代码
package com.zhiyou100.ydb.controller;

import java.io.File;
import java.io.IOException;

import javax.servlet.http.HttpServletRequest;

import org.apache.commons.io.FileUtils;
import org.springframework.stereotype.Controller;
import org.springframework.web.bind.annotation.RequestMapping;
import org.springframework.web.multipart.MultipartFile;

@Controller
public class UploadController {
    @RequestMapping("upload")//HttpServletRequest 作用是为了获取上传文件的路径
    public String upload(MultipartFile myfile,HttpServletRequest request) {
//        1.获取文件上传的真实路径
        String path = request.getServletContext().getRealPath("/upload");
        System.out.println(path);

//        2.创建一个文件对象
        File file = new File(path);
        if(!file.exists()) {//表示该路径不存在
            file.mkdirs();//创建一个path
        }

//        3.获取文件名
        String filename = System.currentTimeMillis()+ myfile.getOriginalFilename();
        File targetFile = new File(path+"/"+filename);

        try {
//        把文件写入到指定目录下
            FileUtils.writeByteArrayToFile(targetFile, myfile.getBytes());
        } catch (IOException e) {
            // TODO Auto-generated catch block
            e.printStackTrace();
        }
        return "index";
    }
}
如果表单中除了文件输入框还有其他输入框时
<%@ page language="java" contentType="text/html; charset=UTF-8"
    pageEncoding="UTF-8"%>
<!DOCTYPE html>
<html>
<head>
<meta charset="UTF-8">
<title>Insert title here</title>
</head>
<body>
<form action="uploadstu" method="post" enctype="multipart/form-data">
        姓名:<input type="text" name="name"><br>
        年龄:<input type="text" name="age"><br>
请选择上传到文件:<input type="file" name="myfile"><br>
                <input type="submit" value="提交">
</form>
</body>
</html>
可以在将各个表单封装成一个实体类(注意:实体类的名字不能和input中的name的值一样)
package com.zhiyou100.ydb.bean;

public class Student {
    private String name;
    private Integer age;
    private String img;
    public String getName() {
        return name;
    }
    public void setName(String name) {
        this.name = name;
    }
    public Integer getAge() {
        return age;
    }
    public void setAge(Integer age) {
        this.age = age;
    }
    public String getImg() {
        return img;
    }
    public void setImg(String img) {
        this.img = img;
    }


}
最后再操作层中加入的方法参数中加入该实体类
package com.zhiyou100.ydb.controller;

import java.io.File;
import java.io.IOException;

import javax.servlet.http.HttpServletRequest;

import org.apache.commons.io.FileUtils;
import org.springframework.stereotype.Controller;
import org.springframework.ui.Model;
import org.springframework.web.bind.annotation.RequestMapping;
import org.springframework.web.multipart.MultipartFile;

import com.zhiyou100.ydb.bean.Student;
    @Controller
    public class UploadStuController {
        @RequestMapping("uploadstu")
        public String Uploadstu(Student stu,MultipartFile myfile,HttpServletRequest request,Model model) {
            String path = request.getServletContext().getRealPath("/img");
            File file = new File(path);
            if(!file.exists()) {
                file.mkdirs();
            }

            String filename = System.currentTimeMillis()+ myfile.getOriginalFilename();
            stu.setImg("img/"+filename);//设置实体类img属性的值

            File targetfile = new File(path+"/"+filename);
            try {
                FileUtils.writeByteArrayToFile(targetfile, myfile.getBytes());
            } catch (IOException e) {
                // TODO Auto-generated catch block
                e.printStackTrace();
            }
            model.addAttribute("stu", stu);
            return "index";
        }
}
(2)springmvc拦截器 拦截的都是控制层的地址。filter
步骤1.创建一个类并且实现HandlerInterceptor 接口 和重写该接口的方法
package com.zhiyou100.ydb.interceptor;

import javax.servlet.http.HttpServletRequest;
import javax.servlet.http.HttpServletResponse;

import org.springframework.web.servlet.HandlerInterceptor;
import org.springframework.web.servlet.ModelAndView;

public class UserInterceptor implements HandlerInterceptor {

    @Override
    public void afterCompletion(HttpServletRequest arg0, HttpServletResponse arg1, Object arg2, Exception arg3)
            throws Exception {
        // TODO Auto-generated method stub

    }

    @Override
    public void postHandle(HttpServletRequest arg0, HttpServletResponse arg1, Object arg2, ModelAndView arg3)
            throws Exception {
        // TODO Auto-generated method stub

    }

    @Override
    public boolean preHandle(HttpServletRequest request, HttpServletResponse response, Object arg2) throws Exception {
        Object name = request.getSession().getAttribute("name");return false;
    }

}
步骤2,把创建的类配置到springmvc文件中
<mvc:mapping path=""/>表示只拦截该路径
<mvc:exclude-mapping path=""/>表示派出拦截该路径
<bean class="com.zhiyou100.ydb.interceptor.UserInterceptor"></bean>加入拦截器类的全类名
<?xml version="1.0" encoding="UTF-8"?>
<beans xmlns="http://www.springframework.org/schema/beans"
    xmlns:xsi="http://www.w3.org/2001/XMLSchema-instance"
    xmlns:context="http://www.springframework.org/schema/context"
    xmlns:mvc="http://www.springframework.org/schema/mvc"
    xsi:schemaLocation="http://www.springframework.org/schema/mvc http://www.springframework.org/schema/mvc/spring-mvc-4.2.xsd
        http://www.springframework.org/schema/beans http://www.springframework.org/schema/beans/spring-beans.xsd
        http://www.springframework.org/schema/context http://www.springframework.org/schema/context/spring-context-4.2.xsd">
    <!-- 扫描包 -->
    <context:component-scan base-package="com.zhiyou100.ydb.controller"></context:component-scan>
    <!-- 开启 -->
    <mvc:annotation-driven />
    <!-- 释放静态资源 -->
    <mvc:default-servlet-handler/>
    <!-- 配置拦截器 -->
    <mvc:interceptors>
        <mvc:interceptor>
            <mvc:mapping path="/users/**"/>
            <mvc:exclude-mapping path="/users/login"/>
            <mvc:exclude-mapping path="/users/loginwin"/>
            <bean class="com.zhiyou100.ydb.interceptor.UserInterceptor"></bean>
        </mvc:interceptor>
    </mvc:interceptors>

    <!-- 配置文件上传解析器 -->
    <bean id="multipartResolver" class="org.springframework.web.multipart.commons.CommonsMultipartResolver">
        <property name="maxUploadSize" value="2097135820"></property>
    </bean>

    <bean class="org.springframework.web.servlet.view.InternalResourceViewResolver">
        <property name="prefix" value="/WEB-INF/veiws/"></property>
        <property name="suffix" value=".jsp"></property>
    </bean>

</beans>
(3)springmvc数据校验(后台校验hilbeernate validate)
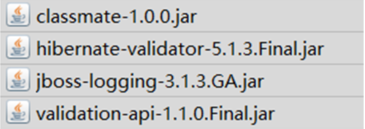
1.引入Hibernate-validate的jar包
2.在相应的实体类属性上加上校验注解

更多校验注解:https://blog.csdn.net/songmaolin_csdn/article/details/78522950
3.控制层接收参数的地方加上@Valid 如果参数不符合校验 就把错误封装到BindingResultu对象中
//    注册错误
    @RequestMapping("register")
//    @Valid校验 该参数
    public String toRegister(@Valid User user,BindingResult br,Model model) {
        //BindingResult把验证的错误信息封装到BindingResult类中
        if(br.hasErrors()) {//判断有没有错误信息
            List<FieldError> fieldErrors = br.getFieldErrors();
            Map<String,Object> errorMsg = new HashMap<>();
            for(FieldError f:fieldErrors) {
//                System.out.println(f.getField()+"=="+f.getDefaultMessage());//错误字段 和错误提示
                errorMsg.put(f.getField(), f.getDefaultMessage());
            }
            model.addAttribute("errorMsg", errorMsg);
            return "forward:toregister";
        }
        return "login";
    }
//    注册
    @RequestMapping("toregister")
    public String register() {
        return "register";
    }
4.网页接收错误信息
<%@ page language="java" contentType="text/html; charset=UTF-8"
    pageEncoding="UTF-8"%>
<!DOCTYPE html>
<html>
<head>
<meta charset="UTF-8">
<title>Insert title here</title>
</head>
<body>
<form action="register">
    name:<input type="text" name="name">${errorMsg.name }<br>
    pass:<input type="text" name="password">${errorMsg.password }<br>
    <input type="submit" value="注册">
</form>
</body>
</html>