准备工作
使用xftp将项目传到linux

将knight 传到linux上
将项目的数据导出
mysqldum -uroot -p --all-database > alldb.dump
在windows的cmd中执行上面命令导出mysql所有数据库的数据
然后将alldb.dump用xftp传到opt目录下
导入数据:
mysql -uroot -p < alldb.dump
记得远程连接授权:

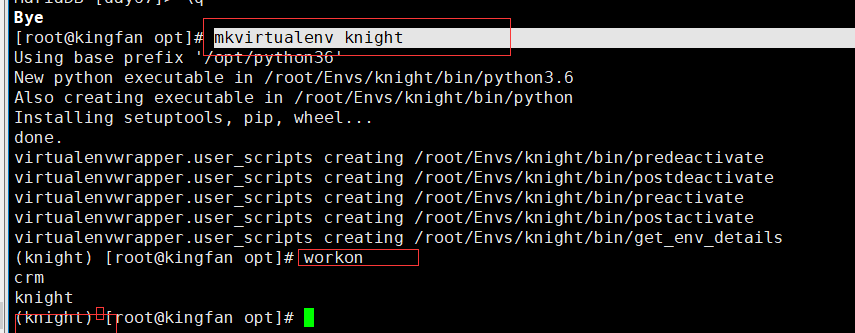
创建一个knight虚拟环境
mkvirtualenv knight

在虚拟环境下运行下项目
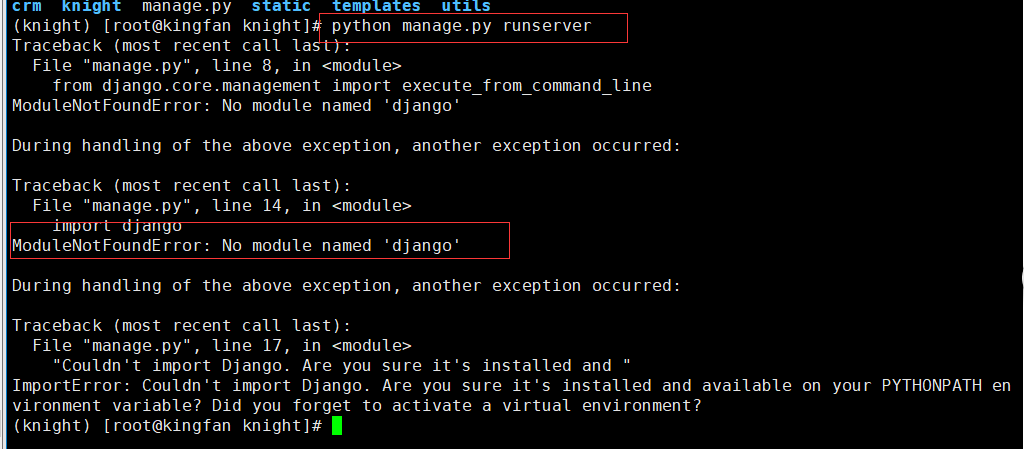
尝试云行下

发现缺少模块。
解决步骤:
pip3 install django==1.11.16
pip3 install pymysql
pip3 install django-multiselectfield
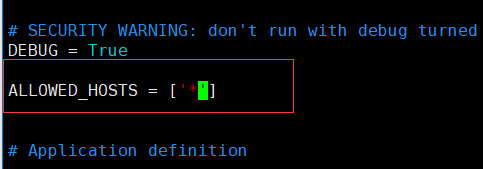
将项目的settings.py中参数改以下:

记得还需改变连接数据库的账号密码等信息
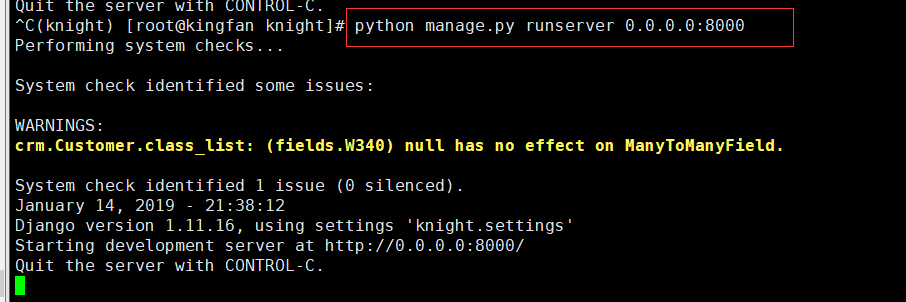
启动:


centos+django的项目部署就完成了
使用uwsgi
使用uwsgi.ini配置文件去启动项目,这个文件自己去创建即可,放哪都可以
	(knight) [root@qishione knight]# cat uwsgi.ini
[uwsgi]
# Django-related settings
# the base directory (full path)
#写上项目的绝对路径
chdir= /opt/knight
# Django's wsgi file

#填写找到django的wsgi文件,填写相对路径,以chdir参数为相对路径
module= knight.wsgi
# the virtualenv (full path)
#填写虚拟环境的绝对路径
home= /root/Envs/knight/
# process-related settings
# master
#启动uwsgi主进程
master= true
# maximum number of worker processes
processes= 5

#如果你使用了nginx,做反向代理,必须填写socket链接,而不是http参数
# the socket (use the full path to be safe
#socket= 0.0.0.0:8000

#如果你不用nginx,直接使用uwsgi,运行一个http服务端,就用这个http参数
http = 0.0.0.0:8000
# ... with appropriate permissions - may be needed
# chmod-socket    = 664
# clear environment on exit
vacuum= true


指定配置文件去启动uwsgi
uwsgi --ini  uwsgi.ini
/opt/mydjangoproject/knight
启动你会发现静态文件不生效了
使用nginx反向代理
1.设置django的静态文件目录,收集一下
	修改knight/settings.py ,写入如下参数
	STATIC_ROOT= '/opt/static'
	2.使用命令收集django的静态文件
	python3 manage.py collectstatic
	3.查看django的静态文件收集目录
	ls /opt/static

	4.配置nginx,反向代理,找到uwsgi项目,且配置nginx处理uwsgi的静态文件
	nginx.conf 修改配置如下

	server {
        listen       80;
        server_name  qishijd.com;
        #只要用户访问qishijd.com:80/  就走这个location匹配>,反向代理给uwsgi:
        location / {
			include    uwsgi_params;
			uwsgi_pass  0.0.0.0:8000;
					}
			#当用户请求是qishijd.com/static/的时候
			#就会进入这个location匹配
			#通过alias参数进行路径别名,让nginx去/opt/static底下去找静>态资源
			location  /static  {
			alias  /opt/static;
}
    }
记得改这里!!

10. 公司会用一个进程管理工具,去启动,管理多个项目,supervisor


本来我们是用命令启动管理项目,


现在讲这些命令,写入到supervisor,通过superviosr去启动管理这些命令


使用python2的模块管理工具,去下载supervisor ,注意此时,退出虚拟环境
使用python2的模块管理工具,去下载supervisor ,注意此时,退出虚拟环境
使用python2的模块管理工具,去下载supervisor ,注意此时,退出虚拟环境
使用python2的模块管理工具,去下载supervisor ,注意此时,退出虚拟环境
使用python2的模块管理工具,去下载supervisor ,注意此时,退出虚拟环境

安装supervisor
yum install python-setuptools
#安装
easy_install supervisor

2.使用supervisor命令,生成配置文件
echo_supervisord_conf   >  /etc/supervisor.conf

3.在这个配置文件中,写入我们想要管理的任务
vim /etc/supervisor.conf
在最底行写入如下配置
#定义一个任务,名字自定义
#commnad=参数,定义我们启动项目的命令
[program:crm_knight]
command=/root/Envs/knight/bin/uwsgi    /opt/knight/uwsgi.ini
stopasgroup=true     ;默认为false,进程被杀死时,是否向这个
进程组发送stop信号,包括子进程
killasgroup=true     ;默认为false,向进程组发送kill信号,包括子进程

4.通过配置文件启动supervisor服务
supervisord -c /etc/supervisor.conf

5.启动了supervisor服务端后,管理任务
supervisorctl -c /etc/supervisor.conf

任务管理命令如下:有两种,一个是交互式,一个是参数形式
#参数形式

supervisorctl -c /etc/supervisor.conf stop/start/restart   all
supervisorctl -c /etc/supervisor.conf start crm_knight

#交互式形式
supervisorctl -c /etc/supervisor.conf