Tabbar控件在我们现在的项目中现在已是十分常见的控件,然而Tabbar控件又有许多问题伴随着我们,比如我们在项目中设置tabbar的image 和 SelectedImage 但是为什么没有达到我们预想的效果?又比如当我们创建导航条的时候,为什么不能用self.title 或者 self.navigationitem.title进行导航条标题赋值?接下来为你解决.....
1,首先在工程中创建4个viewController,为了更方便的看清楚 我每个界面都添加了不同的图片

2.首先在AppDelegate.h 导入头文件
 1 //
 2 //  AppDelegate.h
 3 //  Tabbar02
 4 //
 5 //  Created by mac on 23/10/15.
 6 //  Copyright © 2015年 mac. All rights reserved.
 7 //
 8
 9 #import <UIKit/UIKit.h>
10 #import "firstViewController.h"
11 #import "secondViewController.h"
12 #import "thirdViewController.h"
13 #import "fourViewController.h"
14
15 @interface AppDelegate : UIResponder <UIApplicationDelegate>
16
17 @property (strong, nonatomic) UIWindow *window;
18
19
20 @end
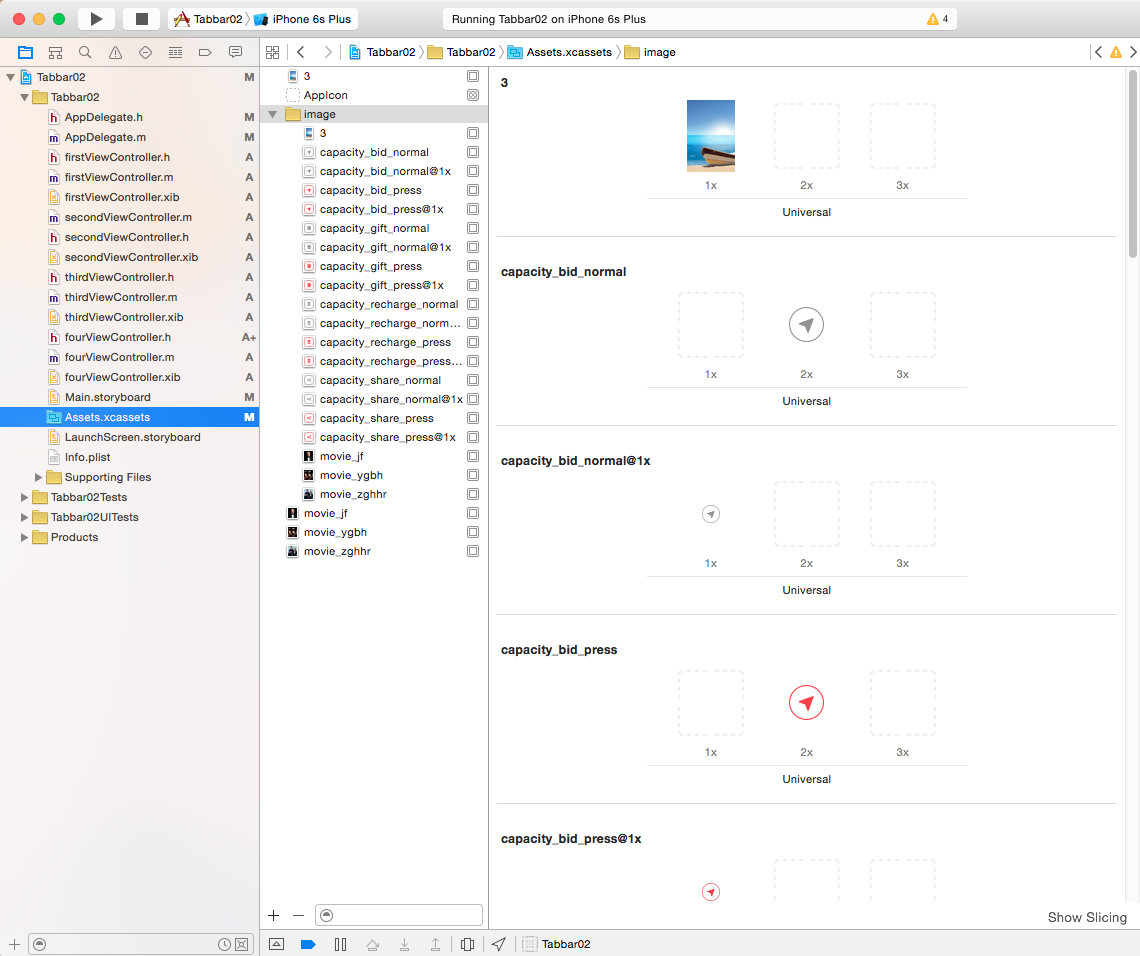
3.首先看一下我在图片控制器里面的图片

4.在AppDelegate.m里面写入相应的代码
#import "AppDelegate.h"

@interface AppDelegate ()

@end

@implementation AppDelegate


- (BOOL)application:(UIApplication *)application didFinishLaunchingWithOptions:(NSDictionary *)launchOptions {
    // Override point for customization after application launch.

    //创建UITabBarController 对象
    UITabBarController * tabbar = [[UITabBarController alloc]init];
    //创建每个viewController 的对象
    firstViewController * firstView = [[firstViewController alloc]init];
    secondViewController * secondView = [[secondViewController alloc]init];
    thirdViewController * thirdView = [[thirdViewController alloc]init];
    fourViewController * fourView = [[fourViewController alloc]init];
    //设置第一个界面tabbar被点击之后的图片
    UIImage * firstViewSelectedImage = [UIImage imageNamed:@"capacity_bid_press"];
//设置第一个界面tabbar的各个元素
    firstView.tabBarItem = [[UITabBarItem alloc]initWithTitle:@"first" image:[UIImage imageNamed:@"capacity_bid_normal"] selectedImage:firstViewSelectedImage];
    //设置第二个界面tabbar被点击之后的图片
    UIImage * secondeViewSelectedImage = [UIImage imageNamed:@"capacity_gift_press"];
//设置第二个界面的tabbar的各个元素
    secondView.tabBarItem = [[UITabBarItem alloc]initWithTitle:@"seconde" image:[UIImage imageNamed:@"capacity_gift_normal"] selectedImage:secondeViewSelectedImage];
    //设置第三个界面tabbar被点击之后的图片
    UIImage * thirdViewSelectedImage = [UIImage imageNamed:@"capacity_recharge_press"];
//设置第三个界面的tabbar各个元素
    thirdView.tabBarItem = [[UITabBarItem alloc]initWithTitle:@"third" image:[UIImage imageNamed:@"capacity_recharge_normal"] selectedImage:thirdViewSelectedImage];
    //设置第四个界面tabbar被点击之后的图片
    UIImage * fourViewSelectedImage = [UIImage imageNamed:@"capacity_share_press"];
//设置第四个界面tabbar各个元素
    fourView.tabBarItem = [[UITabBarItem alloc]initWithTitle:@"four" image:[UIImage imageNamed:@"capacity_share_normal"] selectedImage:fourViewSelectedImage];
    //创建一个数组 接受各个viewController
    NSArray * arr = @[firstView,secondView,thirdView,fourView];
    NSMutableArray * array = [[NSMutableArray alloc]init];
    for (UIViewController * viewController in arr) {
//让每个ViewController上面都有一个导航控制器
        UINavigationController * nav = [[UINavigationController alloc]initWithRootViewController:viewController];
//把4个导航控制器放进一个可变数组
        [array addObject:nav];
    }

    tabbar.viewControllers = array;
    self.window.rootViewController = tabbar;

    return YES;
}
运行...哈哈你会发现自己设置的图片是橙色的,为什么是蓝色的,因为tabbar默认是蓝色的包括图片和文字,所以要解决这个问题就需要我们去掉SelectedImage的渲染效果.代码如下(在上面的代码中添加):
firstViewSelectedImage = [firstViewSelectedImage imageWithRenderingMode:UIImageRenderingModeAlwaysOriginal];

secondeViewSelectedImage = [secondeViewSelectedImage imageWithRenderingMode:UIImageRenderingModeAlwaysOriginal];

thirdViewSelectedImage = [thirdViewSelectedImage imageWithRenderingMode:UIImageRenderingModeAlwaysOriginal];

fourViewSelectedImage = [fourViewSelectedImage imageWithRenderingMode:UIImageRenderingModeAlwaysOriginal];
5,设置tabbar上面字体的颜色
tabbar.tabBar.tintColor = [UIColor purpleColor];
注意!!! 如果我们的图片和文字都是单一的线条都是同一个颜色 我们可以直接设置tabbar.tabBar.tintColor = [UIColor orangeColor];这样也能达到我们的效果哟!
6.设置导航条标题
可以直接在AppDelegate.m里面的
- (BOOL)application:(UIApplication *)application didFinishLaunchingWithOptions:(NSDictionary *)launchOptions方法里面写
firstView.title = @"第一";
secondView.title = @"第二";
thirdView.title = @"第三";
fourView.title = @"第四";
这样效果就达成了
同时 我们也可以在相应的ViewController里面写上 self.title = @"",或者写上 self.navigationitem.tilte = @"".
这样都可以为我们的导航条标题赋值!!
你学会了吗??祝您开心快乐每一天!!