做成之后就
是这个样子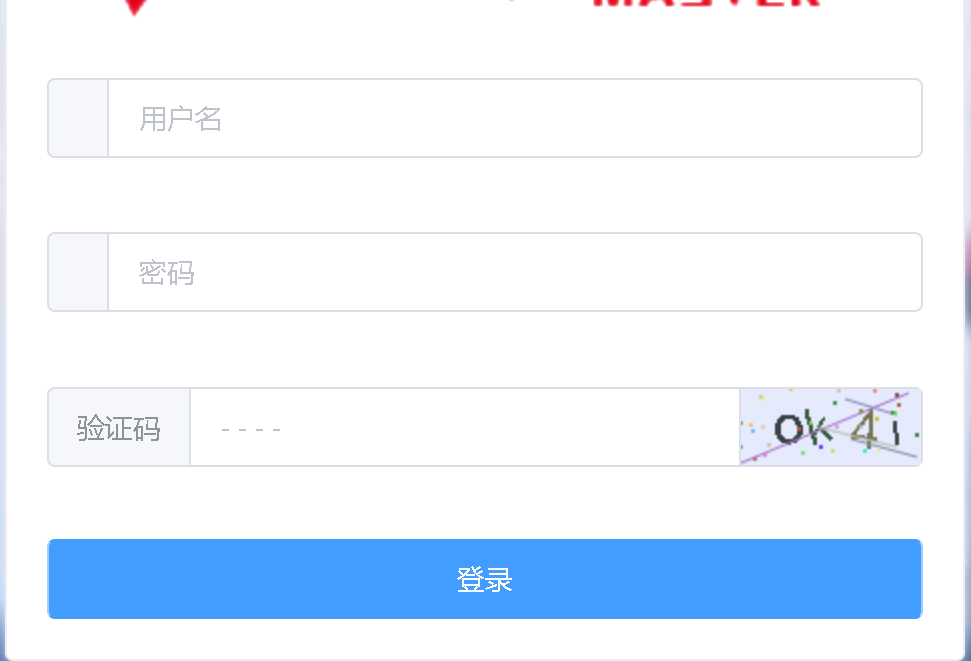
接下来上代码
创建一个组件。显示验证码图片
<template>
  <div class="s-canvas">
    <canvas id="s-canvas" :width="contentWidth" :height="contentHeight"></canvas>
  </div>
</template>
<script>
export default{
  name: 'SIdentify',
  props: {
    identifyCode: { // 默认注册码
      type: String,
      default: '1234'
    },
    fontSizeMin: { // 字体最小值
      type: Number,
      default: 25
    },
    fontSizeMax: { // 字体最大值
      type: Number,
      default: 35
    },
    backgroundColorMin: { // 验证码图片背景色最小值
      type: Number,
      default: 200
    },
    backgroundColorMax: { // 验证码图片背景色最大值
      type: Number,
      default: 220
    },
    dotColorMin: { // 背景干扰点最小值
      type: Number,
      default: 60
    },
    dotColorMax: { // 背景干扰点最大值
      type: Number,
      default: 120
    },
    contentWidth: { // 容器宽度
      type: Number,
      default: 90
    },
    contentHeight: { // 容器高度
      type: Number,
      default: 38
    }
  },
  methods: {
    // 生成一个随机数
    randomNum (min, max) {
      return Math.floor(Math.random() * (max - min) + min)
    },

    // 生成一个随机的颜色
    randomColor (min, max) {
      let r = this.randomNum(min, max)
      let g = this.randomNum(min, max)
      let b = this.randomNum(min, max)
      return 'rgb(' + r + ',' + g + ',' + b + ')'
    },

    drawPic () {
      let canvas = document.getElementById('s-canvas')
      let ctx = canvas.getContext('2d')
      ctx.textBaseline = 'bottom'
      // 绘制背景
      ctx.fillStyle = '#e6ecfd'
      ctx.fillRect(0, 0, this.contentWidth, this.contentHeight)
      // 绘制文字
      for (let i = 0; i < this.identifyCode.length; i++) {
        this.drawText(ctx, this.identifyCode[i], i)
      }
      this.drawLine(ctx)
      this.drawDot(ctx)
    },

    drawText (ctx, txt, i) {
      ctx.fillStyle = this.randomColor(50, 160) // 随机生成字体颜色
      ctx.font = this.randomNum(this.fontSizeMin, this.fontSizeMax) + 'px SimHei' // 随机生成字体大小
      let x = (i + 1) * (this.contentWidth / (this.identifyCode.length + 1))
      let y = this.randomNum(this.fontSizeMax, this.contentHeight - 5)
      var deg = this.randomNum(-30, 30)
      // 修改坐标原点和旋转角度
      ctx.translate(x, y)
      ctx.rotate(deg * Math.PI / 180)
      ctx.fillText(txt, 0, 0)
      // 恢复坐标原点和旋转角度
      ctx.rotate(-deg * Math.PI / 180)
      ctx.translate(-x, -y)
    },

    drawLine (ctx) {
      // 绘制干扰线
      for (let i = 0; i < 4; i++) {
        ctx.strokeStyle = this.randomColor(100, 200)
        ctx.beginPath()
        ctx.moveTo(this.randomNum(0, this.contentWidth), this.randomNum(0, this.contentHeight))
        ctx.lineTo(this.randomNum(0, this.contentWidth), this.randomNum(0, this.contentHeight))
        ctx.stroke()
      }
    },

    drawDot (ctx) {
      // 绘制干扰点
      for (let i = 0; i < 30; i++) {
        ctx.fillStyle = this.randomColor(0, 255)
        ctx.beginPath()
        ctx.arc(this.randomNum(0, this.contentWidth), this.randomNum(0, this.contentHeight), 1, 0, 2 * Math.PI)
        ctx.fill()
      }
    }
  },
  watch: {
    identifyCode () {
      this.drawPic()
    }
  },
  mounted () {
    this.drawPic()
  }
}
</script>
在登录页面中
验证码输输入框
           <el-form-item prop="code">
              <el-input type="text" v-model="formLogin.code" placeholder="- - - -">
                <template slot="prepend">验证码</template>
                <template slot="append">
                  <div class="login-code"  @click="refreshCode">
                    <Identify :identifyCode="identifyCode"></Identify>
                  </div>
                </template>
              </el-input>
            </el-form-item>
登录按钮
<el-button-group>
                <el-button style="100%" @click="submit" type="primary">登录</el-button>
 </el-button-group>
引入之前的组件(在例子中它叫identify)
import Identify from './identify'
在登录组件中引入Identify (这是验证码组件)这一部分略
在data中
// 表单
      formLogin: {
        username: "",
        password: "",
        code: ""
      },
      identifyCodes: '1234567890abcdefjhijklinopqrsduvwxyz',
      identifyCode: '',
      // 校验
      rules: {
        username: [
          { required: true, message: "请输入用户名", trigger: "blur" }
        ],
        password: [{ required: true, message: "请输入密码", trigger: "blur" }],
        code: [{ required: true, message: "请输入验证码", trigger: "blur" }]
      }
在mounted中
mounted () {
    // 初始化验证码
    this.identifyCode = ''
    this.makeCode(this.identifyCodes, 4)
  },
在method中
   // 引入验证接口
 ...mapActions("d2admin/account", ["login"]),
        // 重置验证码
    refreshCode () {
      this.identifyCode = ''
      this.makeCode(this.identifyCodes, 4)
    },
    makeCode (o, l) {
      for (let i = 0; i < l; i++) {
        this.identifyCode += this.identifyCodes[this.randomNum(0, this.identifyCodes.length)]
      }
    },
    randomNum (min, max) {
      return Math.floor(Math.random() * (max - min) + min)
    },
    /**
     * @description 提交表单
     */
    // 提交登录信息
    submit() {
        if (this.formLogin.code.toLowerCase() !== this.identifyCode.toLowerCase()) {
        this.$message.error('请填写正确验证码')
        this.refreshCode()
        return
      }
      this.$refs.loginForm.validate(valid => {
        if (valid) {
          // 登录
          // 注意 这里的演示没有传验证码
          // 具体需要传递的数据请自行修改代码
          this.login({
            vm: this,
            username: this.formLogin.username,
            password: this.formLogin.password
          });
        } else {
          // 登录表单校验失败
          this.$message.error("表单校验失败");
        }
      });
    }
感谢浏览到这里,希望这篇文章对你有帮助~