在css3之前,要实现圆角的效果可以通过图片或者用margin属性实现(可以参考这里:http://www.hicss.net/css-practise-of-image-round-box/)。实现过程很繁琐,但CSS3的到来简化了实现圆角的方式。
CSS3实现圆角需要使用border-radius属性,但因为浏览器兼容性的问题,在开发过程中要加私有前缀。
|
1
2
3
4
|
-webkit-border-radius-moz-border-radius-ms-border-radius-o-border-radius |
border-radius属性其实可以分为四个其他的属性:
|
1
2
3
4
5
|
border-radius-top-left /*左上角*/border-radius-top-right /*右上角*/border-radius-bottom-right /*右下角*/border-radius-bottom-left /*左下角*///提示:按顺时针方式 |
下面用几个实例来展示border-radius的具体用法。
1、border-radius单个属性值:
|
1
2
|
//HTML清单<div class="roundedCorner"> |
|
1
2
3
4
5
6
|
.roundedCorner{ width:100px; height:100px; background-color:#f90; border-radius:10px;//左上,右上,右下,坐下都是10px} |
效果:

2、border-radius是个属性值方式:
|
1
2
3
4
5
6
7
|
<div class="roundedCorner2"></div><br/><br/><br/>//HTML清单.roundedCorner2{ width:100px; height:100px; background-color:#f99; border-radius:20px 10px 5px 2px;} |
效果:

不过在开发的过程中(我的工作中),经常用到的是border-radius单属性值,设置4个不同圆角的情况很少。
border-radius的优势不仅仅在制作圆角的边框,还是利用border-radius属性来画圆和半圆。
1、制作半圆的方法:
元素的高度是宽度的一半,左上角和右上角的半径元素的高度一致(大于高度也是可以的,至少为height值)。
|
1
2
3
4
5
6
7
|
<div class="semi-circle"></div>.semi-circle{ width:100px; height:50px;//高度是宽度的一半 background-color:#000; border-radius:50px 50px 0 0;//左上和右上至少为height值} |
效果:

知道了如何画上半圆,就会举一反三画其他方向的圆了,这里不再赘述。
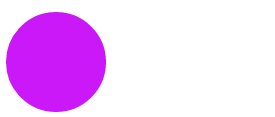
2、画实心圆的方法:
宽度和高度一致(正方形),然后四个角设置为高度或者宽度的1/2.
|
1
2
3
4
5
6
7
|
<div class="circle"></div>.circle{ width:100px; height:100px; background-color:#cb18f8; border-radius:50px;} |
效果:

总结:
CSS3实现圆角的方式既优雅又方便,但是兼容性不够好,如果需要考虑旧版本的浏览器的话,可以考虑优雅降级的方式。开始提到的两种方式的优点是兼容性好,但不够优雅。
使用哪种方式,看具体的项目需求吧。