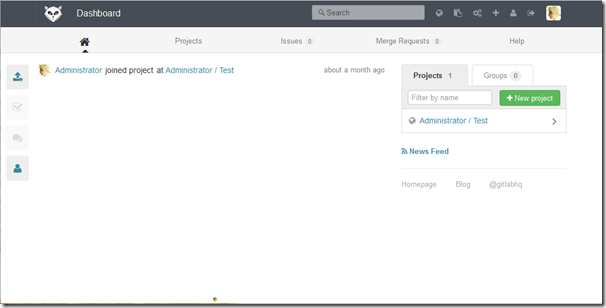
环境:CentOS 6.5 x64 min
GitLab是一个利用 Ruby on Rails 开发的开源应用程序,实现一个自托管的Git项目仓库,可通过Web界面进行访问公开的或者私人项目。
https://github.com/gitlabhq/gitlabhq
https://www.gitlab.com/
#配置安装EPEL及依赖环境
#更新包
yum update
yum -y install wget
#添加epel源
http://www.cnblogs.com/Irving/p/3729074.html
#安装所需依赖包
yum -y install readline readline-devel ncurses-devel gdbm-devel glibc-devel tcl-devel expat-devel db4-devel byacc sqlite-devel libyaml libyaml-devel libffi libffi-devel libxml2 libxml2-devel libxslt libxslt-devel libicu libicu-devel system-config-firewall-tui python-devel redis wget crontabs logwatch logrotate perl-Time-HiRes git gettext-devel libel openssl-devel zlib-devel gcc gcc-c++ make autoconf readline-devel expat-devel gettext-devel tk-devel libxml2-devel libffi-devel libxslt-devel libicu-devel python-pip sqlite-devel patch libyaml* pcre-devel
#安装bundle(需要添加rubygems的国内镜像)
gem sources --remove https://rubygems.org/
gem source -a http://ruby.taobao.org/
gem sources -l
gem install bundler --no-ri --no-rdoc
ln -s /usr/local/bin/gem /usr/bin/gem
ln -s /usr/local/bin/bundle /usr/bin/bundle
#安装Ruby
wget http://cache.ruby-lang.org/pub/ruby/2.1/ruby-2.1.2.tar.gz
tar zfvx ruby-2.1.2.tar.gz
./configure --prefix=/usr/local/
make && make install
ln -s /usr/local/bin/ruby /usr/bin/ruby
ruby -v
#安装Git
http://www.cnblogs.com/Irving/p/3729064.html
#创建一个Git用户供GitLab使用
adduser --comment 'GitLab' git
passwd git
#为了方便添加git用户拥有root权限
vi /etc/sudoers
git ALL=(ALL) ALL
#强制保存
:wq!
#设置权限(重要)
sudo chmod o+x /home/git
vi /home/git/.bash_profile
export GIT_SSL_NO_VERIFY=1
source /home/git/.bash_profile
#不添加变量的话使用https链接会报如下错误
fatal: unable to access 'https://github.com/gitlabhq/grit.git/': Peer certificate cannot be authenticated with known CA certificates
#安装GitLab的Shell
su - git
git clone https://gitlab.com/gitlab-org/gitlab-shell.git -b v1.9.3
cd gitlab-shell/
cp config.yml.example config.yml
vi config.yml
#配置gitlab域名
gitlab_url: "http://git.test.com/"
#果gitlab是使用https访问
self_signed_cert:true
#安装
./bin/install
CREATE USER 'gitlab'@'localhost' IDENTIFIED BY '123456';
#安装MYSQL
su -
yum install -y mysql-server mysql-devel
chkconfig mysqld on
service mysqld start
#设置mysql root账号的密码
/usr/bin/mysql_secure_installation
创建gitlab使用的数据库
mysql -u root -p
#创建用户
CREATE USER 'gitlab'@'localhost' IDENTIFIED BY 'gitlab登陆密码';
#创建数据库
CREATE DATABASE IF NOT EXISTS `gitlabhq_production` DEFAULT CHARACTER SET `utf8` COLLATE `utf8_unicode_ci`;
#设置权限
GRANT SELECT, LOCK TABLES, INSERT, UPDATE, DELETE, CREATE, DROP, INDEX, ALTER ON `gitlabhq_production`.* TO 'gitlab'@'localhost';
quit
#安装GitLab
su - git
git clone https://gitlab.com/gitlab-org/gitlab-ce.git -b 6-8-stable gitlab
cd gitlab
#复制配置文件
cp config/gitlab.yml.example config/gitlab.yml
#修改访问域名
vi config/gitlab.yml
## Web server settings
host: git.test.com
port: 80
https: true
#配置权限
chown -R git log/
chown -R git tmp/
chmod -R u+rwX log/
chmod -R u+rwX tmp/
mkdir tmp/pids/
mkdir tmp/sockets/
chmod -R u+rwX tmp/pids/
chmod -R u+rwX tmp/sockets/
mkdir public/uploads
chmod -R u+rwX public/uploads
cp config/unicorn.rb.example config/unicorn.rb
cp config/initializers/rack_attack.rb.example config/initializers/rack_attack.rb
#配置git的用户和邮件
git config --global user.name "GitLab"
git config --global user.email "gitlab@localhost"
git config --global core.autocrlf input
#配置gitlab数据库
cp config/database.yml.mysql config/database.yml
vi config/database.yml
production:
adapter: mysql2
encoding: utf8
reconnect: false
database: gitlabhq_production
pool: 5
username: gitlab
password: "gitlab"
# host: localhost
# socket: /tmp/mysql.sock
#安装gems
su -
$ gem install charlock_holmes --version '0.6.9.4'
vi Gemfile
source "https://rubygems.org"改为source "http://rubygems.org"或改成
#安装
bundle install --deployment --without development test postgres puma aws
#启动redis服务
sudo /etc/init.d/redis start
sudo chkconfig redis on
#初始化数据库
bundle exec rake gitlab:setup RAILS_ENV=production
#默认账号和密码
Administrator account created:
login.........admin@local.host
password......5iveL!fe
#安装启动脚本
sudo wget https://raw.github.com/gitlabhq/gitlab-recipes/master/init/sysvinit/centos/gitlab-unicorn -P /etc/init.d/
sudo mv /etc/init.d/gitlab-unicorn /etc/init.d/gitlab
sudo chmod +x /etc/init.d/gitlab
sudo chkconfig --add gitlab
sudo chkconfig gitlab on
sudo /etc/init.d/gitlab start
#拉取GitLab静态文件
cd /home/git/gitlab
bundle exec rake assets:precompile RAILS_ENV=production
#检查应用程序状况
bundle exec rake gitlab:env:info RAILS_ENV=production
#安装Nginx
#安装
su -
yum -y install nginx
chkconfig nginx on
#拷贝gitlab配置
cp /home/git/gitlab/lib/support/nginx/gitlab /etc/nginx/conf.d/
#备份默认配置
mv /etc/nginx/conf.d/default.conf /etc/nginx/conf.d/default.conf.back
#重盖默认配置(或者删除default.conf 默认配置,只用gitlab)
mv /etc/nginx/conf.d/gitlab /etc/nginx/conf.d/default.conf
#启动服务
#service gitlab start (restart)
#service nginx start (restart)
#关闭防火墙 (重启后永久性生效)
service iptables stop
chkconfig iptables off
#访问服务
http://192.168.0.107/
基本查看网上的文章安装,还算比较顺利,我这边遇到如下问题:
1.ruby 最新源码编译很久不能通过,换到低一个版本
2.502错误,因为Nginx默认配置了502错误,查看Nginx日志 /var/log/nginx/gitlab_error.log
"/home/git/gitlab/public/favicon.ico.html" failed (13: Permission denied), client: 33.33.33.1, server: gitlab.web.lo, request: "GET /favicon.ico HTTP/1.1"
开始以为是Socet服务有问题,后发现是权限问题。
解决方法:chmod o+x /home/git
Refer:
用Gitlab来工作
http://feiyang.me/2013/03/work-with-gitlab/
Puma 替换 Unicorn 跑 Gitlab
http://icyleaf.com/2014/01/moving-unicorn-to-puma-on-gitlab/
GitLab 启用HTTPS
http://blog.csdn.net/csfreebird/article/details/8579488
Ubuntu
http://my.oschina.net/guol/blog/165409
http://rfyiamcool.blog.51cto.com/1030776/1365521/
Redhat
http://my.oschina.net/xiaokaceng/blog/187573
CentOS
http://my.oschina.net/wzlee/blog/262181
http://hypocritical.blog.51cto.com/3388028/1405574
