抽空写个小demo,顺便温习下知识,自从用了Spring boot之后,怎一个爽字了得,开发起来太舒服了,目前Springboot已经成为了开发界的主流框架了,在此就将Spring与Mybatis的整合小例子写下。
一、Spring boot简介
由于Spring框架本身需要大量的配置,各种繁重的配置,导致了低效率的开发、复杂的部署流程以及第三方技术集成难度大,在这种情况下Springboot应运而生,Springboot引入了自动配置的概念,使得项目设置变得非常简便。同时Springboot本身并不是Spring框架的和新特性以及功能扩展,只是用于快速、敏捷地开发新一代基于Spring框架的应用程序。它并不是用来替代Spring的解决方案,而是和Spring框架紧密结合用于提升Spring开发者体验的工具。
Springboot集成了大量常用的第三方库配置(例如Jackson, JDBC, Mongo, Redis, Mail等等),Spring Boot应用中这些第三方库几乎可以零配置的开箱即用(out-of-the-box),大部分的Spring Boot应用都只需要很少的配置代码,令开发者能够更加专注于业务逻辑。
所以,用最简练的语言概括就是:
Spring 是一个“引擎”;
Spring MVC 是基于Spring的一个 MVC 框架;
Spring Boot 是基于Spring4的条件注册的一套快速开发整合包。
二、创建项目##
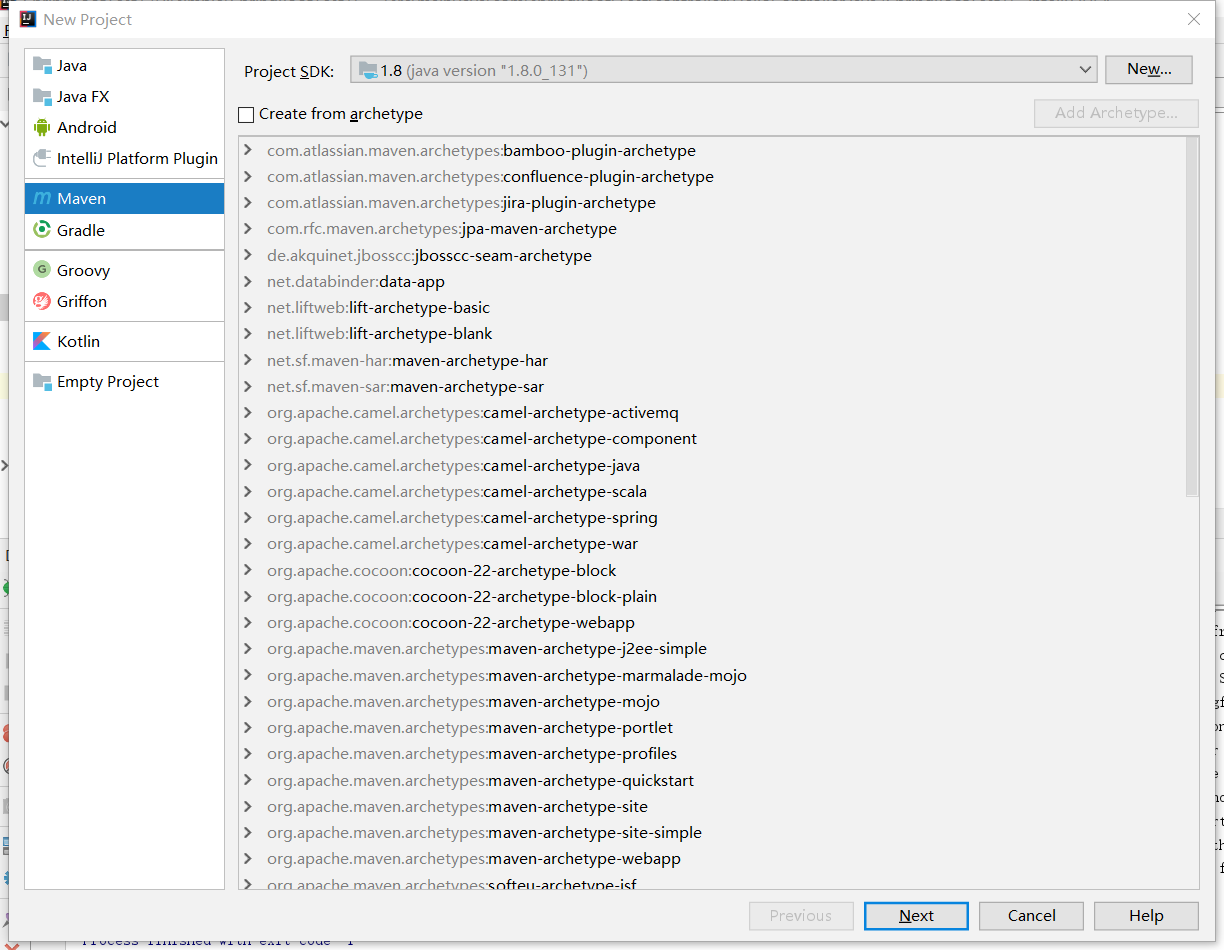
1、 打开IDEA,File -> New -> project 打开如下图1-1所示的对话框
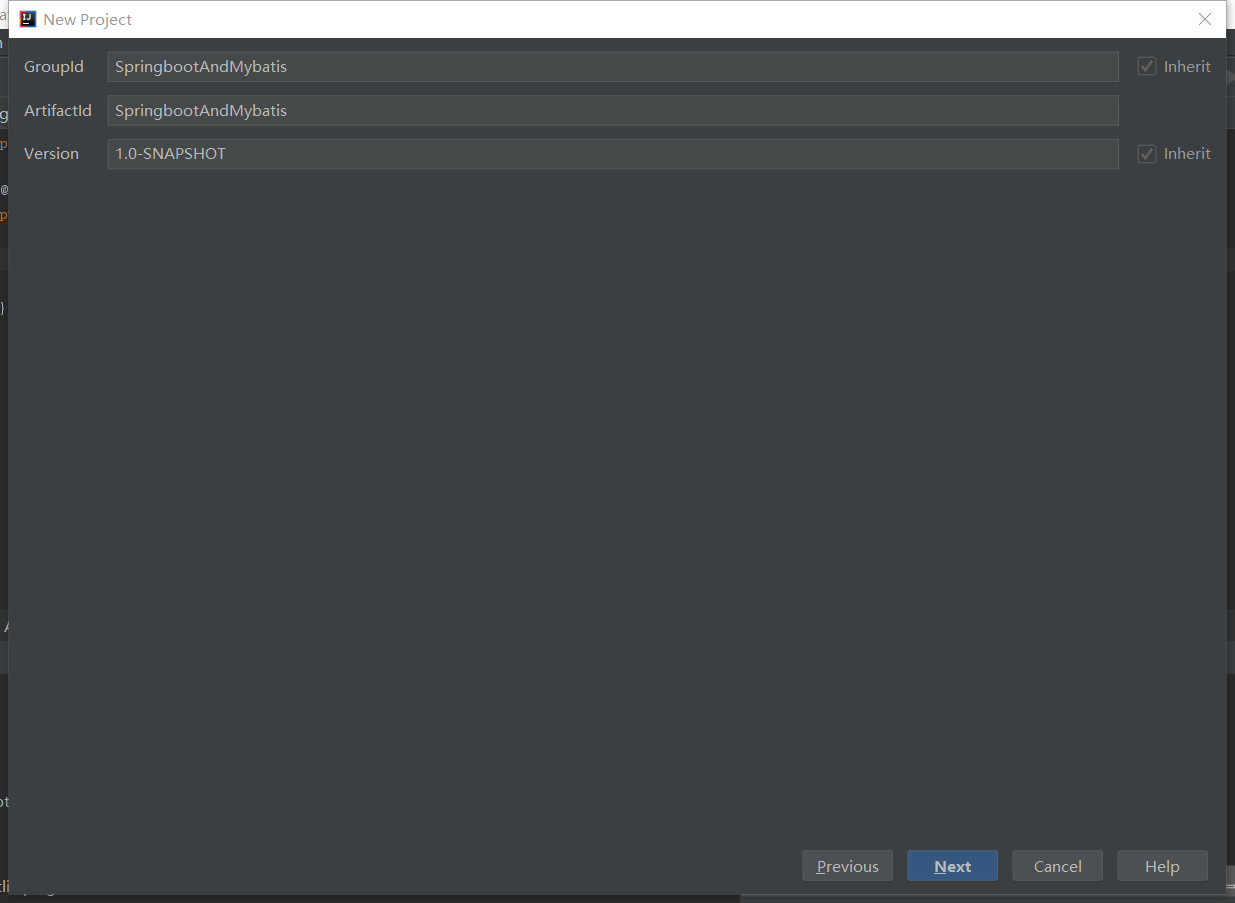
2、点击"Next"按钮,如下图1-2所示:
3、继续点击"Next"按钮,然后是"finsh",则工程即建立下来,pom.xml文件填写如下所示:
<?xml version="1.0" encoding="UTF-8"?>
<project xmlns="http://maven.apache.org/POM/4.0.0"
         xmlns:xsi="http://www.w3.org/2001/XMLSchema-instance"
         xsi:schemaLocation="http://maven.apache.org/POM/4.0.0 http://maven.apache.org/xsd/maven-4.0.0.xsd">
    <modelVersion>4.0.0</modelVersion>

    <groupId>SpringbootAndMybatis</groupId>
    <artifactId>SpringbootAndMybatis</artifactId>
    <version>1.0-SNAPSHOT</version>

    <parent>
        <groupId>org.springframework.boot</groupId>
        <artifactId>spring-boot-starter-parent</artifactId>
        <version>2.0.3.RELEASE</version>
    </parent>

    <properties>
        <project.build.sourceEncoding>UTF-8</project.build.sourceEncoding>
    </properties>

    <dependencies>
        <dependency>
            <groupId>org.springframework.boot</groupId>
            <artifactId>spring-boot-starter-web</artifactId>
        </dependency>
        <dependency>
            <groupId>org.mybatis.spring.boot</groupId>
            <artifactId>mybatis-spring-boot-starter</artifactId>
            <version>1.3.2</version>
        </dependency>
        <dependency>
            <groupId>mysql</groupId>
            <artifactId>mysql-connector-java</artifactId>
        </dependency>
    </dependencies>
    <build>
        <plugins>
            <plugin>
                <groupId>org.springframework.boot</groupId>
                <artifactId>spring-boot-maven-plugin</artifactId>
            </plugin>
        </plugins>
    </build>
</project>
pom.xml中几个包的含义如下:
-
spring-boot-starter-parent : 可以通过继承spring-boot-starter-parent包来获得一些合理的默认配置,在dependencies里的部分配置可以不用填写version信息,自动继承parent包的版本,也可以不使用该包。
-
spring-boot-starter-web:用户构建Web,包含restful风格框架SpringMVC和默认的嵌入式容器Tomcat,即该包整合了Spring mvc,同时自带嵌入式tomcat,因此启动项目时只要运行main方法就行,无需再配置Tomcat。
-
mybatis-spring-boot-starter:该包为spring boot和mybatis的整合包。
-
spring-boot-maven-plugin : 该插件能够以Maven的方式为应用提供Spring Boot的支持,即为Spring Boot应用提供了执行Maven操作的可能。
三、项目开发#
1、项目结构如下图2-1所示:
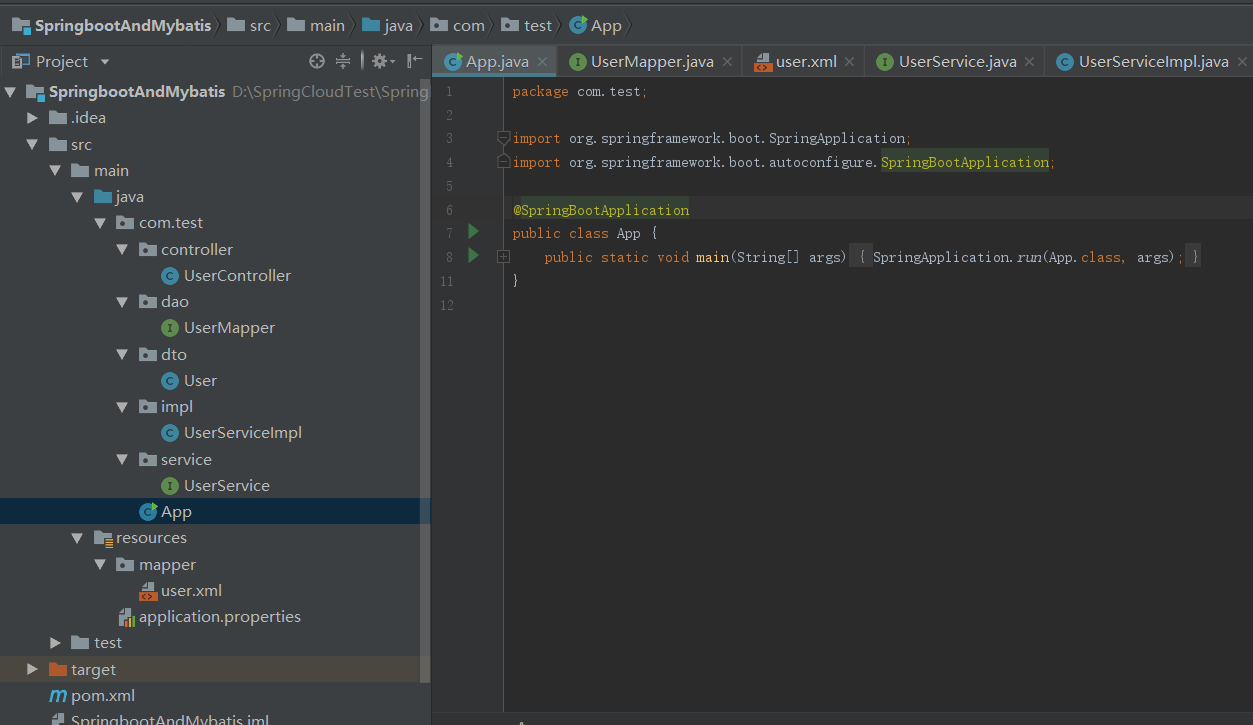
2、启动代码如下所示:
package com.test;

import org.springframework.boot.SpringApplication;
import org.springframework.boot.autoconfigure.SpringBootApplication;

@SpringBootApplication
public class App {
    public static void main(String[] args) {
        SpringApplication.run(App.class, args);
    }
}
在启动类中只有一个注解@SpringBootApplication,该注解是组合注解,主要包括:@SpringBootConfiguration、@EnableAutoConfiguration、@ComponentScan三个注解。
-
@SpringBootConfiguration:该注解继承自@Configuration,一般与@Bean配合使用,使用这两个注解就可以创建一个简单的spring配置类,可以用来替代相应的xml配置文件。同时说明这是一个
springboot项目的配置。 -
@EnableAutoConfiguration:该注解的意思就是
Springboot可以根据你添加的jar包来配置你项目的默认配置,比如当你添加了mvc的jar包,它就会自动配置web项目所需的配置。springboot的自动配置功能就是由于该注解。 -
@ComponentScan:顾名思义该注解是用来扫描组件的,只要组件上有@component及其子注解@Service、@Repository、@Controller等,springboot会自动扫描到并纳入Spring 容器进行管理,有点类似xml文件中的
<context:component-scan>该注解不填属性的话就是默认扫描启动类所在的包,或者启动类所在包的下一级,所以启动类要放在最外层。在基于SpringBoot的应用中,通常需要将包含main方法的启动类(即在main方法中通过执行SpringApplication.run方法来启动应用)放在项目的根目录,即与所有包平级。原因主要是启动类自身是一个基于注解的配置类,使用@SpringBootApplication注解,其包括的@ComponentScan注解、@EnableAutoConfiguration注解都是扫描使用了这个注解的类所在的包及其子包,故放在项目根目录,则可以扫描项目所有的包,对所有的类(具体为使用Spring容器管理的)进行检测。
3、Controller类代码如下所示:
package com.test.controller;

import com.test.dto.User;
import com.test.service.UserService;
import org.springframework.beans.factory.annotation.Autowired;
import org.springframework.web.bind.annotation.PathVariable;
import org.springframework.web.bind.annotation.RequestMapping;
import org.springframework.web.bind.annotation.RestController;

import java.util.List;

@RestController
public class UserController {

    @Autowired
    private UserService userService;

    @Autowired
    private User user;
    //显示用户
    @RequestMapping("getUser")
    public List<User> getUser() throws Exception {
        return userService.getUser();
    }
    //删除用户
    @RequestMapping("delete/{id}")
    public String deleteUser(@PathVariable int id) throws Exception {
        userService.deleteUser(id);
        return "你已经删掉了id为"+id+"的用户";
    }
    //增加用户
    @RequestMapping("addUser")
    public String addUser() throws Exception {
        user.setAge("18");
        user.setName("阿花");
        userService.addUser(user);
        return "增加用户";
    }
}
4、dao层UserMapper代码如下所示:
package com.test.dao;

import com.test.dto.User;
import org.apache.ibatis.annotations.Mapper;
import java.util.List;

@Mapper
public interface UserMapper {

    //获取用户名单
    public List<User> getUser() throws Exception;
    //根据id删除用户
    public void deleteUser(int id)throws Exception;
    //新增用户
    public void addUser(User user)throws Exception;

}
将mapper装配到spring容器中去,要在mapper接口中加上@Mapper注解,或者在启动类中加上@MapperScan(“包路径”)注解。
5、dto中User实体类代码如下:
package com.test.dto;

import org.springframework.stereotype.Component;

@Component
public class User {

    private int id;

    private String name;

    private String age;

    private String sex;

    public int getId() {
        return id;
    }

    public void setId(int id) {
        this.id = id;
    }

    public String getName() {
        return name;
    }

    public void setName(String name) {
        this.name = name;
    }

    public String getAge() {
        return age;
    }

    public void setAge(String age) {
        this.age = age;
    }

    public String getSex() {
        return sex;
    }

    public void setSex(String sex) {
        this.sex = sex;
    }
}
5、service层UserService接口代码如下:
package com.test.service;

import com.test.dto.User;

import java.util.List;

public interface  UserService {

    //显示所有用户
    public List<User> getUser() throws Exception;
    //根据id删除用户
    public void deleteUser(int id) throws Exception;
    //新增用户
    public void addUser(User user) throws Exception;

}
6、service层实现类UserServiceImpl代码如下:
package com.test.impl;

import com.test.dao.UserMapper;
import com.test.dto.User;
import com.test.service.UserService;
import org.springframework.beans.factory.annotation.Autowired;
import org.springframework.stereotype.Service;

import java.util.List;

@Service
public class UserServiceImpl implements UserService {

    @Autowired
    private UserMapper userMapper;


    @Override
    public List<User> getUser() throws Exception {
        return userMapper.getUser();
    }

    @Override
    public void deleteUser(int id) throws Exception {
        userMapper.deleteUser(id);
    }

    @Override
    public void addUser(User user) throws Exception {
        userMapper.addUser(user);
    }
}
7、mapper配置文件user.xml如下:
<?xml version="1.0" encoding="UTF-8"?>
<!DOCTYPE mapper PUBLIC "-//mybatis.org//DTD Mapper 3.0//EN" "http://www.mybatis.org/dtd/mybatis-3-mapper.dtd">
<mapper namespace="com.test.dao.UserMapper">
    <select id="getUser" resultType="com.test.dto.User">
        select * from user
    </select>
    <delete id="deleteUser" parameterType="Integer">
        delete from user where id =#{id}
    </delete>
    <insert id="addUser" parameterType="com.test.dto.User">
        insert into user(id,name,age,sex)values(#{id},#{name},#{age},#{sex})
    </insert>
</mapper>
8、application.properties配置文件内容如下:
spring.datasource.driverClassName=com.mysql.jdbc.Driver
spring.datasource.url=jdbc:mysql://localhost:3306/test?useUnicode=true&characterEncoding=UTF-8
spring.datasource.username=root
spring.datasource.password=root
mybatis.mapper-locations: classpath:mapper/*.xml
四、项目运行#
项目运行结果如下:

到此,一个简单的springboot整合Mybatis的一个小demo就完成了。